Table of Contents
Advertisement
Advertisement
Chapters
Table of Contents

Related Manuals for dynabook Satellite C40-G


Summary of Contents for dynabook Satellite C40-G
- Page 1 Chapter 1 Hardware Overview...
-
Page 2: Table Of Contents
Figure 1-3 System Board Configurations .................7 Figure 1-4 System Unit Block Diagram ................8 Figure 1-5 Solid state driver ...................13 Tables Table 1-1 SSD Specifications ..................14 Table 1-2 Battery Specifications ..................15 Table 1-3 Quick/Normal Charging Time ................16 SATELLITE PRO C40-G, SATELLITE C40-G Maintenance Manual... - Page 3 1.1 System Features Dynabook Satellite C40-G/ Satellite Pro C40-G is a Slim and Light entry notebook PC based on the mobile Intel Comet Lake U series processor, providing high-speed processing capabilities and advanced features. The computer employs a Lithium Ion battery that allows it to be battery-operated for a longer period of time.
- Page 4 LAN at up to 1Gbps. It supports Wake-up on LAN from S3/S4 and PXE boot support. This internal LAN has RJ45 jack to directly accommodate a LAN cable. Wireless LAN The internal Mini Card slot supports Intel Jefferson Peak1 (802.11ac+BT5.0), SATELLITE PRO C40-G, SATELLITE C40-G Maintenance Manual...
- Page 5 This slot is for your memory card requirements like SD/Mini SD (need adaptor)/Micro SD (need adaptor)/SDHC/SDXC and MMC Cards to provide memory card read on your computer. Webcam with embedded internal microphone SATELLITE PRO C40-G, SATELLITE C40-G Maintenance Manual...
- Page 6 Battery The computer has a 2 Cell (6000mAh) Lithium Ion battery pack. Figures 1-1/1-2/1-3 and 1-4 show the computer and its system unit configuration, respectively. SATELLITE PRO C40-G, SATELLITE C40-G Maintenance Manual...
-
Page 7: Figure 1-1 Id Parts Description Placement
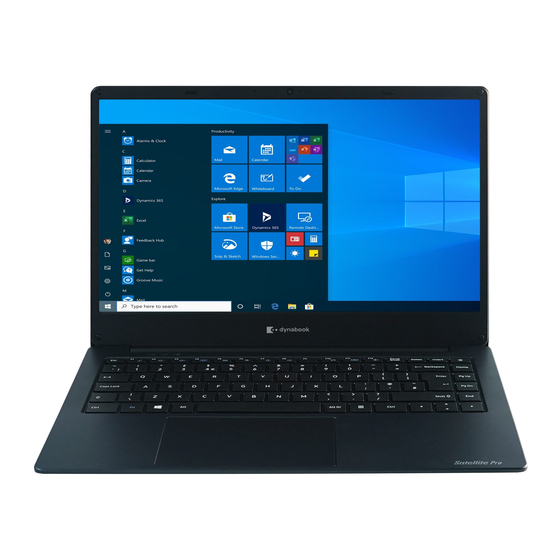
Figure 1-1 ID Parts Description Placement SATELLITE PRO C40-G, SATELLITE C40-G Maintenance Manual... -
Page 8: Figure 1-2 Computer Block Diagram
Figure 1-2 Computer Block Diagram Figure 1-3 System Board Configurations SATELLITE PRO C40-G, SATELLITE C40-G Maintenance Manual... -
Page 9: System Unit Components
1.2 System Unit Components Figure 1-4 System Unit Block Diagram SATELLITE PRO C40-G, SATELLITE C40-G Maintenance Manual... - Page 10 It can incorporate up to 16GB of memory configuration. PC4-2666 (2666MHz) supported SO-DIMM DDR4 DDR4 1.2V operation Data transfer rates: PC4-2666 on i3/i5/i7 CPU, PC4-2400 on Celeron BIOS ROM (Flash memory) SATELLITE PRO C40-G, SATELLITE C40-G Maintenance Manual...
- Page 11 Intel Turbo Boost Technology 2.0 Power Control Configurable TDP (cTDP) and Low Power Mode Adaptive Thermal Monitor Digital Thermal Sensor Intel Memory Thermal Management Scenario Design Power(SDP) SATELLITE PRO C40-G, SATELLITE C40-G Maintenance Manual...
- Page 12 Interface controller function EC Power Supply sequence control Overheat shutdown support LED control Beep control Cooling fan speed control Universal I/O port Battery capacity check SATELLITE PRO C40-G, SATELLITE C40-G Maintenance Manual...
- Page 13 IEEE 802.11b: 11Mbps IEEE 802.11a/g: 54Mbps IEEE 802.11n: 150Mbps IEEE 802.11ac: 433.3Mbps Intel Jefferson Peak2 IEEE 802.11b: 11Mbps IEEE 802.11a/g: 54Mbps IEEE 802.11n: 258Mbps IEEE 802.11ac: 1366Mbps SATELLITE PRO C40-G, SATELLITE C40-G Maintenance Manual...
- Page 14 IEEE 802.11ac: 2.4Ghz/5Ghz Non-Intel CM251 IEEE802.11b/g :2.4GHz IEEE802.11n :2.4GHz/5GHz IEEE802.11a: 5GHz IEEE802.11ac: 5GHz Intel Harrison Peak2 IEEE802.11b/g :2.4GHz IEEE802.11n :2.4GHz/5GHz IEEE 802.11ax :2.4GHz/5GHz IEEE802.11a/ac: 5GHz SATELLITE PRO C40-G, SATELLITE C40-G Maintenance Manual...
-
Page 15: Figure 1-5 Solid State Driver
NAND flash Memory which has a high reliability and a high technology in a small form factor for using a SSD The SSD is shown in Figure 1-5 and some of its specifications are listed in Table 1-1. Figure 1-5 Solid state driver SATELLITE PRO C40-G, SATELLITE C40-G Maintenance Manual... -
Page 16: Power Supply
Issues a charging current instruction to the PWM control IC of the battery pack charging power supply. Controls the supply of power to the system block (load/logic circuit side). Controls forced shutdown if the power supply malfunctions. SATELLITE PRO C40-G, SATELLITE C40-G Maintenance Manual... -
Page 17: Batteries
Main Battery Pack Main Battery 1.51 The main battery pack serves as the computer's main power source when the AC adapter is not attached. The main battery maintains the state of the computer SATELLITE PRO C40-G, SATELLITE C40-G Maintenance Manual... -
Page 18: Battery Charging Control
A full charge is detected only when the battery is being charged by quick or normal charge. A full charge is detected when either of the following conditions is met: The current in the battery charging circuit drops below the SATELLITE PRO C40-G, SATELLITE C40-G Maintenance Manual... - Page 19 The charging time exceeds the fixed limit. SATELLITE PRO C40-G, SATELLITE C40-G Maintenance Manual...
- Page 20 Chapter 2 Troubleshooting...
- Page 21 Chapter 2 Contents Outline........................4 Basic Flowchart......................4 Power Supply......................8 Procedure 1 Power Icon Check ................5 Procedure 2 Connection Check................9 System Board......................10 Procedure 1 Message Check ...................10 Procedure 2 Test Program Check ................10 Procedure 3 Replacement Check ................10 Keyboard........................11 Procedure 1 Test Program Check ................11 Procedure 2 Connector Check and Replacement Check..........11 Display ........................12 Procedure 1 External Monitor Check...............12...
- Page 22 2.12 Headphone Port .......................19 Procedure 1 Windows Application Test ..............19 Procedure 2 Connector Check and Replacement Check...........19 2.13 Microphone Port ......................20 Procedure 1 Windows Application Test ..............20 Procedure 2 Connector Check and Replacement Check...........20 2.14 HDMI Port.........................21 Procedure 1 Windows Application Test ..............21 Procedure 2 Connector Check and Replacement Check...........21 2.15 TF card Port.......................22...
-
Page 23: Outline
2 Troubleshooting 2.1 Outline 2.1 Outline This chapter describes the fault diagnostic procedures for field replaceable units (FRUs) in the computer. The FRUs covered here are as follows: System Board 2. Keyboard 3. Display 4. Memory 5. SSD 6. Audio 7. - Page 24 Charge LED is on? Turn the power on Follow the display diagnostic Any error message is Procedure in Section 2.6 displayed? Message “dynabook” See the previous page to Delete is displayed? the password. Follow the SSD diagnostic OS has started? Procedure in Section 2.5...
- Page 25 2 Troubleshooting 2.2 Basic Flowchart Insert Bootable USB Memory into USB Port. Follow the keyboard diagnostic Diagnostic Program Procedure in Section 2.6 is loaded? Perform each test with the diagnostic program. Identify the test resulting in the Any error is detected by error and perform the appropriate the diagnostic program? Diagnostic procedures...
- Page 26 2 Troubleshooting 2.2 Basic Flowchart If diagnostic program cannot detect an error, the error may be intermittent. Run continuous test program repeatedly to isolate problem. Check log utility function to confirm which diagnostic test detects error, and perform appropriate troubleshooting procedures as below: 1.
-
Page 27: Power Supply
2 Troubleshooting 2.3 Power Supply 2.3 Power Supply The power supply in the computer controls many functions and components. To check if the power supply is defective or malfunctioning, follow the troubleshooting procedures below as instructed. Procedure 1 Power Icon Check Procedure 2 Connection Check Procedure 3 Replacement Check Procedure 1 Power Icon Check... -
Page 28: Procedure 2 Connection Check
Make sure the DC IN/Battery Charge LED goes on in White or Amber again.If it does not, go to Procedure 3. 2 Troubleshooting 2.3 Power Supply Procedure 2 Connection Check Power is supplied to the system board as illustrated below: Follow the steps below to check whether each connector has been connected correctly: Check 1 Make sure the AC adaptor and AC power cord have been firmly plugged into the DC IN socket and... -
Page 29: System Board
2 Troubleshooting 2.4 System Board 2.4 System Board To check if the system board is defective or malfunctioning, follow the troubleshooting procedures below as instructed. Procedure 1 Message Check Procedure 2 Test Program Check Procedure 3 Replacement Check Procedure 1 Message Check When the power is turned on, the system performs the self-diagnostic Power On Self Test (POST) embedded in the BIOS ROM. -
Page 30: Keyboard
2 Troubleshooting Keyboard 2.5 Keyboard To check if the computer’s keyboard is defective or malfunctioning, follow troubleshooting procedures below as instructed. Procedure 1 Test Program Check Procedure 2 Connector Check and Replacement Check Procedure 1 Test Program Check Execute the Keyboard test available as part of the maintenance test program. See Chapter 3 for information on how to perform the test. -
Page 31: Display
The memory may be defective. Replace the memory module with a new one following the steps described in Chapter 4. 2 Troubleshooting 2.6 Display 2.6 Display To check if the computer’s display is defective or malfunctioning, follow the troubleshooting procedures below as instructed. Procedure 1 External Monitor Check (Monitor with HDMI terminal) Procedure 2 Test Program Check Procedure 3 Connector Check and Replacement Check... - Page 32 If any of the cables is loose or off, reconnect it firmly and return to Procedure 3. If there is still an error, perform Check 2. 2 Troubleshooting 2.6 Display Check 2 The LCD cable may be faulty. Replace it with a new one and return to Procedure 3. If there is still an error, perform Check 3.
-
Page 33: Memory
2 Troubleshooting 2.7 Memory 2.7 Memory To check if the computer’s Memory Module is defective or malfunctioning, follow the troubleshooting procedures below as instructed. Procedure 1 Test Program Check Procedure 2 Connector Check and Replacement Check Procedure 1 Test Program Check Execute Memory Test Program available as part of the maintenance test program. -
Page 34: Solid State Drive (Ssd)
the tape is stuck to any part of memory, stick it back to the specified point and if a foreign matter is found on memory, remove it and then return to Procedure 1. If there is still an error, perform Check 2. -
Page 35: Audio Test
Check 3 The System board may be faulty. Replace it with a new one following the instructions in Chapter 4. 2 Troubleshooting 2.9 Audio Test 2.9 Audio Test To check if the computer’s Speaker is defective or malfunctioning, follow troubleshooting procedures below as instructed. -
Page 36: Touchpad
The System board may be faulty. Replace it with a new one following the instructions in Chapter 4. If the Audio is still not functioning properly, perform Check 4. Check 4 The memory may be defective. Replace the memory module with a new one following the steps described in Chapter 4. -
Page 37: Usb Port
If the tape is stuck to any part of Touchpad , stick it back to the specified point and if a foreign matter is found on Touchpad, remove it and then return to Procedure 1. If there is still an error, perform Check 2. -
Page 38: Headphone Port
And if the connector is disconnected, connect it firmly to the system board and return to Procedure 1. If a foreign matter is found on USB Port of System Board, remove it and then return to Procedure 1. If the problem persists, perform Check 2. Check 2 System Board may be faulty. -
Page 39: Microphone Port
And if the connector is disconnected, connect it firmly to the system board and return to Procedure 1. If a foreign matter is found on Headphone Port of System Board, remove it and then return to Procedure 1. If the problem persists, perform Check 2. Check 2 System Board may be faulty. -
Page 40: Hdmi Port
And if the connector is disconnected, connect it firmly to the system board and return to Procedure 1. If a foreign matter is found on Microphone Port of System Board, remove it and then return to Procedure 1. If the problem persists, perform Check 2. Check 2 System Board may be faulty. -
Page 41: Tf Card Port
And if the connector is disconnected, connect it firmly to the system board and return to Procedure 1. If a foreign matter is found on HDMI Port of System Board, remove it and then return to Procedure 1. If the problem persists, perform Check 2. Check 2 System Board may be faulty. -
Page 42: Type-C Port
And if the connector is disconnected, connect it firmly to the system board and return to Procedure 1. If a foreign matter is found on IO Board, remove it and then return to Procedure 1. If the problem persists, perform Check 2. Check 2 IO may be faulty. -
Page 43: Camera
And if the connector is disconnected, connect it firmly to the system board and return to Procedure 1. If a foreign matter is found on type-C Card, remove it and then return to Procedure 1.If the problem persists, perform Check 2. Check 2 Type-C Card may be faulty. -
Page 44: Wireless Lan
Make sure Camera Module FPC Cable has been firmly connected to the connector on System Board. Also make sure Camera Module is free of foreign matters. And if the connector is disconnected, connect it firmly to the system board and return to Procedure 1. -
Page 45: Battery Pack
Make sure Wireless LAN module has been firmly connected to the connector on the system board. Also make sure Wireless LAN module is free of foreign matters. And if the connector is disconnected, connect it firmly to the system board and return to Procedure 1. - Page 46 Record current Battery charged percentage value. Connect AC adaptor power cable to unit to charge battery. After 10 mins, check system battery icon in window again. If Battery charged percentage is not increased, go to Procedure 3. If Battery charged percentage is increased or is full charged, Battery Pack is functioning properly.
-
Page 47: Bluetooth
2 Troubleshooting 2.20 Bluetooth 2.20 Bluetooth Bluetooth is combo module with Wireless LAN on this model. Bluetooth Module or system board may be the reason of Bluetooth fault. Either of these two components may be damaged. To determine if the computer’s Bluetooth module is functioning properly, perform following procedures. -
Page 48: Lan Port
Make sure Bluetooth module has been firmly connected to the connector on the system board. Also make sure Bluetooth module is free of foreign matters. And if the connector is disconnected, connect it firmly to the system board and return to Procedure 1. -
Page 49: Procedure 2 Connector Check And Replacement Check
And if the connector is disconnected, connect it firmly to the system board and return to Procedure 1. If a foreign matter is found on LAN Port on System Board, remove it and then return to Procedure 1. If the problem persists, perform Check 2. Check 2 System Board may be faulty. - Page 50 2Troubleshooting 2.22Fingerprint 2.22 Fingerprint The computer supports fingerprint.Check your computer’s fingerprint lf afault occurs ,follow the instructions below to execute the troubleshooting procedure. Procedure 1 Windows Application Test Procedure 2 Connector Check and Replacement Check Procedure 1 Windows Application Test Please power on the computer into Windows.
- Page 51 2Troubleshooting 2.23 BIOS 2.23 BIOS Check 1 Short circuit PCB test point TP30 and TP81 copper spots, press the power button, the machine into the BIOS reset state.
- Page 52 Chapter 4 Replacement Procedures Satellite C40-G/Pro C40-G Maintenance Manual...
- Page 54 Installing CPU Cooling Module and Fan ............4-19 System Board ......................4-20 Remove System Board ..................4-20 Installing System Board ..................4-21 IO board ........................4-22 Removing IO board ..................... 4-22 Installing IO board ....................4-23 Satellite C40-G/Pro-C40-G Maintenance Manual...
- Page 55 LCD Panel ........................ 4-29 Removing LCD Panel ..................4-29 Installing LCD Panel ................... 4-31 4.13 CCD Module ......................4-32 Removing CCD Module ..................4-32 Installing CCD Module ..................4-33 4.14 Touch pad Module....................4-34 Removing Touch pad..................4-34 Installing Touch pad..................4-35 Satellite C40-G/Pro-C40-G Maintenance Manual...
- Page 56 Figure 4.12 Removing LCD Panel follow direction ............4-29 Figure 4.12 Removing the LCD cable ................. 4-32 Figure 4.12 LCD cable below the LCD module cover latch ..........4-32 Figure 4.13 Removing the CCD Module ................4-33 Figure 4.14 Removing the Touch pad Module..............4-35 Satellite C40-G/Pro-C40-G Maintenance Manual...
-
Page 57: General
First, remove Base Enclosure, Battery Pack and display assembly. Then, remove SSD, and all cable, all of which are shown above the System Board. For removing the LCD Module: First, remove the display mask, both of which are shown above the LCD module. Satellite C40-G/Pro-C40-G Maintenance Manual... - Page 58 Never work with damp or wet hands. To avoid personal injury, use care to avoid the sharp edges or corners of the components. Satellite C40-G/Pro-C40-G Maintenance Manual...
- Page 59 Inside the PC are components that become hot during operation (such as the CPU and cooling module). To avoid burns, let the hot components cool down before starting inspection or repair task. Satellite C40-G/Pro-C40-G Maintenance Manual...
-
Page 60: Before You Begin
See the appropriate explanations and figures for screw sizes. To avoid personal injury, use care to handle components that have sharp edges or corners. After you have replaced a FRU, check that the FRU works correctly to ensure normal computer operation. Satellite C40-G/Pro-C40-G Maintenance Manual... -
Page 61: Disassembly Procedures
Check that all the required screws are used to secure the FRUs. Using wrong screws can damage the threads or heads of the screws or does not ensure that the FRUs are secure. After installing a FRU, make sure that the FRU and computer work normally. Satellite C40-G/Pro-C40-G Maintenance Manual... -
Page 62: Tools And Equipment
M2.0*L3.0*D7.5*T0.5 0.36 N・m (2.0 kgf・cm) M2.0*L3.0*D4.5*T0.5 0.22 N・m (1.5 kgf・cm) M2.0*L2.5*D5.0*T0.5 0.22 N・m (1.5 kgf・cm) M2.0*L3.5*D4.5*T0.5 0.36 N・m (2.0 kgf・cm) M2.0*L5.5*D4.5*T0.5 0.36 N・m (2.0 kgf・cm) M2.0*L7.0*D4.5*T0.5 0.36 N・m (2.0 kgf・cm) Satellite C40-G/Pro-C40-G Maintenance Manual... -
Page 64: Base Enclosure
Removing Base Enclosure Remove Base Enclosure according to the following procedures and Figure 4-7. 1. Remove seven M2.0x7.0x4.5black Phillips head screws securing Base Enclosure and four M2.0x.3.5x4.5black Phillips head screws securing Base Enclosure . 2. Remove Base Enclosure.. Satellite C40-G/Pro-C40-G Maintenance Manual... - Page 65 4.2 Base Enclosure 4 Replacement Procedures Figure 4-7 Removing Base Enclosure Satellite C50-E Maintenance Manual...
-
Page 67: Installing Base Enclosure
Installing Base Enclosure Install Base Enclosure according to the following procedures and Figure 4-7. 1. Place Base Enclosure in correct position. 2. Secure Base Enclosure with seven M2.0x7.0x4.5black Phillips head screws and M2.0x3.5x4.5black Phillips head screws . Satellite C40-G/Pro-C40-G Maintenance Manual... -
Page 68: Battery Pack
Do not drop, hit, twist, or bend the battery packs. Do not scratch or break up their casing. 1. Remove Battery Maly. 2. Disconnect Battery cable from CN3 on system board. 3. Remove four M2.0x3.0x4.5 black Phillips head screws securing Battery. 4. Remove Battery. Figure 4-9Removing battery pack Satellite C40-G/Pro-C40-G Maintenance Manua l 4-9... -
Page 69: Installing Battery Pack
3. Secure Battery with four M2.0x3.0x4.5 black Phillips head screws. 4. Check the battery screw hole ,if there is cracking,please replace the parts. 5. Connect Battery cable to CN3 on system board. 6. Installing Battery Maly. Satellite C40-G/Pro-C40-G Maintenance Manual 4-10... -
Page 70: Ssd
SSD can fail if they are contaminated with sweat, natural oils, etc. from your hands. 1. Remove thermally conductive pad 2. Remove one M2.0x2.5x5.0 black Phillips head screw securing the SSD. 3. Pull SSD from CN8 on system board. Figure 4-13Removing SSD Satellite C40-G/Pro-C40-G Maintenance Manual 4-11... -
Page 71: Installing Ssd
3.Install thermal silica gel CAUTION: Do not touch the connectors on SSD and in the computer with your bare hands. SSD can fail if they are contaminated with sweat, natural oils, etc. from your hand Satellite C40-G/Pro-C40-G Maintenance Manual 4-12... -
Page 72: Sodimm
SODIMM hands. 1.Press both sides of the J1 connector shrapnel 15° with both index fingers 2.Take out the SODIMM at 45° horizontal Figure 4-14 Removing SODIMM Satellite C40-G/Pro-C40-G Maintenance Manual 4-13... -
Page 73: Installing Sodimm
Lightly press the SODIMM upper and lower sides with two fingers CAUTION: Do not touch the connectors on and in the computer with your bare SODIMM hands. can fail if they are contaminated with sweat, natural oils, etc. from your SODIMM hands Satellite C40-G/Pro-C40-G Maintenance Manu 4-14... -
Page 74: Lcd Module Assembly
5. Open LCD Module Assembly at an angle of 90 degrees. 6. Remove six M2.0x5.5x4.5 black Phillips head screws securing LCD Module Assembly with top cover. 7. Remove LCD Module Assembly. Figure 4-17 Removing the LCD Module assembly Satellite C40-G/Pro-C40-G Maintenance Manual 4-15... - Page 75 4.6 LCD Module Assembly 4 Replacement Procedures Figure 4-18 Removing the LCD Module assembly Satellite C40-G/Pro-C40-G Maintenance Manual 4-16...
-
Page 76: Installing Lcd Module Assembly
6. Put the PC gasket back on the WiFi module Install plastic chips on wifi module. 7. Connect LCD cable to CN6 on system board. 8. Routing LCD cable according to Figure 4-18, need to under Rib on Top Cover. 9. Stick tape to fasten LCD cable. Satellite C40-G/Pro-C40-G Maintenance Manual 4-18... -
Page 77: Cpu Cooling Module And Fan
4. Disconnect Fan cable from CN21 on system board. 5. Remove the plastic pad from the fan screw.Remove the plastic pad from the fan screw. 6. Remove two M2.0x3.0x4.5 black Phillips head screws securing Fan. 7. Remove FAN. Satellite C40-G/Pro-C40-G Maintenance Manual 4-17... - Page 78 4.7 CPU Cooling Module and Fan 4 Replacement Procedures Figure 4-19Removing the CPU Cooling Module and Fan Satellite C40-G/Pro-C40-G Maintenance Manual 4-18...
- Page 79 4.7 CPU Cooling Module and Fan 4 Replacement Procedures Figure 4-20 Applying silicon grease Satellite C40-G/Pro-C40-G Maintenance Manual 4-19...
-
Page 80: System Board
- Released wireless antenna cables from top cover latch. 2. Remove two M2.0x3.0x4.5and three M2.0x2.5x5.0 black Phillips head screw securing System Board. 3. Remove System Board. 4. Remove the high position adhesive paper of DC seat Satellite C40-G/Pro-C40-G Maintenance Manual 4-20... - Page 81 4.8 4.8 System Board 4 Replacement Procedures Figure 4-21 Removing System Board 4-21 Satellite C50-E Maintenance Manual...
- Page 83 Be sure to place all cables into the ditch to avoid the damage during assembling the bottom cover. NOTE: Be sure to align Type-C connector to Top Cover, when place system board on the unit.. Satellite C40-G/Pro-C40-G Maintenance Manual 4-21...
-
Page 84: Io Board
1. Disconnect the following cable from the connector on IO Board: - IO Board cable from JDB1 2. Remove three M2.0x3.0x4.5 black Phillips head screw securing IO Board. 3. Remove the IO panel Myla. Figure 4-23 Removing IO Board Satellite C40-G/Pro-C40-G Maintenance Manual 4-22... - Page 85 1. Place IO Board in correct position. 2. Securing IO Board with three M2.0x3.0x4.5 black Phillips head screw. 3. Connect following cable to the connector on System Board: -IO Board cable from JDB1 4. Stick tape on the IO Board. Satellite C40-G/Pro-C40-G Maintenance Manual 4-23...
-
Page 86: Speaker
4 Replacement Procedures 4.10 Speaker Removing Speaker Remove Speake according to the following procedures and Figure 4-25. 1. Disconnect Speaker cable from SPK on system board. 2. Remove left and right Speaker. Figure 4-25 Removing Speaker Satellite C40-G/Pro-C40-G Maintenance Manual 4-24... -
Page 87: Installing Speaker
4.10 Speaker 4 Replacement Procedures Installing Speaker Install Speaker according to the following procedures and Figure 4-25. 1. Place speaker in correct position. 2. Connect speaker cable to SPK on system board Satellite C40-G/Pro-C40-G Maintenance Manual 4-25... -
Page 88: Lcd Module Mask
1, 2 & 3 to release the latches as Figure 4- 27 shown. 4. Remove the LCD Module Mask while unlatching the LCD Module Mask. Figure 4-27 Removing the LCD Module Mask Satellite C40-G/Pro-C40-G Maintenance Manual 4-26... - Page 89 4.11 4.11 LCD Module Mask 4 Replacement Procedures Figure 4-28 Removing the LCD Module Mask Satellite C40-G/Pro-C40-G Maintenance Manual 4-27...
-
Page 91: Installing Lcd Module Mask
3. Install 4 rubber foot pads nstall four plastic pads. NOTE: When installing the LCD Module Mask, ensure there is no gap between the LCD Module Mask and the LCD module cover. NOTE: Do not lose the Camera Shutter. Satellite C40-G/Pro-C40-G Maintenance Manual 4-28... -
Page 92: Lcd Panel
3. Turn the LCD upside down. Be sure to place it on a cushioned surface such as a foam pad. 4. Remove the tape and LCD cable connector. Then disconnect the LCD cable as Figure 4-30 shown. Satellite C40-G/Pro-C40-G Maintenance Manual 4-29... - Page 93 4.12 4.12 LCD Panel 4 Replacement Procedures Figure 4-29 Removing LCD Panel follow direction 1. Figure 4-30 removing the LCD cable Satellite C40-G/Pro-C40-G Maintenance Manual 4-30...
-
Page 95: Installing Lcd Panel
4. d then place the LCD panel Check LCD cable below the LCD module cover latch as Figure 4-30 shown. CAUTION: When installing the LCD module, please follow below instruction: When plug in LCD/FL cable into LCD panel connector, need to plug horizontally. Satellite C40-G/Pro-C40-G Maintenance Manual 4-31... -
Page 96: Ccd Module
Remove the CCD Module according to the following procedures and Figure 4-33 1. Lift the CCD Module from the LCD module cover. 2. Disconnect LCD cable from CCD Module connector. Figure 4-33Removing the CCD Module Satellite C40-G/Pro-C40-G Maintenance Manual 4-32... -
Page 97: Installing Ccd Module
3.After ripping off FPC release paste FPC into shell LCD cover. 4.Seat the CCD Module in the correct position. 5.Route the LCD cables according to Figure 4-29, place the cable into the ditch and correct position. Avoid to pinching the cables. Satellite C40-G/Pro-C40-G Maintenance Manual 4-33... -
Page 98: Touch Pad Module
Touch pad can fail if they are contaminated with sweat, natural oils, etc. from your hands. 1.Separate the touchpad from the C shell 2.Detach the bracket from the trackpad Figure 4-35 Removing Touch pad Satellite C40-G/Pro-C40-G Maintenance Manual 4-34... -
Page 99: Installing Touch Pad
5.Remove the mylar release paper and paste the adhesive CAUTION: Do not touch the connectors on Touch pad and in the computer with your bare hands. Touch pad can fail if they are contaminated with sweat, natural oils, etc. from your hands Satellite C40-G/Pro-C40-G Maintenance Manual 4-35...
Need help?
Do you have a question about the Satellite C40-G and is the answer not in the manual?
Questions and answers