dynabook Satellite C30-K Manual
Hide thumbs
Also See for Satellite C30-K:
- Manual (46 pages) ,
- User manual (145 pages) ,
- User manual (114 pages)

Related Manuals for dynabook Satellite C30-K


Summary of Contents for dynabook Satellite C30-K
- Page 1 Chapter 1 Hardware Overview [CONFIDENTIAL]Satellite C30-K/C40-K/C50-K Maintenance Manual...
-
Page 2: Table Of Contents
1 Hardware Overview Chapter 1 Contents Features ........................1-4 Solid State Drive(SSD) ..................1-12 Power Supply ....................... 1-12 Batteries ........................ 1-14 1.4.1 Main Battery ..................1-14 1.4.2 Battery Charging Control..............1-14 [CONFIDENTIAL]Satellite C30-K/C40-K/C50-K Maintenance Manual... - Page 3 1 Hardware Overview Figures Figure 1-1 ID Parts Description Placement - Satellite C30-K ......... 1-8 Figure 1-2 ID Parts Description Placement - Satellite C40-K ......... 1-8 Figure 1-3 ID Parts Description Placement - Satellite C50-K ......... 1-8 Figure 1-3 Block Diagram Description ................1-9...
-
Page 4: Features
1.1 Features Features The Dynabook Satellite C30-K/C40-K/C50-K is a full-size PC notebook equipped with an Intel processor, providing high-speed processing capabilities and advanced features. The computer employs a lithium ion battery that allows it to be battery-operated for long periods of time. - Page 5 127 USB devices. The USB3.0 serial data transfer rate is up to 5 Gbps. The USB-C data transfer rate is up to 10Gbps. These ports support PnP installation and hot plugging. [CONFIDENTIAL]Satellite C30-K/C40-K/C50-K Maintenance Manual...
- Page 6 The HDMI 1.4b out port can connect with a Type A connector HDMI cable. The HDMI out port can send up to 4K HDR video/audio signals. Built-in LAN The computer has built-in support for 10/100/1000M Gigabit. It employs a Realtek RTL8111H controller. It supports wake-up on LAN form S4/S5 boot support. [CONFIDENTIAL]Satellite C30-K/C40-K/C50-K Maintenance Manual...
- Page 7 When implemented, Bluetooth provides wireless communication in a small space. This module is Version 5.0 or later support (combo module with WLAN), and supports Microsoft stack. [CONFIDENTIAL]Satellite C30-K/C40-K/C50-K Maintenance Manual...
-
Page 8: Figure 1-1 Id Parts Description Placement - Satellite C30-K
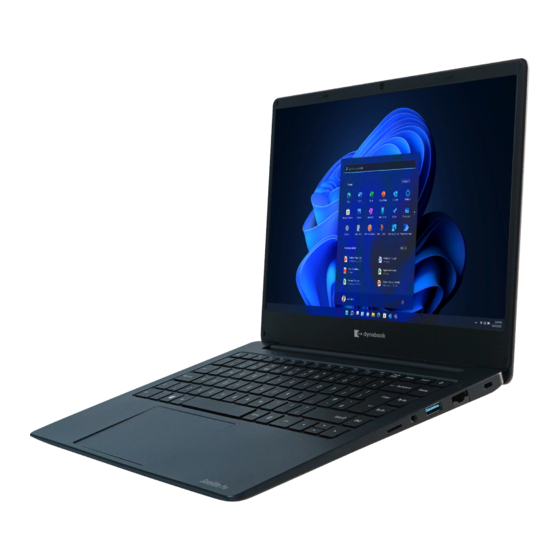
Figures 1-1 to 1-4 show the computer and its system unit configuration. Figure 1-1 ID Parts Description Placement - Satellite C30-K Figure 1-2 ID Parts Description Placement - Satellite C40-K Figure 1-3 ID Parts Description Placement - Satellite C50-K [CONFIDENTIAL]Satellite C30-K/C40-K/C50-K Maintenance Manual... -
Page 9: Block Diagram Description
1 Hardware Overview 1.1 Features Figure 1-4 Block Diagram Description [CONFIDENTIAL]Satellite C30-K/C40-K/C50-K Maintenance Manual... - Page 10 Hot keys for system control Audio volume control Battery status report and control Power switch control Support three independent devices Internal Keyboard country selection Wireless LAN on/off button 1-10 [CONFIDENTIAL]Satellite C30-K/C40-K/C50-K Maintenance Manual...
- Page 11 Interface controller function EC Power supply sequence control Overheat shutdown support LED control Device ON/OFF Cooling fan speed control Universal I/O port Battery capacity check Flash memory reprogramming function EC access interface I2C communication control 1-11 [CONFIDENTIAL]Satellite C30-K/C40-K/C50-K Maintenance Manual...
-
Page 12: Solid State Drive(Ssd)
Controls the supply of DC power supply input (AC Adapter output) to the power supply unit. Controls the supply of power to the system block (load/logic circuit side). 3. Logic circuit control Instructs the gate array to enable/disable tuning the power on. Controls power-on/off operation. 1-12 [CONFIDENTIAL]Satellite C30-K/C40-K/C50-K Maintenance Manual... - Page 13 Monitors the voltage output to the system block (load/logic circuit side). Monitors the voltage, over-voltage, input/output current of the battery pack. Monitors the internal temperature of the battery pack. Monitors the supply voltage from the AC adapter. 1-13 [CONFIDENTIAL] Satellite C30-K/C40-K/C50-K Maintenance Manual...
-
Page 14: Batteries
Table 1-2 Quick/Normal Charging Time State Charge Time 3 hours Battery pack (4050mAh, 3cell) Off-State Charge 4 hours Battery pack (3550mAh, 4cell) Battery pack (4050mAh, 3cell) 12 hours On-State Charge Battery pack (3550mAh, 4cell) 12 hours 1-14 [CONFIDENTIAL]Satellite C30-K/C40-K/C50-K Maintenance Manual... - Page 15 A full charge is detected when either of the following conditions are met: 1. The current in the battery charging circuit drops below the predetermined value. 2. The charging time exceeds the fixed limit. 1-15 [CONFIDENTIAL] Satellite C30-K/C40-K/C50-K Maintenance Manual...
- Page 16 Chapter 2 Troubleshooting Procedures...
- Page 17 TYPE C Troubleshooting ..................2-40 2-38 2.17 LAN Troubleshooting… ................... 2-42 2-40 2.18 Battery Troubleshooting ..................2-44 2-42 2.19 LED Troubleshooting ....................2-46 2-44 2.20 FAN Troubleshooting ....................2-48 2-46 2.21 Memory Troubleshooting…………………………………………………………..2-50 2-48 2.22 Finger Print Troubleshooting……………………………………………………….2-52 2-50 [CONFIDENTIAL]Satellite C30-K/C40-K/C50-K Maintenance Manual...
- Page 18 Figure 2-19 FAN troubleshooting process ................2-48 2-46 Figure 2-20 Memory troubleshooting process ..............2-50 2-48 Figure 2-21 Finger Print troubleshooting process ............…… 2-52 2-50 Tables Table 2-1 Battery LED ....................... 2-10 Table 2-2 DC-IN LED ......................2-11 [CONFIDENTIAL]Satellite C30-K/C40-K/C50-K Maintenance Manual...
-
Page 19: Troubleshooting Introduction
4. Multimedia sound system with line-in and line-out ports 5. Headphones 6. USB test module and USB cable 7. MIC module and MIC line 8. Audio loop back 9. USB3.0 HDD 10. HDMI 11. T&D for diagnostics program [CONFIDENTIAL]Satellite C30-K/C40-K/C50-K Maintenance Manual... -
Page 20: Troubleshooting Flowchart
Verify with the customer that Windows 11 is installed on the hard disk (SSD). Operating systems that were not pre-installed by Dynabook can cause the computer to malfunction. Make sure all optional equipment is removed from the computer... - Page 21 Perform the Power Supply Troubleshooting procedures in section 2.3 Perform the Power Supply Troubleshooting procedures in section 2.3 Perform the HDD/SSD Troubleshooting Is Dynabook Win 11 being loaded? procedures in section 2.13 Figure 2-1 Troubleshooting flowchart (1/2) [CONFIDENTIAL]Satellite C30-K/C40-K/C50-K Maintenance Manual...
- Page 22 Allow each test to perform automatically After confirming which diagnostics test has detected Is an error detected by any of the an error, perform the diagnostics tests? appropriate procedure as outlined below. System is normal Figure 2-1 Troubleshooting flowchart (2/2) [CONFIDENTIAL]Satellite C30-K/C40-K/C50-K Maintenance Manual...
- Page 23 Section 2.21 11. If an error is defected when using Memory ,perform the Memory troubleshooting procedures in Section 2.22 12. If an error is defected when using Finger Print ,perform the Memory troubleshooting procedures in Section 2.23 [CONFIDENTIAL]Satellite C30-K/C40-K/C50-K Maintenance Manual...
- Page 24 8. If an error is detected when using the USB3.0&USB2.0, perform the USB3.0&USB2.0 troubleshooting procedures in Section 2.16 9. If an error is detected when using The TYPE C, perform TYPE C troubleshooting procedures in Section 2.17 [CONFIDENTIAL]Satellite C30-K/C40-K/C50-K Maintenance Manual...
-
Page 25: Power Supply Troubleshooting
2.3 Power Supply Troubleshooting 2 Troubleshooting Procedures Power Supply Troubleshooting Figure 2-2 Power Supply Troubleshooting Process [CONFIDENTIAL]Satellite C30-K/C40-K/C50-K Maintenance Manual... - Page 26 The system is (LED on for 1 second protected and cannot be re-powered on every 2 seconds) without the AC power connected. Amber color off Battery not in low or critical low state; It’s in discharging state [CONFIDENTIAL]Satellite C30-K/C40-K/C50-K Maintenance Manual 2-10...
- Page 27 Check 2 Make sure the AC adaptor cord and AC power cord are firmly plugged into the DC-IN socket, AC adaptor inlet and wall outlet. If these cables are connected correctly, go to Check 3. 2-11 [CONFIDENTIAL]Satellite C30-K/C40-K/C50-K Maintenance Manual...
- Page 28 Make sure that the battery cable is firmly connected to the system board. If it is connected firmly, go to Check 3. Check 3 The system board may be damaged. Replace it with a new one following the instructions in Chapter 4. 2-12 [CONFIDENTIAL]Satellite C30-K/C40-K/C50-K Maintenance Manual...
-
Page 29: Display Troubleshooting
2 Troubleshooting Procedures 2.4 Display Troubleshooting Display Troubleshooting Display is not faulty. Continue troubleshooting- refer to Figure 2-1 Figure 2-3 Display troubleshooting process 2-13 [CONFIDENTIAL]Satellite C30-K/C40-K/C50-K Maintenance Manual... - Page 30 Refer to Chapter 3, Tests and Diagnostics for details. If an error is detected, go to Procedure 3. If an error is not detected, the display is functioning properly. [CONFIDENTIAL]Satellite C30-K/C40-K/C50-K Maintenance Manual 2-14...
- Page 31 Check 3 Replace the LCD cable with a new one and test display again. If the problem still exists, perform Check 4. Check 4 The system board may be damaged. Replace it with a new one. 2-15 [CONFIDENTIAL]Satellite C30-K/C40-K/C50-K Maintenance Manual...
-
Page 32: Keyboard Troubleshooting
2.5 Keyboard Troubleshooting 2 Troubleshooting Procedures Keyboard Troubleshooting Keyboard is not faulty. Continue troubleshooting-refer to Figure 2-1 Perform connector and replacement check (Procedure 2) Figure 2-4 Keyboard troubleshooting process [CONFIDENTIAL]Satellite C30-K/C40-K/C50-K Maintenance Manual 2-16... - Page 33 The keyboard may be damaged. Replace it with a new one following the instructions in Chapter 4. If the problem still exists, perform Check 3. Check 3 The system board may be damaged. Replace it with a new one following the instructions in Chapter 4. 2-17 [CONFIDENTIAL]Satellite C30-K/C40-K/C50-K Maintenance Manual...
-
Page 34: External Usb Devices Troubleshooting
2.6 External USB Devices Troubleshooting 2 Troubleshooting Procedures External USB Devices Troubleshooting Figure 2-5 External USB device troubleshooting process [CONFIDENTIAL]Satellite C30-K/C40-K/C50-K Maintenance Manual 2-18... - Page 35 USB small board may be damaged. Go to Procedure 2. Procedure 2 Replace system board If the error persists, the system board or USB small board may be damaged. Replace it with a new one following the instructions in Chapter 4. 2-19 [CONFIDENTIAL]Satellite C30-K/C40-K/C50-K Maintenance Manual...
-
Page 36: Touchpad Troubleshooting
2.7 Touch Pad Troubleshooting 2 Troubleshooting Procedures Touch Pad Troubleshooting Does Touchpad function ok? Touchpad is not faulty. Continue troubleshooting -refer to Figure Figure 2-6 Touchpad troubleshooting process [CONFIDENTIAL]Satellite C30-K/C40-K/C50-K Maintenance Manual 2-20... - Page 37 The Touchpad unit or FPC may be defective or damaged. Replace each with a new one following the steps in Chapter 4. If under windows system test is still not functioning properly, replace the system board with a new one following the steps in Chapter 4. 2-21 [CONFIDENTIAL]Satellite C30-K/C40-K/C50-K Maintenance Manual...
-
Page 38: Speaker Troubleshooting
2.8 Speaker Troubleshooting 2 Troubleshooting Procedures Speaker Troubleshooting Speakers are not faulty. Continue troubleshooting - see Figure 2-1 Perform connection check (Procedure 3) Perform replacement check (Procedure 4) Figure 2-7Speaker troubleshooting process [CONFIDENTIAL]Satellite C30-K/C40-K/C50-K Maintenance Manual 2-22... - Page 39 If the stereo speakers don't sound properly, the stereo speakers may be defective or damaged. Replace them with new ones. If the stereo speakers still do not work properly, try replacing in turn the audio board and system board. [CONFIDENTIAL]Satellite C30-K/C40-K/C50-K Maintenance Manual 2-23...
-
Page 40: Wireless Lan Troubleshooting
2 Troubleshooting Procedures Wireless LAN Troubleshooting Wireless LAN system is not faulty. Continue troubleshooting - refer to Figure 2-10 Perform connector and replacement check (Procedure 2) Replace wireless LAN antenna/unit Figure 2-8 Wireless LAN troubleshooting process [CONFIDENTIAL]Satellite C30-K/C40-K/C50-K Maintenance Manual 2-24... - Page 41 The wireless LAN unit may be damaged. Replace it with a new one following the instructions in Chapter 4. If the problem still exists, perform Check 4. Check 4 The system board may be damaged. Replace it with a new one following the instructions in Chapter 4. [CONFIDENTIAL]Satellite C30-K/C40-K/C50-K Maintenance Manual 2-25...
-
Page 42: Camera Troubleshooting
2.10 Camera Troubleshooting 2 Troubleshooting Procedures 2.10 Camera Troubleshooting Camera is not faulty. Continue troubleshooting-refer to Figure Perform connector and replacement check (Procedure 2) Replace Camera /B Figure 2-9 Camera troubleshooting process [CONFIDENTIAL]Satellite C30-K/C40-K/C50-K Maintenance Manual 2-26... - Page 43 The Camera board may be damaged. Replace it with a new one following the instructions in Chapter 4. If the problem still exists, perform Check 3. Check 4 The system board may be damaged. Replace it with a new one following the instructions in Chapter 4. [CONFIDENTIAL]Satellite C30-K/C40-K/C50-K Maintenance Manual 2-27...
-
Page 44: Bluetooth Troubleshooting
2.11 Bluetooth Troubleshooting 2 Troubleshooting Procedures 2.11 Bluetooth Troubleshooting Bluetooth is not faulty. Continue troubleshooting- refer to Figure 2-1 Perform connector and replacement check (Procedure 2) Replace Bluetooth Module(combined in WLAN card). Figure 2-10 Bluetooth troubleshooting process [CONFIDENTIAL]Satellite C30-K/C40-K/C50-K Maintenance Manual 2-28... - Page 45 Check 3 The Bluetooth module may be damaged. Replace it with a new one following the instructions in Chapter 4. If the problem still exists, perform Check 4. Check 4 The system board may be damaged. Replace it with a new one following the instructions in Chapter 4. [CONFIDENTIAL]Satellite C30-K/C40-K/C50-K Maintenance Manual 2-29...
- Page 46 2.12 SD slot Troubleshooting START Perform SD test (Procedure 1) Do errors occur during SD function is not SD test? faulty. Replace SD card to check (Procedure 2) Replace system board Figure 2-11 SD card troubleshooting process [CONFIDENTIAL]Satellite C30-K/C40-K/C50-K Maintenance Manual 2-30...
- Page 47 The test SD card may be damaged or defective, please check the other SD card to test again. If the system board is defective, it need to be replaced. Replace it with a new one following the instructions in Chapter 4. [CONFIDENTIAL]Satellite C30-K/C40-K/C50-K Maintenance Manual 2-31...
-
Page 48: Sd Troubleshooting
2 Troubleshooting Procedures 2.13 SDD Troubleshooting 2.13 SSD Troubleshooting Replace SSD Figure 2-12 SDD troubleshooting process [CONFIDENTIAL]Satellite C30-K/C40-K/C50-K Maintenance Manual 2-32... - Page 49 The SSD module may be damaged. Replace it with a new one following the instructions in Chapter 4. If the problem still exists, perform Check 3. Check 3 The system board may be damaged. Replace it with a new one following the instructions in Chapter 4. [CONFIDENTIAL]Satellite C30-K/C40-K/C50-K Maintenance Manual 2-33...
-
Page 50: Hdmi Troubleshooting
2 Troubleshooting Procedures 2.14 HDMI Troubleshooting 2.14 HDMI Troubleshooting R eplace H D M I cable Figure 2-13 HDMI troubleshooting process [CONFIDENTIAL]Satellite C30-K/C40-K/C50-K Maintenance Manual 2-34... - Page 51 Try connecting a different television to the computer. If the replacement television works, the original set may be damaged. If the replacement set does not work the system board may be damaged. Replace it with a new one following the instructions in Chapter 4. [CONFIDENTIAL]Satellite C30-K/C40-K/C50-K Maintenance Manual 2-35...
-
Page 52: Mic Troubleshooting
2.15 MIC Troubleshooting 2 Troubleshooting Procedures 2.15 MIC Troubleshooting Replace Camera module Figure 2-14 MIC troubleshooting process [CONFIDENTIAL]Satellite C30-K/C40-K/C50-K Maintenance Manual 2-36... - Page 53 The MIC cable may be damaged. Replace it with a new one following the instructions in Chapter 4. If the problem still exists, perform Check Check 3 The system board may be damaged. Replace it with a new one following the instructions in Chapter 4. [CONFIDENTIAL]Satellite C30-K/C40-K/C50-K Maintenance Manual 2-37...
-
Page 54: Type C Troubleshooting
2.16 TYPE C Troubleshooting 2 Troubleshooting Procedures 2.16 TYPE C Troubleshooting Perform TYPE C adapter 65W check (Procedure 2) Perform HDMI monitor check (Procedure 3) Replace the system board Figure 2-15 Type C troubleshooting process 2-38 [CONFIDENTIAL]Satellite C30-K/C40-K/C50-K Maintenance Manual... - Page 55 Plug in the Type C HDMI to system, then check HMDI monitor is well or not, if HDMI is OK, the function is OK, if no work. Please replace HDMI cable to check again, if still no work please replace the system board. [CONFIDENTIAL]Satellite C30-K/C40-K/C50-K Maintenance Manual 2-39...
-
Page 56: Lan Troubleshooting
2.17 LAN Troubleshooting 2 Troubleshooting Procedures 2.17 LAN Troubleshooting LAN is not faulty. Continue troubleshooting- refer to Figure 2-1 Figure 2-16 LAN troubleshooting process [CONFIDENTIAL]Satellite C30-K/C40-K/C50-K Maintenance Manual 2-40... - Page 57 The LAN cable may be damaged. Replace it with a new one and repeat Procedure 2. If the problem still exists, perform Check 3. Check 3 The system board may be damaged. Replace it with a new one following the instructions in Chapter 4. [CONFIDENTIAL]Satellite C30-K/C40-K/C50-K Maintenance Manual 2-41...
-
Page 58: Battery Troubleshooting
2.18 Battery Troubleshooting 2 Troubleshooting Procedures 2.18 Battery Troubleshooting Battery is not faulty. Continue troubleshooting-refer to Figure Perform connector and replacement check (Procedure 2) Replace Battery Figure 2-17Battery troubleshooting process [CONFIDENTIAL]Satellite C30-K/C40-K/C50-K Maintenance Manual 2-42... - Page 59 The Battery module may be damaged. Replace it with a new one following the instructions in Chapter 4. If the problem still exists, perform Check 3. Check 3 The system board may be damaged. Replace it with a new one following the instructions in Chapter 4. [CONFIDENTIAL]Satellite C30-K/C40-K/C50-K Maintenance Manual 2-43...
-
Page 60: Led Troubleshooting
2.19 LED Troubleshooting 2 Troubleshooting Procedures 2.19 LED Troubleshooting Replace LED Board Figure 2-18 LED troubleshooting process [CONFIDENTIAL]Satellite C30-K/C40-K/C50-K Maintenance Manual 2-44... - Page 61 The LED board may be damaged. Replace it with a new one following the instructions in Chapter 4. If the problem still exists, perform Check 3. Check 3 The system board may be damaged. Replace it with a new one following the instructions in Chapter 4. [CONFIDENTIAL]Satellite C30-K/C40-K/C50-K Maintenance Manual 2-45...
-
Page 62: Fan Troubleshooting
2.20 FAN Troubleshooting 2 Troubleshooting Procedures 2.20 FAN Troubleshooting FAN is not faulty. Continue troubleshooting- refer to Figure 2-1 Figure 2-19 FAN troubleshooting process [CONFIDENTIAL]Satellite C30-K/C40-K/C50-K Maintenance Manual 2-46... - Page 63 The FAN may be damaged. Replace it with a new one and repeat Procedure 2. If the problem still exists, perform Check 3. Check 3 The system board may be damaged. Replace it with a new one following the instructions in Chapter 4. [CONFIDENTIAL]Satellite C30-K/C40-K/C50-K Maintenance Manual 2-47...
-
Page 64: Memory Troubleshooting
2.21 Memory Troubleshooting 2 Troubleshooting Procedures 2.21 Memory Troubleshooting Memory is not faulty. Continue troubleshooting- refer to Figure 2-1 Figure 2-20 Memory troubleshooting process [CONFIDENTIAL]Satellite C30-K/C40-K/C50-K Maintenance Manual 2-48... - Page 65 The Memory may be damaged. Replace it with a new one and repeat Procedure 2. If the problem still exists, perform Check 2. Check 2 The system board may be damaged. Replace it with a new one following the instructions in Chapter 4. [CONFIDENTIAL]Satellite C30-K/C40-K/C50-K Maintenance Manual 2-49...
-
Page 66: Finger Print Troubleshooting
2.22 Finger Print Troubleshooting 2 Troubleshooting Procedures 2.22 Finger Print Troubleshooting Does Finger Print function FP is not faulty. Continue troubleshooting -refer to Figure Figure 2-21 Finger Print troubleshooting process [CONFIDENTIAL]Satellite C30-K/C40-K/C50-K Maintenance Manual 2-50... - Page 67 The Finger Print unit or FPC may be defective or damaged. Replace each with a new one following the steps in Chapter 4. If under windows system test is still not functioning properly, replace the system board with a new one following the steps in Chapter 4. 2-51 [CONFIDENTIAL]Satellite C30-K/C40-K/C50-K Maintenance Manual...
- Page 68 Chapter 3 Tests and Diagnostics...
- Page 69 SSD Test ........................3-28 3.19 RAM Test........................3-28 3.20 CMOS (RTC) Test ......................3-28 3.21 Wireless Card Detect ..................... 3-29 3.22 TPM Test ........................3-29 3.23 FAN Test ........................3-29 3.24 Exit from TD ........................3-30 [CONFIDENTIAL]Satellite C30-K/C40-K/C50-K Maintenance Manual...
- Page 70 C:\ for easy finding) 3. Make TD image to USB driver procedure Step 1: Insert USB drive and launch the Rufus tool (Please “Run as administrator”). Step 2: Click “SELECT” to select image file, like as “Syrah-V1.WIM” [CONFIDENTIAL]Satellite C30-K/C40-K/C50-K Maintenance Manual...
- Page 71 Step 4: Press OK till TIPS (Keeping default setting) close. Step 5: After finished, please remove USB driver by safety mode. Step 6: Insert USB driver to debug unit. Then press F12 to select USB driver booting. [CONFIDENTIAL]Satellite C30-K/C40-K/C50-K Maintenance Manual...
- Page 72 You will need the following equipment to perform some of the Diagnostic test programs. USB memory TYPE C memory Type C adapter (65W) AC adapter Micro SD card HDMI monitor [CONFIDENTIAL]Satellite C30-K/C40-K/C50-K Maintenance Manual...
- Page 73 FP TEST Back BATTERY TEST USB PORT TEST TYPE C – USB TEST SSD TEST MEMORRY TEST CMOS TIME TEST WL CARD DETECT CHECK TPM CHECK FAN TEST [CONFIDENTIAL]Satellite C30-K/C40-K/C50-K Maintenance Manual...
- Page 74 The below display will show up at the beginning of T&D program Fore: test program under foreground testing. (Sense check by human) Back: test program under background testing. (Automatic test) If the test result passes, the following display will show up: [CONFIDENTIAL]Satellite C30-K/C40-K/C50-K Maintenance Manual...
- Page 75 If an error is detected and a test fails, the following message displays: How to check fail log for detail, please refer to below step. Step1: Click the stop button when test fail. Step 2: Refer to fail information or select Link to open fail log. [CONFIDENTIAL]Satellite C30-K/C40-K/C50-K Maintenance Manual...
- Page 76 DDRAM SIZE Panel ID HDD1 VGA CHIP TYPE / VRAM size Battery cell LAN Type Wireless type Bluetooth MBID UUID The screen should display items as below: [CONFIDENTIAL]Satellite C30-K/C40-K/C50-K Maintenance Manual...
- Page 77 Step 3 Insert earphone (Need support Microphone), the Headphones will be activity as below picture, then click “Headphones” Step 4 Please select “Advanced” item, then click “Test” button to check the Left/Right channel. (If PASS please [CONFIDENTIAL]Satellite C30-K/C40-K/C50-K Maintenance Manual 3-10...
- Page 78 3 Tests and Diagnostics 3.5 External Audio Jack Test click OK button) Step 5 Select “Recording” item, then speech to check the microphone whether increase (please refer to below picture). [CONFIDENTIAL]Satellite C30-K/C40-K/C50-K Maintenance Manual 3-11...
- Page 79 Listen the Right channel to select correct number. Test way by system self without the tool. Step 1: Press “Win+S” key to open the search tool then key in “sound settings” to open it. Step 2: click the “More sound settings” [CONFIDENTIAL]Satellite C30-K/C40-K/C50-K Maintenance Manual 3-12...
- Page 80 3 Tests and Diagnostics 3.6 Speaker Test Step 3: click the “Speakers” Step 3: click the “Test” to check left/Right channel. [CONFIDENTIAL]Satellite C30-K/C40-K/C50-K Maintenance Manual 3-13...
- Page 81 The Touch pad test need user to click & move pad to test, please refer to below step: Step 1: Move to click area then click left button (PAD) Step 2: Slide the Touch PAD & click touch pad Left/Right button. [CONFIDENTIAL]Satellite C30-K/C40-K/C50-K Maintenance Manual 3-14...
- Page 82 *Notice: SD card need write the mark by Compal release Card Mark tool. Step 2: insert SD card, tool will auto test, if PASS SD text will become green *SD card Mark Guideline & Card Mark tool (PW:123) SD Card Mark CardMarker for Guideline.pdf Brazil.7z [CONFIDENTIAL]Satellite C30-K/C40-K/C50-K Maintenance Manual 3-15...
- Page 83 Test way without tool Step 1: Please insert SD card to system, the system will add SD device as below picture. Step 2: Please copy file to SD device to check the R/W function whether OK. [CONFIDENTIAL]Satellite C30-K/C40-K/C50-K Maintenance Manual 3-16...
- Page 84 Web Camber test need user to check the Camera display whether OK, please refer to below picture, if check PASS please select “Y” for function PASS. (Select N it meaning check fail) Test way without tool Step 1: Press “Win+S” key to open the search tool then key in “Camera” to open it. [CONFIDENTIAL]Satellite C30-K/C40-K/C50-K Maintenance Manual 3-17...
- Page 85 6. KB UK L When you execute this test, the keyboard layout is drawn on the display. When any key is pressed, the corresponding key on the screen changes to black as shown below. *US Key sample [CONFIDENTIAL]Satellite C30-K/C40-K/C50-K Maintenance Manual 3-18...
- Page 86 3. 11 LID Test This function will check LID (Magnet) function whether OK. Step 1: Execute test program will show below picture. Step 2: Close the LCD then open LCD will show PASS as below picture. [CONFIDENTIAL]Satellite C30-K/C40-K/C50-K Maintenance Manual 3-19...
- Page 87 Step 2: count the Power LED (White) flicker times then select the number. (If fail its meaning the count wrong number, please re-test again) Step 3: count the Charge LED (White) flicker times then select the number. (If fail its meaning the count wrong number, please re-test again) 3-20 [CONFIDENTIAL]Satellite C30-K/C40-K/C50-K Maintenance Manual...
- Page 88 3 Tests and Diagnostics 3.12 LED Test Step 4: count the Discharge LED (Amber) flicker times then select the number. (If fail its meaning the count wrong number, please re-test again) [CONFIDENTIAL]Satellite C30-K/C40-K/C50-K Maintenance Manual 3-21...
- Page 89 This function will check Finger print function by system automatic, please follow below step to test. Step 1: please execute the FP test tool as below picture, then click the start button. Step 2: Put finger on FP device, if test OK will show PASS. 3-22 [CONFIDENTIAL]Satellite C30-K/C40-K/C50-K Maintenance Manual...
- Page 90 Step 1: Press “Win+S” key to open the search tool then key in “Control panel” to open the “control panel” then select “Network and Internet Network and Sharing Center” Step 2: Insert LAN cable to system, the Network will show the “Ethernet” as below picture. [CONFIDENTIAL]Satellite C30-K/C40-K/C50-K Maintenance Manual 3-23...
- Page 91 Step 2: Plug in AC adapter or 65w type C adapter, the Battery icon become charge icon as below picture. Step 3: Waiting 5 minutes to check Battery capacity whether increase. (When charge the LED is amber, if full the LED is white) [CONFIDENTIAL]Satellite C30-K/C40-K/C50-K Maintenance Manual 3-24...
- Page 92 Step 1: Please insert USD disk to test port. (USB port 1 & port 2 in right side, USB port 3 in left side) Step 2: The system will automatic test by background, if PASS will show below picture. Test PASS condition [CONFIDENTIAL]Satellite C30-K/C40-K/C50-K Maintenance Manual 3-25...
- Page 93 Test way without tool Step 1: Please insert USB device to system, the system will add USB device as below picture. Step 2: Please copy file to USB device to check the R/W function whether OK. [CONFIDENTIAL]Satellite C30-K/C40-K/C50-K Maintenance Manual 3-26...
- Page 94 TYPE C DP test Step 1: Please insert TYPE C w/HDMI dongle to system. Step 2: Press Key “Win” + “P” (refer to below picture) to select “Duplicate” or “Extend” mode then check HDMI display. [CONFIDENTIAL]Satellite C30-K/C40-K/C50-K Maintenance Manual 3-27...
- Page 95 The CMOS test will check CMOS function by system automatically. Step 1: Please execute CMOS test tool, system will run automatically. *When block is twinkle by blue color, it meaning testing on going. (PASS will show Green block, fail show Red block) [CONFIDENTIAL]Satellite C30-K/C40-K/C50-K Maintenance Manual 3-28...
- Page 96 The FAN test will check FAN function by system automatically. Step 1: Please execute FAN test tool, system will run automatically. *When block is twinkle by blue color, it meaning testing on going. (PASS will show Green block, fail show Red block) [CONFIDENTIAL]Satellite C30-K/C40-K/C50-K Maintenance Manual 3-29...
- Page 97 3.24 Exit from TD 3 Tests and Diagnostics 3.24 Exit from TD When you finish test, please move to “Exit” to exit the TD. (Please refer to below picture) [CONFIDENTIAL]Satellite C30-K/C40-K/C50-K Maintenance Manual 3-30...
- Page 98 4 Replacement Procedures Chapter-4 Dynabook Replacement Procedures [CONFIDENTIAL]Satellite C30-K Maintenance Manual...
- Page 99 Installing the IO Board ......................4-24 4.8 Sensor Board ..........................4-25 Removing the Sensor Board ....................4-25 Installing the Sensor Board ....................4-26 4.9 Motherboard ..........................4-27 Removing the Motherboard ....................4-27 Installing the Motherboard ....................4-28 [CONFIDENTIAL]Satellite C30-K Maintenance Manual...
- Page 100 4.16 Camera Module ........................... 4-44 Removing the Camera Module ....................4-44 Installing the Camera Module ....................4-44 4.17 LCD Hinges ........................... 4-45 Removing the LCD Hinges ...................... 4-45 Installing the LCD Hinges ......................4-46 Installing the Panel Assembly ....................4-47 [CONFIDENTIAL]Satellite C30-K Maintenance Manual...
- Page 101 Figure 4-25 Panel assembly explanation (For P30) ....................4-41 Figure 4-26 Panel assembly explanation (For P20) ....................4-41 Figure 4-27 Removing the Antenna module ......................4-42 Figure 4-28 Removing the Camera Module ......................4-44 Figure 4-29 Removing LCD Hinges ........................4-45 [CONFIDENTIAL]Satellite C30-K Maintenance Manual...
-
Page 102: General
4.8 Sensor board 4.6 Speakers 4.9 Mother Board 4.10 Finger print Module 4.11 Touch Pad module For panel models: 4.12 LCD Assembly 4.13 B Cover 4.14 Panel module 4.15 Antenna module 4.16 Camera module 4.17 LCD Hinge [CONFIDENTIAL]Satellite C30-K Maintenance Manual... -
Page 103: Safety Precautions
DANGER: Always use the original batteries or replacement batteries authorized by dynabook. Batteries other than those differ in specifications and are incompatible with the laptop. They may burst or explode. To avoid leakage of alkaline solutions, never heat or disassemble the battery packs. - Page 104 The components inside the PC become hot during operation (such as the CPU and cooling module). To avoid burns, let the hot components cool down before starting inspection or repair task. [CONFIDENTIAL]Satellite C30-K Maintenance Manual...
-
Page 105: Before You Begin
See the appropriate explanations and figures for screw sizes. To avoid personal injury, use care when handling components that have sharp edges or corners. After you have replaced a FRU, check that the FRU works correctly to ensure normal laptop operation. [CONFIDENTIAL]Satellite C30-K Maintenance Manual... -
Page 106: Disassembly Procedures
Check that all the required screws are used to secure the FRUs. Using wrong screws can damage the threads or heads of the screws or not ensure the FRUs securely. After installing a FRU, make sure that the FRU and laptop work normally. [CONFIDENTIAL]Satellite C30-K Maintenance Manual... -
Page 107: Tools And Equipment
M2.0×5 0.157-0.205 N・m (1.7-2.0 kgf・cm) M2.5×5 0.270-0.318 N・m (2.75-3.25 kgf・cm) M2×3 0.157-0.205 N・m (1.7-2.0 kgf・cm) M2x2.5 0.157-0.205 N・m (1.7-2.0 kgf・cm) M2x2 0.157-0.205 N・m (1.7-2.0 kgf・cm) 4-10 [CONFIDENTIAL]Satellite C30-K Maintenance Manual... -
Page 108: Base Cover
,4 and then the bottom □ 4. Slightly shake the base cover to release the center snap on base cover □ 5. Remove the base cover ,7 . Figure 4-1 Removing the Base Cover 4-11 [CONFIDENTIAL]Satellite C30-K Maintenance Manual... -
Page 109: Installing The Base Cover
Make sure all the snaps are latched and secured. □ □ 2. Tighten the six M2×5 screws ,1 and four M2x3 screws ,2(the four screws have angles) to secure the base cover to the logic upper assembly. (as shown in Figure 4-1) 4-12 [CONFIDENTIAL]Satellite C30-K Maintenance Manual... -
Page 110: Battery Pack
Do not scratch or break up their casing. □ ach the Battery connector □ 2. Remove the four M2x3 screws ,2 . □ 3. Remove the battery pack Figure 4-2 Removing the Battery Pack 4-13 [CONFIDENTIAL]Satellite C30-K Maintenance Manual... -
Page 111: Installing The Battery Pack
1. Seat the battery pack in the correct position on the logic upper assembly and insert the battery □ □ connector □ 2. Tighten the four M2 x 3 screws to secure the battery pack to the logic upper assembly 4-14 [CONFIDENTIAL]Satellite C30-K Maintenance Manual... -
Page 112: Fan And Thermal Module
3. Disconnect the Fan cable from the motherboard □ 4. Remove the two M2x3 screws and fan 5. Remove the three M2x3 screws according to the number sequence (5->4->3) indicated in Figure 4-3 . 6. Remove the thermal module. 4-15 [CONFIDENTIAL]Satellite C30-K Maintenance Manual... - Page 113 4 Replacement Procedures 4.4 Fan and Thermal Module Figure 4-3 Removing the Fan and thermal module Figure 4-4 Removing the w-lan cable 4-16 [CONFIDENTIAL]Satellite C30-K Maintenance Manual...
-
Page 114: Installing The Thermal Module
6. For the w-lan cable routing, tuck the w-lan cable into the fan hook ,11, and wlan cable □ □ connector insert the wlan card ,12. Finally, paste wlan mylar on the w-lan module ,13 as shown in Figure 4-5. Figure 4-5 Fan Cable and W-lan Cable Routing 4-17 [CONFIDENTIAL]Satellite C30-K Maintenance Manual... - Page 115 4 Replacement Procedures 4.4 Fan and Thermal Module Figure 4-6 Checking the Thermal Pad on Thermal module 4-18 [CONFIDENTIAL]Satellite C30-K Maintenance Manual...
-
Page 116: Ssd Card/Wlan Card/Dimm
1. Remove the one M2x3 screw and Wlan card from the motherboard □ □ 2. Remove the one M2x3 screw and SSD card from the motherboard □ □ 3. Remove the DDR shielding and DIMM from the motherboard Figure 4-7 Removing the SSD Card/WLAN Card/DIMM 4-19 [CONFIDENTIAL]Satellite C30-K Maintenance Manual... -
Page 117: Installing The Ssd Card/Wlan Card/Dimm
Seat the SSD in the correct position and tighten the one M2 x 3 screw to secure the wlan to the □ □ motherboard assembly □ Seat the DIMM in the correct position and seat the shielding cover to the motherboard □ 4-20 [CONFIDENTIAL]Satellite C30-K Maintenance Manual... -
Page 118: Speakers
Remove the speaker assembly according to the following procedures and Figure 4-8. □ 1. Disconnect the speaker cable from the motherboard □ 2. Gently pull up the speaker assembly and the speaker cable out of the routing channels □ Figure 4-8 Removing the Speakers 4-21 [CONFIDENTIAL]Satellite C30-K Maintenance Manual... -
Page 119: Installing The Speakers
Route and secure the speaker cable in the routing channels as shown in Figure 4-9. □ Connect the speaker cable to the motherboard ,1 as shown in Figure 4-8. Figure 4-9 Speaker Cable routing channels on upper 4-22 [CONFIDENTIAL]Satellite C30-K Maintenance Manual... -
Page 120: Io Board
1. Disconnect the IO board FFC □ 2. Remove three M2x3 screws □ 3. Gently lift up the right edge of the IO board and remove it from the logic upper assembly Figure 4-10 Removing the IO Board 4-23 [CONFIDENTIAL]Satellite C30-K Maintenance Manual... -
Page 121: Installing The Io Board
2. Tighten three M2×3 screw to secure the IO board to the logic upper assembly 3. Connect the IO board FFC to the IO board. Make sure the FFC are properly engaged and firmly □ □ secured 4-24 [CONFIDENTIAL]Satellite C30-K Maintenance Manual... -
Page 122: Sensor Board
Remove the Sensor board according to the following procedures and Figure 4-11. □ □ 1. Disconnect the sensor board FFC □ 2. Gently pry up the sensor board from the adhesive and remove it from the Upper cover Figure 4-11 Removing the sensor board 4-25 [CONFIDENTIAL]Satellite C30-K Maintenance Manual... -
Page 123: Installing The Sensor Board
Figure 4-12 . 2. Connect the sensor board FFC to the sensor board. Make sure the FFC are properly engaged and □ □ firmly secured Figure 4-12 Removing the release paper of sensor board adhesive 4-26 [CONFIDENTIAL]Satellite C30-K Maintenance Manual... -
Page 124: Motherboard
,11/ FP FFC from the motherboard as shown in Figure 4-13. 3. Gently lift the left edge of the motherboard and remove the motherboard from the logic upper □ assembly ,14. Figure 4-13 Removing the Motherboard 4-27 [CONFIDENTIAL]Satellite C30-K Maintenance Manual... -
Page 125: Installing The Motherboard
□ □ □ □ ,7/ keyboard FPC ,9/ IO FFC ,11/ FP FFC ,13 to the motherboard as shown in Figure 4-13. Make sure the FPC and the connectors are properly engaged and firmly secured. 4-28 [CONFIDENTIAL]Satellite C30-K Maintenance Manual... -
Page 126: Finger Print Module
2. Remove the one M2×2 screws securing the finger print bracket to the logic upper □ assembly □ 3. Remove finger print bracket ,4 from the logic upper. □ 4. Gently push the finger print away from the logic upper assembly Figure 4-14 Removing the Finger Print Module 4-29 [CONFIDENTIAL]Satellite C30-K Maintenance Manual... -
Page 127: Installing The Finger Print Module
2. Place the finger print bracket on the logic upper assembly □ 3. Tighten one M2×2 screws to secure the finger print bracket to the logic upper assembly □ □ Connect the finger print FFC to the finger print 4-30 [CONFIDENTIAL]Satellite C30-K Maintenance Manual... -
Page 128: Touch Pad Module
3. Remove the two M2×2 screws securing the tp support bracket to the logic upper assembly □ □ 4. Remove tp support bracket ,4 from the logic upper. □ 5. Gently push the touch pad away from the logic upper assembly Figure 4-15 Removing the Touch Pad Module 4-31 [CONFIDENTIAL]Satellite C30-K Maintenance Manual... -
Page 129: Installing The Touch Pad Module
M2×2 screws to secure the tp support bracket to the logic upper assembly □ □ 3. Connect the touch pad FPC to the touch pad 4. Adhere the conductive tape over the touch pad and logic upper assembly as shown in Figure □ 4-16 4-32 [CONFIDENTIAL]Satellite C30-K Maintenance Manual... -
Page 130: Lcd Assembly
3. Make sure all cables are moved away from the logic upper assembly to avoid damaging the system when removing the LCD assembly. Lift away the LCD assembly from the logic upper □ assembly as the arrow ,4 indicates in Figure 4-18. Figure 4-17 W-LAN /edp Cables Routing Channel 4-33 [CONFIDENTIAL]Satellite C30-K Maintenance Manual... -
Page 131: Installing The Lcd Assembly
3. Tighten the four M2.5×5 screws to secure the LCD assembly to the logic upper assembly as □ shown in Figure 4-18. Route and secure the W-LAN cables and edp cable in the routing channels on the logic upper □ □ assembly as shown in Figure 4-17. 4-34 [CONFIDENTIAL]Satellite C30-K Maintenance Manual... -
Page 132: Bezel
2. Insert a smooth, flat instrument into the gap between the Bezel and the LCD cover as shown in Figure 4-19, and then gently twist the instrument to pry up the Bezel from the LCD cover. Figure 4-19 Removing the Bezel 4-35 [CONFIDENTIAL]Satellite C30-K Maintenance Manual... -
Page 133: Installing The Bezel
1. Place the Bezel on the LCD cover assembly. Make sure the tabs on the back of the Bezel align with the slots in the LCD cover assembly. 2. Gently press down edges around the Bezel until clicks are heard. Make sure all the snaps are latched and secured. 4-36 [CONFIDENTIAL]Satellite C30-K Maintenance Manual... -
Page 134: Panel Assembly
,5 and Gently pry up the □ Camera FPC ,6 as shown in Figure 4-22. □ 5. Pull the lock bar outward and disconnect the eDP cable from the touch glass panel □ ,8 as shown in Figure 4-23. 4-37 [CONFIDENTIAL]Satellite C30-K Maintenance Manual... - Page 135 4 Replacement Procedures 4.14 Panel Assembly Figure 4-20 Removing the Panel Adhesive Figure 4-21 Removing the Panel Assembly 4-38 [CONFIDENTIAL]Satellite C30-K Maintenance Manual...
- Page 136 4.14 Panel Assembly 4 Replacement Procedure Figure 4-22 Disconnecting the eDP Cables FFC from Camera FPC Assembly Figure 4-23 Disconnecting the Cables from Panel Assembly 4-39 [CONFIDENTIAL]Satellite C30-K Maintenance Manual...
-
Page 137: Installing The Panel Assembly
Panel to seat it in the correct position as shown in Figure 4-25. 6. For Panel P20 type : Rotate the panel right-side up and use 1.25mm Mylar between LCD cover □ and Panel to seat it in the correct position as shown in Figure 4-26. 4-40 [CONFIDENTIAL]Satellite C30-K Maintenance Manual... - Page 138 4.14 Panel Assembly 4 Replacement Procedure Figure 4-24 Removing the Release Paper of Panel Adhesive Figure 4-25 Panel assembly explanation (For P30) Figure 4-26 Panel assembly explanation (For P20) 4-41 [CONFIDENTIAL]Satellite C30-K Maintenance Manual...
-
Page 139: Antenna Module
5. Gently pry up the Cu-Foil from the adhesive and remove it from the LCD cover □ 6. Removing the Antenna module from the adhesive and remove it from the LCD cover Figure 4-27 Removing the Antenna module 4-42 [CONFIDENTIAL]Satellite C30-K Maintenance Manual... -
Page 140: Installing The Antenna Module
4. Seat the Antenna module_B in the correct position and secure it in place with adhesives □ behind it. □ 5. Pasting the Cu-Foil_B in the correct position. 6. Seat the Antenna cable in the correct position and secure it in place with adhesives □ behind it. 4-43 [CONFIDENTIAL]Satellite C30-K Maintenance Manual... -
Page 141: Camera Module
Figure 4-28 Removing the Camera Module Installing the Camera Module Install the camera module according to the following procedure: 1. Seat the camera module in the correct position and secure it in place with adhesives □ behind it. 4-44 [CONFIDENTIAL]Satellite C30-K Maintenance Manual... -
Page 142: Lcd Hinges
Remove the LCD hinges according to the following procedures and Figure 4-29. □ 1. Remove the six M2×2.5 screws securing the LCD hinges □ 2. Remove the two M2×3 screws securing the LCD hinges Figure 4-29 Removing LCD Hinges 4-45 [CONFIDENTIAL]Satellite C30-K Maintenance Manual... -
Page 143: Installing The Lcd Hinges
Install the LCD hinges according to the following procedures: □ 1. Tighten the six M2×2.5 screws to secure the LCD hinges to the hinge cover assembly. □ 2. Tighten the two M2×3 screws to secure the LCD hinges to the hinge cover assembly. 4-46 [CONFIDENTIAL]Satellite C30-K Maintenance Manual... -
Page 144: Installing The Panel Assembly
Panel to seat it in the correct position as shown in Figure 4-25. 10. For Panel P20 type : Rotate the panel right-side up and use 1.25mm Mylar between LCD cover and Panel to seat it in the correct position as shown in Figure 4-26. 4-47 [CONFIDENTIAL]Satellite C30-K Maintenance Manual...
Need help?
Do you have a question about the Satellite C30-K and is the answer not in the manual?
Questions and answers