Subscribe to Our Youtube Channel
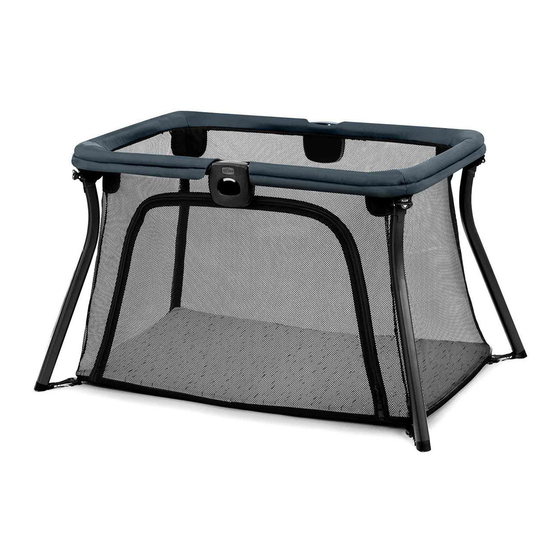
Summary of Contents for Chicco Alfa Lite
- Page 1 Read all instructions BEFORE assembly and USE of product. KEEP INSTRUCTIONS FOR FUTURE USE. Alfa Lite Portable Playard Owner's Manual IS0199E_01 ©2020 Artsana USA, INC. 07/20 www.chiccousa.com...
- Page 2 • Discontinue use of the product when • Use ONLY the mattress provided child is able to climb out or reaches by Chicco. NEVER add a mattress, the height of 35 in. (89 cm) in height, pillow, comforter, or padding.
- Page 3 WARNING Failure to follow these warnings and the instructions could result in serious injury or death • NEVER use plastic shipping bags When using this product as a PLAY or other plastic film as mattress AREA with the DOOR UNZIPPED: covers not sold and intended for that •...
-
Page 4: Parts List
Parts List A. - Frame B. - Mattress Pad C. - Carry Bag... - Page 5 Setting Up the Playard WARNING Before use, remove and dispose of any plastic bags and keep them out of reach of children to avoid the danger of suffocation. Failure to follow these warnings and instructions could result in serious injury or death. This product requires adult assembly.
- Page 6 Setting Up the Playard “CLICK!” 2. With the Frame laying on the floor with the legs facing up, rotate each leg out until it clicks into position, as shown.
- Page 7 Setting Up the Playard 3. When all 4 legs are opened, attach the black strap buckles on each leg to the corner of the fabic, making sure the straps are not twisted. Flip the playard over onto its legs.
- Page 8 Setting Up the Playard 4. Insert the Mattress Pad into the playard, padded side up. Never use playard without Mattress Pad.
- Page 9 Setting Up the Playard 5A. Lift up the ends of the Mattress Pad and locate 4 slots on the floor of the playard. 5B. Thread the 4 straps on the back of the Mattress Pad through the slots on the floor of the playard.
- Page 10 Setting Up the Playard 6. Pull the strap through the opening in the playard floor. Bring together the mattress buckle and the white Leg Bottom View buckle to attach, as shown. Repeat this step for the remaining 3 Mattress Pad Buckles. “CLICK!”...
- Page 11 Play Area 7. To convert from a playard to a play area. Undo the Zipper Buckle, and then unzip the door and tuck it under the playard floor.
- Page 12 Packing Up the Playard 8. Undo the Mattress buckles on the bottom of the Frame and remove Mattress Pad from the playard. Reverse steps 5 and 6.
- Page 13 Packing Up the Playard Release Button 9. Flip the playard over and locate the Release Button on the corners of the playard. Push on the Release Button while at the same time pushing down on the bottom tab to unlock the leg. With the leg unlocked, fold the leg down.
- Page 14 Packing Up the Playard 10. Flip the Playard Frame over, with the legs facing down. Then press in both Fold buttons located inside the Hubs on the playard frame. Fold the Playard Frame in half, as shown. Place the Playard Frame and folded mattress into the Carry Bag.
-
Page 15: Store Instructions
Store Instructions 11. To keep instructions for future use: Place the manual in the storage sleeve located on the underside of the Mattress Pad. - Page 16 Softgoods Removal 12. Locate the zipper under the top edge of the Playard Frame next to the folding hub. Undo the buckle, and then unzip both ends of the playard fabric.
- Page 17 Softgoods Removal 13. After both ends have been unzipped, undo all 4 snap buttons on each corner of the playard. The top portion of the zipper goes up and over the the Frame, and the bottom portion of the zipper gets pulled down below the leg release button.
- Page 18 Softgoods Removal 14. Flip the playard over and undo all 4 fabric buckles on the bottom of the playard.
- Page 19 Softgoods Removal 15. Turn the Playard Frame upside down. Then unlock 2 legs on one end of the playard, see step 9. Carefully remove the playard zipper fabric from around both legs and then repeat for the other 2 legs.
- Page 20 Tips for Reattaching Softgoods 16. Repeat steps 12 to 15 in reverse to reattach the playard fabric. On Step 15 make sure to place the lower section of the zipper over each leg. After the fabric has been zipped closed make sure safety buckle on zipper tang is clicked-in.
-
Page 21: Cleaning And Maintenance
Periodically check the playard for loose screws, worn parts, torn material or stitching. Replace or repair the parts as needed. Use only Chicco replacement parts. Keep the playard in a dry place. If playard becomes wet open playard and allow to dry completely. - Page 22 For More Information If you have any questions or comments about this product, or are missing any of the parts please do not return this product to the store. Contact us in one of the following ways: (877)-424-4226 info.usa@artsana.com www.chiccousa.com 1826 William Penn Way Lancaster, PA 17601...
- Page 24 www.chiccousa.com...


Need help?
Do you have a question about the Alfa Lite and is the answer not in the manual?
Questions and answers