Table of Contents
Advertisement
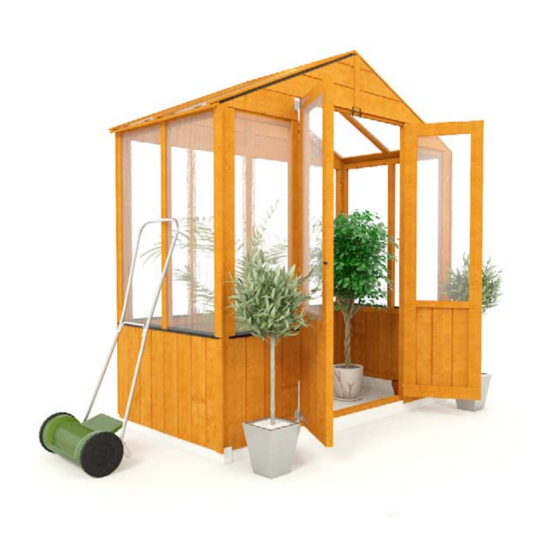
YOUR APEX GREENHOUSE GENERAL INSTRUCTIONS
Sizes Covered:
3x6, 6x6, 9x6 and 12x6
Smaller, Manageable Panels:
New sturdier features
Now easier to handle
Now easier to assemble
Safer for the customer
BEFORE
YOU
START
PLEASE READ INSTRUCTIONS THOROUGHLY AND
PLEASE RETAIN FOR FUTURE REFERENCE
Please note that all images are for illustration purposes only.
IF YOU HAVE ANY ISSUES WITH YOUR BUILDING PLEASE CALL THE MANUFACTURER ON: 01636 822883
1) Take 5 minutes
and have a co ee.
2) Reacquaint
yourself with the parts
,QTY's and Sizes on the
PACKING LIST.
3) Read the instructions
thoroughly and then
re-read if necessary.
REV-3.0-250913
Advertisement
Table of Contents

Related Manuals for Billyoh APEX


Summary of Contents for Billyoh APEX
- Page 1 YOUR APEX GREENHOUSE GENERAL INSTRUCTIONS PLEASE READ INSTRUCTIONS THOROUGHLY AND PLEASE RETAIN FOR FUTURE REFERENCE Please note that all images are for illustration purposes only. IF YOU HAVE ANY ISSUES WITH YOUR BUILDING PLEASE CALL THE MANUFACTURER ON: 01636 822883...
- Page 2 IMPORTANT SAFETY NOTICES GENERAL RECOMMENDATIONS Thank you for purchasing this building. We hope you will be delighted with your new building for many years to come. These instructions have been written as a guide to assembling this building and will provide you with an overview of GARDEN BUILDINGS: THESE PRODUCTS ARE INTENDED FOR DOMESTIC AND OUTDOOR USE ONLY.
- Page 3 The Building Must Not Be In Contact With Anything: lower impact use. Q: Are my window & plain panels interchangeable? A: On apex buildings the window & plain panels are interchangeable where they Overhanging hedges or trees must be cut back regularly as a branch are the same size or make up the same size panel as the opposing wall with more than one part.
- Page 4 GREENHOUSE - Panel Arrangement 12x6 (Polycarb (Polycarb (Polycarb (Polycarb (Polycarb (Polycarb (Polycarb (Polycarb Window) Window) Window) Window) Window) Window) Window) Window) 879mm 879mm 879mm 879mm 879mm 879mm 879mm 879mm (Polycarb (Polycarb 1ft6 1ft6 Window) Window) 439.5mm 439.5mm Key: (Polycarb (Polycarb 1ft6 1ft6 Window)
- Page 5 EZE BASE CONSTRUCTION: Please note these instructions are generic and cover a range of buildings and not all items will be included. STEP 1: MEASURING YOUR SHED PRIOR TO ASSEMBLY OF ‘EZE BASE’ Measure the length of the building which is to be mounted on the Eze Base and transfer these dimensions to the two outers supplied.
- Page 6 3) ASSEMBLING THE PANELS (1): 1) DOOR GABLE: 2) PLAIN GABLE: 50mm Screws Philips Screwdriver 1’6” or 439.5mm 1’6” or 439.5mm 3’ or 879mm 3’ or 879mm VIEW FROM OUTSIDE VIEW FROM OUTSIDE 1) Pilot drill your screw holes (through the frame on the inside of the panel) in to the rear WINDOW PANEL (WP) this will help to reduce wood splitting.
- Page 7 NOTE: Use the Plain Gable Apex as a guide for angles to make the Truss with. They should NOTE: Do not attach the panels to the oor at this point as it will make it very di cult to square up your NOTE: Start to square up your building at this point to make sure the Door Threshold (DT) is in the building later.
- Page 8 13) FIXING THE CENTRE PURLIN: 14) INSERTING ROOF GLAZING: (Polycarb used) 15) FIXING THE DOORS: 12mm Screws Philips Screwdriver GROOVE IN FRAME 30mm Screws Philips Screwdriver GLAZING SLOTS IN The printed film is the UV coated surface and should be fitted as the Use 30mm screws (S30) to x the HINGES (HG) to the DOORS (D) and through the 1) Place the PURLINS (PU) on top of the TRUSS (TRU) and slot them into the notches on out side face.
- Page 9 19) GLAZING (2): (Styrene or Polycarb) 20) FIXING ROOF PANELS: 21) GLAZING THE DOORS: (Styrene or Polycarb) 30mm 50mm 30mm Screws Pins Screws 50mm Screws Philips Hammer Screwdriver 1) Hold the GLAZING (GL) Philips panes in place and x a Screwdriver WINDOW CLOAKING STRIP (CSW) over the ends of...
- Page 10 Use 25mm screws (S25) to x the AUTOMATIC VENT OPENING ARM (AVA) to the Fix one of the WINDOW SILL (1172mm) (WS) on each of the gable apex. Slot them in to the Fix one of the WINDOW SILL (1172mm) (WS) on each of the gable apex. Slot them in to the Casement Stay pins with 25mm Screws (S25).
Need help?
Do you have a question about the APEX and is the answer not in the manual?
Questions and answers