Advertisement
Quick Links
Advertisement

Subscribe to Our Youtube Channel
Related Manuals for Pentair ONGA PANTERA P221


Summary of Contents for Pentair ONGA PANTERA P221
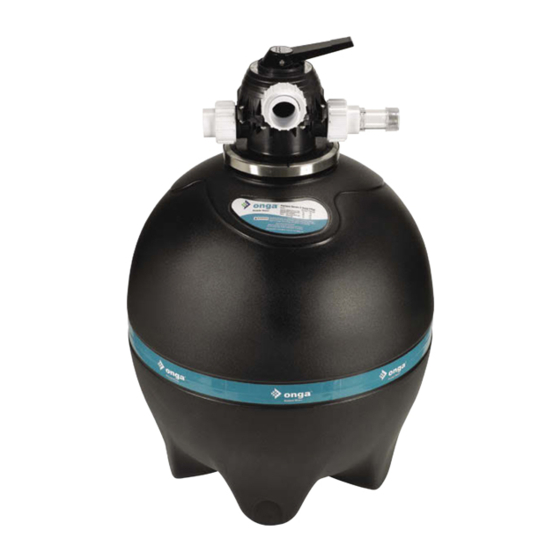
- Page 1 PANTERA HIGH-RATE SAND FILTER OWNER’S MANUAL...
-
Page 3: Table Of Contents
TABLE OF CONTENTS General Information Model Data Installation & Assembly 4 - 8 Startup / Operation 9 - 10 Service & Maintenance 11 - 12 Tank Assembly Troubleshooting 14 - 15 Pantera High-Rate Sand Filter Owner’s Manual... -
Page 4: General Information
GENERAL INFORMATION This filter is designed for use in domestic/residential swimming pool installations with correctly sanitised fresh or salt chlorinated water. Suitable for use with sand or Zelbrite filter media. Locate the filter system as close to the pool as practical. Place the filter on a level stable foundation, preferably a concrete pad or paving. -
Page 5: Model Data
MODEL DATA The operator must be provided with the owner’ s manual. This must be read before operation and followed during operation. These instructions are a guide only. Users not familiar with pool equipment should seek advice for suitably qualified persons with experience in pool equipment installation. -
Page 6: Installation & Assembly
INSTALLATION & ASSEMBLY Hazardous Pressure Incorrectly installed or tested equipment may fail, causing severe injury or property damage. Read and follow instructions in owner’ s manual when installing and operating equipment. Have a trained pool professional perform all pressure tests. All glued fittings and pipe work should be allowed to dry to atmosphere for 24 hours before closing the installation. - Page 7 INSTALLATION & ASSEMBLY Installation & Assembly of Internal Components Installation of filter should be only carried out by qualified personnel. Ensure that the under-drain assembly (hub, laterals & tube) are properly assembled & installed prior to adding filter media (sand). The filter internals comprise of a collector hub and eight (8) laterals, which are supplied packaged seperately with the collector hub and are stored inside the filter tank prior to shipment.
- Page 8 INSTALLATION & ASSEMBLY Steps for Installation of Filter Internals A. Insert first lateral into socket; twist clockwise 1/4 turn to lock lateral into hub.Lateral is correctly installed when slots face down. B. Insert assembly into top of filter tank. C. Hold assembly up near top of tank and add remaining laterals.
- Page 9 INSTALLATION & ASSEMBLY Loading Sand Media To keep sand out off collector assembly, place plastic sand shield over top of collector tube before pouring sand into filter (See diagram). To support laterals and prevent lateral breakage during loadings, fill tank about half full of water before loading sand.
- Page 10 INSTALLATION & ASSEMBLY Hazardous pressure. Clamp will not hold unless it is seated properly! DO NOT START PUMP until clamp ends are 1/4” (6mm) apart or less. Tighten clamp knob until clamp ends (under bolt) are 1/4” (6mm) apart. Tap around outside of clamp with a mallet to help seat clamp. Connect pipe from pump discharge to valve port labelled “PUMP”;...
-
Page 11: Startup / Operation
STARTUP / OPERATION The filter operator or owner must be provided with this owner’ s manual. This must be read before operation, and followed during operation. Incorrectly installed or tested equipment may fail, causing severe injury or property damage. Read and follow instructions in owner’ s manual when installing and operating equipment. - Page 12 STARTUP / OPERATION Open system valve and make sure pump is filled with water. Make sure pool water level is 2” (50mm) above bottom of skimmer opening. With pump OFF, set valve to ‘BACKWASH’ position. Start pump, circulating water through filter to waste. NOTE: To prevent pump running dry, be sure water level never drops below bottom of skimmer inlet.
-
Page 13: Service & Maintenance
SERVICE & MAINTENANCE Hazardous pressure. Stop pump and release all pressure from system before working on filter, valve, or clamp. DO NOT use solvents to clean filter; solvents may damage components in system. General Maintenance: Wash outside of filter with a mild detergent and water. Rinse off with hose. Inspect sand/media bed at least once a year to remove foreign material which has not been back-washed out of the system. - Page 14 Start pump. Multi-Port Valve Service If valve is leaking during normal operation it will need to be repaired by an authorised Pentair Water service technician. Valve Removal Hazardous pressure. Stop pump and release all pressure from system before working on filter, valve, or clamp.
-
Page 15: Tank Assembly
TANK ASSEMBLY 2016 Onward 2016 Onwards Item Description PANTERA HIGH-RATE SAND FILTERS FILTER TANK ASSEMBLY 110550 110551 110552 110553 COLLECTOR HUB 24201-0040 24201-0040 5306700 5306700 5306900 (pre 2016) 5306800 (pre 2016) LATERAL STEM 24700-0075 24700-0075 89012516 (2016 onwards) 89012516 (2016 onwards) 5307000 (pre 2016) 5307000 (pre 2016) LATERAL BRANCH... -
Page 16: Troubleshooting
TROUBLESHOOTING SYMPTOM CAUSE REMEDY No Water Discharge Pool water level too low Fill Pool to correct level. Air leaks in inlet fittings Check and tighten all connections. to pump. Teflon tape fittings. Short Filter Cycles Filter Dirty Filter not backwashed for long enough period. - Page 17 Tank o-ring dirty Call an authorised service agent to Tank Joint service pump. o-ring incorrectly fitted o-ring damaged (pinched) Clamp Band not correctly fitted Should problems persist, contact your nearest Pentair Water Service Agent. Pantera High-Rate Sand Filter Owner’s Manual...
- Page 18 NOTES Pantera High-Rate Sand Filter Owner’s Manual...
- Page 19 Pantera High-Rate Sand Filter Owner’s Manual...
- Page 20 1-21 Monash Drive | Dandenong South, VIC 3175 | Australia | 1300 137 344 | pentairpool.com.au Information contained here-in remains the property of Pentair Australia Holdings Pty Ltd under Australian copyright law. Content may not be reproduced or transmitted without our prior written permission.
Need help?
Do you have a question about the ONGA PANTERA P221 and is the answer not in the manual?
Questions and answers