Table of Contents
Advertisement
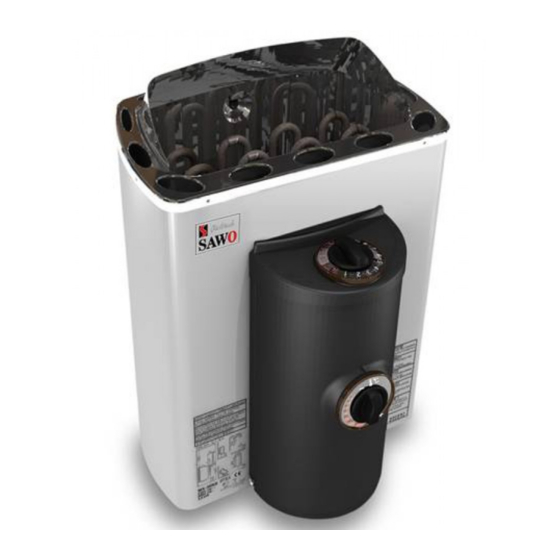
MINI X HEATER
MX-23NB
MX-23NS
Onnittelut loistavasta kiuasvalinnastanne!
Tutustu käyttöohjeisiin huolellisesti ennen
käyttöönottoa.
Vastukset
Heating Elements
MX-30NB
MX-36NB
MX-36NS
MX-23NS
SÄHKÖKIUAS | ELECTRIC SAUNA HEATER
Ei käytössä seuraavissa maissa: USA, Kanada ja Meksiko.
Not for use in the USA, Canada and Mexico.
SUOMI | ENGLISH
KÄYTTÖOHJEET
Congratulations on your purchase of
SAWO sauna heater!
Please read the manual carefully before
using the heater.
Ajastin
Timer
Termostaatti
Thermostat
Ylikuumenemissuojan
palautuspainike
Reset Button Hole
MANUAL
AVAILABLE AS:
• PREMIUM
• TRENLINE
• FIBERCOATED
Advertisement
Table of Contents

Related Manuals for Sawo MINI X MX-23NB


Summary of Contents for Sawo MINI X MX-23NB
- Page 1 • PREMIUM • TRENLINE MX-36NS MX-23NS MX-23NS • FIBERCOATED Onnittelut loistavasta kiuasvalinnastanne! Congratulations on your purchase of Tutustu käyttöohjeisiin huolellisesti ennen SAWO sauna heater! käyttöönottoa. Please read the manual carefully before using the heater. Vastukset Heating Elements Ajastin Timer Termostaatti...
-
Page 2: Table Of Contents
table of ContentS Safety instructions ................5 For user:..................5 For technicians: ................7 Heater Installation ................9 Electrical diagram ................. 10 Technical data ................11 Repositioning of the Built-In Control Unit ........13 Heater Stones ................15 Loading stones into the heater ............15 Control Settings ................ -
Page 3: Safety Instructions
Safety inStruCtionS Please take note of these safety precautions before using the sauna or when installing the heater. for user: • This product is not designed to be used by persons (including children) with limited physical or mental abilities and limited experience and knowledge except under close supervision by a responsible person with knowledge and experience or having been advised by such person. -
Page 4: For Technicians
for technicians: • Wiring and repairs must be done by a certified electrician. • Follow the Minimum Safety Distances when mounting the heater. See page 9 • The electronic sensor and electornic heating system should be mounted in a way so that incoming air will not interfere with it. If using separate control, the controlunit and control panel must be mounted outside the sauna cabin. -
Page 5: Heater Installation
heater inStallation It is recommended that the heater be placed on the wall nearest to the door. The air circulation created by the door should work together with the hot air generated by the heater. For safety and convenience, follow the minimum safety distances as provided (See Fig 1.). Follow the cubic volumes (See page 11). Do not install the heater to the floor or wall niche. Install only one heater in a sauna room. -
Page 6: Electrical Diagram
KytKentÄKaavio eleCtriCal diagram Kuva 3 Fig. 3 2 VAIHE / 1 VAIHE Erillinen ohjausyksikkö 2 PHASE / 1 PHASE Separate Control Unit AJASTIN TERMOSTAATTI MX-23NB MX-23NS TIMER THERMOSTAT MX-30NB MX-30NS MX-36NB MX-36NS 400V 2N~ a1 a N L1 L2 SENSORI SENSOR 230V 1N~ N L1... -
Page 7: Technical Data
Kuva 4 Vastukset Fig. 4 Heating Elements Anturien sijainnit Sensor location Säätöanturi Turva-anturi Regulating sensor Safety Sensor MN115 MN180 teKniSet tiedot teChniCal data KIUKAAN KOKO KIUAS VASTUS SAUNAN JÄNNITE JOHDON KIVET SULAKE OHJAUS TILAVUUS LEVEYS SYVYYS KORKEUS POIKKIPINTA MALLI TYYPPINUMERO SIZE OF HEATER HEATER HEATING ELEMENT... - Page 8 ohjauSKeSKuKSen KÄtiSyyden muuttaminen Jos haluat siirtää ohjausyksikön kiukaan toiselle puolelle (oikealle tai vasemmalle): 1. Irrota termostaatin nuppi (kuva A), ja ruuvit jotka pitävät muovikantta paikoillaan. 2. Avaa ruuvit joilla ohjausyksikkö on kiinnitetty (kuva A). 3. Vedä ohjausyksikön yläreunaa ulospäin ja siirrä ohjausyksikkö kiukaan toiselle puolelle.
-
Page 9: Repositioning Of The Built-In Control Unit
repoSitioning of the built-in Control unit If you want to transfer the control unit to the other side (right or left): Pull out the thermostat’s knob (Fig. A) and open the screws, which are holding the front cover. Open the screws which are holding the control unit (Fig. B). Pull outwards the control unit’s upper edge and transfer the control unit to the other side. -
Page 10: Heater Stones
heater StoneS The main purpose of the stones in the heater unit is to store enough energy to effi- ciently vaporize the water thrown on top of the stones to maintain correct humidity in the sauna room. The stones must be removed at least once a year or every 500 hours which ever occurs first. All stone crumbles must be removed from the heater unit and replaced with new ones as described in the heater manual. When placing the stones, recommended to use cut resistant gloves. -
Page 11: Control Settings
Control SettingS thermoStat Adjust the temperature of the sauna by simply turning the operating knob. Thermostat support automatically the choosen temperature. In case the heater overheats, the safety sensor will automatically stop the heater even if the timer is on. Find out for what reason the heater overheated. The reason for this could be too tightly placed sauna stones, heater´s location or inappropriate ventilation. If this occurs, find out the cause and fix the problem before resetting the safety sensor. -
Page 12: Heating Of The Sauna
heating of the Sauna Caution! Smoke and odor formation when heating up for the first time. Work materials from the manufacturing process will be present on the new heating elements. These evaporate when the sauna heater is heated up for the first time. This produces smoke and an unpleasant odor. Breathing in the fumes or smoke can be harmful to your health. Perform the following steps when operating the sauna heater for the first time and if the heating elements for the sauna heater have been changed. In this way you will prevent damage to health due to the fumes and smoke produced when heating up for the first time. -
Page 13: Insulation
inSulation The sauna must have proper insulation on the walls, ceiling and door. One square meter (m²) of uninsulated surface increases the cubic volume by approximately 1,2m³ when determining the power requirement of the heater. See page 11. Ensure that moisture proofing is appropriate in sauna room. The purpose of this is to prevent spreading of moisture to the other rooms or wall structure. Moisture proofing must be placed between heating insulation and panel. -
Page 14: Sauna Maintenance
If there is calcium stains or other dirt on the heater cover, clean it with mild soap water. You can also use SAWO Decalcifying solution for washing the stains. Dry after wash. Clean glass surfaces with window cleaning agent or dish soap. Rinse well and dry with a squeegee or a dry cloth. -
Page 15: Diagnostic Table
diagnoStiC table If heater is not heating up or sauna room is heating up slowly: nb-modelS: • Is timer set to the operating range? • Is the timer On? Is timer knob stuck? (Suitable gab is 1 - 2mm between knob and heater body) If necessary, pull out the knob couple of millimeters. - Page 16 mini X KiuKaan varaoSat MN kaulus MN kivitaso Vastus Seinäkiinnitysteline (MX) MN keskiheijastuslevy Vastuspidikkeet o-renkailla Ajastimen nuppi Ajastimen lamppu Ajastin 10. Anturipidike 11. Termostaatti 12. Termostaatin lamppu (Premium malli) 13. Riviliitin (keskikoko) 14. Etukuori 15. Termostaatin nuppi 16. Kaapelipidike siivillä 17.
-
Page 17: Mini X Heater Spare Parts
HP01-009 MX-23NB MX-30NB MX-36NB HP01-010 HP01-011 HP01-012 (PREMIUM ONLY) HP01-013 HP01-018 HP01-014 HP01-022-B1 HP07-002 HP01-015 HP01-017 HP01-016 mini X heater Spare partS MX-23NS MN Frame MX-30NS MN Stone Holder MX-36NS Heating Element Wall Mounting Rack (MX) HP01-020 MN Mid Reflection Sheet Heating Element Holder with O-rings HP01-021 Timer Knob Timer Pilot Lamp... - Page 18 PX 4 Pidätämme oikeuden muutoksiin. Subject to change without notice. www.sawo.com | info@sawo.com...
- Page 19 L´unité de commande incorporée MX-23NB MX-30NB MX-36NB MX-23NB MX-30NB MX-36NB MX-23NS MX-30NS MX-36NS Поздравляем Вас с покупкой печи для сауны SAWO. Пожалуйста. Внимательно прочитайте это руководство перед использованием элекрокаменки. Eléments de chauffage Commutateur Horaire Unité de commande séparée MX-23NS MX-30NS...
- Page 20 Installation du réchauffeur Установка печи Il est recommandé de situer le réchauffeur sur le mur le plus proche à la porte. La circulation d´air provenant de la porte doit fonctionner concurrement à l´air chaud, généré par le réchauffeur. Pour des raisons de sécurité...
- Page 21 Nie sollten Sie das Heizgerät ohne Steine verwenden, weil dies zu Feuerbildung führen Перед укладкой камни рекомендуется ополоснуть водой, чтобы удалить краситель и пыль, которые могут стать könnte. Es empfiehlt sich, nur die Original Sawo oder Peri Rocks zu verwenden. Verwenden причиной неприятного запаха во время первых раз использования каменки.
- Page 22 Diagramme électrique Eléments de chauffage Fig. 6 Fig. 7 2 PHASES / 1 PHASES L´unité de commande incorporée Unité de commande séparée L´emplacement des capteurs Abb. 8 INTERRUPTEUR HORAIRE MX-23NB MX-23NS Capteur de régulation MX-30NB MX-30NS Capteur de sécurité MX-36NB MX-36NS a1 a 400V 2N~...
- Page 23 Réglage de cotrôle Thermostat Настройки панели управления THERMOSTAT ТЕРМОСТАТ Ajustez la température de sauna en tournant tout simplement le Температура в сауне регулируется простым поворотом ручки термостата. Термостат commutateur d´opération. Le dispositif de contrôle de température est поддерживает выбранную температуру. В случае перегрева, датчик безопасности capable de détecter intelligemment le niveau de température actuel et de автоматически...
- Page 24 Chauffage du sauna Нагрев сауны Contrôlez la pièce de sauna toujours avant d´enclencher le réchauffeur de sauna (assurez- Прежде чем включить каменку, проверьте помещение сауны, убедитесь, что рядом с печью нет vous qu´il n´y a aucun objet près du réchauffeur). Quand vous utilisez le réchauffeur pour la ничего...
Need help?
Do you have a question about the MINI X MX-23NB and is the answer not in the manual?
Questions and answers