Table of Contents
Advertisement
Quick Links
Javo 'Compact' Robot
Placing and Pick-up
Versie 1
JAVO B.V.
Westeinde 4
2211 XP Noordwijkerhout
Holland
●
●
●
©
All rights reserved
The information provided herein may not be reproduced and/or published in any form, by print, photoprint,
microfilm or any other means whatsoever (electronically or mechanically) without the prior written authorisation
of JAVO B.V.
Create PDF
files without this message by purchasing novaPDF printer (http://www.novapdf.com)
Advertisement
Table of Contents

Related Manuals for Javo Compact


Summary of Contents for Javo Compact
- Page 1 Javo ‘Compact’ Robot Placing and Pick-up Versie 1 JAVO B.V. Westeinde 4 2211 XP Noordwijkerhout Holland ● ● ● © All rights reserved The information provided herein may not be reproduced and/or published in any form, by print, photoprint, microfilm or any other means whatsoever (electronically or mechanically) without the prior written authorisation of JAVO B.V.
-
Page 2: Declaration Of Conformity
It describes the features, startup, and operation and other important information. Read and understand this manual before you use the machine or do maintenance. Javo b.v. takes no responsibility for mistakes in this manual, or for any consequences from its use. -
Page 3: Type Plate
The CE-mark The CE-mark is shown on the robot body. In combination with the registration plate. Type plate A. Type name of the machine B. Unique serial number of the machine C. Year of building D. Motor E. Mains voltage F. - Page 4 Descriptions of used icons Below is a list of the notes, cautions and warnings used throughout this guide. They consist of an icon, followed by text in bold or italic type. NOTE: This icon indicates important information and tips that help you make better use of the machine.
-
Page 5: Safety Precautions
Safety Safety precautions Always keep hands, hair, loose clothing and/or jewellery away from moving parts of the machine WARNING: Use of controls, adjustments or procedures other than those specified in this documentation may result in exposure to shock electrical hazards and/or mechanical hazards. -
Page 6: Dangerous Situations
Dangerous situations The figure below shows the emergency stops and the safety marks on the machine with references to the potential risks. The fork moves in a linear system. During the process there is a risk of injury by turning parts. Only approach when the system is switched out. -
Page 7: Electrical Protection
WARNING: Never move the machine when the mains cord is connected to the power supply. Electrical protection The motors of this machine are protected by circuit breakers. These are located inside the side panel box. If one of the circuit breakers is switched OFF, turn the black button of that circuit breaker to restart the machine. -
Page 8: Before Start-Up
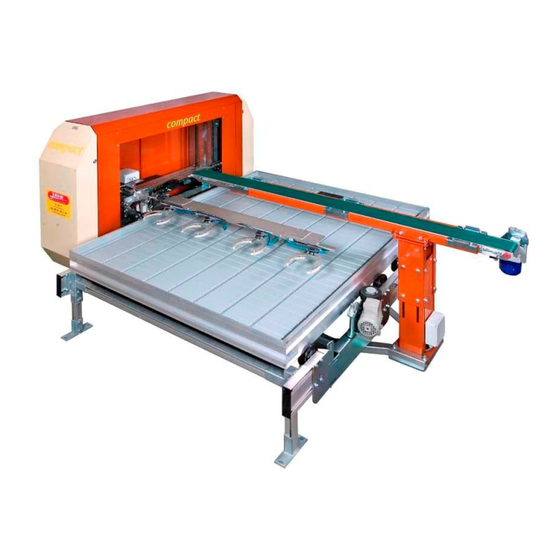
General This machine automatically pick up or put down plant containers (pots) by moving a fork in horizontal and vertical direction. The robot is integrated in a stationary automatic processes. Overview of the total machine Conveyor Conveyor support Container transportmotor Before Start-up Before startup make sure that the following points are correct. -
Page 9: Installation
Javo B.V. Helsingborgsv., Varalöv Westeinde 4, 262 96 ÄNGELHOLM 2211 XP Noordwijkerhout, Holland Representative in USA Javo USA Inc. 1900 Cobb Intl. Blvd., Ste. G&H Kennesaw, GA 30152 1-800-USA-Javo There is no information about installation inside this manual. Create PDF... -
Page 10: Operating The Machine
Operating the machine Instructions for use On the machine ‘instructions for use’ stickers are present. 1. Manual control Vertical movement 2. Manual control Horizontal movement 3. Manual control Container transport 4. Reset Emergency stop 5. Emergency stop A Connector for continuous electrical power B Connector for continuous electrical power Create PDF files without this message by purchasing novaPDF printer (http://www.novapdf.com) -
Page 11: Normal Startup
Normal startup On the machine one control panel is provided. One on a flexible cord. Make sure that the machine is in a normal condition. (See paragraph 3.2 ‘Before start up’). Switch ON the main switch on the front panel. The lamp (E) will light. - Page 12 Emergency stop 1. Push the red emergency button (B) on the left side panel or right side panel on the machine , to (chapter 5.2) activate the emergency stop. 2. To reset the emergency stop pull the res button an press the blue reset button.
Need help?
Do you have a question about the Compact and is the answer not in the manual?
Questions and answers