Table of Contents
Advertisement
Quick Links
Advertisement
Table of Contents

Related Manuals for Interacoustics VF405


Summary of Contents for Interacoustics VF405
- Page 1 Instructions for use - GB VF405 Video Frenzel 80705354 ver. 09/2012...
-
Page 3: Table Of Contents
System Configurations ......................5 System Contents ......................... 6 Software Installation ..................7 Video Frenzel ........................7 External Camera (VF405 Extended only) ................. 11 Foot Pedal (Option only for VF405 Extended) ..............15 Using the Software ......................15 3.4.1 General Layout ....................15 3.4.2 License Setup .................... -
Page 5: Introduction
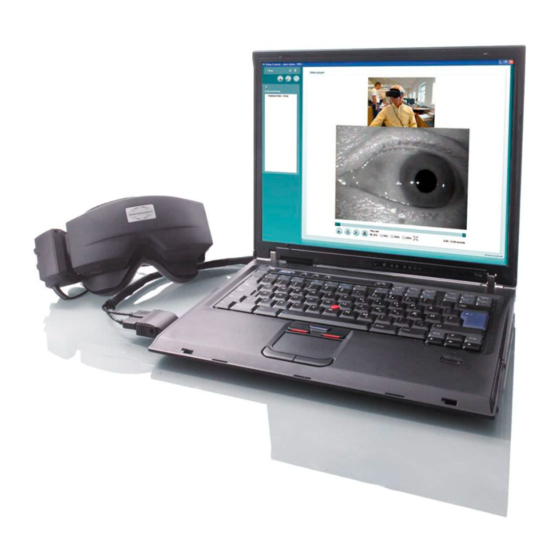
Web: www.interacoustics.com Intended Use The VF405 Video Frenzel systems provide information to assist in the evaluation, diagnosis and documentation of vestibular disorders. Eye movements are recorded by use of a goggle mounted with infrared video cameras. The eye images are displayed in real time in large format on a computer monitor. - Page 6 VF405 Video Frenzel Instructions for Use - English Date: 2012-08-24 Page 2/33 3. Be sure to use only stimulation movements that are acceptable to the patient. 4. Exchange the disposable goggle foam cushion between patients to avoid cross contamination. Never attempt to wash the disposable goggle foam cushions 1.
-
Page 7: Unpacking And Installation
Keep carton for future shipment The VF405 comes in its own shipping carton, which is specially designed for the VF405. Please keep this carton. It will be needed if the instrument has to be returned for service. -
Page 8: Safety Regulations
One 34 mm ExpressCard slot available One free USB port for available footswitch (only VF405 Ext) One free USB port for external Web camera (only VF405 Ext) Monitor resolution 1024 x 768 or better Desktop PC ... -
Page 9: System Configurations
Page 5/33 System Configurations Features The VF405 system is available in 4 different configurations: One camera, eye images are only displayed – not stored for later replay VF405m Standard Two cameras, eye images are only displayed – not stored for later replay... -
Page 10: System Contents
VF405 Video Frenzel Instructions for Use - English Date: 2012-08-24 Page 6/33 System Contents Depending on system configuration the following components will be included: Item VF405m Std VF405b Std VF405m Ext VF405b Ext 80481101 Camera Firewire® Complete 80480502 Combi Mask VOG 80427502 FireWire®... -
Page 11: Software Installation
VF405 Video Frenzel Instructions for Use - English Date: 2012-08-24 Page 7/33 3 Software Installation 3.1 Video Frenzel Insert the installation CD and follow the steps below to install the Video Frenzel. If the installation procedure does not start automatically, click “Start”, then go to “My Computer” and double-click the DVD/CD-RW drive to view the contents of the installation CD. - Page 12 VF405 Video Frenzel Instructions for Use - English Date: 2012-08-24 Page 8/33 Click “Next” and wait while installing. Click “Continue Anyway”. Make sure the firewire card is inserted, otherwise click “Retry” when card is inserted:...
- Page 13 VF405 Video Frenzel Instructions for Use - English Date: 2012-08-24 Page 9/33 You will see this screen while the program is being installed. Click “Close”. The Video Frenzel is now installed. Now you need to setup OtoAccess™.
- Page 14 VF405 Video Frenzel Instructions for Use - English Date: 2012-08-24 Page 10/33 Start OtoAccess™. Go to File►Setup and select the Instruments tab. Create a new Video Frenzel instrument as shown below. Click Ok. Double-click Video Frenzel in the instruments list as shown below to start the application.
-
Page 15: External Camera (Vf405 Extended Only)
VF405 Video Frenzel Instructions for Use - English Date: 2012-08-24 Page 11/33 External Camera (VF405 Extended only) You must install the Logitech®QuickCam® software before connecting your camera, or some of the camera’s features may not function properly. Only connect your camera when prompted to do so during the software installation process. - Page 16 VF405 Video Frenzel Instructions for Use - English Date: 2012-08-24 Page 12/33 When the camera has been detected, the dialog below is shown. Click Next.
- Page 17 VF405 Video Frenzel Instructions for Use - English Date: 2012-08-24 Page 13/33 In the dialog shown above, select Quick Install and click Next. The installation will begin. As the installation is complete, the following dialog is shown.
- Page 18 VF405 Video Frenzel Instructions for Use - English Date: 2012-08-24 Page 14/33 Click Next. When the dialog shown below appears, the web camera installation is complete. Once the web camera is installed it can be enabled in Video Frenzel. The video frame rate is restricted to...
-
Page 19: Foot Pedal (Option Only For Vf405 Extended)
VF405 Video Frenzel Instructions for Use - English Date: 2012-08-24 Page 15/33 Foot Pedal (Option only for VF405 Extended) The foot pedal is pre-programmed with the following functions: Connect the foot pedal to any available USB port on the computer. There is no need for installation of drivers or software. -
Page 20: License Setup
VF405 Video Frenzel Instructions for Use - English Date: 2012-08-24 Page 16/33 Recording Mode (Extended version only) Playback Mode (Extended version only) Save Session (Extended version only) Save and Exit Report Editor (Extended version only) Session Selector Fixation Light On/Off 3.4.2 License Setup... - Page 21 VF405 Video Frenzel Instructions for Use - English Date: 2012-08-24 Page 17/33 The serial numbers of the connected cameras are shown above. Click on each Serial and enter the corresponding license (23 characters) found in the License Certificate. Click Apply. Apply will only be enabled if the license is valid.
-
Page 22: General Setup
VF405 Video Frenzel Instructions for Use - English Date: 2012-08-24 Page 18/33 3.4.3 General Setup Go to Menu►Setup►General Setup as shown below to enter the general setup page. 3.4.4 Eye Camera(s) The setup page for the eye camera(s) is shown below. -
Page 23: Video Recorder
VF405 Video Frenzel Instructions for Use - English Date: 2012-08-24 Page 19/33 The external camera must first be installed as described in the section page 11. 3.4.6 Video Recorder The setup page for the video recorder is shown below. Recording Speed The recording speed can be set to either 25 frames per second or 50 frames per second. -
Page 24: Recording Video
VF405 Video Frenzel Instructions for Use - English Date: 2012-08-24 Page 20/33 Enter a name in the Test name box and click Add to add new test names to the list. To delete a test name, first select in the list and the click Delete. -
Page 25: Adjusting Eye Camera Brightness
VF405 Video Frenzel Instructions for Use - English Date: 2012-08-24 Page 21/33 3.5.1 Adjusting Eye Camera Brightness To adjust the brightness of an eye camera, right-click anywhere within the live view frame. By default the brightness is automatically adjusted, but by clicking on the Auto button, the brightness can be manually adjusted using the slider. -
Page 26: Deleting Videos
VF405 Video Frenzel Instructions for Use - English Date: 2012-08-24 Page 22/33 The recorded video is now listed in the Performed Tests list. 3.6.1 Deleting Videos To delete a recorded video, simply select it in the Performed Tests list and click the Delete button, as shown below. -
Page 27: Video Playback
VF405 Video Frenzel Instructions for Use - English Date: 2012-08-24 Page 23/33 3.6.3 Video Playback To select the video mode, click the Playback Mode button as shown below. 3.7 General Layout Entering playback mode, the following window is presented. Select the video to playback by clicking the appropriate test in the Performed Tests list. -
Page 28: Playback Controls
VF405 Video Frenzel Instructions for Use - English Date: 2012-08-24 Page 24/33 3.8 Playback Controls The player controls are located below the video playback frame and supports the following functions. Video Track bar indicating the current position of the video. Drag the thumb to set the video at a specific time. - Page 29 VF405 Video Frenzel Instructions for Use - English Date: 2012-08-24 Page 25/33 Notice that the highlight follows the video playback. Click the Highlighter to deactivate highlighting. Adding a Note to a Highlight Stop/pause video playback if it is currently playing Click on the relevant highlight to open the notes field and to start playback of that particular video sequence.
-
Page 30: Report Editor
VF405 Video Frenzel Instructions for Use - English Date: 2012-08-24 Page 26/33 Deleting a Note Stop/pause video playback if it is currently playing. Right-click on the appropriate highlight and select Delete. 3.9.1 Report Editor To enter the report editor, click the Report Editor button as shown below. -
Page 31: Creating A Report
VF405 Video Frenzel Instructions for Use - English Date: 2012-08-24 Page 27/33 Create New Report Template Editor Print Report Delete Report Save Report 3.11 Creating a Report When entering the report editor a blank report is created by default. The report is ready for editing. It is... -
Page 32: Saving A Report
VF405 Video Frenzel Instructions for Use - English Date: 2012-08-24 Page 28/33 When selecting a report template, all previously entered text will be replaced by data generated by the template. 3.11.1 Saving a Report To save a report, click the Save button in the left toolbar, as shown below. - Page 33 VF405 Video Frenzel Instructions for Use - English Date: 2012-08-24 Page 29/33 Add dynamic data by selecting keywords in the Available Keywords list on the right side, and clicking the Add Keyword button to add it to the report template.
- Page 34 VF405 Video Frenzel Instructions for Use - English Date: 2012-08-24 Page 30/33...
-
Page 35: Care And Maintenance
VF405 Video Frenzel Instructions for Use - English Date: 2012-08-24 Page 31/33 4. Care and Maintenance The performance and safety of the instrument will be kept if the following recommendations for care and maintenance are observed: It is recommended to let the instrument go through at least one annual overhaul, to ensure that the electrical and mechanical properties are correct. -
Page 36: Concerning Repair
Warranty INTERACOUSTICS warrants that: The VF405 is free from defects in material and workmanship under normal use and service for a period of 24 months from the date of delivery by Interacoustics to the first purchaser. Accessories are free from defects in material and workmanship under normal use and service for a period of ninety (90) days from the date of delivery by Interacoustics to the first purchaser. - Page 37 This warranty is in lieu of all other warranties, express or implied, and of all other obligations or liabilities of Interacoustics, and Interacoustics does not give or grant, directly or indirectly, the authority to any representative or other person to assume on behalf of Interacoustics any other liability in connection with the sale of Interacoustics products.
Need help?
Do you have a question about the VF405 and is the answer not in the manual?
Questions and answers