
Related Manuals for Interacoustics Virtual SVV


Summary of Contents for Interacoustics Virtual SVV
- Page 1 Instructions for Use Virtual SVV™ D-0116067 – A – 2017/09...
- Page 2 Copyright © February 1, 2017 by Interacoustics. All rights reserved. Information in this document is subject to change without notice. Companies, names, and data used in example herein are fictitious unless otherwise noted. No part of this document may be reproduced or transmitted in any form or by any means, electronic or mechanical, for any purpose, without express written permission of Interacoustics A/S or its licensees.
-
Page 3: Table Of Contents
OPERATIONAL INSTRUCTIONS ....................17 System startup ........................17 Entering patient information ....................17 Starting the Virtual SVV™ software .................. 18 Navigating the Virtual SVV™ user interface ..............19 Virtual SVV™ settings ....................... 20 Virtual SVV™ findings sheet ..................... 21 TEST PROCEDURES ........................ 23 Test mode selection ...................... - Page 4 CARE AND MAINTENANCE ..................... 31 General maintenance procedures ..................31 How to clean Interacoustics products ................34 Concerning repair ......................35 Warranty ..........................35 TROUBLESHOOTING ....................... 37 Troubleshooting table ......................37 System function check ...................... 38 GENERAL TECHNICAL SPECIFICATIONS ................39 System requirements ......................
-
Page 5: Introduction
The target population for the Virtual SVV™ is 8 years of age and over. The Virtual SVV™ system is to be used by trained personnel only, such as physicians, audiologists, physical therapists, medical assistants, hearing healthcare professionals, or personnel with a similar level of qualifications. -
Page 6: Product Description
Product description The Virtual SVV™ system provides a method to assess the patient’s ability to adjust a line, in the absence of any other visible cues, to be parallel with gravity. The sensory information required to perform this task is provided predominantly by the vestibular system of the inner ear. -
Page 7: Unpacking And Inspection
Please use the Return Report to help to us guarantee that the correction of the problem will be to your satisfaction. Storage If you need to store the Virtual SVV™ for a period, please ensure it is stored under the conditions specified in the section for technical specifications. -
Page 8: Labeling
Virtual SVV™ Instructions for Use – EN Page 4 Labeling The following labeling can be found on the instrument: Symbol Explanation Type B applied parts. Patient applied parts without electrical connection to the patient. Refer to instruction manual. WEEE (EU-directive). -
Page 9: General Warnings And Precautions
General warnings and precautions Intended purpose 1. The Virtual SVV™ system is intended to be used exclusively for medical purposes. It is not intended for private or entertainment use. 2. The Virtual SVV™ system must only be operated according to the instructions described in this manual. - Page 10 Virtual SVV™ Instructions for Use – EN Page 6 Battery safety 1. The Virtual SVV™ handheld remote contains two rechargeable AA NiMH batteries. Read the instructions in Chaper 6 Exchanging Batteries carefully before opening the battery compartment and exchanging the batteries.
-
Page 11: Setup And Installation
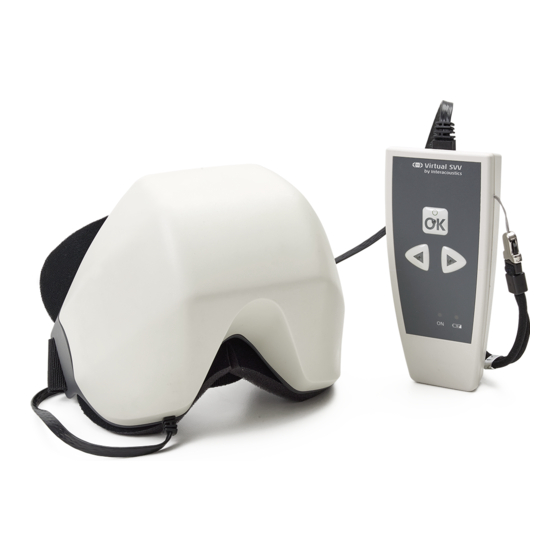
Virtual SVV™ Instructions for Use – EN Page 7 3 Setup and installation The Virtual SVV™ system components The Virtual SVV™ Device is comprised of four main components: Virtual Reality Goggle Base Station Handheld Remote Virtual SVV™ Application Software 3.1.1... -
Page 12: Base Station
Figure 3-1 First step in Virtual SVV™ installation setup A valid user license in the form of a license file is included with the purchase of a Virtual SVV™ device. The name of the license file is generated as the combination of “device number.license”. - Page 13 Figure 3-2 Selection of directory path for license file The license file is to be found in the directory /License on the Virtual SVV™ installation media. Press “Browse” to select the path as shown in the dialogue box. The installation can only be completed after the license file has been identified.
- Page 14 Page 10 The following default directory path will be selected for the installation procedure. Figure 3-4 Selecting directory path for Virtual SVV™ installation Select “Next” to proceed with installation. Upon successful installation, the setup assistant may be closed by selecting “Finish”.
-
Page 15: Installation Of Virtual Svv™ Drivers
Installation of Virtual SVV™ drivers Connect the base station of the Virtual SVV™ to a USB port on the PC or laptop. The installation procedure identifies whether the necessary driver software is already installed on the PC. If this is not the case, these are installed automatically. -
Page 16: Hardware Setup
Virtual SVV™ Instructions for Use – EN Page 12 Hardware setup The Virtual SVV™ system is composed of several components. Each component, its function and installation is described below. 3.6.1 Attaching the face cushion to the virtual reality goggle Step 1 Align the face cushion to the virtual reality goggle, with the side with black fabric towards the virtual reality goggle. -
Page 17: Attaching The Head Strap
Virtual SVV™ Instructions for Use – EN Page 13 Step 3 Press the face cushion to the virtual reality goggle, beginning in the center (see Figure 3.3) and working towards the outer edges. Ensure that the entire interface between face cushion and virtual reality goggle is bonded. -
Page 18: Handheld Remote
Virtual SVV™ Instructions for Use – EN Page 14 Step 2 Fold the left-hand end of the head strap around the slot and fixate the Velcro hooks and loops. This end of the head strap remains fastened throughout the examination. -
Page 19: Preparing The Base Station
Virtual SVV™ Instructions for Use – EN Page 15 Figure 3-12 Elements of the handheld remote OK button for confirming completion of adjustment Buttons for left / right rotation of the luminous line LED indicating power ON (green) ... -
Page 20: Battery Charging
Virtual SVV™ Instructions for Use – EN Page 16 NOTICE Positioning the base station To ensure a reliable wireless transmission it is important that a free line-of-sight is maintained between the virtual reality goggle and base station. It is recommended that the base station is positioned in the vicinity of the patient. -
Page 21: Operational Instructions
Enabling and disabling the Virtual SVV™ system To enable the Virtual SVV™ system press the OK button on the handheld remote for approximately 2 seconds until the green ON LED indicator begins to blink, then release the button. The system initiates after a further 3 seconds and the green ON LED ceases to blink and remains illuminated. -
Page 22: Starting The Virtual Svv™ Software
Starting the Virtual SVV™ software Select the desired patient in the OtoAccess database, then double-click on Virtual SVV™ from the Select Instrument box in the upper right corner of OtoAccess to launch the software. -
Page 23: Navigating The Virtual Svv™ User Interface
Virtual SVV™ Instructions for Use - EN Page 19 Navigating the Virtual SVV™ user interface Figure 4-3 Virtual SVV™ User Interface Located on the upper left are the buttons for establishing communication with the base station, printout of test report and application preferences. -
Page 24: Virtual Svv™ Settings
Virtual SVV™ Instructions for Use - EN Page 20 Virtual SVV™ settings Settings can be accessed via the gear icon located in the upper left panel of the user interface. Default parameters can be adjusted as described below. Figure 4-4 Settings Dialogue ... -
Page 25: Virtual Svv™ Findings Sheet
Virtual SVV™ Instructions for Use - EN Page 21 Virtual SVV™ findings sheet The findings for each examination are collated and stored on a findings report sheet in PDF format. Optionally, this can be printed as a hard copy. In addition, the measurement data from each examination is stored and can be exported in CSV format. - Page 26 Virtual SVV™ Instructions for Use - EN Page 22...
-
Page 27: Test Procedures
Enable the Virtual SVV™ system by holding the OK button on the handheld remote for approximately two seconds until the green ON LED begins to blink. After approximately three seconds the system is activated and the LED remains illuminated. -
Page 28: Mounting The Virtual Reality Goggle
Virtual SVV™ Instructions for Use – EN Page 24 5.2.1 Mounting the virtual reality goggle Loosen the head strap and instruct the patient to hold the virtual reality goggle with fitted face cushion to his/her face so that it is comfortable. Ensure that the patient can now see all four boundary dots on the display. -
Page 29: Starting Measurements
Virtual SVV™ Instructions for Use – EN Page 25 Figure 5-4 Example of the luminous line as seen by the patient Starting measurements Click on the Start button to begin test measurement. Familiarize the patient with the operation of the device. -
Page 30: Testing With Static Tilt
This also allows outliers beyond a set permissible tolerance range to be excluded. This tolerance range defines how many degrees any individual measurement data point may deviate in order to be considered in the median calculation and can be defined within Virtual SVV™ settings. -
Page 31: Viewing The Sequence Of Measurement Positions
Virtual SVV™ Instructions for Use – EN Page 27 5.4.2 Viewing the sequence of measurement positions The Static Tilt planned measurement sequence can be viewed in the upper left area in the application software. Normally the 0° head upright position is preselected and the corresponding block for that measurement is shaded orange. -
Page 32: Angle Of Deviation
Virtual SVV™ Instructions for Use – EN Page 28 5.4.5 Angle of deviation The angle of deviation (Δ) between the angle of the head tilt and the set angle of the luminous line is presented graphically and as a numerical value. -
Page 33: Swapping Measurement Sequences
3.5-4.0 cm off center in both directions. In order to generate an adequate unilateral centrifugation stimulus, a contant angular velocity of at least 240⁰/second is required. For a complete desription of the unilateral centrifugation test procedure, please refer to the Virtual SVV™ Additional Information . - Page 34 Virtual SVV™ Instructions for Use – EN Page 30...
-
Page 35: Care And Maintenance
Under normal usage conditions recalibration is not necessary. Damage to devices In the following situations the Virtual SVV™ system should not be used until a qualified inspection has been performed: 1. One or more devices have been mechanically damaged (e.g. through impact). - Page 36 Virtual SVV™ Instructions for Use – EN Page 32 • Avoid interrupting the charging cycle before the yellow LED extinguishes • The integrated inactivity-timer in the handheld remote powers the system down after prolonged inactivity in order to save battery capacity. The standard period of inactivity is set to 10 minutes.
- Page 37 Virtual SVV™ Instructions for Use – EN Page 33 Step 4 Only the following battery type may be used: 2 x VARTA Ready to use – NiMH AA 1,2 V 2600 mAh Under no circumstances should non-rechargeable (alkaline) batteries be used. The permissible battery type can be read from the label inside the battery compartment.
-
Page 38: How To Clean Interacoustics Products
Virtual SVV™ Instructions for Use – EN Page 34 Step 6 Replace the securing screw gently to avoid any unintentional opening of the compartment. NOTICE After inserting new batteries it is important that the charging process is continued until the yellow LED charge indicator extinguishes. -
Page 39: Concerning Repair
Interacoustics warrants that: • The Virtual SVV™ system is free from defects in material and workmanship under normal use and service for a period of 24 months from the date of delivery by Interacoustics to the first purchaser • Accessories are free from defects in material and workmanship under normal use and service... - Page 40 Virtual SVV™ Instructions for Use – EN Page 36...
-
Page 41: Troubleshooting
Your license does not match your software. Please license for this uninstall the current Virtual SVV™ software and install software version. Virtual SVV™ from the included media and use the Please contact your license included. distributor. Contact your distributor to obtain a valid license... -
Page 42: System Function Check
Virtual SVV™ Instructions for Use - EN Page 38 System function check Before patient testing it is recommended that a quick check of the main system functions be performed. Head tilt sensors Tilt the virtual reality goggle to the right and to the left and check that a corresponding reading appears on the software application device displays. -
Page 43: General Technical Specifications
35 % – 95 % Transporting the system The Virtual SVV™ system should be switched off prior to transport. The device should be transported in the original package or in a suitable transport case. The device should be protected from impact, humidity, dust, and electrical interference during transport. -
Page 44: Virtual Svv™ Hardware Specifications
Storage If the Virtual SVV™ system is not used for any length of time, keep it stored in a dry, dust-free area out of sunlight. The batteries should be removed if the device is not being used for a longer period. The device should preferably be stored in the original packaging. -
Page 45: Electromagnetic Compatibility (Emc)
Virtual SVV™ Instructions for Use - EN Page 41 Electromagnetic compatibility (EMC) CAUTION • This instrument is suitable in hospital environments except for near active HF surgical equipment and RF shielded rooms of systems for magnetic resonance imaging, where the intensity of electromagnetic disturbance is high •... - Page 46 Guidance and manufacturer’s declaration - electromagnetic emissions Virtual SVV™ is intended for use in the electromagnetic environment specified below. The customer or the user of Virtual SVV™ should assure that it is used in such an environment. Emissions Test Compliance...
- Page 47 Page 43 Guidance and Manufacturer’s Declaration - Electromagnetic Immunity Virtual SVV™ is intended for use in the electromagnetic environment specified below. The customer or the user of Virtual SVV™ should assure that it is used in such an environment. Immunity Test...
-
Page 48: Safety Regulations
If the measured field strength in the location in which Virtual SVV™ is used exceeds the applicable RF compliance level above, Virtual SVV™ should be observed to verify normal operation, If abnormal performance is observed, additional measures may be necessary, such as reorienting or relocating Virtual SVV™... - Page 49 Instructions for Use - US Virtual SVV™ D-0116071 – A – 2017/09...
- Page 50 Copyright © February 1, 2017 by Interacoustics. All rights reserved. Information in this document is subject to change without notice. Companies, names, and data used in example herein are fictitious unless otherwise noted. No part of this document may be reproduced or transmitted in any form or by any means, electronic or mechanical, for any purpose, without express written permission of Interacoustics A/S or its licensees.
- Page 51 OPERATIONAL INSTRUCTIONS ....................17 System startup ........................17 Entering patient information ....................17 Starting the Virtual SVV™ software .................. 18 Navigating the Virtual SVV™ user interface ..............19 Virtual SVV™ settings ....................... 20 Virtual SVV™ findings sheet ..................... 21 TEST PROCEDURES .........................23 Test mode selection ......................
- Page 52 CARE AND MAINTENANCE ......................31 General maintenance procedures..................31 How to clean Interacoustics products ................34 Concerning repair......................35 Warranty ..........................35 TROUBLESHOOTING ........................37 Troubleshooting table ....................... 37 System function check ...................... 38 GENERAL TECHNICAL SPECIFICATIONS ................39 System requirements ......................39 Virtual SVV™...
-
Page 53: Introduction
The target population for the Virtual SVV™ is 8 years of age and over. The Virtual SVV™ system is to be used by trained personnel only, such as physicians, audiologists, physical therapists, medical assistants, hearing healthcare professionals, or personnel with a similar level of qualifications. -
Page 54: Product Description
Product description The Virtual SVV™ system provides a method to assess the patient’s ability to adjust a line, in the absence of any other visible cues, to be parallel with gravity. The sensory information required to perform this task is provided predominantly by the vestibular system of the inner ear. -
Page 55: Unpacking And Inspection
Please use the Return Report to help to us guarantee that the correction of the problem will be to your satisfaction. Storage If you need to store the Virtual SVV™ for a period, please ensure it is stored under the conditions specified in the section for technical specifications. -
Page 56: Labeling
Virtual SVV™ Instructions for Use – US Page 4 Labeling The following labeling can be found on the instrument: Symbol Explanation Type B applied parts. Patient applied parts without electrical connection to the patient. Refer to instruction manual. WEEE (EU-directive). -
Page 57: General Warnings And Precautions
General warnings and precautions Intended purpose 1. The Virtual SVV™ system is intended to be used exclusively for medical purposes. It is not intended for private or entertainment use. 2. The Virtual SVV™ system must only be operated according to the instructions described in this manual. - Page 58 Virtual SVV™ Instructions for Use – US Page 6 Battery safety 1. The Virtual SVV™ handheld remote contains two rechargeable AA NiMH batteries. Read the instructions in Chaper 6 Exchanging Batteries carefully before opening the battery compartment and exchanging the batteries.
-
Page 59: Setup And Installation
Virtual SVV™ Instructions for Use – US Page 7 3 Setup and installation The Virtual SVV™ system components The Virtual SVV™ Device is comprised of four main components: Virtual Reality Goggle Base Station Handheld Remote Virtual SVV™ Application Software 3.1.1... -
Page 60: Base Station
Figure 3-1 First step in Virtual SVV™ installation setup A valid user license in the form of a license file is included with the purchase of a Virtual SVV™ device. The name of the license file is generated as the combination of “device number.license”. - Page 61 Figure 3-2 Selection of directory path for license file The license file is to be found in the directory /License on the Virtual SVV™ installation media. Press “Browse” to select the path as shown in the dialogue box. The installation can only be completed after the license file has been identified.
- Page 62 Page 10 The following default directory path will be selected for the installation procedure. Figure 3-4 Selecting directory path for Virtual SVV™ installation Select “Next” to proceed with installation. Upon successful installation, the setup assistant may be closed by selecting “Finish”.
-
Page 63: Installation Of Virtual Svv™ Drivers
Installation of Virtual SVV™ drivers Connect the base station of the Virtual SVV™ to a USB port on the PC or laptop. The installation procedure identifies whether the necessary driver software is already installed on the PC. If this is not the case, these are installed automatically. -
Page 64: Hardware Setup
Virtual SVV™ Instructions for Use – US Page 12 Hardware setup The Virtual SVV™ system is composed of several components. Each component, its function and installation is described below. 3.6.1 Attaching the face cushion to the virtual reality goggle Step 1 Align the face cushion to the virtual reality goggle, with the side with black fabric towards the virtual reality goggle. -
Page 65: Attaching The Head Strap
Virtual SVV™ Instructions for Use – US Page 13 Press the face cushion to the virtual reality goggle, beginning in the center (see Figure 3.3) and working towards the outer edges. Ensure that the entire interface between face cushion and virtual reality goggle is bonded. -
Page 66: Handheld Remote
Virtual SVV™ Instructions for Use – US Page 14 Step 2 Fold the left-hand end of the head strap around the slot and fixate the Velcro hooks and loops. This end of the head strap remains fastened throughout the examination. -
Page 67: Preparing The Base Station
Virtual SVV™ Instructions for Use – US Page 15 Figure 3-12 Elements of the handheld remote OK button for confirming completion of adjustment Buttons for left / right rotation of the luminous line LED indicating power ON (green) ... -
Page 68: Battery Charging
Virtual SVV™ Instructions for Use – US Page 16 To ensure a reliable wireless transmission it is important that a free line-of-sight is maintained between the virtual reality goggle and base station. It is recommended that the base station is positioned in the vicinity of the patient. -
Page 69: Operational Instructions
Enabling and disabling the Virtual SVV™ system To enable the Virtual SVV™ system press the OK button on the handheld remote for approximately 2 seconds until the green ON LED indicator begins to blink, then release the button. The system initiates after a further 3 seconds and the green ON LED ceases to blink and remains illuminated. -
Page 70: Starting The Virtual Svv™ Software
Starting the Virtual SVV™ software Select the desired patient in the OtoAccess database, then double-click on Virtual SVV™ from the Select Instrument box in the upper right corner of OtoAccess to launch the software. -
Page 71: Navigating The Virtual Svv™ User Interface
Virtual SVV™ Instructions for Use Page 19 Navigating the Virtual SVV™ user interface Figure 4-3 Virtual SVV™ User Interface Located on the upper left are the buttons for establishing communication with the base station, printout of test report and application preferences. -
Page 72: Virtual Svv™ Settings
Virtual SVV™ Instructions for Use Page 20 Virtual SVV™ settings Settings can be accessed via the gear icon located in the upper left panel of the user interface. Default parameters can be adjusted as described below. Figure 4-4 Settings Dialogue ... -
Page 73: Virtual Svv™ Findings Sheet
Virtual SVV™ Instructions for Use Page 21 Virtual SVV™ findings sheet The findings for each examination are collated and stored on a findings report sheet in PDF format. Optionally, this can be printed as a hard copy. In addition, the measurement data from each examination is stored and can be exported in CSV format. - Page 74 Virtual SVV™ Instructions for Use Page 22...
-
Page 75: Test Procedures
Enable the Virtual SVV™ system by holding the OK button on the handheld remote for approximately two seconds until the green ON LED begins to blink. After approximately three seconds the system is activated and the LED remains illuminated. -
Page 76: Mounting The Virtual Reality Goggle
Virtual SVV™ Instructions for Use – US Page 24 5.2.1 Mounting the virtual reality goggle Loosen the head strap and instruct the patient to hold the virtual reality goggle with fitted face cushion to his/her face so that it is comfortable. Ensure that the patient can now see all four boundary dots on the display. -
Page 77: Starting Measurements
Virtual SVV™ Instructions for Use – US Page 25 Figure 5-4 Example of the luminous line as seen by the patient Starting measurements Click on the Start button to begin test measurement. Familiarize the patient with the operation of the device. -
Page 78: Testing With Static Tilt
This also allows outliers beyond a set permissible tolerance range to be excluded. This tolerance range defines how many degrees any individual measurement data point may deviate in order to be considered in the median calculation and can be defined within Virtual SVV™ settings. -
Page 79: Viewing The Sequence Of Measurement Positions
Virtual SVV™ Instructions for Use – US Page 27 5.4.2 Viewing the sequence of measurement positions The Static Tilt planned measurement sequence can be viewed in the upper left area in the application software. Normally the 0° head upright position is preselected and the corresponding block for that measurement is shaded orange. -
Page 80: Angle Of Deviation
Virtual SVV™ Instructions for Use – US Page 28 5.4.5 Angle of deviation The angle of deviation (Δ) between the angle of the head tilt and the set angle of the luminous line is presented graphically and as a numerical value. -
Page 81: Swapping Measurement Sequences
3.5-4.0 cm off center in both directions. In order to generate an adequate unilateral centrifugation stimulus, a contant angular velocity of at least 240⁰/second is required. For a complete desription of the unilateral centrifugation test procedure, please refer to the Virtual SVV™ Additional Information . - Page 82 Virtual SVV™ Instructions for Use – US Page 30...
-
Page 83: Care And Maintenance
Under normal usage conditions recalibration is not necessary. Damage to devices In the following situations the Virtual SVV™ system should not be used until a qualified inspection has been performed: 1. One or more devices have been mechanically damaged (e.g. through impact). - Page 84 Virtual SVV™ Instructions for Use – US Page 32 • Avoid interrupting the charging cycle before the yellow LED extinguishes • The integrated inactivity-timer in the handheld remote powers the system down after prolonged inactivity in order to save battery capacity. The standard period of inactivity is set to 10 minutes.
- Page 85 Virtual SVV™ Instructions for Use – US Page 33 Step 4 Only the following battery type may be used: 2 x VARTA Ready to use – NiMH AA 1,2 V 2600 mAh Under no circumstances should non-rechargeable (alkaline) batteries be used. The permissible battery type can be read from the label inside the battery compartment.
-
Page 86: How To Clean Interacoustics Products
Virtual SVV™ Instructions for Use – US Page 34 Step 6 Replace the securing screw gently to avoid any unintentional opening of the compartment. NOTICE After inserting new batteries it is important that the charging process is continued until the yellow LED charge indicator extinguishes. -
Page 87: Concerning Repair
Interacoustics warrants that: • The Virtual SVV™ system is free from defects in material and workmanship under normal use and service for a period of 12 months from the date of delivery by Interacoustics to the first purchaser • Accessories are free from defects in material and workmanship under normal use and service... - Page 88 Virtual SVV™ Instructions for Use – US Page 36...
-
Page 89: Troubleshooting
Your license does not match your software. Please license for this uninstall the current Virtual SVV™ software and install software version. Virtual SVV™ from the included media and use the Please contact your license included. distributor. Contact your distributor to obtain a valid license... -
Page 90: System Function Check
Virtual SVV™ Instructions for Use - US Page 38 System function check Before patient testing it is recommended that a quick check of the main system functions be performed. Head tilt sensors Tilt the virtual reality goggle to the right and to the left and check that a corresponding reading appears on the software application device displays. -
Page 91: General Technical Specifications
35 % – 95 % Transporting the system The Virtual SVV™ system should be switched off prior to transport. The device should be transported in the original package or in a suitable transport case. The device should be protected from impact, humidity, dust, and electrical interference during transport. -
Page 92: Virtual Svv™ Hardware Specifications
Storage If the Virtual SVV™ system is not used for any length of time, keep it stored in a dry, dust-free area out of sunlight. The batteries should be removed if the device is not being used for a longer period. The device should preferably be stored in the original packaging. -
Page 93: Electromagnetic Compatibility (Emc)
Virtual SVV™ Instructions for Use - US Page 41 Electromagnetic compatibility (EMC) CAUTION • This instrument is suitable in hospital environments except for near active HF surgical equipment and RF shielded rooms of systems for magnetic resonance imaging, where the intensity of electromagnetic disturbance is high •... - Page 94 Guidance and manufacturer’s declaration - electromagnetic emissions Virtual SVV™ is intended for use in the electromagnetic environment specified below. The customer or the user of Virtual SVV™ should assure that it is used in such an environment. Emissions Test Compliance...
- Page 95 Page 43 Guidance and Manufacturer’s Declaration - Electromagnetic Immunity Virtual SVV™ is intended for use in the electromagnetic environment specified below. The customer or the user of Virtual SVV™ should assure that it is used in such an environment. Immunity Test...
-
Page 96: Safety Regulations
If the measured field strength in the location in which Virtual SVV™ is used exceeds the applicable RF compliance level above, Virtual SVV™ should be observed to verify normal operation, If abnormal performance is observed, additional measures may be necessary, such as reorienting or relocating Virtual SVV™... - Page 97 Brugsanvisning - DA Virtual SVV™ D-0116072 – A – 2017/09...
- Page 98 Copyright © 01-02-2017 tilhørende Interacoustics. Alle rettigheder forbeholdes. Informationen i dette dokument kan ændres uden forudgående varsel. Selskaber, navne, og data, der anvendes i eksempel heri er fiktive medmindre andet er nævnt. Ingen del af dette dokument må reproduceres eller udveksles i nogen som helst form eller med noget som helst middel, elektronisk eller mekanisk, til andre formål, uden...
- Page 99 Installation af OtoAccess™-databasen ................8 Installation af Virtual SVV™-softwaren ................8 Installation af Virtual SVV™'s drivere ................11 Konfiguration af Virtual SVV™ i OtoAccess™ ..............11 Installation af hardware ..................... 12 3.6.1 Fastgørelse af ansigtspuden til virtual reality-brillen ..........12 3.6.2...
- Page 100 Om reparationer ........................ 35 Garanti ..........................35 FEJLFINDING ..........................37 Fejlfindingstabel ........................ 37 Tjek af systemets funktion ....................38 ALMINDELIGE TEKNISKE SPECIFIKATIONER ..............39 Systemkrav ........................39 Specifikationer for Virtual SVV™-hardwaren ..............40 Elektromagnetisk kompatibilitet (EMK) ................41 Sikkerhedsbestemmelser ....................44...
-
Page 101: Indledning
Operatøren skal følge anvisningerne i denne vejledning. Virtual SVV™-systemet er påtænkt til brug i den kliniske og medicinske praksis. Det er for eksempel egnet til brug: •... -
Page 102: Produktbeskrivelse
Brugsanvisning til Virtual SVV™ – DA Side2 Produktbeskrivelse Virtual SVV™-systemet er en metode til vurdering af patientens evne til at justere en linje parallelt med tyngdekraften uden hjælp fra visuelle referencer. Den sensoriske information til udførelse af denne opgave leveres hovedsageligt af det vestibulære system i det indre øre. -
Page 103: Udpakning Og Kontroleftersyn
Brug returneringsrapport-formularen til at hjælpe os med at garantere, at du er tilfreds med rettelsen af problemet. Opbevaring Hvis man har behov for at opbevare Virtual SVV™ i en periode, bør man sikre sig, at det opbevares under de betingelser, som er angivet i afsnittet Tekniske specifikationer. -
Page 104: Mærkning
Brugsanvisning til Virtual SVV™ – DA Side4 Mærkning Følgende mærkninger kan findes på instrumentet: Symbol Forklaring Type B komponenter. Komponenter, der er i direkte patientkontakt, men ikke elektrisk tilsluttede. Der henvises til instruktionsvejledningen. WEEE (EU-direktiv). Dette symbol angiver, at når slutbrugeren ønsker at bortskaffe produktet, skal det afleveres til et særligt indsamlingssted til oparbejdning og genbrug. -
Page 105: Generelle Advarsler Og Sikkerhedsforanstaltninger
Side5 Generelle advarsler og sikkerhedsforanstaltninger Formål 1. Virtual SVV™-systemets påtænkte brug er udelukkende til medicinske formål. Det er ikke påtænkt til privat eller underholdende brug. 2. Virtual SVV™-systemet må kun betjenes ifølge anvisninger beskrevet i denne vejledning. Målingen af den subjektive, visuelle vertikal er påtænkt til brug ved klinisk diagnose af vestibulære læsioner. - Page 106 Brugsanvisning til Virtual SVV™ – DA Side6 Batterisikkerhed 1. Virtual SVV™'s håndholdte fjernbetjening indeholder to genopladelige AA NiMH-batterier. Læs anvisningerne i Kapitel 6 Udskiftning af batterier nøje inden åbning af batterirummet og udskiftning af batterierne. 2. Kun VARTA klar til brug – NiMN AA 1,2 V 2600 mAh batteritypen må anvendes.
-
Page 107: Opsætning Og Installation
Brugsanvisning til Virtual SVV™ – DA Side7 3 Opsætning og installation Virtual SVV™-systemets komponenter Virtual SVV™-instrumentet består af fire hovedkomponenter: Virtual reality-brille Basisstation Håndholdt fjernbetjening Virtual SVV™-applikationssoftware 3.1.1 Virtual reality brille Virtual reality-brillen forsyner patienten med visningen af den lysende linje i ellers fuld mørke. Den er designet til at være let og behagelig. -
Page 108: Basisstation
En assistent til installationsopsætningen guider installationen. Figur 3 1 Første trin i installationsopsætningen af Virtual SVV™ En gyldig brugerlicens i form af en licensfil følger med købet af et Virtual SVV™-instrument. Navnet på licensfilen genereres som en kombination af “instrumentnummer.licens”. - Page 109 Figur 3 2Valg af sti til mappen for licensfilen Licensfilen findes i mappen /Licens installationsmediet til Virtual SVV™. Tryk på “Browse”, og vælg stien som vist i dialogboksen. Installationen kan kun afsluttes, når licensfilen er blevet identificeret. Bemærk, at en gyldig licens tillader installation af Virtual SVV™-applikationen på mere end én computer.
- Page 110 Den følgende standard sti til mappen vil blive valgt til installationsproceduren. Figur 3 4 Valg af sti til mappen til installation af Virtual SVV™ Vælg “Næste” for at fortsætte med installationen. Når installationen er afsluttet, kan assistenten til opsætningen lukkes ved valg af “Afslut”.
-
Page 111: Installation Af Virtual Svv™'S Drivere
, og vælg “Fil”, og fortsæt til “Opsætning”. Vælg fanen “Instrumenter”. Angiv Virtual SVV™ i feltet “Nyt instruments navn”. Vælg Virtual SVV™ i felterne for både softwaren og hardwaren. Vælg “Opret” for at bekræfte Virtual SVV™ som et nyt instrument i OtoAccess . -
Page 112: Installation Af Hardware
Brugsanvisning til Virtual SVV™ – DA Side12 Installation af hardware Virtual SVV™-systemet består af flere komponenter. Hver komponent, dets funktion og installation er beskrevet herunder. 3.6.1 Fastgørelse af ansigtspuden til virtual reality-brillen Trin 1 Flugt ansigtspuden med virtual reality-brillen, med den sorte stofside imod virtual reality-brillen. Fold eventuelt ansigtspuden lidt, som vist i Figur 3-6 Centrer den imod virtual reality-brillen. -
Page 113: Fastgørelse Af Hovedstroppen
Brugsanvisning til Virtual SVV™ – DA Side13 Trin 3 Tryk ansigtspuden på virtual reality-brillen, idet du begynder i centrum (se Figur 3.3), og arbejd udad imod kanterne. Sørg for, at hele berøringsfladen mellem ansigtspuden og virtual reality-brillen er forbundet. Dette er nødvendigt at spærre for alle lyskilder fra omgivelserne, mens virtual reality-brillen bæres. -
Page 114: Håndholdt Fjernbetjening
Brugsanvisning til Virtual SVV™ – DA Side14 Trin 2 Fold den venstre ende af hovedstroppen rundt om åbningen, og sæt velcrobåndet fast. Denne del af hovedstroppen forbliver fastspændt under hele undersøgelsen. Hovedstroppen kan nu trækkes igennem den højre åbning, fra højre mod venstre. Hovedstroppen kan justeres i længden, så... -
Page 115: Klargøring Af Basisstationen
Brugsanvisning til Virtual SVV™ – DA Side15 Figur 3 12Den håndholdte fjernbetjenings elementer OK-knappen til bekræftelse af fuldført justering Knapper til venstre/højre rotation af den lysende linje LED, der indikerer, at strømmen er tændt (grøn) LED, der indikerer opladning (gul) ... -
Page 116: Opladning Af Batteriet
Brugsanvisning til Virtual SVV™ – DA Side16 BEMÆRKNING Placering af basisstationen For at sikre en pålidelig trådløs transmission er det vigtigt, at der holdes en fri synsvidde mellem virtual reality- brillen og basisstationen. Det anbefales, at basisstationen placeres i nærheden af patienten. For at undgå... -
Page 117: Driftsinstruktioner
Systemet starter efter yderligere 3 sekunder, og det grønne LED for tændt holder op med at blinke og forbliver oplyst. For at slukke for Virtual SVV™-systemet trykkes der på de to knapper og samtidigt i næsten fem sekunder, indtil det grønne LED for tændt slukkes. -
Page 118: Start Af Virtual Svv™-Softwaren
Søg Klient for at bruge felterne med patientoplysninger som søgeparametre. Start af Virtual SVV™-softwaren Vælg den ønskede patient i OtoAccess -databasen og dobbeltklik derefter på Virtual SVV™ fra boksen Vælg instrument i øverste højre hjørne af OtoAccess for at starte softwaren. -
Page 119: Navigation I Virtual Svv™'S Brugergrænseflade
Brugsanvisning til Virtual SVV™ – DA Side19 Navigation i Virtual SVV™'s brugergrænseflade. Figur 4 3 Virtual SVV™'s brugergrænseflade Øverst til venstre sidder knapperne til oprettelse af kommunikation med basisstationen, udskrivning af testrapporten og applikationspræferencer. Panel med patientens demografiske oplysninger. Mere detaljerede patientoplysninger kan vises, men ikke ændres. -
Page 120: Indstillingerne På Virtual Svv
Brugsanvisning til Virtual SVV™ – DA Side20 Indstillingerne på Virtual SVV™ Indstillingerne kan tilgås via tandhjulsikonet, som sidder i øverste venstre panel på brugergrænsefladen. Standardparametrene kan justeres som beskrevet nedenfor. Figur 4 4 Dialog om indstillinger Generelt Valgmuligheder som applikationens sprog, lysstyrken på den lysende linje og definition af deaktiveringstimerens interval. -
Page 121: Rapport Med Virtual Svv™-Resultater
Brugsanvisning til Virtual SVV™ – DA Side21 Rapport med Virtual SVV™-resultater Resultaterne af hver undersøgelsen sammenlignes og gemmes i resultatrapporten i PDF-format. Arket kan eventuelt udskrives i papirformat. Desuden gemmes måledataene fra hver undersøgelse og kan eksporteres i et CSV-format. - Page 122 Brugsanvisning til Virtual SVV™ – DA Side22...
-
Page 123: Testprocedurer
, vælg en patient, og dobbeltklik på Virtual SVV™-instrumentet i det valgte instrumentfelt i det øverste højre hjørne af databasens klientskærm. Aktiver Virtual SVV™-systemet ved at trykke på OK-knappen på den håndholdte fjernbetjening i cirka to sekunder, indtil den grønne LED-indikator for tændt begynder at blinke. Efter ca. tre sekunder aktiveres systemet, og LED'et forbliver oplyst. -
Page 124: Påsætning Af Virtual Reality-Brillen
Brugsanvisning til Virtual SVV™ – DA Side24 5.2.1 Påsætning af virtual reality-brillen Løsn hovedstroppen, og instruer patienten om, at han/hun holder virtual reality brillen med den tilpassede ansigtspude imod sit ansigt således, at det er behageligt. Sørg for, at patienten nu kan se alle fire afgrænsningsprikker på... -
Page 125: Start Af Målingen
Brugsanvisning til Virtual SVV™ – DA Side25 Figur 5 4 Eksempel på den lysende linje, som den ses af patienten Start af målingen Klik på Start-knappen for at begynde testmålingen. Gør patienten bekendt med betjeningen af instrumentet. Figur 5 5 Start-knap Når der klikkes på... -
Page 126: Test Med Statisk Hældning
De ønskede hældningsvinkler kan hver især defineres i fanen Undersøgelse under Virtual SVV's indstillinger. Op til fire hældningspositioner med hoved mellem 1° og 60° til venstre og til højre kan indtastes. -
Page 127: Visning Af Sekvensen Af Målepositioner
Brugsanvisning til Virtual SVV™ – DA Side27 5.4.2 Visning af sekvensen af målepositioner Den planlagte målesekvens ved Statisk hældning kan vises i det øverste venstre område i applikationssoftwaren. Normalt forvælges hovedets lodrette 0° position, og den tilsvarende blok af den måling er skyggelagt med orange. -
Page 128: Afvigelsesvinkel
Brugsanvisning til Virtual SVV™ – DA Side28 Bliv ved med at observere patienten under hele produceren for hurtigt at kunne reagere i tilfælde af ubehag. Hvis patienten testes i en position med hældning eller roteres på en roterende stol, skal han/hun være forsvarligt holdt fast. -
Page 129: Skift Mellem Målesekvenser
240⁰/sekund. For den komplette beskrivelse af testproceduren af den unilaterale centrifugering henvises der til Virtual SVV™ Additional Information. Sletning af data Når testene er fuldført kan de gemte måledata slettes ved afmærkning af måleindtastningen i tabellen og aktivering af sletningsikonet forneden i højre side af datatabellen. - Page 130 Brugsanvisning til Virtual SVV™ – DA Side30...
-
Page 131: Vedligeholdelse
Side31 Vedligeholdelse Generelle fremgangsmåder ved vedligeholdelse Operatøren af Virtual SVV™-systemet er ansvarlig for holde det medicinske udstyr i fejlfri stand. Alle komponenternes funktion og stand skal tjekkes regelmæssigt. Engangsdelene (ansigtspuder, hovedstrop og sikkerhedsløkke) skal udskiftes eller bortskaffes som beskrevet. Hvert levereret system består af instrumentets tre komponenter – basisstation, håndholdt fjernbetjening og virtual reality-brille –... - Page 132 Brugsanvisning til Virtual SVV™ – DA Side32 • Undgå afbrydelser af opladningscyklussen, inden det gule LED slukkes. • Den indbyggede inaktivitetstimer i den håndholdte fjernbetjening slukker systemet efter længerevarende inaktivitet for at spare på batteriet. Standardperioden for inaktivitet er sat til 10 minutter.
- Page 133 Brugsanvisning til Virtual SVV™ – DA Side33 Trin 4 Kun følgende batteritype må bruges: 2 stk. VARTA klar til brug – NiMH AA 1,2 V 2600 mAh Ikke-genopladelige (alkaliske) batterier må under ingen omstændigheder bruges. Den tilladte batteritype kan læses på etiketten inde i batterirummet. rug af et ikke-genopladeligt batteri vil ugyldiggøre instrumentets garanti.
-
Page 134: Sådan Rengøres Interacoustics' Produkter
Brugsanvisning til Virtual SVV™ – DA Side34 Trin 6 Montér låseskruen igen og stram den let for at undgå utilsigtet åbning af rummet. BEMÆRKNING Når de nye batterier er sat i, er det vigtigt, at opladningsprocessen fortsætter, indtil den gule LED- indikator for opladningen slukkes. -
Page 135: Om Reparationer
Ovenstående gælder udelukkende for den oprindelige, første køber. Denne garanti gælder ikke for nogen efterfølgende ejer eller indehaver af produktet. Desuden gælder denne garanti ikke for, og Interacoustics er ikke ansvarlig for, tab, der opstår i forbindelse med køb eller brug af ethvert Interacoustics produkt, der: •... - Page 136 Brugsanvisning til Virtual SVV™ – DA Side36...
-
Page 137: Fejlfinding
Din licens svarer ikke til din software. Afinstaller gyldig licens til denne den aktuelle Virtual SVV™-software, og installer softwareversion. Virtual SVV™ fra det indbefattede medie, og brug Kontakt din distributør. den inkluderede licens. Kontakt din distributør for at få en gyldig licens Serienummeret på... -
Page 138: Tjek Af Systemets Funktion
Brugsanvisning til Virtual SVV™ – DA Side38 Tjek af systemets funktion Inden test af patienter anbefales det at udføre et hurtigt tjek af systemets vigtigste funktioner. Hovedets hældningssensorer Hæld virtual reality-brillen til højre og til venstre, og tjek, om en tilsvarende aflæsning vises på... -
Page 139: Almindelige Tekniske Specifikationer
Brugsanvisning til Virtual SVV™ – DA Side39 Almindelige tekniske specifikationer Systemkrav Hardware Processor Intel i5 processor 2,5 GHz eller bedre Minimum 8 GB Porte En USB 2.0 port 250 GB eller mere Drev ikke nødvendigt Skærmopløsning 1366 x 768 eller højere Med-PC Acc. -
Page 140: Specifikationer For Virtual Svv™-Hardwaren
Side40 Opbevaring Hvis det Virtual SVV™-system ikke anvendes i en længere periode, skal det opbevares i et tørt og støvfrit område uden sollys. Batterierne skal tages ud, hvis instrumentet ikke bliver brugt i en længere periode. Instrumentet skal helst opbevares i sin originalemballage. -
Page 141: Elektromagnetisk Kompatibilitet (Emk)
Brugsanvisning til Virtual SVV™ – DA Side41 Elektromagnetisk kompatibilitet (EMK) FORSIGTIG • Dette instrument er egnet til anvendelse i et hospitalsmiljø, dog ikke i nærheden af aktivt kirurgisk HF-udstyr og RF-sikrede lokaler med MR-billeddannelsessystemer, hvor styrken af elektromagnetisk forstyrrelse er høj •... - Page 142 Brugsanvisning til Virtual SVV™ – DA Side42 Vejledning og producentens erklæring – elektromagnetiske emissioner Virtual SVV™ er påtænkt til brug i et elektromagnetisk miljø som angivet nedenfor. Kunden eller brugeren af Virtual SVV™ bør tilsikre, at udstyret bruges i et sådant miljø. Emissionstest Overensstemmelse Elektromagnetisk miljø...
- Page 143 Brugsanvisning til Virtual SVV™ – DA Side43 Vejledning og fabrikantens erklæring – Elektromagnetisk immunitet Virtual SVV™ er påtænkt til brug i et elektromagnetisk miljø som angivet nedenfor. Kunden eller brugeren af Virtual SVV™ bør tilsikre, at udstyret bruges i et sådant miljø. Immunitetstest...
-
Page 144: Sikkerhedsbestemmelser
For at vurdere det elektromagnetiske miljø forårsaget af faste RF-sendere, bør en elektromagnetisk undersøgelse af lokaliteten overvejes. Hvis den målte feltstyrke på det sted, hvor Virtual SVV™anvendes, overstiger det gældende RF-niveau, bør Virtual SVV™overvåges for at sikre normal drift. Hvis der observeres unormal ydeevne, kan yderligere foranstaltning være nødvendige, såsom reorientering eller flytning af Virtual SVV™. - Page 145 Bedienungsanleitung – DE Virtual SVV™ D-0116073 – A – 2017/09...
- Page 146 Copyright © 01.02.2017 by Interacoustics. Alle Rechte vorbehalten. Informationen in diesem Dokument können ohne Vorankündigung geändert werden. In diesem Handbuch als Beispiel angeführte Unternehmen, Namen und Daten sind vorbehaltlich anders lautender Angaben fiktiv. Eine Vervielfältigung oder Übertragung des ganzen oder eines Teils dieses Handbuchs in jeglicher Form oder durch jegliche Mittel, ob elektronisch oder mechanisch, für jeglichen Zweck ist ohne die ausdrückliche schriftliche...
- Page 147 Installation der OtoAccess™ Datenbank ................8 Installation der Virtual SVV™ Software ................8 Installation der Virtual SVV™ Treiber ................11 Konfiguration von Virtual SVV™ in OtoAccess™ ............. 11 Hardware-Setup ........................ 12 3.6.1 Anbringen des Gesichtspolsters an der Virtual-Reality-Brille ......... 12 3.6.2...
- Page 148 PFLEGE UND WARTUNG ......................31 Allgemeine Wartungshinweise ..................31 So werden Interacoustics-Produkte gereinigt ..............34 Hinweise zu Reparaturen ....................35 Garantie ..........................35 STÖRUNGSBESEITIGUNG ....................... 37 Tabelle zur Störungsbeseitigung..................37 Systemfunktionstest ......................38 ALLGEMEINE TECHNISCHE DATEN ..................39 Systemanforderungen ....................... 39 Hardware-Spezifikationen Virtual SVV™...
-
Page 149: Einleitung
Fachwissen und die erforderliche Unterweisung in seine Funktionsweise und die Deutung der Ergebnisse nicht verwendet werden. Der Bediener muss die Anweisungen dieser Bedienungsanleitung einhalten. Das Virtual SVV™ System ist für die Verwendung in Kliniken und Arztpraxen konzipiert. Es ist beispielsweise für die folgenden Anwendungen geeignet: •... -
Page 150: Beschreibung Des Produkts
Gebrauchsanweisung Virtual SVV™ – DE Seite2 Beschreibung des Produkts Das Virtual SVV™ System ermöglicht eine Bewertung, ob ein Patienten eine Linie in Abwesenheit sonstiger visueller Anhaltspunkte parallel zur Erdanziehung auszurichten kann. Die sensorischen Informationen, welche für die Durchführung dieser Aufgabe notwendig sind, werden hauptsächlich vom vestibulären System des Innenohrs bereitgestellt. -
Page 151: Auspacken Und Prüfen
Bitte verwenden Sie den Rücksendebericht, um uns dabei zu helfen, sicherzustellen, dass die Problembehebung zu Ihrer Zufriedenheit erfolgt. Aufbewahrung Wenn Sie das Virtual SVV™ über einen längeren Zeitraum lagern müssen, stellen Sie bitte sicher, dass es unter den Bedingungen gelagert wird, die im Abschnitt „Technische Daten“ aufgeführt sind. -
Page 152: Kennzeichnungen
Gebrauchsanweisung Virtual SVV™ – DE Seite4 Kennzeichnungen Die folgenden Kennzeichnungen sind am Gerät zu finden: Symbol Erläuterung Anwendungsteile Typ B. Am Patienten angebrachte Teile ohne elektrische Verbindung zum Patienten. Siehe Bedienungsanleitung. WEEE (EU-Richtlinie). Dieses Symbol bedeutet, dass dieses Produkt zwecks Entsorgung an eine spezielle Entsorgungseinrichtung für Rückgewinnung und Recycling zu... -
Page 153: Allgemeine Warnhinweise Und Vorkehrungen
Allgemeine Warnhinweise und Vorkehrungen Zweckbestimmung 1. Das Virtual SVV™ System ist ausschließlich zur Verwendung für medizinische Zwecke bestimmt. Es ist nicht für den privaten Gebrauch oder für Unterhaltungszwecke bestimmt. 2. Das Virtual SVV™ System darf nur in Übereinstimmung mit den in dieser Bedienungsanleitung beschriebenen Anweisungen betrieben werden. - Page 154 Gebrauchsanweisung Virtual SVV™ – DE Seite6 13. Trennen Sie das Netzteil vom Strom, wenn die Batterien voll geladen sind und das Virtual SVV™ Gerät für einen längeren Zeitraum nicht verwendet wird. Batteriesicherheit 1. Die tragbare Fernbedienung des Virtual SVV™ enthält zwei AA NiMH-Akkus. Lesen Sie die Anweisungen im Kapitel 6 Batterientausch aufmerksam durch, bevor Sie das Batterienfach öffnen...
-
Page 155: Konfiguration Und Installation
Gebrauchsanweisung Virtual SVV™ – DE Seite7 3 Konfiguration und Installation Die Virtual SVV™ Systemkomponenten Das Virtual SVV™ Gerät besteht aus für Hauptkomponenten: Virtual-Reality-Brille Basisstation Tragbare Fernbedienung Virtual SVV™ Anwendungssoftware 3.1.1 Virtual-Reality-Brille Die Virtual-Reality-Brille zeigt dem Patienten einen Leuchtbalken in ansonsten völliger Dunkelheit an. Sie ist so konzipiert, dass sie leicht und bequem ist. -
Page 156: Basisstation
Die OtoAccess™ Datenbank muss installiert werden, bevor Sie die Virtual SVV™ Software installieren. Um die Virtual SVV™ Anwendung auf einem Windows-PC zu installieren, starten Sie das Setup-Programm im korrekten Verzeichnis des mit dem Gerät gelieferten Installationsmediums. Beachten Sie, dass entweder die 32-Bit- oder die 64-Bit-Version installiert werden muss, abhängig vom auf dem Host-PC installierten... - Page 157 Sie auf „Durchsuchen“, um den Pfad wie im Dialogfenster angezeigt auszuwählen. Die Installation kann erst abgeschlossen werden, nachdem die Lizenzdatei erkannt wurde. Bitte beachten Sie, dass eine gültige Lizenz die Installation der Virtual SVV™ Anwendung auf mehr als einem PC erlaubt.
- Page 158 Der folgende Dateipfad wird standardmäßig für den Installationsvorgang ausgewählt. Abbildung 3 4 Auswahl des Verzeichnispfads für die Virtual SVV™ Installation Klicken Sie auf „Weiter“, um mit der Installation fortzufahren. Nach erfolgreichem Abschluss der Installation kann der Einrichtungsassistent durch einen Klick auf „Fertigstellen“ geschlossen werden.
-
Page 159: Installation Der Virtual Svv™ Treiber
, klicken Sie auf „Datei“ und anschließend auf „Setup“. Wählen Sie die Registerkarte „Geräte“ aus. Geben Sie im Feld „Neuer Gerätename“ Virtual SVV™ ein. Wählen Sie sowohl im Software- als auch im Hardware-Feld Virtual SVV™ aus. Klicken Sie auf „Erstellen“, um Virtual SVV™ als neues Gerät in OtoAccess zu bestätigen. -
Page 160: Hardware-Setup
Gebrauchsanweisung Virtual SVV™ – DE Seite12 Hardware-Setup Das Virtual SVV™ Gerät besteht aus mehreren Komponenten. Jede Komponente, ihre Funktion und Installation werden nachstehend beschrieben. 3.6.1 Anbringen des Gesichtspolsters an der Virtual-Reality-Brille Schritt 1 Legen Sie das Gesichtspolster an der Virtual-Reality-Brille an, sodass die mit schwarzem Stoff versehene Seite in Richtung der Virtual-Reality-Brille zeigt. -
Page 161: Anbringen Des Kopfriemens
Gebrauchsanweisung Virtual SVV™ – DE Seite13 Schritt 3 Drücken Sie das Gesichtspolster auf die Virtual-Reality-Brille, zuerst in der Mitte (siehe Abbildung 3.6) und von hier aus weiter zu den äußeren Kanten. Stellen Sie sicher, dass die Fläche zwischen dem Gesichtspolster und der Virtual-Reality-Brille vollständig geschlossen ist. Dies ist notwendig, um jegliche Lichtquellen in der Umgebung zu verdecken, während die Virtual-Reality-Brille getragen wird. -
Page 162: Tragbare Fernbedienung
Gebrauchsanweisung Virtual SVV™ – DE Seite14 Schritt 2 Falten Sie das linke Ende des Kopfriemens um den Schlitz und schließen Sie den Klettverschluss. Dieses Ende des Kopfriemens bleibt für den gesamten Zeitraum der Untersuchung geschlossen. Der Kopfriemen kann nun von rechts nach links durch den Schlitz auf der rechten Seite gezogen werden. -
Page 163: Vorbereitung Der Basisstation
Gebrauchsanweisung Virtual SVV™ – DE Seite15 Abbildung 3 12 Elemente der tragbaren Fernbedienung OK-Taste zur Bestätigung des Abschlusses der Ausrichtung Tasten für Links-/Rechts-Rotation des Leuchtbalkens LED-Anzeige für eingeschaltetes Gerät (grün) LED-Anzeige für Ladestatus (gelb) Armband zur Sicherung der tragbaren Fernbedienung 3.6.4... -
Page 164: Laden Der Akkus
Gebrauchsanweisung Virtual SVV™ – DE Seite16 HINWEIS Positionierung der Basisstation Um eine verlässliche kabellose Übertragung sicherzustellen, ist es wichtig, eine frei Sichtlinie zwischen der Virtual-Reality-Brille und der Basisstation zu gewährleisten. Es wird empfohlen, die Basisstation in der Nähe des Patienten zu positionieren. Um elektrische Interferenzen zu vermeiden, sollte sie nicht nahe beim PC, Monitor oder sonstigen Geräten positioniert werden, welche wahrscheinlich Hochfrequenzstrahlung erzeugen. -
Page 165: Gebrauchsanweisung
Das System startet nach weiteren 3 Sekunden, die grüne Betriebs-LED hört auf zu blinken und leuchtet durchgängig. Um das Virtual SVV™ System zu deaktivieren, halten Sie gleichzeitig die beiden Tasten und für etwa fünf Sekunden gedrückt, bis die grüne Betriebs-LED erlischt. -
Page 166: Start Der Virtual Svv™ Software
Felder mit den Patientendaten als Suchparameter zu verwenden. Start der Virtual SVV™ Software Wählen Sie den gewünschten Patienten in der OtoAccess -Datenbank aus, und doppelklicken Sie anschließend auf Virtual SVV™ im Feld Gerät auswählen in der oberen rechten Ecke von OtoAccess um die Software zu starten. -
Page 167: Navigation Durch Die Virtual Svv™ Benutzeroberfläche
Gebrauchsanweisung Virtual SVV™ – DE Seite19 Navigation durch die Virtual SVV™ Benutzeroberfläche Abbildung 4 3 Virtual SVV™ Benutzeroberfläche Oben links befinden sich die Schaltflächen für den Kommunikationsaufbau mit der Basisstation, den Druck von Testberichten und die Anwendungseinstellungen. Feld mit demographischen Angaben zum Patienten. Detailliertere Patienteninformationen können angezeigt aber nicht verändert werden. -
Page 168: Virtual Svv™ Einstellungen
Gebrauchsanweisung Virtual SVV™ – DE Seite20 Die Statusleiste enthält Informationen zur aktuellen Testsequenz und der Akkukapazität. Die Hilfefunktion, welche durch das Fragezeichen in der unteren rechten Ecke dargestellt wird, öffnet die Bedienungsanleitung im PDF-Format. Virtual SVV™ Einstellungen Zu den Einstellungen gelangen Sie über das Zahnradsymbol im oberen linken Feld der Benutzeroberfläche. -
Page 169: Virtual Svv™ Befundbogen
Gebrauchsanweisung Virtual SVV™ – DE Seite21 Virtual SVV™ Befundbogen Die Ergebnisse jeder Untersuchung werden in einem Befundbericht im PDF-Format zusammengestellt und gespeichert. Dieser kann optional auch als Hardcopy gedruckt werden. Die Messdaten jeder Untersuchung werden zudem gespeichert und können im CSV-Format exportiert werden. - Page 170 Gebrauchsanweisung Virtual SVV™ – DE Seite22...
-
Page 171: Testverfahren
Gerät im Feld Gerät auswählen in der oberen rechten Ecke des Bildschirm des Datenbankclients. Aktivieren Sie das Virtual SVV™ System, indem Sie die OK-Taste auf der tragbaren Fernbedienung für etwa zwei Sekunden gedrückt halten, bis die grüne Betriebs-LED zu blinken beginnt. Nach etwa drei Sekunden ist das System aktiv und die LED leuchtet durchgängig. -
Page 172: Aufsetzen Der Virtual-Reality-Brille
Gebrauchsanweisung Virtual SVV™ – DE Seite24 5.2.1 Aufsetzen der Virtual-Reality-Brille Lockern Sie den Kopfriemen und bitten Sie den Patienten, die Virtual-Reality-Brille mit dem angebrachten Gesichtspolster so an sein/ihr Gesicht zu halten, dass sie bequem sitzt. Stellen Sie sicher, dass der Patient alle vier Begrenzungspunkte auf dem Display sehen kann. -
Page 173: Starten Der Messungen
Gebrauchsanweisung Virtual SVV™ – DE Seite25 Abbildung 5 4 Darstellung des Leuchtbalkens aus der Sicht des Patienten Starten der Messungen Klicken Sie auf die Schaltfläche Start, um die Testmessung zu starten. Machen Sie den Patienten mit der Bedienung des Geräts vertraut. -
Page 174: Test Mit Statischer Neigung
Toleranzbereich hinausgehen, ausgeschlossen werden. Dieser Toleranzbereich legt fest, um wie viel Grad ein einzelner Messdatenpunkt abweichen darf, um in der Medianberechnung berücksichtigt zu werden und kann in den Virtual SVV™ Einstellungen definiert werden. Jegliche Änderungen der Konfiguration können durch einen Klick auf OK bestätigt werden. -
Page 175: Anzeige Der Abfolge Von Messpositionen
Gebrauchsanweisung Virtual SVV™ – DE Seite27 5.4.2 Anzeige der Abfolge von Messpositionen Die geplante Messsequenz für Statische Neigung wird im oberen linken Bereich der Anwendungssoftware angezeigt. Normalerweise ist die aufrechte Kopfposition mit 0° voreingestellt und der jeweilige Block dieser Messung orange hinterlegt. Die Reihenfolge der Positionen kann durch Markieren des gewünschten Blocks geändert werden. -
Page 176: Abweichungswinkel
Gebrauchsanweisung Virtual SVV™ – DE Seite28 WICHTIG Stellen Sie die Beaufsichtigung des Patienten über den gesamten Vorgang hinweg sicher, um im Falle von Beschwerden schnell reagieren zu können. Wenn der Patient in einer geneigten Position oder rotiert in einem drehbaren Liegestuhl untersucht wird, stellen Sie sicher, dass er/sie sicher befestigt ist. -
Page 177: Austausch Von Messsequenzen
Um einen ausreichenden Stimulus einseitiger Zentrifugation zu erzeugen, wird eine konstante Winkelgeschwindigkeit von mindestens 240°/Sekunde benötigt. Für eine vollständige Beschreibung des Testverfahrens mit einseitiger Zentrifugation, siehe Virtual SVV™ Zusatzinformationen. Daten verwerfen Wenn die Testuntersuchungen abgeschlossen sind, können die gespeicherten Messdaten durch Markierung der Messeinträge in der Tabelle und Klick auf das Symbol Löschen auf der unteren rechten... - Page 178 Gebrauchsanweisung Virtual SVV™ – DE Seite30...
-
Page 179: Pflege Und Wartung
Jedes Virtual SVV™ System wird im Werk des Herstellers kalibriert. Unter normalen Einsatzbedingungen ist keine Rekalibrierung notwendig. Schäden an den Geräten Unter den folgenden Umständen sollte das Virtual SVV™ System nicht verwendet werden, bis eine fachkundige Überprüfung stattgefunden hat: 1. Eines oder mehrere Geräte wurden mechanisch beschädigt (z. B. durch Stoßwirkung). - Page 180 Gebrauchsanweisung Virtual SVV™ – DE Seite32 • Beachten Sie, dass eine neue Batterie ihre volle Kapazität erst nach einigen Ladezyklen erreicht • Schließen Sie die Kontakte an der tragbaren Fernbedienung oder der Ladeschale der Basisstation niemals kurz. Das Gerät wird hierdurch beschädigt! •...
- Page 181 Gebrauchsanweisung Virtual SVV™ – DE Seite33 Schritt 3 Schieben Sie den Sicherungsriegel der Batteriefachabdeckung nach unten, um die Abdeckung zu öffnen. Schritt 4 Es darf ausschließlich der folgende Batterietyp verwendet werden: 2 x VARTA Ready to use – NiMH AA 1,2 V 2600 mAh Unter keinen Umständen sollten nicht wiederaufladbare (alkalische) Batterien verwendet werden.
-
Page 182: So Werden Interacoustics-Produkte Gereinigt
Gebrauchsanweisung Virtual SVV™ – DE Seite34 Schritt 5 Bringen Sie die Abdeckung des Batteriefachs wieder an, wie in der nachfolgenden Abbildung gezeigt. Schieben Sie den Sicherungsriegel nach oben. Schritt 6 Bringen Sie die Schraube vorsichtig wieder an, um ein unabsichtliches Öffnen des Fachs zu vermeiden. -
Page 183: Hinweise Zu Reparaturen
Teillisten zur Verfügung stellen. Garantie Interacoustics gewährleistet Folgendes: • Das Virtual SVV™ System weist für einen Zeitraum von 24 Monaten ab Lieferung von Interacoustics an den ersten Käufer unter normalen Einsatz- und Wartungsbedingungen keinerlei Material- oder Verarbeitungsfehler auf • Zubehör weist für einen Zeitraum von neunzig (90) Tagen ab Lieferung von Interacoustics an den ersten Käufer unter normalen Einsatz- und Wartungsbedingungen keinerlei Material- oder... - Page 184 Dies bezieht sich ausschließlich auf den ursprünglichen Käufer. Diese Garantie ist nicht gültig für jegliche nachfolgenden Besitzer oder Inhaber des Produkts. Des Weiteren erstreckt sich diese Garantie nicht auf und Interacoustics ist nicht haftbar für jegliche Verluste, die durch den Erwerb oder die Benutzung irgendwelcher Produkte von Interacoustics entstanden sind, die •...
-
Page 185: Störungsbeseitigung
Gebrauchsanweisung Virtual SVV™ – DE Seite37 Störungsbeseitigung Tabelle zur Störungsbeseitigung Lösung Problem Mögliche Ursache Verbindung Zeitüberschreitung Tragbare Fernbedienung anschalten zwischen Batterie schwach Tragbare Fernbedienung in Ladeschale an der Basisstation und Basisstation einlegen. Wenn die gelbe LED erlischt, ist tragbarer der Ladevorgang beendet... -
Page 186: Systemfunktionstest
Ihre Lizenz stimmt nicht mit Ihrer Software überein. keine gültige Lizenz Bitte deinstallieren Sie die aktuelle Virtual SVV™ für diese Software und installieren Sie Virtual SVV™ mittels des Softwareversion. beigefügten Mediums und der beigefügten Lizenz. Bitte kontaktieren Kontaktieren Sie Ihren Fachhändler, um eine gültige... -
Page 187: Allgemeine Technische Daten
35 % – 95 % Transport des Systems Das Virtual SVV™ System sollte vor dem Transport abgeschaltet werden. Das Gerät sollte in der Originalverpackung oder einem geeigneten Transportbehältnis transportiert werden. Das Gerät sollte während des Transports vor Stoßwirkung, Feuchtigkeit, Staub und elektrischen Interferenzen geschützt werden. -
Page 188: Hardware-Spezifikationen Virtual Svv
Seite40 Aufbewahrung Wird das Virtual SVV™ System für einen gewissen Zeitraum nicht verwendet, bewahren Sie es in einem trockenen, staubfreien und vor Sonnenlicht geschützten Bereich auf. Die Akkus sollten entfernt werden, falls das Gerät für eine längere Zeit nicht verwendet wird. Es wird empfohlen, das Gerät in der Originalverpackung aufzubewahren. -
Page 189: Elektromagnetische Verträglichkeit (Emv)
Gebrauchsanweisung Virtual SVV™ – DE Seite41 Elektromagnetische Verträglichkeit (EMV) VORSICHT • Dieses Gerät eignet sich für Krankenhausumgebungen, sollte aber nicht in Nähe von aktiven Hochfrequenz-Chirurgiegeräten und HF-geschirmten Räumen mit Systemen für Kernspintomografie eingesetzt werden, in denen hohe elektromagnetische Störungen anzutreffen sind. - Page 190 Seite42 Leitfaden und Herstellererklärung – elektromagnetische Emissionen Virtual SVV™ ist für die Verwendung in der nachstehend aufgeführten elektromagnetischen Umgebung vorgesehen. Der Kunde oder Anwender von Virtual SVV™ muss sicherstellen, dass das Gerät in einer derartigen Umgebung eingesetzt wird. Emissionstest Komplianz Elektromagnetische Umgebung –...
- Page 191 Seite43 Leitfaden und Herstellererklärung – elektromagnetische Störfestigkeit Virtual SVV™ ist für die Verwendung in der nachstehend aufgeführten elektromagnetischen Umgebung vorgesehen. Der Kunde oder Anwender von Virtual SVV™ muss sicherstellen, dass das Gerät in einer derartigen Umgebung eingesetzt wird. Störfestigkeitsprüfung IEC 60601 Mess-...
- Page 192 Seite44 Leitfaden und Herstellererklärung – elektromagnetische Störfestigkeit Virtual SVV™ ist für die Verwendung in der nachstehend aufgeführten elektromagnetischen Umgebung vorgesehen. Der Kunde oder Anwender von Virtual SVV™ muss sicherstellen, dass das Gerät in einer derartigen Umgebung eingesetzt wird. Störfestigkeitsprüfung IEC/EN 60601- Komplianz-Pegel Elektromagnetische Umgebung –...
- Page 193 Gebrauchsanweisung Virtual SVV™ – DE Seite45 beobachtet, sind möglicherweise zusätzliche Maßnahmen erforderlich, wie eine Neukalibrierung oder Neupositionierung von Virtual SVV™. Im Frequenzbereich von 150 kHz bis 80 MHz sollten die Feldstärken weniger als 3 V/m betragen.
-
Page 194: Sicherheitsbestimmungen
Gebrauchsanweisung Virtual SVV™ – DE Seite46 Sicherheitsbestimmungen Konformitätserklärung Das CE-Zeichen bestätigt die Konformität des Virtual SVV™ Systems mit den wesentlichen Bestimmungen der Richtlinie 93/42/EEC. Das Virtual SVV™ System ist dementsprechend als Medizinprodukt der Klasse 1 klassifiziert. Sicherheitsnormen Dieses Gerät erfüllt die internationalen Normen IEC/EN/ES 60601-1 Medizinische elektrische Geräte –... - Page 195 Manual de instrucciones - ES Virtual SVV™ D-0116074 – A – 2017/09...
- Page 196 Copyright © 01/02/2017 por Interacoustics. Todos los derechos reservados. La información contenida en este documento está sujeta a cambios sin previo aviso. Las empresas, nombres y datos empleados en los ejemplos del presente documento son ficticios, a menos que se indique lo contrario. Queda prohibida la reproducción de todo o parte de este documento, así...
- Page 197 Introducir la información del paciente ................17 Inicio del software de Virtual SVV™ ................. 18 Exploración de la interfaz de usuario de Virtual SVV™ ............ 19 “Virtual SVV™ settings” (Ajustes de Virtual SVV™) ............20 “Findings sheet” (Ficha de resultados) de Virtual SVV™ ..........21 PROCEDIMIENTOS DE PRUEBA .....................
- Page 198 Tabla de resolución de problemas ..................37 Comprobación de las funciones del sistema ..............38 ESPECIFICACIONES TÉCNICAS GENERALES ..............39 Requisitos del sistema ...................... 39 Especificaciones de hardware de Virtual SVV™ .............. 40 Compatibilidad electromagnética (CEM) ................41 Normativas sobre seguridad ..................... 44...
-
Page 199: Introducción
El Virtual SVV™ está pensado para usuarios con una edad igual o superior a los 8 años. El sistema Virtual SVV™ solo debe utilizarlo el personal cualificado, como, por ejemplo, médicos, audiólogos, fisioterapeutas, asistentes sanitarios, expertos en la atención sanitaria auditiva o personal con un nivel de cualificación similar. -
Page 200: Descripción Del Producto
Página 2 Descripción del producto El sistema Virtual SVV™ ofrece un método de evaluar la habilidad del paciente para situar una línea en paralelo con la gravedad sin valerse de ningún otro tipo de apoyo visual. La información sensorial que se necesita para realizar esta labor la proporciona sobre todo el sistema vestibular del oído interno. -
Page 201: Desembalaje Y Comprobación
Utilice el Informe de devolución para ayudarnos a garantizar que la solución del problema será la deseada. Almacenamiento Si tiene que guardar el Virtual SVV™ durante un tiempo, asegúrese de guardarlo de acuerdo con las condiciones especificadas en el apartado de especificaciones técnicas. -
Page 202: Etiquetas
Manual de instrucciones de Virtual SVV™ - ES Página 4 Etiquetas En el instrumento pueden verse las siguientes etiquetas: Símbolo Explicación Piezas aplicadas de tipo B. Piezas aplicadas al paciente sin conexión eléctrica al paciente. Consulte el manual de instrucciones. -
Page 203: Advertencias Y Precauciones Generales
él. 2. El sistema Virtual SVV™ solo debe utilizarse de acuerdo con las instrucciones descritas en este manual. La medición de la vertical visual subjetiva está diseñada para utilizarse con el objetivo de realizar diagnósticos médicos de desórdenes vestibulares. - Page 204 Seguridad de las pilas 1. El control remoto portátil de Virtual SVV™ contiene dos pilas AA recargables de níquel e hidruro metálico (NiMH). Lea las instrucciones incluidas en el Capítulo 6: Cambio de pilas (Chaper 6 Exchanging Batteries) con atención antes de abrir el compartimento y sustituir las pilas.
-
Page 205: Configuración E Instalación
Manual de instrucciones de Virtual SVV™ - ES Página 7 3 Configuración e instalación Componentes del sistema Virtual SVV™ El dispositivo Virtual SVV™ está compuesto de cuatro componentes principales: Gafas de realidad virtual Estación de carga Control remoto portátil ... -
Page 206: Software De La Aplicación
Instalación de la base de datos OtoAccess™ Al software de Virtual SVV™ se accede a través de la base de datos OtoAccess™ de Interacoustics. La base de datos OtoAccess™ de Interacoustics se usa para almacenar los datos del paciente y las grabaciones. - Page 207 Haga clic en “Browse” (Explorar) para seleccionar la ruta de acceso tal y como se muestra en el cuadro de diálogo. La instalación solo puede finalizarse una vez que se ha identificado el archivo de licencia. Tenga en cuenta que una licencia válida le permite instalar la aplicación de Virtual SVV™ en más de un ordenador.
- Page 208 Figura 3 4 Selección de la ruta de acceso del directorio para instalar Virtual SVV™ Seleccione “Next” para seguir con la instalación. Después de instalar el programa de forma correcta, podrá cerrar el asistente de instalación al hacer clic en “Finish”.
-
Page 209: Instalación De Los Controladores De Virtual Svv
Instalación de los controladores de Virtual SVV™ Conecte la estación de base de Virtual SVV™ a un puerto USB del ordenador o portátil. Mediante el procedimiento de instalación, se determina si el software de los controladores necesarios ya está instalado en el ordenador. -
Page 210: Configuración Del Hardware
Manual de instrucciones de Virtual SVV™ - ES Página 12 Configuración del hardware El sistema Virtual SVV™ está compuesto de varios componentes. A continuación se muestra una descripción de cada equipo, así como de su función e instalación. 3.6.1 Fijación de la almohadilla para el rostro en las gafas de realidad virtual... -
Page 211: Colocación De La Diadema
Manual de instrucciones de Virtual SVV™ - ES Página 13 Paso 3 Presione la almohadilla para el rostro contra las gafas de realidad virtual desde el centro (consulte la Figura 3.6) hacia los extremos. Asegúrese de que la almohadilla para el rostro se ha unido a las gafas de realidad virtual por toda la zona de contacto. -
Page 212: Control Remoto Portátil
Manual de instrucciones de Virtual SVV™ - ES Página 14 Paso 2 Pliegue el extremo izquierdo de la diadema alrededor de la ranura y una ambas partes del velcro. Este extremo de la diadema debe queda pegado durante la prueba. -
Page 213: Preparación De La Estación De Base
Manual de instrucciones de Virtual SVV™ - ES Página 15 Figura 3 12 Elementos del control remoto portátil Botón “OK”, que permite confirmar la finalización del ajuste Botones de rotación de la línea luminosa hacia la izquierda/derecha ... -
Page 214: Carga De Las Pilas
Manual de instrucciones de Virtual SVV™ - ES Página 16 AVISO Colocación de la estación de base Para garantizar que se produce una transmisión inalámbrica fiable, es importante mantener una línea de visión directa entre las gafas de realidad virtual y la estación de base. Se recomienda colocar la estación de base cerca del paciente. -
Page 215: Instrucciones De Funcionamiento
El sistema se inicia después de que transcurran tres segundos y la luz LED verde de encendido deja de parpadear y permanece encendida. Para desactivar el sistema Virtual SVV™, pulse los dos botones y a la vez durante unos cinco segundos hasta que se apague la luz LED verde de encendido. -
Page 216: Inicio Del Software De Virtual Svv
Manual de instrucciones de Virtual SVV™ - ES Página 18 Figura 4 2 Inserción de información de pacientes en OtoAccess Si el paciente vuelve para someterse a una visita de repetición, seleccione el registro del cliente en la lista de la parte inferior de la pantalla o haga clic en el icono “Search Client” (Buscar cliente) para usar los campos de información del paciente como parámetros de búsqueda. -
Page 217: Exploración De La Interfaz De Usuario De Virtual Svv
Manual de instrucciones de Virtual SVV™ - ES Página 19 Exploración de la interfaz de usuario de Virtual SVV™ Figure 4 3 Interfaz de usuario de Virtual SVV™ Los botones para conectarse con la estación de base, imprimir informes de pruebas y ajustar las preferencias de la aplicación se encuentran en la esquina superior izquierda. -
Page 218: Virtual Svv™ Settings" (Ajustes De Virtual Svv™)
Manual de instrucciones de Virtual SVV™ - ES Página 20 La barra de estado contiene información acerca de la secuencia de pruebas actual y de la capacidad de las pilas. La función de ayuda, que se muestra en la esquina inferior derecha en forma de signo de interrogación, abre el manual de usuario en PDF. -
Page 219: Findings Sheet" (Ficha De Resultados) De Virtual Svv
Manual de instrucciones de Virtual SVV™ - ES Página 21 “Findings sheet” (Ficha de resultados) de Virtual SVV™ Los resultados de cada prueba se recopilan y almacenan en una ficha de informe de resultados en formato PDF. Si lo desea, puede exportarlo en formato impreso. Además, los datos de medición de cada prueba se almacenan y pueden exportarse en formato CSV. - Page 220 Manual de instrucciones de Virtual SVV™ - ES Página 22...
-
Page 221: Procedimientos De Prueba
Selección del modo de prueba La aplicación del Virtual SVV™ permite elegir entre dos modos de prueba para realizar la medición de la vertical visual subjetiva: “Static Tilt” (Inclinación estática) y “Unilateral Centrifugation” (Centrifugación unilateral) Puede seleccionar el modo que desee en las pestañas situadas en el panel izquierdo. -
Page 222: Montaje De Las Gafas De Realidad Virtual
Manual de instrucciones de Virtual SVV™ - ES Página 24 5.2.1 Montaje de las gafas de realidad virtual Suelte la diadema e indique al paciente que sujete las gafas de realidad virtual con la almohadilla para el rostro adaptada a su estructura facial para que le resulten cómodas. Asegúrese de que el paciente puede ver los cuatro puntos delimitadores en la pantalla. -
Page 223: Inicio De Las Mediciones
Manual de instrucciones de Virtual SVV™ - ES Página 25 Figura 5 4 Ejemplo de cómo ve el paciente la línea luminosa Inicio de las mediciones Haga clic en el botón “Start” para iniciar la prueba. Haga que el paciente se familiarice con el funcionamiento del dispositivo. -
Page 224: Pruebas Con Inclinación Estática
Este intervalo de tolerancia, que puede definirse en los ajustes del Virtual SVV™, indica cuántos grados puede desviarse un punto de datos de medición individual para que pueda incluirse en el cálculo del valor medio. -
Page 225: Visualización De La Secuencia De Posiciones De Medición
Manual de instrucciones de Virtual SVV™ - ES Página 27 5.4.2 Visualización de la secuencia de posiciones de medición La secuencia de medición programada “Static Tilt” (Inclinación estática) pueden verse en la zona superior izquierda del software de la aplicación. Normalmente, la posición vertical de 0° de la cabeza está... -
Page 226: Ángulo De Desviación
Manual de instrucciones de Virtual SVV™ - ES Página 28 IMPORTANTE No deje al paciente desatendido en ningún momento para que pueda ofrecer una respuesta rápida a cualquier molestia que muestre. Si el paciente va a someterse a la prueba en una posición inclinada o va a girar en un sillón rotatorio, asegúrese de que esté... -
Page 227: Intercambio De Secuencias De Medición
Manual de instrucciones de Virtual SVV™ - ES Página 29 Figura 5 10 Diagrama de resultados y tabla con un modelo de un único punto de datos Fuente: UWE SCHÖNFELD & ANDREW H. CLARKE Departamento de otorrinolaringología, Charité Medical School, Campus Benjamin Franklin, Berlín, Alemania, 473 participantes Los datos de las mediciones (α... -
Page 228: Pruebas Con Centrifugación Unilateral
Manual de instrucciones de Virtual SVV™ - ES Página 30 Durante la prueba, el paciente ha estado a oscuras durante varios minutos. Tras quitarle las gafas de realidad virtual al paciente, tenga en cuenta que la luz ambiente de la sala podría molestarle. Deje que el paciente se vuelva a acostumbrar a la luz de la sala durante unos minutos. -
Page 229: Cuidado Y Mantenimiento
Cuidado y mantenimiento Procedimientos generales de mantenimiento El operador del sistema Virtual SVV™ es el encargado de mantener dicho producto de uso médico en perfectas condiciones. La funcionalidad y el estado de todos los componentes deben comprobarse con regularidad. Debe sustituir o descartar los elementos desechables (almohadillas para el rosto, diadema y cierre de seguridad) de la forma indicada. - Page 230 Manual de instrucciones de Virtual SVV™ - ES Página 32 • No cortocircuite nunca los contactos del control remoto portátil o del soporte de la estación de base. Esto provocaría daños en el dispositivo. • Evite interrumpir el ciclo de carga antes de que se apague la luz LED amarilla.
- Page 231 Manual de instrucciones de Virtual SVV™ - ES Página 33 Paso 3 Deslice el cierre de seguridad de la tapa del compartimento de las pilas hacia abajo para abrir la tapa. Paso 4 Solo deben usarse los siguientes tipos de pilas: 2 x pilas AA listas para usar de NiMH, 1,2 V y 2600 mAh de VARTA No deben usarse pilas no recargables (alcalinas) en ningún caso.
-
Page 232: Cómo Limpiar Los Productos De Interacoustics
Manual de instrucciones de Virtual SVV™ - ES Página 34 Paso 5 Retire la tapa del compartimento de las pilas tal y como se muestra en la siguiente figura. Deslice el cierre de seguridad hacia arriba. Paso 6 Retire el tornillo de seguridad con cuidado para evitar que el compartimento se abra de forma inintencionada. -
Page 233: Acerca De Las Reparaciones
Acerca de las reparaciones Interacoustics solo se considera responsable de la validez del marcado CE, los efectos en materia de seguridad, fiabilidad y rendimiento del equipo cuando: 1. las operaciones de montaje, extensiones, reajustes, modificaciones o reparaciones se llevan a cabo por personal autorizado;... - Page 234 Esto se aplicará exclusivamente al comprador original. Esta garantía no tendrá validez con ningún propietario o titular posterior del producto. Además, la garantía no se aplicará a (e Interacoustics no será responsable de) ninguna pérdida relativa a la adquisición o el uso de un producto de Interacoustics que: •...
-
Page 235: Resolución De Problemas
Manual de instrucciones de Virtual SVV™ - ES Página 37 Resolución de problemas Tabla de resolución de problemas Solución Problema Causa posible La conexión entre la Tiempo de espera Encienda el control remoto portátil estación de base y Batería baja Coloque el control remoto portátil en el soporte de la... -
Page 236: Comprobación De Las Funciones Del Sistema
No dispone de una La licencia no es válida Su licencia no corresponde a su software. Desinstale licencia válida para el software de Virtual SVV™ actual, instale el Virtual esta versión de SVV™ de los medios incluidos y utilice la licencia software. Póngase incluida. -
Page 237: Especificaciones Técnicas Generales
De 35 a 95 % Transporte del sistema El sistema Virtual SVV™ debe apagarse antes de transportarlo. El dispositivo debe transportarse en su paquete original o en un estuche de transporte adecuado. El dispositivo debe quedar protegido frente a golpes, a la humedad, al polvo y a interferencias eléctricas durante el transporte. -
Page 238: Especificaciones De Hardware De Virtual Svv
Almacenamiento Si el sistema Virtual SVV™ no va a utilizarse durante un largo periodo de tiempo, guárdelo en una zona seca, sin polvo y alejada de la luz solar. Si no va a utilizar el dispositivo durante un largo periodo de tiempo, debe extraerle las pilas. -
Page 239: Compatibilidad Electromagnética (Cem)
Manual de instrucciones de Virtual SVV™ - ES Página 41 Compatibilidad electromagnética (CEM) ADVERTEN • Este instrumento es idóneo para entornos hospitalarios salvo en ubicaciones próximas a equipos quirúrgicos de alta frecuencia activos y salas con apantallamiento RF de sistemas para imagen de resonancia magnética, donde la intensidad de las interferencias electromagnéticas es alta. - Page 240 El Virtual SVV™ está diseñado para utilizarse en un entorno electromagnético en el que las interferencias de RF estén controladas. El cliente o el usuario del Virtual SVV™ pueden contribuir a evitar que se produzcan interferencias electromagnéticas manteniendo una distancia mínima entre los equipos de comunicaciones RF portátiles y móviles (transmisores) y el Virtual SVV™, según las recomendaciones...
- Page 241 Guía y declaración del fabricante: inmunidad electromagnética El Virtual SVV™ está diseñado para utilizarse en el entorno electromagnético que se especifica a continuación. El cliente o el usuario del Virtual SVV™ debe asegurarse de que se utiliza en un entorno de este tipo.
-
Page 242: Normativas Sobre Seguridad
Sobre el intervalo de frecuencia de 150 kHz a 80 MHz, la intensidad de campo debe ser inferior a 3 V/m. Normativas sobre seguridad Declaración de conformidad El marcado CE confirma que el sistema Virtual SVV™ cumple los requisitos correspondientes de la directiva 93/42/CEE. El sistema Virtual SVV™ está clasificado como dispositivo médico de Clase 1. Normativas de seguridad El dispositivo está... - Page 243 Istruzioni per l’uso – IT Virtual SVV™ D-0116075 – A – 2017/09...
- Page 244 Copyright © 01/02/2017 di Interacoustics. Tutti i diritti riservati. Le informazioni nel presente documento possono venire modificate senza preavviso. Le aziende, i nomi e i dati utilizzati nell’esempio accluso sono immaginari, salvo che non venga indicato altrimenti. Nessuna parte del presente documento può...
- Page 245 3.1.4 Software dell’applicazione ..................8 Installazione del database OtoAccess™ ................8 Installazione del software Virtual SVV™ ................8 Installazione dei driver di Virtual SVV™ ................11 Configurazione di Virtual SVV™ in OtoAccess™ ............. 11 Configurazione hardware ....................12 3.6.1 Collegamento del cuscinetto per il viso alla maschera per realtà virtuale ....12 3.6.2...
- Page 246 Tabella di risoluzione dei problemi ..................37 Controllo della funzione di sistema ................... 38 SPECIFICHE TECNICHE GENERALI ..................39 Requisiti di sistema ......................39 Specifiche hardware di Virtual SVV™ ................40 Compatibilità elettromagnetica (EMC) ................41 Regolamenti di sicurezza ....................45...
-
Page 247: Introduzione
L’operatore deve adempiere alle istruzioni nel presente manuale. Il sistema Virtual SVV™ è pensato per l’uso nella prassi clinica e medica. Ad esempio, è indicato per l’uso: • Con paziente seduto su una normale sedia da esame •... -
Page 248: Descrizione Del Prodotto
Pagina 2 Descrizione del prodotto Il sistema Virtual SVV™ offre un metodo per la valutazione della capacità del paziente di regolare una linea, in assenza di qualsiasi altro indizio visivo, in modo che questa sia parallela con la gravità. Le informazioni sensoriali necessarie per eseguire questo compito vengono fornite in maniera predominante dal sistema vestibolare dell’orecchio interno. -
Page 249: Disimballaggio E Controllo
Utilizzare il Rapporto di reso per contribuire a garantire che la correzione del problema sia soddisfacente. Conservazione Nel caso in cui sia necessario riporre Virtual SVV™ per un certo periodo di tempo, assicurarsi che l’apparecchio venga conservato alle condizioni indicate nelle specifiche tecniche. -
Page 250: Etichette
Istruzioni per l’uso di Virtual SVV™ – IT Pagina 4 Etichette Sull’apparecchio possono essere presenti le seguenti etichette: Simbolo Spiegazione Componenti applicati di Tipo B. Componenti applicati al paziente senza connessione elettrica al paziente. Consultare il Manuale di istruzioni. RAEE (Direttiva UE). -
Page 251: Avvertimenti E Precauzioni Generali
Avvertimenti e precauzioni generali Scopo previsto 1. Il sistema Virtual SVV™ è pensato per essere utilizzato esclusivamente a scopo medico. Non è pensato per uso privato o di intrattenimento. 2. Il sistema Virtual SVV™ deve essere azionato solo nel rispetto delle istruzioni descritte all’interno del presente manuale. - Page 252 Pagina 6 Sicurezza della batteria 1. Il telecomando manuale di Virtual SVV™ contiene due batterie AA NiMH ricaricabili. Leggere le istruzioni presenti nel Capitolo 6 Sostituzione delle batterie con attenzione prima di aprire il vano batterie e cambiare le batterie.
-
Page 253: Configurazione E Installazione
Istruzioni per l’uso di Virtual SVV™ – IT Pagina 7 3 Configurazione e installazione Componenti del sistema Virtual SVV™ Il dispositivo Virtual SVV™ è composto da quattro componenti principali: Maschera per realtà virtuale Postazione di base Telecomando manuale Software dell’applicazione Virtual SVV™... -
Page 254: Software Dell'applicazione
Installazione del database OtoAccess™ Per accedere al software Virtual SVV™ è necessario il database OtoAccess™ di Interacoustics. Il database OtoAccess™ di Interacoustics viene utilizzato per conservare le informazioni sui pazienti e le registrazioni dei dati. OtoAccess™ deve essere installato prima dell’installazione del software Virtual SVV™. Consultare le istruzioni per l’uso incluse al supporto di installazione di OtoAccess™... - Page 255 Istruzioni per l’uso di Virtual SVV™ – IT Pagina 9 Con l’acquisto di un dispositivo Virtual SVV™ è inclusa una licenza per l’utente valida sotto forma di file di licenza. Il nome del file di licenza è generato come combinazione di “numero di dispositivo.licenza“.
- Page 256 Per la procedura di installazione verrà selezionato il seguente percorso di directory predefinito. Figura 3 4 Selezione del percorso della directory per l’installazione di Virtual SVV™ Selezionare Next (Avanti) per procedere con l’installazione. Una volta completata la configurazione, è possibile chiudere l’assistente alla configurazione selezionando Finish (Termina).
-
Page 257: Installazione Dei Driver Di Virtual Svv
Installazione dei driver di Virtual SVV™ Connettere la postazione di base di Virtual SVV™ alla porta USB sul PC o sul computer portatile. La procedura di installazione verifica se sul PC è già installato il software dei driver necessari. In caso contrario, questi vengono installati automaticamente. -
Page 258: Configurazione Hardware
Istruzioni per l’uso di Virtual SVV™ – IT Pagina 12 Configurazione hardware Il sistema Virtual SVV™ è composto da vari componenti. Di seguito vengono descritti tutti i componenti, le loro funzioni e la loro installazione. 3.6.1 Collegamento del cuscinetto per il viso alla maschera per realtà virtuale Passaggio 1 Allineare il cuscinetto per il viso alla maschera per realtà... -
Page 259: Fissaggio Della Fascia Per La Testa
Istruzioni per l’uso di Virtual SVV™ – IT Pagina 13 Passaggio 3 Premere il cuscinetto per il viso sulla maschera per realtà virtuale partendo dal centro (consultare la Figura 3.3) per poi procedere verso i bordi esterni. Assicurarsi che l’intera interfaccia fra il cuscinetto per il viso e la maschera per realtà... -
Page 260: Telecomando Manuale
Istruzioni per l’uso di Virtual SVV™ – IT Pagina 14 Passaggio 2 Piegare l’estremità sinistra della fascia per la testa attorno alla fessura e poi fissare il velcro. Questa estremità della fascia per la testa rimane fissata durante tutto l’esame. -
Page 261: Preparazione Della Postazione Di Base
Istruzioni per l’uso di Virtual SVV™ – IT Pagina 15 Figura 3 12 Elementi del telecomando manuale Tasto OK per confermare il completamento della regolazione Tasti per la rotazione verso destra e sinistra della linea luminosa LED che indica che l’alimentazione è ON (verde) ... -
Page 262: Ricarica Della Batteria
Istruzioni per l’uso di Virtual SVV™ – IT Pagina 16 AVVISO Posizionamento della postazione di base Per assicurare una trasmissione wireless affidabile, è importante che la traiettoria diretta fra la maschera per realtà virtuale e la postazione di base sia libera. Si consiglia di posizionare la postazione di base nei pressi del paziente. -
Page 263: Istruzioni Di Funzionamento
Abilitazione e disabilitazione del sistema Virtual SVV™ Per abilitare il sistema Virtual SVV™, tenere premuto il tasto OK sul telecomando manuale per circa due secondi fino a quando il LED ON verde non comincia a lampeggiare e poi rilasciare il tasto. Il sistema si inizializza dopo altri tre secondi e il LED ON verde cessa di lampeggiare e diventa fisso. -
Page 264: Avvio Del Software Virtual Svv
Istruzioni per l’uso di Virtual SVV™ – IT Pagina 18 Figura 4 2 Inserimento delle informazioni del paziente in OtoAccess Se il paziente torna per una visita di controllo, selezionarne la scheda dall’elenco in fondo alla schermata oppure selezionare l’icona Search Client (Cerca il cliente) per utilizzare i campi con le informazioni sul paziente come parametri di ricerca. -
Page 265: Navigazione Dell'interfaccia Utente Di Virtual Svv
Istruzioni per l’uso di Virtual SVV™ – IT Pagina 19 Navigazione dell’interfaccia utente di Virtual SVV™ Figura 4 3 Interfaccia utente di Virtual SVV™ In alto a sinistra ci sono i tasti che permettono di stabilire la comunicazione con la postazione di base, stampare i rapporti del test e impostare le preferenze dell’applicazione. -
Page 266: Impostazioni Di Virtual Svv
Istruzioni per l’uso di Virtual SVV™ – IT Pagina 20 La barra di stato contiene informazioni sulla sequenza di test corrente e sulla capacità della batteria. La funzione di aiuto, indicata dal punto interrogativo nell’angolo in basso a destra, apre il manuale per l’utente in formato PDF. -
Page 267: Scheda Dei Risultati Di Virtual Svv
Istruzioni per l’uso di Virtual SVV™ – IT Pagina 21 Scheda dei risultati di Virtual SVV™ I risultati per ciascun esame vengono raccolti e conservati su una scheda di rapporto dei risultati in formato PDF. In maniera opzionale, questa scheda può essere stampata su formato cartaceo. Inoltre, i dati di misurazione di ciascun esame vengono conservati e possono essere esportati in formato CSV. - Page 268 Istruzioni per l’uso di Virtual SVV™ – IT Pagina 22...
-
Page 269: Procedure Di Test
Abilitare il sistema Virtual SVV™ tenendo premuto il tasto OK sul telecomando manuale per circa due secondi fino a quando il LED ON verde non comincia a lampeggiare. Dopo circa tre secondi, il sistema è... -
Page 270: Installazione Della Maschera Per Realtà Virtuale
Istruzioni per l’uso di Virtual SVV™ – IT Pagina 24 5.2.1 Installazione della maschera per realtà virtuale Allentare la fascia per la testa e chiedere al paziente di reggere la maschera per realtà virtuale con il cuscinetto per il viso a contatto con il volto in modo tale che questa sia confortevole. Assicurarsi che il paziente sia ora in grado di vedere tutti e quattro i punti di confine sullo schermo. -
Page 271: Avvio Delle Misurazioni
Istruzioni per l’uso di Virtual SVV™ – IT Pagina 25 Figura 5 4 Esempio di linea luminosa così come è vista dal paziente Avvio delle misurazioni Cliccare sul tasto Start (Avvio) per cominciare la misurazione del test. Permettere al paziente di familiarizzarsi con il funzionamento del dispositivo. -
Page 272: Test Con Inclinazione Statica
Istruzioni per l’uso di Virtual SVV™ – IT Pagina 26 La modalità di misurazione in serie è abilitata selezionando la casella che si trova al di sopra del tasto di avvio. Durante le misurazioni in serie, ciascuna prova è preceduta da un conto alla rovescia. In questo modo, l’esaminatore è... -
Page 273: Visualizzazione Della Sequenza Delle Posizioni Di Misurazione
Istruzioni per l’uso di Virtual SVV™ – IT Pagina 27 5.4.2 Visualizzazione della sequenza delle posizioni di misurazione La sequenza di misurazione pianificata Static Tilt (Inclinazione statica) può essere visualizzata nell’area superiore sinistra del software dell’applicazione. In genere, viene preselezionata una posizione eretta della testa a 0°... -
Page 274: Angolo Di Deviazione
Istruzioni per l’uso di Virtual SVV™ – IT Pagina 28 IMPORTANTE Continuare a osservare il paziente durante l’intera procedura allo scopo di poter rispondere rapidamente in caso di qualche fastidio. Se il paziente viene sottoposto al test in posizione inclinata o ruotata su una sedia rotante, assicurarsi che questi sia fissato in maniera sicura. -
Page 275: Inversione Delle Sequenze Di Misurazione
Allo scopo di generare un adeguato stimolo centrifugo unilaterale, è necessaria una velocità angolare costante di almeno 240°/sec. Per una descrizione completa della procedura di test con centrifuga unilaterale, consultare le Informazioni aggiuntive di Virtual SVV™. Eliminazione dei dati Quando le prove di test sono completate, i dati delle misurazioni possono essere cancellati contrassegnando la voce della misurazione nella tabella e attivando l’icona di cancellazione in basso a... - Page 276 Istruzioni per l’uso di Virtual SVV™ – IT Pagina 30...
-
Page 277: Cura E Manutenzione
Danni ai dispositivi Nelle circostanze seguenti, il sistema Virtual SVV™ non deve essere utilizzato fino a quando non è stata eseguita un controllo qualificato: 1. Uno o più dispositivi sono stati danneggiati meccanicamente (ad esempio, attraverso impatto). - Page 278 Istruzioni per l’uso di Virtual SVV™ – IT Pagina 32 • È necessario prendere in considerazione il fatto che una batteria nuova raggiunge la propria capacità completa dopo vari cicli di ricarica • Non mandare mai in cortocircuito i contatti del telecomando manuale o del supporto nella postazione di base.
- Page 279 Istruzioni per l’uso di Virtual SVV™ – IT Pagina 33 Passaggio 3 Far scorrere la clip di fissaggio sulla copertura del vano batterie verso il basso allo scopo di aprire la copertura. Passaggio 4 Utilizzare solo il tipo di batteria seguente: 2 VARTA Pronte all’uso –...
-
Page 280: Come Pulire I Prodotti Interacoustics
Istruzioni per l’uso di Virtual SVV™ – IT Pagina 34 Passaggio 5 Riposizionare la copertura del vano batterie come mostrato nella figura seguente. Far scorrere la clip di fissaggio verso l’alto. Passaggio 6 Riposizionare la vite di fissaggio delicatamente in modo da evitare qualsiasi apertura indesiderata del vano. -
Page 281: In Merito Alle Riparazioni
Interacoustics garantisce che: • Il sistema Virtual SVV™ è privo di difetti nei materiali e nella realizzazione in condizioni di utilizzo e assistenza normali per un periodo di ventiquattro (24) mesi dalla data di consegna al primo acquirente da parte di Interacoustics •... - Page 282 Interacoustics e Interacoustics non fornisce e non garantisce, in maniera diretta o indiretta, l’autorità ad alcun rappresentante o a chiunque altro di assumersi per conto di Interacoustics qualsiasi altra responsabilità in connessione con la vendita di prodotti Interacoustics.
-
Page 283: Risoluzione Dei Problemi
Istruzioni per l’uso di Virtual SVV™ – IT Pagina 37 Risoluzione dei problemi Tabella di risoluzione dei problemi Soluzione Problema Causa possibile La comunicazione Timeout Accendere il telecomando manuale fra la postazione di Batteria scarica Inserire il telecomando manuale nel supporto sulla base e il postazione di base. -
Page 284: Controllo Della Funzione Di Sistema
Istruzioni per l’uso di Virtual SVV™ – IT Pagina 38 Non è stato Trasmissione wireless Controllare che la linea diretta fra il telecomando possibile avviare la scadente manuale e la postazione di base sia libera misurazione. Controllare la connessione. Non si dispone di Licenza non valida La licenza non corrisponde al software. -
Page 285: Specifiche Tecniche Generali
35-95% Trasporto del sistema Il sistema Virtual SVV™ deve essere spento prima del trasporto. Il dispositivo deve essere trasportato nella confezione originale o in una custodia di trasporto idonea. Il dispositivo deve essere protetto dagli impatti, dall’umidità, dalla polvere e dalle interferenze elettriche durante il trasporto. -
Page 286: Specifiche Hardware Di Virtual Svv
Pagina 40 Conservazione Se il sistema Virtual SVV™ non viene utilizzato per un certo periodo di tempo, immagazzinarlo in un’area asciutta e priva di polvere e lontano dalla luce diretta del sole. Le batterie devono essere rimosse nel caso in cui il dispositivo non venga utilizzato per un periodo di tempo prolungato. Il dispositivo deve essere conservato preferibilmente nell’imballaggio originale. -
Page 287: Compatibilità Elettromagnetica (Emc)
Istruzioni per l’uso di Virtual SVV™ – IT Pagina 41 Compatibilità elettromagnetica (EMC) PRUDENZA • Questo strumento è idoneo per l’ambiente ospedaliero fatta eccezione per il posizionamento nei pressi di apparecchiatura chirurgica HF e in ambienti schermati RF destinati a sistemi per l’imaging con risonanza magnetica, dove l’intensità... - Page 288 Guida e dichiarazione del produttore – emissioni elettromagnetiche Virtual SVV™ è progettato per venire utilizzato nell’ambiente elettromagnetico specificato di seguito. Il cliente o l’utente di Virtual SVV™deve accertarsi che questo venga utilizzato in un ambiente simile. Test delle emissioni Conformità...
- Page 289 Guida e dichiarazione del produttore – immunità elettromagnetica Virtual SVV™ è progettato per venire utilizzato nell’ambiente elettromagnetico specificato di seguito. Il cliente o l’utente di Virtual SVV™deve accertarsi che questo venga utilizzato in un ambiente simile. Test di immunità Test IEC 60601 Conformità...
- Page 290 RF fissi, è necessario prendere in considerazione un’indagine elettromagnetica del sito. Se la forza del campo misurato nella sede in cui Virtual SVV™ verrà utilizzato supera il livello di conformità RF applicabile indicato in precedenza, Virtual SVV™ va osservato allo scopo di accertare il normale funzionamento.
-
Page 291: Regolamenti Di Sicurezza
Pagina 45 Regolamenti di sicurezza Dichiarazione di conformità Il contrassegno CE conferma che il sistema Virtual SVV™ è conforme ai requisiti pertinenti delle linee guida 93/42/CEE. Il sistema Virtual SVV™ è classificato come dispositivo medico di Classe 1. Standard di sicurezza Il presente dispositivo è... - Page 292 Instructions d'utilisation - FR Virtual SVV™ D-0116077 – A – 2017/09...
- Page 293 Aucune section de ce document ne peut être reproduite ou transmise sous quelque forme ou moyen que ce soit, électroniquement ou mécaniquement, à quelque fin que ce soit sans l'accord express écrit d'Interacoustics A/S ou de ses licenciés.
- Page 294 Installation de la base de données OtoAccess™ ............... 8 Installation du logiciel Virtual SVV™ ................... 8 Installation des pilotes Virtual SVV™ ................11 Configuration de Virtual SVV™ dans OtoAccess™ ............11 Installation du matériel ...................... 12 3.6.1 Fixation du coussinet facial aux lunettes de réalité virtuelle ........12 3.6.2...
- Page 295 DEPANNAGE ..........................37 Tableau de dépannage ..................... 37 Vérification du fonctionnement du système ..............38 CARACTERISTIQUES TECHNIQUES GENERALES ............... 39 Configuration système requise..................39 Spécifications matérielles de Virtual SVV™ ..............40 Compatibilité électromagnétique (EMC) ................41 Réglementations de sécurité ..................... 45...
-
Page 296: Introduction
L'opérateur doit respecter les instructions contenues dans le présent manuel. Le système Virtual SVV™ est conçu pour être utilisé dans un cadre clinique et médical. Par exemple, il peut être utilisé : •... -
Page 297: Description Du Produit
Page 2 Description du produit Le système Virtual SVV™ propose une méthode pour évaluer la capacité du patient à ajuster une ligne, en l'absence de toute autre indication visible, qui doit être parallèle à la gravité. L'information sensorielle nécessaire à la réalisation de cette tâche est principalement fournie par le système vestibulaire de l'oreille interne. -
Page 298: Deballage Et Inspection
Merci d'utiliser le Rapport de renvoi pour nous aider à garantir que la correction du problème vous apporte satisfaction. Stockage Si vous devez stocker le Virtual SVV™ pour une période assez longue, veuillez vous assurer qu'il est stocké dans les conditions spécifiées au chapitre couvrant les caractéristiques techniques :... -
Page 299: Étiquetage
Virtual SVV™ Instructions d'utilisation – FR Page 4 Étiquetage L'instrument comporte les étiquetages suivants : Symbole Description Pièces appliquées de type B. Pièces appliquées au patient sans connexion électrique au patient. Consultez le manuel d'instructions. WEEE (directive de l'UE). Ce symbole indique que lorsque l'utilisateur souhaite se débarrasser de ce produit, il doit l'envoyer à... -
Page 300: Avertissements Et Précautions Généraux
Avertissements et précautions généraux Objectif 1. Le système Virtual SVV™ est conçu pour être utilisé uniquement à des fins médicales. Il n'est pas conçu pour une utilisation privée ou à des fins de divertissement. 2. Le système Virtual SVV™ ne doit être utilisé qu'en respectant les instructions décrites dans le présent manuel. - Page 301 Virtual SVV™ n'est pas utilisé pendant une longue période. Sécurité de la batterie 1. La télécommande manuelle du Virtual SVV™ contient deux piles AA NiMH rechargeables. Lisez bien les instructions du Chapitre 6 : Changement des piles avant d'ouvrir le compartiment des piles et de changer les piles.
-
Page 302: Configuration Et Installation
Virtual SVV™ Instructions d'utilisation – FR Page 7 3 Configuration et installation Composants du système Virtual SVV™ L'appareil Virtual SVV™ est composé de quatre composants principaux : Lunettes de réalité virtuelle Base Télécommande manuelle Logiciel d'application Virtual SVV™ 3.1.1 Lunettes de réalité virtuelle Les lunettes de réalité... -
Page 303: Station D'accueil
électronique ou papier. Installation de la base de données OtoAccess™ Le logiciel Virtual SVV™ est accessible depuis la base de données Interacoustics OtoAccess™. La base de données Interacoustics OtoAccess™ sert à sauvegarder les informations du patient et les enregistrements de données. - Page 304 Page 9 Une licence d'utilisateur valide, sous forme d'un fichier de licence, est incluse lors de l'achat d'un appart Virtual SVV™. Le nom du fichier de licence est généré à partir d'une combinaison de « numéro d'appareil.licence ». L'installation nécessite le chemin d'accès du fichier de licence valide. L'image ci-dessous illustre cela.
- Page 305 Le chemin de répertoire par défaut suivant sera sélectionné pour la procédure d'installation. Image 3 4 Sélection du chemin de répertoire pour l'installation Virtual SVV™ Sélectionnez « Suivant » pour poursuivre l'installation. Une fois l'installation terminée, l'assistant d'installation peut être fermé en cliquant sur « Terminer ».
-
Page 306: Installation Des Pilotes Virtual Svv
Page 11 Installation des pilotes Virtual SVV™ Connectez la base du Virtual SVV™ à un port USB sur le PC ou l'ordinateur portable. La procédure d'installation identifie les logiciels pilotes nécessaires déjà installés sur le PC. Si aucun n'est installé, ils seront installés automatiquement. -
Page 307: Installation Du Matériel
Virtual SVV™ Instructions d'utilisation – FR Page 12 Installation du matériel Le système Virtual SVV™ est composé de plusieurs composants : Chaque composant, sa fonction et son installation sont décrits ci-dessous. 3.6.1 Fixation du coussinet facial aux lunettes de réalité virtuelle Étape 1... -
Page 308: Fixation Du Bandeau
Virtual SVV™ Instructions d'utilisation – FR Page 13 Étape 3 Pressez le coussinet facial sur les lunettes de réalité virtuelle, en commençant au centre (voir Image 3.3) et en allant vers les bords extérieurs. Assurez-vous que toute la surface entre le coussinet facial et les lunettes de réalité... -
Page 309: Télécommande Manuelle
Virtual SVV™ Instructions d'utilisation – FR Page 14 Étape 2 Pliez l'extrémité gauche du bandeau autour de la fente et fixez le Velcro. Cette extrémité du bandeau reste fixe pendant toute la durée de l'examen. Le bandeau peut à présent être tiré de la fente droite de droite à gauche. Le bandeau peut être réglé en longueur, pour s'adapter à... -
Page 310: Préparation De La Base
Virtual SVV™ Instructions d'utilisation – FR Page 15 Image 3 12 Éléments de la télécommande manuelle Bouton OK pour confirmer la réalisation de l'ajustement Boutons pour la rotation gauche/droite de la ligne lumineuse LED ON (verte) ... -
Page 311: Chargement Des Batteries
Virtual SVV™ Instructions d'utilisation – FR Page 16 AVIS Positionnement de la base Pour assurer une transmission sans fil fiable, il est important de maintenir une visibilité claire entre les lunettes de réalité virtuelle et la base. Nous conseillons de placer la base à proximité du patient. Pour éviter toute interférence électrique, elle ne doit pas être placée à... -
Page 312: Instructions D'utilisation
Activer et désactiver le système Virtual SVV™ Pour activer le système Virtual SVV™, appuyez sur OK sur la télécommande manuelle pendant environ 2 secondes, jusqu'à ce que le témoin LED ON vert commence à clignoter, puis relâchez le bouton. Le système s'allume au bout de 3 secondes et le témoin LED ON vert arrête de clignoter et reste allumé. -
Page 313: Démarrage Du Logiciel Virtual Svv
Virtual SVV™ Instructions d'utilisation - FR Page 18 Image 4 2 Saisie des informations patient sous OtoAccess Si le patient vient pour une visite de contrôle, sélectionnez son dossier depuis la liste en bas de l'écran ou sélectionnez l'icône Rechercher client pour utiliser les champs d'informations patient comme paramètres de recherche. -
Page 314: Navigation Dans L'interface D'utilisateur Virtual Svv
Virtual SVV™ Instructions d'utilisation - FR Page 19 Navigation dans l'interface d'utilisateur Virtual SVV™ Image 4 3 Interface d'utilisateur Virtual SVV™ Les boutons permettant d'établir une communication entre la base, l'imprimante des rapports de test et les préférences d'application sont en haut à gauche. -
Page 315: Paramètres Virtual Svv
Virtual SVV™ Instructions d'utilisation - FR Page 20 La barre de statut contient des informations sur la séquence de test en cours et sur la capacité de la batterie. La fonction d'aide, signalée par le point d'interrogation en bas à droite, ouvre le manuel d'utilisateur PDF. -
Page 316: Fiche De Résultats Virtual Svv
Virtual SVV™ Instructions d'utilisation - FR Page 21 Fiche de résultats Virtual SVV™ Les résultats de chaque examen sont compilés et conservés dans un rapport de résultats en format PDF. Ce fichier peut également être imprimé sur papier. De plus, les données de mesure de chaque examen sont conservées et peuvent être exportées en format CSV. - Page 317 Virtual SVV™ Instructions d'utilisation - FR Page 22...
-
Page 318: Procedures De Test
LED reste allumé. Le logo démarrer avec quatre points rouges s'affiche dans les lunettes de réalité virtuelle. Sélection du mode de test L'application Virtual SVV™ permet deux modes de test différents pour la mesure de la verticale visuelle subjective : Inclinaison statique et Centrifugation unilatérale Le mode de test souhaité... -
Page 319: Montage Des Lunettes De Réalité Virtuelle
Virtual SVV™ Instructions d'utilisation – FR Page 24 5.2.1 Montage des lunettes de réalité virtuelle Desserrez le bandeau et demandez au patient de tenir les lunettes de réalité virtuelle avec le coussinet facial sur son visage, de façon à être à l'aise. Assurez-vous que le patient puisse voir les quatre points de délimitation affichés. -
Page 320: Début Des Mesures
Virtual SVV™ Instructions d'utilisation – FR Page 25 Image 5 4 Exemple de la ligne lumineuse vue par le patient Début des mesures Cliquez sur le bouton Démarrer pour commencer la mesure de test. Familiarisez le patient avec le fonctionnement de l'appareil. -
Page 321: Tests Avec L'inclinaison Statique
Les angles d'inclinaison souhaités peuvent être définis individuellement dans l'onglet d'Examen dans les paramètres Virtual SVV™. Il est possible de saisir jusqu'à quatre positions d'inclinaison de tête, entre 1 ° et 60 °. La fenêtre de saisie affiche les angles d'inclinaison précédemment définis. Les anciens angles d'inclinaison peuvent être supprimés après avoir été... -
Page 322: Visualisation De La Séquence Des Positions De Mesure
Virtual SVV™ Instructions d'utilisation – FR Page 27 5.4.2 Visualisation de la séquence des positions de mesure La séquence de mesure prévue en Inclinaison statique peut être visualisée en haut à fauche du logiciel. Normalement, la position droite de la tête à 0 ° est présélectionnée et le bloc correspondant pour cette mesure a un fond orange. -
Page 323: Angle De Déviation
Virtual SVV™ Instructions d'utilisation – FR Page 28 IMPORTANT Continuez l'observation du patient pendant toute la durée de la procédure, pour pouvoir réagir rapidement en cas de gêne. Si, pendant le test, le patient est en position inclinée ou sur un siège rotatif, assurez-vous qu'il soit bien installé. -
Page 324: Échange Des Séquences De Mesure
240 °/seconde. Pour une description complète de la procédure de test de centrifugation unilatérale, reportez-vous aux Informations supplémentaires de Virtual SVV™. Supprimer les données Une fois les essais de test terminés, les données de mesures stockées peuvent être supprimées en... - Page 325 Virtual SVV™ Instructions d'utilisation – FR Page 30...
-
Page 326: Entretien Et Maintenance
L'échange de ces composants doit être réalisé par le fabricant. Chaque système Virtual SVV™ doit être étalonné dans les installations du fabricant. Dans des conditions d'utilisation normales, il n'y a pas besoin de procéder à un nouveau calibrage. - Page 327 Virtual SVV™ Instructions d'utilisation – FR Page 32 • Prenez en compte qu'une batterie neuve atteint sa pleine capacité au bout de plusieurs cycles de charge • Ne court-circuitez jamais les commandes de la télécommande manuelle ou dans le socle de la base.
- Page 328 Virtual SVV™ Instructions d'utilisation – FR Page 33 Étape 3 Faites glisser le clip de maintien du couvercle du compartiment de batterie vers le bas, pour ouvrir ledit couvercle. Étape 4 N'utilisez que le type de piles suivant : 2 x VARTA Prêt à l'emploi – NiMH AA 1,2 V 2 600 mAh Il ne faut jamais et sous aucun prétexte utiliser de piles non rechargeables (alcalines).
-
Page 329: Comment Nettoyer Les Produits Interacoustics
Virtual SVV™ Instructions d'utilisation – FR Page 34 Étape 5 Remettez le couvercle du compartiment de batterie, comme indiqué sur l'image ci-dessous. Faites glisser le clip de maintien vers le haut. Étape 6 Replacez la vis de blocage en douceur, pour éviter toute ouverture involontaire du compartiment. -
Page 330: Réparations
Il est important que le client (agent) complète le RAPPORT DE RENVOI chaque fois qu’un problème est déclaré et l’envoie à Interacoustics ; il doit le faire à chaque fois qu'un instrument est renvoyé à Interacoustics. (Ceci s'applique évidemment aussi dans les situations impensables de décès ou de préjudice grave subi par un patient ou un utilisateur). - Page 331 Cette garantie remplace toutes les autres garanties explicites ou implicites et toutes les obligations ou responsabilités d’Interacoustics. Interacoustics n’accorde directement ou indirectement à aucun agent ou autre personne le droit d’assumer au nom d'Interacoustics aucune autre responsabilité liée à la vente des produits Interacoustics.
-
Page 332: Depannage
Virtual SVV™ Instructions d'utilisation – FR Page 37 Dépannage Tableau de dépannage Solution Problème Cause possible La communication Arrêt Interrupteur sur la télécommande manuelle entre la base et la Batterie faible Insérez la télécommande manuelle dans le socle sur la télécommande... -
Page 333: Vérification Du Fonctionnement Du Système
Votre licence ne correspond pas à votre logiciel. licence valide pour Veuillez désinstaller le logiciel Virtual SVV™ actuel et cette version du installer la version de Virtual SVV™ fournie sur le logiciel. Veuillez support et utilisez la licence incluse. contacter votre Contactez votre distributeur pour obtenir une licence distributeur. -
Page 334: Caracteristiques Techniques Generales
35 % – 95 % Transport du système Avant d'être transporté, le système Virtual SVV™ doit être éteint. L'appareil doit être transporté dans son emballage d'origine ou dans une boîte de transport adaptée. Au cours du transport, l'appareil doit être protégé des chocs, de l'humidité, de la poussière et des interférences électriques. -
Page 335: Spécifications Matérielles De Virtual Svv
Page 40 Stockage Si le système Virtual SVV™ n'est pas utilisé pour une durée donnée, conservez-le dans un endroit sec, sans poussière et à l'abri de la lumière du soleil. Les batteries doivent être retirées si l'appareil n'est pas utilisé pendant une période prolongée. Dans l'idéal, l'appareil doit être conservé dans son emballage d'origine. -
Page 336: Compatibilité Électromagnétique (Emc)
Virtual SVV™ Instructions d'utilisation - FR Page 41 Compatibilité électromagnétique (EMC) AVERTISSE • Cet instrument est adapté aux environnements hospitaliers, mis à part à proximité des équipements chirurgicaux à haute fréquence et dans les salles protégées contre les radiofréquences pour les systèmes d'imagerie par résonance magnétique, où l'intensité des perturbations électromagnétiques est élevée. - Page 337 Directives et déclaration du fabricant - émissions électromagnétiques Le système Virtual SVV™ est destiné à une utilisation en environnement électromagnétique spécifié ci-dessous. Le client ou l'utilisateur du système Virtual SVV™ doit s'assurer de son utilisation dans ledit environnement. Test d'émissions Conformité...
- Page 338 Directives et déclaration du fabricant - Immunité électromagnétique Le système Virtual SVV™ est destiné à une utilisation en environnement électromagnétique spécifié ci- dessous. Le client ou l'utilisateur du système Virtual SVV™ doit s'assurer de son utilisation dans ledit environnement. Test d'immunité...
- Page 339 étude de site électromagnétique doit être envisagée. Si l'intensité de champ mesurée à l'endroit où le système Virtual SVV™ est utilisé dépasse le niveau de conformité RF applicable ci-dessus, le système Virtual SVV™ doit être examiné pour vérifier son fonctionnement normal. Si un fonctionnement anormal est observé, des mesures complémentaires peuvent être nécessaires, telles que la réorientation ou relocalisation...
-
Page 340: Réglementations De Sécurité
Page 45 Réglementations de sécurité Déclaration de conformité Le marquage CE confirme que le système Virtual SVV™ est conforme aux exigences appropriées de la directive 93/42/CEE. Le système Virtual SVV™ est classifié en conséquence, comme appareil médical de Classe 1. - Page 341 Bruksanvisning - NO Virtual SVV™ D-0116078 – A – 2017/09...
- Page 342 Selskaper, navn og data som brukes i eksemplene er oppdiktet hvis ikke annet er oppgitt. Ingen del av dette dokumentet kan reproduseres eller overføres i noen form eller på noen måte, elektronisk eller mekanisk, for noe formål, uten skriftlig tillatelse fra Interacoustics A/S eller dets rettighetshavere.
- Page 343 Innhold INNLEDNING ..........................1 UTPAKKING OG INSPEKSJON ....................3 OPPSETT OG INSTALLASJON ....................7 3.1.1 Virtuelle virkelighetsbriller ..................7 3.1.2 Håndholdt fjernkontroll ....................7 3.1.3 Kontrollstasjon ......................8 3.1.4 Programvare ......................8 3.6.1 Feste ansiktsputen til de virtuelle virkelighetsbrillene ..........12 3.6.2 Feste hodestroppen ....................
- Page 344 STELL OG VEDLIKEHOLD ....................... 31 FEILSØKING ..........................37 GENERELLE TEKNISKE SPESIFIKASJONER ................ 39...
-
Page 345: Innledning
Tiltenkt bruk Virtual SVV™ er tiltenkt for måling av subjektiv visuell vertikal. Systemet lar den undersøkte pasienten gi en estimering av tyngdekraftvertikalen. Pasienten plasseres i total mørke og blir bedt om å rotere, ved hjelp av en fjernkontroll, en lysende linje, slik at den er parallell med tyngdekraftvertikalen. Disse responsene måles, registreres og vises i programvaren. - Page 346 Side 2 Produktbeskrivelse Virtual SVV™-systemet gir en metode for å evaluere pasientens egenskap til å justere en linje, hvor det ikke finnes andre synlige hjelpemidler, til å være parallell med tyngdekraften. Sensorisk informasjon nødvendig for å utføre denne oppgaven kommer hovedsakelig fra det vestibulære systemet i det indre øret.
-
Page 347: Utpakking Og Inspeksjon
Oppbevar tilsendt emballasje for fremtidig forsendelse Virtual SVV™ leveres i en egen emballasje som er spesialdesignet for Virtual SVV™. Ta vare på denne kartongen. Det vil være behov for den hvis instrumentet må sendes til service. - Page 348 Bruksanvisning for Virtual SVV™– NO Side 4 Merking Instrumentet har følgende merker: Symbol Forklaring Type B, anvendte deler. Pasientanvendte deler uten elektrisk tilkobling til pasienten. Se bruksanvisningen. WEEE (EU-direktiv). Dette symbolet angir at når sluttbrukeren ønsker å kassere dette produktet, må...
- Page 349 Side 5 Generelle advarsler og forholdsregler Tiltenkt bruksformål 1. Virtual SVV™-systemet er kun til bruk for medisinske formål. Det er ikke ment for privat bruk eller underholdning. 2. Virtual SVV™-systemet skal kun brukes ifølge instruksjonene i denne manualen. Målingene for den subjektive visuelle vertikalen er ment for bruk i klinisk diagnose av vestibulære sykdommer.
- Page 350 Side 6 Batterisikkerhet 1. Den håndholdte fjernkontrollen til Virtual SVV™ inneholder to oppladbare AA NiMH-batterier.Les instruksjonene i Kapittel 6 Skifte batterier nøye før du åpner batterirommet og skifter ut batteriene. 2. Bruk kun batteritypen VARTA klar-til-bruk – NiMN AA 1.2V 2600mAh.
-
Page 351: Oppsett Og Installasjon
Bruksanvisning for Virtual SVV™– NO Side 7 3 Oppsett og installasjon Komponentene til Virtual SVV™-systemet Virtual SVV™-enheten består av fire hovedkomponenter: Virtuelle virkelighetsbriller Kontrollstasjon Håndholdt fjernkontroll Virtuell SVV™-programvare 3.1.1 Virtuelle virkelighetsbriller De virtuelle virkelighetsbrillene gir pasienten en visning av de lysende linjen i et ellers helt mørkt rom. De er designet for å... -
Page 352: Kontrollstasjon
OtoAccess™-databasen må være installert før du installerer Virtual SVV™-programvare. Hvis du vil installere Virtual SVV™ på en PC med Windows, må du starte oppsettprogrammet i den korrekte mappen på installeringsmediet som fulgte med enheten. Merk at Windowsversjonen din bestemmer om du trenger 32-bit-versjonen eller 64-bit-versjonen på... - Page 353 Figur 3 2 Valg av mappebane for lisensfilen Lisensfilen finner du i mappen /Licence (lisens) på installasjonsmedia for Virtual SVV™. Trykk på «Browse (se gjennom)» for å velge banen som vist i dialogboksen. Installeringen kan kun fullføres etter at lisensfilen har blitt identifisert.
- Page 354 Side 10 Følgende standard mappebane vil bli valgt for installasjonsprosedyren. Figur 3 4 Velge mappebane for installering av Virtual SVV™ Velg «Neste» for å fortsette installeringen. Når installeringen er fullført, kan du lukke oppsettassistenten ved å velge «Finish» (fullfør). Figur 3...
- Page 355 , velg «File» (fil) og fortsett til «Setup» (oppsett). Velg fanen «Instruments» (instrumenter)-fanen. Gå inn i Virtual SVV™ via fanen «New Instrument Name» (Navn på nytt instrument). Velg Virtual SVV™ i både programvarefeltet og maskinvarefeltet. Velg «Create» (opprett) for å bekrefte Virtual SVV™...
-
Page 356: Feste Ansiktsputen Til De Virtuelle Virkelighetsbrillene
Bruksanvisning for Virtual SVV™– NO Side 12 Oppsett av maskinvare Virtual SVV™-systemet består av flere komponenter. Hver komponent, dets funksjon og installasjon er beskrevet nedenfor. 3.6.1 Feste ansiktsputen til de virtuelle virkelighetsbrillene Steg 1 Legg ansiktsputen med den svarte siden mot de virtuelle virkelighetsbrillene. For å gjøre dette enklere, kan du brette puten, slik som vist i figur 3–6. -
Page 357: Feste Hodestroppen
Bruksanvisning for Virtual SVV™– NO Side 13 Steg 3 Trykk ansiktsputen mot de virtuelle virkelighetsbrillene, fra midten av (se figur 3.3) og ut mot kantene. Sørg for at hele grensesnittet mellom ansiktsputen og de virtuelle virkelighetsbrillene har festet seg. Dette er nødvendig for å... -
Page 358: Håndholdt Fjernkontroll
Bruksanvisning for Virtual SVV™– NO Side 14 Steg 2 Brett den venstre enden av hodestroppen rundt hullet og fest med borrelåsen. Denne enden av hodestroppen forblir festet under testen. Hodestroppen kan nå dras gjennom hullet til høyre fra høyre til venstre. Hodestroppen kan justeres i lengden til å... -
Page 359: Forberede Kontrollstasjonen
Bruksanvisning for Virtual SVV™– NO Side 15 Figur 3 12 Elementer på den håndholdte fjernkontrollen OK-knapp for bekreftelse av justering Knapper for å rotere den lysende linjen til høyre/venstre LED som indikerer at strømmen er PÅ (grønn) ... -
Page 360: Lading Av Batteriet
Bruksanvisning for Virtual SVV™– NO Side 16 MERK Plassere kontrollstasjonen Det er viktig at det er fri sikt mellom de virtuelle virkelighetsbrillene og kontrollstasjonen, slik at det opprettholdes en pålitelig trådløs forbindelse. Vi anbefaler å plassere kontrollstasjonen i nærheten av pasienten. -
Page 361: Bruksanvisning
SVV™-systemet, helt til den grønne LED-lampen begynner å blinke. Slipp så knappen. Systemet starter opp etter 3 sekunder og den grønne LED-lampen slutter å blinke og lyser konstant. Når du vil deaktivere Virtual SVV™-systemet, trykker du på de to knappene og samtidig i omtrent fem sekunder til den grønne LED-lampen slukkes. - Page 362 å bruke feltene med pasientinformasjon som søkeparametere. Oppstart av Virtual SVV™-programvaren Velg ønsket pasient i OtoAccess -databasen og dobbelklikk deretter på Virtual SVV™ fra boksen Select Instrument (velg instrument) i høyre hjørnet øverst i OtoAccess , for å starte opp denne programvaren.
- Page 363 Bruksanvisning for Virtual SVV™ – NO Side 19 Navigere brukergrensesnittet til Virtual SVV™ Figur 4 3 Brukergrensesnittet til Virtual SVV™ Øverst i venstre hjørne finner du knappene for kommunikasjon med kontrollstasjonen, utskrift av testrapport og programpreferanser. Panel med informasjon om pasientens demografiske data. Flere detaljerte opplysninger om pasienten kan vises, men ikke endres på.
- Page 364 Bruksanvisning for Virtual SVV™ – NO Side 20 Innstillinger for Virtual SVV™ Du kan gå inn i innstillinger via tannhjul-ikonet øverst i panelet til venstre i brukergrensesnittet. Standardparametre kan justeres som beskrevet under. Figur 4 4 Dialog for innstillinger ...
- Page 365 Bruksanvisning for Virtual SVV™ – NO Side 21 Virtual SVV™-resultater Resultater fra hver undersøkelse samles og lagres i en resultatrapport i PDF-format. Alternativt, kan denne skrives ut. I tillegg, blir målingsdataene fra hver undersøkelse lagret og kan eksporteres i CSV- format.
- Page 366 Bruksanvisning for Virtual SVV™ – NO Side 22...
-
Page 367: Testprosedyrer
LED-lampen lyser konstant. Start-logoen med fire røde prikker vil vises på skjermbildet inne i de virtuelle virkelighetsbrillene. Valg av testmodus Virtual SVV™-programvaren gir deg valget mellom to forskjellige testmodi for måling av pasientens visuelle vertikal: Static Tilt (statisk vinkel) og Unilateral Centrifugation (unilateral sentrifugering) Du kan velge det ønskede testmoduset fra fanene i panelet til venstre. -
Page 368: Sette På De Virtuelle Virkelighetsbrillene
Bruksanvisning for Virtual SVV™ – NO Side 24 5.2.1 Sette på de virtuelle virkelighetsbrillene Løsne hodestroppen og be pasienten om å holde de virtuelle virkelighetsbrillene med ansiktsputen mot ansiktet sitt, slik at den kjennes komfortabel på. Sørg for at pasienten nå kan se alle de fire prikkene på... - Page 369 Bruksanvisning for Virtual SVV™ – NO Side 25 Figur 5 4 Eksempel på den lysende linjen slik pasienten ser den Begynne målingen Klikk på Start-knappen for å starte testmålingen. La pasienten bli kjent med hvordan enheten fungerer. Figur 5 5 Start-knappen Når du har klikket på...
-
Page 370: Konfigurering Og Bruk
De ønskede hodevinklene kan defineres etter behov i fanen Examination (undersøkelse) inne i innstillingene for Virtual SVV™. Du kan angi opptil fire hodevinkelposisjoner mellom 1 ° og 60 ° til venstre eller høyre. I vinduet ser du vinklene som allerede har blitt angitt. Gamle hodevinkler kan slettes ved å... -
Page 371: Vise Sekvensen For Målingsposisjoner
Bruksanvisning for Virtual SVV™ – NO Side 27 5.4.2 Vise sekvensen for målingsposisjoner En planlagt statisk vinkel-målingssekvens kan vises øverst i området til venstre i programvaren. Normalt vil 0°-hodevinkelen i rett opp-posisjon være valgt som standard og den korresponderende stolpen for denne målingen være farget oransje. -
Page 372: Avviksvinkel
Bruksanvisning for Virtual SVV™ – NO Side 28 5.4.5 Avviksvinkel Avviksvinkelen (Δ) mellom hodevinkelen og vinkelen til den lysende linjen blir presentert både grafisk og som en tallverdi. Avviksvinkel (Δ) = SVV-vinkel + hodevinkel Skalaen dekker et område på -25 ° til + 25 °. Den oransje pilen viser hele tiden avviksvinkelen når pasienten justerer på... -
Page 373: Bytte Målingssekvenser
240 ⁰/sekund. Hvis du ønsker en fullstendig beskrivelse av testprosedyren for unilateral sentrifugering, kan du se i manualen for Virtual SVV™, Additional Information (tilleggsinformasjon). Slette data Når alle testene er utført kan du slette lagret målingsdata ved å markere målingsoppføringen i tabellen og aktivere sletteikonet nederst til høyre i datatabellen. - Page 374 Bruksanvisning for Virtual SVV™ – NO Side 30...
- Page 375 å kalibrere på nytt. Skade på enhetene I følgende situasjonen skal Virtual SVV™-systemet ikke brukes før en kvalifisert inspektør har utført en kontroll: 1. En eller flere enheter har blitt påført mekanisk skade (f.eks. ved slag).
- Page 376 Bruksanvisning for Virtual SVV™ – NO Side 32 • Aldri avbryt ladesyklusen før den gule LED-lampen har slukket • Den integrerte timeren for null aktivitet i den håndholdte fjernkontrollen slår av systemet når det ikke har oppdaget aktivitet på en stund, for å spare på batteriet. Standardperioden for null aktivitet er satt til 10 minutter.
- Page 377 Bruksanvisning for Virtual SVV™ – NO Side 33 Steg 4 Kun følgende batteritype skal brukes: 2 x VARTA klar-til-bruk – NiMH AA 1,2 V 2600 mAh Alkaliske batterier skal aldri under noen omstendigheter brukes (ikke-oppladbare batterier). Den godkjente batteritypen finner du på etiketten inne i batterirommet. Hvis du bruker et ikke-oppladbart batteri, vil dette gjøre garantien ugyldig.
- Page 378 Bruksanvisning for Virtual SVV™ – NO Side 34 Steg 6 Skru forsiktig i igjen den svarte skruen slik at lokket ikke kan løsne. MERK Etter at du har satt inn nye batterier, er det viktig at ladeprosessen fullføres helt til den gule LED-lampen slukker.
- Page 379 Det er viktig at kunden (agenten) fyller ut returrapporten (RETURN REPORT) hver gang det oppstår et problem, og sender den til Interacoustics. Dette skal også gjøres hver gang et instrument blir sendt tilbake til Interacoustics. (Gjelder selvsagt også for de verst tenkbare tilfeller som fører til død eller alvorlig skade for pasient eller bruker).
- Page 380 Bruksanvisning for Virtual SVV™ – NO Side 36...
- Page 381 Du har ikke en gyldig Ugyldig lisens Lisensen matcher ikke programvaren. Avinstaller lisens for denne den gjeldende Virtual SVV™-programvaren fra det programvareversjonen. inkluderte mediet og bruk lisensen som fulgte med. Ta kontakt med Kontakt distributøren din for å få tilsendt en gyldig distributøren din.
- Page 382 Bruksanvisning for Virtual SVV™ – NO Side 38 Systemfunksjonskontroll Før du begynner pasienttesting, anbefaler vi at du tar en rask kontroll av hovedsystemfunksjonene. Hodevinkelsensorer Vipp de virtuelle virkelighetsbrillene til høyre og venstre for å kontrollere at en korresponderende avlesning vises på programvareskjermbildet.
- Page 383 Relativ luftfuktighet: 35 %–95 % Transportere systemet Virtual SVV™-systemet skal være avslått før det blir transportert. Enheten må transporteres i den original pakningen eller i en egnet transporteske. Enheten må beskyttes fra støt, fuktighet, støv og elektriske forstyrrelser under transport.
- Page 384 Side 40 Oppbevaring Hvis Virtual SVV™-systemet ikke brukes på en stund, oppbevar det i et tørt, støvfritt område som ikke er utsatt for direkte sollys. Batteriene må fjernes hvis enheten ikke skal brukes på en stund. Enheten må helst oppbevares i den originale pakningen.
- Page 385 Bruksanvisning for Virtual SVV™ – NO Side 41 Elektromagnetisk kompatibilitet (EMS) • Instrumentet er egnet for bruk i sykehusmiljøer bortsett fra nær aktivt HF kirurgisk utstyr og RF- skjermede rom av systemer for magnetisk resonanstomografi, der intensiteten av elektromagnetiske forstyrrelser er høye •...
- Page 386 Side 42 Veiledning og erklæring fra produsent - elektromagnetiske utslipp Virtual SVV™ er ment for bruk i det elektromagnetiske miljøet som er spesifisert under. Kunden eller brukeren av Virtual SVV™ bør være sikker på at det brukes i et slikt miljø.
- Page 387 Side 43 Veiledning og produsentens erklæring – elektromagnetisk immunitet Virtual SVV™ er ment for bruk i det elektromagnetiske miljøet som er spesifisert under. Kunden eller brukeren av Virtual SVV™ bør være sikker på at det brukes i et slikt miljø.
- Page 388 Dersom målt feltstyrke i området der Virtual SVV™ brukes er høyere enn det gjeldende RF-samsvarsnivået ovenfor, bør Virtual SVV™ overvåkes for å sikre normal drift. Dersom det observeres unormal ytelse, kan det være nødvendig med ekstra tiltak, slik som flytting eller endring av Virtual SVV™ sin retning.
- Page 389 Bruksanvisning - SV Virtual SVV™ D-0116081 – A – 2017/09...
- Page 390 Copyright © 2017-02-01 av Interacoustics. Alla rättigheter förbehålles. Informationen i detta dokument kan komma att ändras utan föregående meddelande. De företag, namn och data som används som exempel i denna dokumentation är fiktiva såvida inget annat anges. Ingen del av detta dokument får återges eller överföras i någon form eller på...
- Page 391 3.1.3 Basstation ......................... 8 3.1.4 Programvara ......................8 Installera databasen OtoAccess™ ..................8 Installera programvaran för Virtual SVV™ ................8 Installera drivrutinerna för Virtual SVV™ ................11 Konfigurera Virtual SVV™ i OtoAccess™ ................. 11 Hårdvaruinställningar ......................12 3.6.1 Sätta fast ansiktsdynan på VR-glasögonen ............12 3.6.2...
- Page 392 Rengöra Interacoustics produkter ..................34 Reparationer........................35 Garanti ..........................35 FELSÖKNING ..........................37 Felsökningsguide ......................37 Systemfunktionskontroll ....................38 ALLMÄNNA TEKNISKA SPECIFIKATIONER ................39 Systemkrav ........................39 Maskinvaruspecifikationer för Virtual SVV™-systemet ............. 40 Elektromagnetisk kompatibilitet (EMC) ................41 Säkerhetsföreskrifter ......................44...
-
Page 393: Inledning
Informationen kan användas av utbildad medicinsk personal för att diagnostisera vestibulära sjukdomar. Målgruppen för Virtual SVV™ är patienter från 8 år och uppåt. Virtual SVV™-systemet är endast avsett att användas av utbildad personal som t.ex. läkare, audiologer, fysioterapeuter, sjuksköterskor, hörselvårdspersonal eller personal med liknande kvalifikationer. -
Page 394: Produktbeskrivning
Sida 2 Produktbeskrivning Virtual SVV™-systemet används för att utvärdera patientens förmåga att, i frånvaro av några andra visuella intryck, justera en linje så att den står riktad rakt upp/ner (parallellt med gravitationen). Den sensoriska information som krävs för att utföra den här uppgiften är tillhandahålls främst av innerörats vestibulära system. -
Page 395: Uppackning Och Inspektion
Använd medföljande ”Return Report” (returrapport) Använd returrapporten för att hjälpa oss att garantera att problemet kan lösas på rätt sätt. Förvaring Om Virtual SVV™-enheten ska förvaras en tid ska du se till att den förvaras i enlighet med kraven i avsnittet med tekniska specifikationer. -
Page 396: Märkning
Virtual SVV™ Bruksanvisning – SV Sida 4 Märkning Följande märkning återfinns på instrumentet: Symbol Förklaring Delar av typ B. Patientapplicerade delar utan elektrisk kontakt med patienten. Se bruksanvisningen. WEEE (EU-direktiv). Denna symbol indikerar att den uttjänta produkten måste lämnas in till en återvinningscentral. -
Page 397: Allmänna Varningar Och Försiktighetsuppmaningar
Allmänna varningar och försiktighetsuppmaningar Avsedd användning 1. Virtual SVV™-systemet är endast avsett att användas i medicinskt syfte. Det är inte avsett för användning privat eller i underhållningssyfte. 2. Virtual SVV™-systemet får endast användas i enlighet med anvisningarna i denna bruksanvisning. - Page 398 Virtual SVV™ Bruksanvisning – SV Sida 6 Batterisäkerhet 1. Den handhållna fjärrkontrollen till Virtual SVV™ innehåller två uppladdningsbara AA NiMH-batterier. Läs igenom anvisningarna i Kapitel 6 Byta batterier noga innan du öppnar batteriluckan och byter ut batterierna. 2. Endast batteritypen VARTA Ready-to-use – NiMN AA 1,2 V 2600 mAh får användas.
-
Page 399: Installation Och Konfigurering
Virtual SVV™ Bruksanvisning – SV Sida 7 3 Installation och konfigurering Virtual SVV™-systemets delar Virtual SVV™-enheten består av fyra huvudkomponenter: VR-glasögon Basstation Handhållen fjärrkontroll Virtual SVV™ programvara 3.1.1 VR-glasögon VR-glasögonen utestänger allt ljus i omgivningen och projicerar den lysande linjen för patienten. De är designade att vara lätta och komfortabla. -
Page 400: Basstation
Windows-version som körs på datorn. En installationsassistent vägleder användaren under installationen. Figur 3 1 Första steget i installationen av Virtual SVV™ En giltig användarlicens i form av en licensfil ingår vid köp av en Virtual SVV™-enhet. Licensfilnamnet genereras som en kombination av “enhetsnummer.licens”. - Page 401 Installationen kan endast slutföras efter att licensfilen har identifierats. Observera att en giltig licens tillåter installation av Virtual SVV™-programmet på fler än en dator. Acceptera villkoren i licensavtalet för att fortsätta med installationen.
- Page 402 Virtual SVV™ Bruksanvisning – SV Sida 10 Följande förvalda sökväg väljs för installationsprocessen. Fig. 3 4 Välj sökväg för Virtual SVV™-installationen Välj “Nästa” för att fortsätta med installationen. Efter framgångsrik installation kan installationsassistenten stängas genom att välja ”Avsluta”. Fig. 3...
-
Page 403: Installera Drivrutinerna För Virtual Svv
Öppna OtoAccess , välj ”Fil” och fortsätt sedan till ”Installera”. Välj fliken ”Instrument”. Ange Virtual SVV™ i rutan ”Nytt instrumentnamn”. Välj Virtual SVV™ både i rutan för programvara och maskinvara. Välj ”Skapa/Create” för att bekräfta Virtual SVV™ som ett nytt instrument i OtoAccess . -
Page 404: Hårdvaruinställningar
Virtual SVV™ Bruksanvisning – EN Sida 12 Hårdvaruinställningar Virtual SVV™-systemet består av flera komponenter. Nedan beskrivs alla komponenter, deras funktioner och installationsprocedurer. 3.6.1 Sätta fast ansiktsdynan på VR-glasögonen Steg 1 Rikta in ansiktsdynan mot VR-glasögonen, med sidan med svart tyg mot VR-glasögonen. Vik ansiktsdynan lite för att underlätta proceduren, så... -
Page 405: Fästa Huvudremmen
Virtual SVV™ Bruksanvisning – EN Sida 13 Steg 3 Börja i mitten och tryck fast ansiktsdynan på VR-glasögonen (se Fig. 3.3) och arbeta utåt mot kanterna. Se till att alla delar av ansiktsdynan klistrar fast mot VR-glasögonen. Det här är nödvändigt för att inget ljus ska släppas in när patienten använder VR-glasögonen. -
Page 406: Handhållen Fjärrkontroll
Virtual SVV™ Bruksanvisning – EN Sida 14 Steg 2 Vik den vänstra änden av remmen runt slitsen och sätt fast den med kardborrebandet. Den här änden av remmen sitter fast under undersökningen. Remmen kan nu dras igenom den högra slitsen från höger till vänster. Remmens längd kan justeras för att passa patientens huvud och sedan fästas med kardborredynorna. -
Page 407: Förbereda Basstationen
Virtual SVV™ Bruksanvisning – EN Sida 15 Fig. 3 12 Fjärrkontrollens reglageknappar OK-knapp för bekräftelse av slutförd justering Knappar för vridning av den lysande linjen åt höger/vänster LED-indikator för ström PÅ (grön) LED-indikator för laddningsstatus (gul) ... -
Page 408: Batteriladdning
Virtual SVV™ Bruksanvisning – EN Sida 16 OBSERVERA Placering av basstationen För att säkerställa en tillförlitlig trådlös anslutning ska det inte finnas några hinder i mellan VR-glasögonen och basstationen. Det är rekommenderas att basstationen placeras i närheten av patienten. För att undvika elektriska störningar ska den inte placeras i närheten av datorn eller skärmen, eller nära någon annan... -
Page 409: Användningsanvisningar
PÅ-indikatorn börjar blinka och släpper sedan upp knappen. Systemet startar efter ytterligare 3 sekunder och den gröna PÅ-indikatorn växlar till fast grönt sken. För att stänga av Virtual SVV™-systemet trycker du ner de båda knapparna och samtidigt under ca 5 sekunder, till den gröna PÅ-indikatorn släcks. -
Page 410: Starta Virtual Svv™-Programmet
Sök patient för att använda patientuppgiftsrutorna som sökparametrar. Starta Virtual SVV™-programmet Välj önskad patient i databasen OtoAccess och dubbelklicka sedan på Virtual SVV™ i rutan Välj instrument i övre högra hörnet i OtoAccess för att starta programmet. -
Page 411: Navigera I Virtual Svv™-Programmet
Virtual SVV™ Bruksanvisning – SV Sida 19 Navigera i Virtual SVV™-programmet Fig. 4 3 Virtual SVV™-programmet Knapparna för att upprätta kommunikation med basstationen, skriva ut testrapporter och ändra inställningar finns i skärmbildens övre vänstra hörn. Panel med demografiska patientuppgifter. Mer detaljerade patientuppgifter kan visas men inte ändras. -
Page 412: Inställningar För Virtual Svv
Virtual SVV™ Bruksanvisning – SV Sida 20 Inställningar för Virtual SVV™ Inställningarna kan nås via kugghjullsikonen i Virtual SVV™-programmets övre vänstra panel. Förvalda parametrar kan ändras så som beskrivs nedan. Fig. 4 4 Inställningsdialog Allmänt Inställning av visningsspråk i programmet, ljusstyrka för den lysande linjen och tidursinställning för automatisk avstängning. -
Page 413: Virtual Svv™-Resultat
Virtual SVV™ Bruksanvisning – SV Sida 21 Virtual SVV™-resultat Resultaten för varje undersökning samlas på ett resultatdokument i PDF-format. Dokumentet kan också skrivas ut. Mätdata från varje undersökning sparas också och kan exporteras i CSV-format. Fig. 4 5 Resultatdokument Källa: UWE SCHÖNFELD & ANDREW H. CLARKE... - Page 414 Virtual SVV™ Bruksanvisning – SV Sida 22...
-
Page 415: Testprocedurer
, välj en patient och dubbelklicka på Virtual SVV™-instrumentet i rutan för instrumentval i övre högre hörnet av databasklientens skärmbild. Starta Virtual SVV™-systemet genom att hålla ner OK-knappen på fjärrkontrollen i ca två sekunder tills den gröna PÅ-indikatorn börjar blinka. Systemet startar efter ca tre sekunder och LED-indikatorn förblir tänd. -
Page 416: Montera Vr-Glasögonen
Virtual SVV™ Bruksanvisning – SV Sida 24 5.2.1 Montera VR-glasögonen Lossa huvudremmen och instruera patienten att hålla VR-glasögonen med ansiktskudden mot ansiktet så att de känns komfortabla. Säkerställ att patienten nu kan se alla fyra gränspunkter på displayen. Punkterna markerar gränsområdet för visningen av den lysande linjen. Dra åt huvudremmen så att VR- glasögonen sitter åt mot patientens huvud. -
Page 417: Påbörja Mätningarna
Virtual SVV™ Bruksanvisning – SV Sida 25 Fig. 5 4 Exempel på den lysande linjen som patienten ser den Påbörja mätningarna Klicka på knappen Start för att påbörja testet. Visa patienten hur enheten ska användas. Fig. 5 5 Startknapp Vid tryck på startknappen visas den lysande linjen i en slumpvis vinkel på displayen i VR-glasögonen. -
Page 418: Testa Med Statisk Lutning
Önskade huvudvinklar kan ställas in för sig under fliken Undersökning i inställningarna för Virtual SVV™. Upp till fyra olika huvudlutningspositioner mellan 1° och 60° till vänster och höger kan anges. I inmatningsrutan visas de tidigare angivna lutningsvinklarna. -
Page 419: Visa Mätpositionssekvensen
Virtual SVV™ Bruksanvisning – SV Sida 27 5.4.2 Visa mätpositionssekvensen Den planerade mätningssekvensen för statisk lutning kan visas i övre vänstra delen av skärmen i programmet. Normalt är upprätt huvudposition på 0° förvald och motsvarande block för mätningen skuggad i orange. Positionernas ordning kan ändras genom att markera önskat block. Förutom den aktuella mätpositionen som är markerad orange visas efterföljande mätposition nedanför... -
Page 420: Avvikelsevinkel
Virtual SVV™ Bruksanvisning – SV Sida 28 5.4.5 Avvikelsevinkel Avvikelsevinkeln (Δ) mellan huvudlutningsvinkeln och inställd vinkel för den lysande linjen presenteras grafiskt och som ett numeriskt värde. Deviationsvinkel (Δ) = SVV-vinkel + huvudlutningsvinkel Skalan täcker intervallet -25° till +25°. Den orangefärgade pilen indikerar deviationsvinkeln kontinuerligt medan patienten justerar den lysande linjen. -
Page 421: Växla Mätsekvenser
Virtual SVV™ Bruksanvisning – SV Sida 29 5.4.7 Växla mätsekvenser Efter varje mätning kan operatören välja mellan att behålla den aktuella mätpositionen eller växla till en annan. Det är dock rekommenderat att utföra 3 till 5 mätningar i varje position. - Page 422 Virtual SVV™ Bruksanvisning – SV Sida 30...
-
Page 423: Skötsel Och Underhåll
Skötsel och Underhåll Allmänna underhållsprocedurer Operatören av Virtual SVV™-systemet är ansvarig för att den medicinska enheten hålls i ett gott, funktionsdugligt skick. Funktionen och skicket på alla komponenter ska kontrolleras regelbundet. De kasserbara delarna (ansiktsdynor, huvudrem och säkerhetsrem) ska bytas ut eller kasseras så som beskrivs. - Page 424 Virtual SVV™ Bruksanvisning – SV Sida 32 • Undvik att avbryta laddningscykeln innan den gula LED-indikatorn släcks • Det inbyggda tiduret i fjärrkontrollen stänger av systemet efter en längre tids inaktivitet för att spara batterikapacitet. Förvald inaktivitetsperiod är 10 minuter. Den här perioden kan ökas (upp till 30 minuter) vid behov.
- Page 425 Virtual SVV™ Bruksanvisning – SV Sida 33 Steg 4 Endast följande batterityp får användas: 2 x VARTA Ready to use – NiMH AA 1,2 V 2600 mAh Batterier som inte är uppladdningsbara får aldrig användas. Batteritypen som ska användas anges på...
-
Page 426: Rengöra Interacoustics Produkter
Virtual SVV™ Bruksanvisning – SV Sida 34 Steg 6 Sätt tillbaka skruven igen försiktigt för att undvika att öppna batteriutrymmet oavsiktligen. OBSERVERA Efter isättning av nya batterier är det viktigt att laddningen slutförs tills den gula LED-indikatorn för batteriladdning släcks. Koppla inte ifrån basstationen från nätströmmen under laddning. -
Page 427: Garanti
Denna garanti ersätter alla andra garantier, uttryckliga såväl som underförstådda, samt Interacoustics alla övriga åtaganden eller skyldigheter. Interacoustics ger eller överlåter inte till någon annan representant eller person, vare sig direkt eller indirekt, behörighet att å Interacoustics vägnar anta något annat ansvar i samband med försäljning av Interacoustics produkter. - Page 428 Virtual SVV™ Bruksanvisning – SV Sida 36...
-
Page 429: Felsökning
Licensen ogiltig Licensen överensstämmer inte med programvaran. aktuell programversion. Avinstallera befintligt Virtual SVV™-program och Kontakta distributören. installera Virtual SVV™ från medföljande media och använd den medföljande licensen. Kontakta distributören för att erhålla en giltig licens Serienumret för det Licensen ogiltig Om en giltig licens finns tillgänglig kopierar du den... -
Page 430: Systemfunktionskontroll
Virtual SVV™ Bruksanvisning – SV Sida 38 Systemfunktionskontroll Innan en patientundersökning är det rekommenderat att utföra en snabb kontroll av de huvudsakliga systemfunktionerna. Huvudlutningssensorer Luta VR-glasögonen åt höger och vänster och kontrollera att motsvarande värden visas på indikatorerna i programvaran. -
Page 431: Allmänna Tekniska Specifikationer
Rel. luftfuktighet: 35 % - 95 % Transportera systemet Virtual SVV™-systemet ska vara avstängt under transport. Enheten ska transporteras i originalförpackningen eller i lämpligt transportemballage. Enheten ska skyddas från stötar, hög luftfuktighet, damm och elektriska störningar under transport. Undvik temperaturförändringar och/eller förändringar i den relativa luftfuktigheten när systemet används. -
Page 432: Maskinvaruspecifikationer För Virtual Svv™-Systemet
Sida 40 Förvaring Om Virtual SVV™-systemet inte används under en längre tid ska det förvaras på en torr, dammfri plats utan direkt solljus. Batterierna ska tas bort om enheten inte längre används under en längre tid. Enheten ska helst förvaras i originalförpackningen. -
Page 433: Elektromagnetisk Kompatibilitet (Emc)
Virtual SVV™ Bruksanvisning – SV Sida 41 Elektromagnetisk kompatibilitet (EMC) FÖRSIKTIG • Det här instrumentet är avsett för användning i sjukhusmiljö förutom nära aktiv kirurgisk HF- utrustning och RF-skärmade rum för MRI-utrustning, där den elektromagnetiska störningsintensiteten är hög • Användning av det här instrumentet i närheten av eller staplad på/med annan utrustning ska undvikas eftersom det kan resultera i felaktig funktion. - Page 434 Sida 42 Vägledning och tillverkarens deklaration - elektromagnetisk emission Virtual SVV™ är avsedd för användning i en sådan elektromagnetisk miljö som anges nedan. Köparen eller användaren av Virtual SVV™ ska säkerställa att enheten används i en sådan miljö. Emissionstest Efterlevnad Elektromagnetisk miljö...
- Page 435 Virtual SVV™ Bruksanvisning – SV Sida 43 Vägledning och tillverkarens deklaration - elektromagnetisk immunitet Virtual SVV™ är avsedd för användning i en sådan elektromagnetisk miljö som anges nedan. Köparen eller användaren av Virtual SVV™ ska säkerställa att enheten används i en sådan miljö. Immunitetstest...
-
Page 436: Säkerhetsföreskrifter
AM- och FM-sändningar och TV-sändningar kan inte förutsägas teoretiskt med exakthet. För utvärdering av den elektromagnetiska miljön orsakad av fasta RF-sändare, ska en elektromagnetisk platsundersökning övervägas. Om den uppmätta fältstyrkan på den plats där Virtual SVV™ används överstiger den tillämpliga RF-efterlevnadsnivån ovan, ska man kontrollera att Virtual SVV™...
Need help?
Do you have a question about the Virtual SVV and is the answer not in the manual?
Questions and answers