Table of Contents
Advertisement
Quick Links
Advertisement
Table of Contents

Related Manuals for NESTOR MARTIN M43


Summary of Contents for NESTOR MARTIN M43
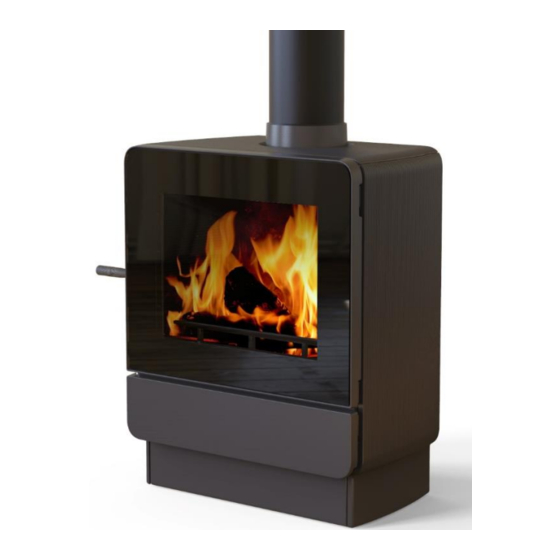
- Page 1 INSTALLATION, USE AND MAINTENANCE INSTRUCTIONS.
-
Page 2: Installation
inspected, first for creosote deposits (which should be 1. INTRODUCTION removed), and then for integrity of the stainless steel IMPORTANT! All local regulations, including those liner. Look for obvious bulges in the lining which may that refer to national or European regulations, must indicate the need to replace that section (use a bright be applied when installing this device. - Page 3 2.1.3. Summary of rules Chimney pipe We shall now provide a summary of the rules that Thermal Insulation should be followed when building a chimney: Use resistant and non-combustible materials for the connection between the appliance and Ceiling the chimney, which are protected if possible Metal Fitting against rust (enamelled steel, aluminized steel, stainless steel, …)
- Page 4 2.3. Above a Fireplace. 2.4. Wall Pass-Throughs In this type of installation, the chimney connector rises Whenever possible, design your installation so that the from the stove, turns no greater than 45ᵒ, and then wall connector does not pass through a combustible goes into the fireplace chimney.
- Page 5 3.1. THE WOODBOX® COMBUSTION SYSTEM 3. USE The Woodbox® system uses a balance of preheated Once your stove has been installed and connected to primary air, secondary air and natural flue draft in a the chimney, you are ready to light the fire. process of combustion and post-combustion, to obtain Before lighting your stove for the first time, please take extremely high efficiency and total controllability of the...
- Page 6 Rear flap: for adjusting the minimum air setting Motor for remote control kit (Optional). Front flap: allows air to Central flap: Brings air into the enter from below the stove stove for distribution above the fuel grate and down the glass (airwash) Burn rate knob Burn type lever...
- Page 7 3.3. USING THE AIR CONTROL. Your stove will have this control panel, allowing you to adjust both: the volume, by rotating the round knob, and the direction from which air enters the stove, by moving the lever vertically up or down. Always use the tool supplied with the stove when adjusting the controls.
- Page 8 Burn Type Lever: Controls the direction of the air flow, either above or below the grate; Adjust according to the type of combustion Lighting Burn Type Lever in mid position: Providing maximum air above and below grate for ignition Wood Burn Type Lever raised (position “A”): Providing top air for wood burning...
- Page 9 3.3.4. Minimum air setting. The adjustment knob for the minimum air intake can be found underneath the stove, on the air flap assembly. It is factory set. This knob allows you to increase, decrease or completely close the permanent air intake. Adjust this knob according to your chimney’s draught, when the chimney is at its operating temperature and using an accurate flue draught gauge.
- Page 10 Insert the receiver box into the supplied bracket with the remote control kit. Hang this support with the receiver box in the grooves that the rear of the stove has. See pictures below. Fig. 17 Fig.18 Connect the electrical lead to the receiver box and place the receiver box in its holder. Detailed instructions on the use of the remote control can be found with the remote control kit.
-
Page 11: Overnight Burning
By-pass 3.5. RELOADING THE STOVE To refuel the stove, first slide the Burn Type Lever to its mid position, and then rotate the Burn Rate Knob to maximum. Let the fire “liven up” for about one minute. Open the front door slightly and hold in this position about 30 seconds or until stove is drafting well. -
Page 12: Ash Removal
3.7. ASH REMOVAL 3.8. FUELS Recommended solid fuels: hornbeam, beech wood, IMPORTANT! Only handle the ash pan when the stove oak wood, fruit tree wood, birch wood and smokeless is cold. Always avoid opening the ash-pan if your fuel designated to be suitable for use in a closed stove is in operation. - Page 13 Use dry wood 4. SAFETY Some types of wood are easier to light than others. The Notify the elderly, as well as children of the high best fire wood, and easiest to light, is always dry wood. surface temperature of the stove in order to avoid Using dry wood will minimise creosote build-up.
-
Page 14: Cleaning And Maintenance
Unattended fires 5. CLEANING & MAINTENANCE Many fires have happened by having a stove on and WARNING: DO NOT CLEAN STOVE WHILE HOT. unattended for a long period of time. These fires usually occur because there are combustible materials Always keep the area around the unit clean and clear near the stove, they heat up more than normal when of furniture and other objects. - Page 15 WARNING: Replacement of damaged glass must be Ashes shall be removed, and disposed of in a steel done with original parts supplied by your dealer. Use container with a tightly fitting lid and moved outdoors of other materials could cause a safety hazard and immediately.
- Page 16 6. TRUHYBRID SYSTEM INSTALLATION...
- Page 18 7. MEASURES...
-
Page 19: Technical Specifications
8.TECHNICAL SPECIFICATIONS Puissance nominale / Nominale kracht / Potenza nominalle / Nominal power / Potencia nominal (kW) Température des gaz moyenne / Gemiddelde temperatuur van de gassen / Temperatura media gas / Average smoke temperature / Temperatura media de los gases (°C) Émissions CO / CO uitstoten / Emissioni CO / CO emissions / Emisiones CO (13% O2 - Vol%) 0,03 Particules / Stof / Particelle / Dust / Partículas (13% O2 –... - Page 20 SOTO DE LA MARINA - CANTABRIA Apdo. de correos 208 SANTANDER C07100DC676_1 ED: 04/2020...
Need help?
Do you have a question about the M43 and is the answer not in the manual?
Questions and answers