
Related Manuals for Chicco Bravo Primo


Summary of Contents for Chicco Bravo Primo
- Page 1 Read all instructions BEFORE assembly and USE of product. KEEP INSTRUCTIONS FOR FUTURE USE. Bravo Primo ® Stroller Owner's Manual ©2020 Artsana USA, INC. 09/20 IS0159E_03 www.chiccousa.com...
- Page 2 • NEVER USE STROLLER ON STAIRS • ONLY USE a Chicco infant car seat • USE OF THE STROLLER with a or escalators. You may suddenly with this stroller. child weighing more than 50 lbs lose control of the product and •...
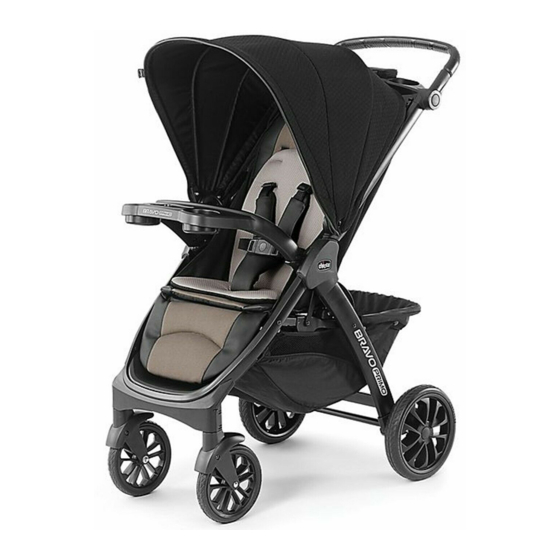
- Page 3 Components Components A. - Stroller Frame E. - Washers F. - Pins G. - Hubcaps B. - Front Wheels Note: Parts E, F, and G are in a small red bag with the rear wheels. H. - Child's Tray C. - Rear Wheels I.
- Page 4 How to Assemble Stroller How to Assemble Stroller WARNING 1B. Press down on the seat to make sure that the frame is locked. When opening the Stroller, ensure that your child, or other children, are at a safe distance. Ensure that during these operations, the movable parts of the Stroller do not come into contact with your child.
- Page 5 How to Assemble Stroller How to Assemble Stroller 2. Attach the Rear Axle Assembly (D) 3A. On one side of the Rear Axle, to the Stroller Frame, as shown. The slide a Rear Wheel (C), and turn the Rear Axle Assembly is attached when Wheel until the brake tab fits into the snap buttons click into the holes one of the grooves on the Wheel.
- Page 6 How to Assemble Stroller How to Assemble Stroller WARNING 3C. Secure the Wheel to the Rear Axle using a Pin (F). Push the straight side Check that the wheels are fitted correctly. of the Pin through the hole on the Rear Axle.
-
Page 7: How To Adjust The Handle
How to Adjust the Handle How to Assemble Stroller 4. Attach the Front Wheel (B) to 5. Rotate the Parent Handle up from “CLICK!” the Stroller Frame by lining up and the closed position until it locks into inserting the Front Wheel Pin into the the 1st position. - Page 8 How to Use the Recline Panel How to Recline the Seat 6. To Recline the Backrest, squeeze 7. To reveal the mesh on the recline both levers together and pull down panel, unzip the zippers down both on the Backrest. To adjust the sides.
- Page 9 How to Use the Canopy How to Use the Canopy 8A. Pull the front edge of the Canopy 8C. To open the mesh panel on the forward to open the Canopy. Canopy, fold the fabric section Extending to last panel reveals a forward.
- Page 10 9A. Push down on the Brake Lock It is recommended that a child under Levers located on each side of the 6 months old ride in the Chicco Rear Wheel assembly, to lock the infant car seat as part of the travel Rear Wheels.
- Page 11 How to Use Safety Harness How to Use Safety Harness WARNING 11. This stroller has a 5-point safety harness. The Shoulder Strap Never leave child unattended. Avoid serious injury from falling or sliding out. Connector is designed to break away Always use seat belt.
- Page 12 How to Use the Soft Insert How to Use Safety Harness 13. The length of the Shoulder Straps 14. Place the Soft Insert (I) into the can be adjusted by pulling on the Stroller seat and thread the Shoulder adjustment buckles to tighten or Straps, Waist Straps and Crotch Strap loosen.
-
Page 13: How To Use The Basket
How to Use the Child's Tray How to Use the Basket 16A. Inside the Basket on the back 15A. Insert the Child's Tray (H) panel, locate 2 storage pockets. Tongues into the corresponding openings on the Stroller Frame. To release the Child's Tray, press in on “CLICK!”... - Page 14 How to Use the Accessory Pocket How to Remove the Accessory Pocket 17. To access the Accessory Pocket, 18. To remove the Accessory Pocket, lift up on the front edge and undo the flip out the plastic tab from the hook and loop fastener.
- Page 15 19A. Pull the Accessory Pocket out of the opening on the Parent Tray. ONLY USE a Chicco infant car seat with this product. Make sure to properly install the Child's Tray prior to using the Chicco infant car seat. Always make sure child is properly harnessed in the car seat.
- Page 16 Using the Chicco Infant Car Seat How to Remove Front Wheels 21. Squeeze the Release Handle on 22. Remove the Front Wheels by the back of the infant car seat and lift pushing in on the Release Button, just up on the carrying handle, to remove above the wheel (as shown).
- Page 17 How to Close the Stroller How to Close the Stroller WARNING 24. Pull up on the Fold Handle, the Stroller Legs and Seat back will fold When folding the Stroller, make sure that your child and other children are at down and the front wheels will a safe distance.
-
Page 18: How To Remove The Seat
How to Remove the Seat How to Remove the Seat 25. Pull the Canopy Zipper up and around the outside of the Canopy, as shown. Then, pull out on the Canopy Clips to remove the Canopy from both sides of the Stroller Frame. Fabric Clips Note: It is not required for the Canopy to be removed to use Stroller... - Page 19 How to Remove the Seat How to Remove the Seat 27. Lift up the Footrest Pad on the 26B. The fabric will still be attached to the Parent Tray, as shown. Lift up front of the stroller to locate two sets and remove the Flexible Tab from the of straps.
- Page 20 Steps 20 thru 21 to Remove the back section of the Seat attach the Chicco infant car seat to the Stroller Frame. Pan and Seat Pad Assembly. Note: Stroller Canopy can be used in this Mode for additional coverage of the infant.
-
Page 21: How To Attach The Seat
How to Attach the Seat How to Attach the Seat 30A. Fold the bottom of the seat pad 30C. Press down on the back edge up to expose Seat Bracket. From the of the Seat Bracket until it clicks into back of the stroller, insert the seat place, making sure both sides lock between the stroller frame and tilt... -
Page 22: Cleaning And Maintenance
For More Information Cleaning and Maintenance This product requires regular maintenance. The cleaning and maintenance of the If you have any questions or comments about this product, or are missing any of stroller must only be carried out by an adult. the parts please do not return this product to the store. - Page 23 www.chiccousa.com...
Need help?
Do you have a question about the Bravo Primo and is the answer not in the manual?
Questions and answers
Where does the single **** the soft fame go?