Table of Contents
Advertisement
Quick Links
Advertisement
Table of Contents

Related Manuals for DeDietrich dpi7688xt


Summary of Contents for DeDietrich dpi7688xt
- Page 1 EN USER GUIDE INDUCTION HOB...
- Page 2 Follow us on www.dedietrich-electromenager.com...
-
Page 3: Table Of Contents
CONTENTS Important safety advice and precautions.........3 Presentation ..................7 Installation ...................8 Unpacking ....................8 Fitting ....................8 Connection ..................10 Use ..................... 11 Control panel glossary ................ 11 Choice of cookware ................12 Cooking zone selection ..............12 Powering On / Off ................12 Power setting ..................12 Setting the timer .................13 Locking the controls................13 Clean lock function ................14... -
Page 4: Important Safety Advice And Precautions
IMPORTANT SAFETY ADVICE AND PRECAUTIONS This user guide is also available on the brand's web site. Please read these instructions before installing and using your appliance. They have been written for your safety and the safety of others. Keep this user guide with your appliance. - Page 5 IMPORTANT SAFETY ADVICE AND PRECAUTIONS glass worktop very the pacemaker must be sturdy; however, it is not designed and programmed unbreakable. in compliance with the Do not place any hot lids regulations that apply flat on your cooking hob. A to it.
- Page 6 IMPORTANT SAFETY ADVICE AND PRECAUTIONS installation regulations. A the manufacturer of the disconnection device must cooking appliance or listed be incorporated into the as suitable in the user fixed wiring. guide, or included with power cable the appliance. The use of damaged, should unsuitable protectors could...
- Page 7 - The sensor is not designed to go in an oven. We, Brandt France, declare that the appliance equipped with the Perfect Sensor complies to directive 2014/53/EU. The full EU declaration of compliance is available on the following website: www.dedietrich- electromenager.com.
-
Page 8: Presentation
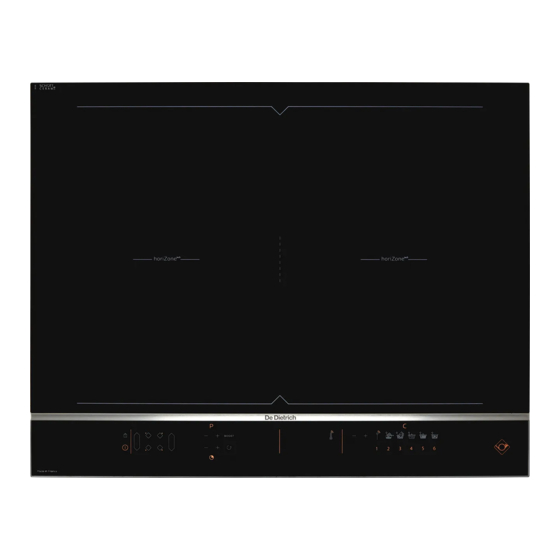
Thanks to the De Dietrich Perfect Sensor hob with its connected temperature sensor, you can perform every culinary gesture expertly and accurately, cook all meats and fish according to your tastes and succeed in your preparations, by adjusting the core temperature of your preparations. -
Page 9: Installation
1.1 UNPACKING Remove all the protective elements from the hob, the sensor and the sensor stand. Your sensor is delivered with a battery that you have to install (1.0). To insert the battery, unscrew the cover on the back of the sensor using a coin. Insert the battery following the polarity (+ upwards), then screw the cover back on. - Page 10 - Fitting flush with the worktop diagram (1.2.3) Check that air can flow correctly between the front and back of your hob. If you are installing the hob above a drawer (1.2.6) or above a built-in oven (1.2.7), comply with the dimensions provided on the illustrations to ensure a sufficient air outlet at the front.
-
Page 11: Connection
1. 3 ELECTRICAL CONNECTIONS This hob must be connected to the mains via an all-pole cut-off device that complies with current installation regulations. A disconnection device must be incorporated into the fixed wiring. Identify the type of cable of your hob according to the number of wires and colours: - 5-wire cable (1.3.1):... -
Page 12: Use
• Puissance - Minute Puissance - Minute Control panel glossary = Switch on and off = Locking / Clean Lock (locks the hob during cleaning) = Choice of cooking zone = Display (Power / minutes) = Thermometer function (temperature display) = Sensor adjustment = Cooking functions Expert... -
Page 13: Choice Of Cookware
• When several cooking zones are used 2.1 CHOICE OF COOKWARE at the same time, the hob manages the Most cookware is compatible with power distribution, so as not to exceed induction. Only glass, terracotta, its total power. aluminium without a special base, copper and some non-magnetic stainless steels 2.3 SWITCHING ON/OFF do not work with induction cooking. -
Page 14: Setting The Timer
• - Set the time with - or +. 2.5 SETTING THE TIMER Each cooking zone has a dedicated timer. This can be set once the relevant cooking area is in operation. To turn it on or change the timing, press - the display of the remaining time is . -
Page 15: Clean Lock Function
• Table locked in operation give a short press on the key The display of cooking zones in When the hob is in operation (at least operation alternately indicates power one burner on), give a short press on the and the locking symbol . . -
Page 16: Perfect Sensor Function
• Pairing the sensor with the hob - Intermediate (adjustable) Pairing takes place only once when using the sensor for the first time or when replacing it. The hob must be off. - Slanted 1 - Press the on / off button on the back of the sensor for 3 seconds;... - Page 17 • then the “°” is shown until the setpoint temperature is reached. The selected The sensor temperature is refreshed function is shown alternately with the every 1.5 seconds. temperature. There is a beeping sound to indicate that the “°” has been set. The Cooking functions temperature will be maintained until you To access the different cooking functions,...
- Page 18 • milk. In this case, use the slow cooking function. Vacuum cooking This function allows you to cook food at a temperature that can be adjusted between 45 and 85°C. The setpoint temperature is 60°C. Warm This function allows you to warm food at a temperature that can be adjusted between 65 and 80°C.
- Page 19 • Technical information regarding the Warning: sensor: - You can programme a time in sensor Parameter Specifications Notes mode. In this case, the time is displayed Voltage 2.5 - 3V CR2032 battery alternately with the temperature. - The sensor can only be used on one Autonomy with new battery 300 hours...
-
Page 20: Cooking Instructions
• Cooking instructions: Basic ingredient or Function Quantity (g) Temperature (°C) Time Tips dish White meat 150g chicken fillets 80°C 8 to 12 min Flatten the breasts (1/1.5 cm high) 30s to 2 min/side Leave the meat to rest for 5 min (depending on 150 to 200g 35 to 45°C (blue) - Page 21 • Cooking instructions: Basic ingredient or Function Quantity (g) Temperature (°C) Time Tips dish Adjust the cooking container 2 hours 30 to 3 to the quantity to cook. Add Stew 1000 - 4000 70 - 80 hours the peeled potatoes before the last 1/2 hour of cooking Adjust the cooking container Veal blanquette...
-
Page 22: Safety And Recommendations
• "Auto-Stop" system 2.10 SAFETY PRECAUTIONS AND If you forget to switch off a pan, your RECOMMENDATIONS hob has an “Auto-Stop” safety function that automatically switches off the Residual heat forgotten cooking zone after a pre-set After intensive use, the cooking area you time (between 1 and 10 hours based on have just used will remain hot for several the power level setting). -
Page 23: Care
• CARE Looking after the sensor Looking after the hob - Clean the sensor before using for the For light soiling, use a kitchen sponge. first time Use hot water to wet the area to be - Only use neutral products, no abrasive cleaned and then wipe dry. -
Page 24: Problems
• PROBLEMS Code F7 is displayed. When using for the first time T h e e l e c t r o n i c c i r c u i t s h a v e Yo u n o t i ce that s om ething overheated... -
Page 25: Environment
• PROBLEMS The sensor flashes red: - Before switching off if the battery is too weak. event loss communication, flashes and then green depending on whether connection with the hob is restored or not. • ENVIRONMENT ENVIRONMENTAL COMPLIANCE Contact your local authority or retailer for information on used appliance collection The packaging material of this appliance points close to your home. -
Page 26: Customer Service
• CUSTOMER SERVICE SERVICING AND REPAIRS Any repairs to your appliance must be made by a qualified professional accredited to work on the brand. When calling, please provide the full references of your appliance (commercial reference, service reference, serial number), so that we can handle your call more efficiently. -
Page 27: Perfect Sensor Collection
- Slow cooking function (80°C) - Recall function (reminder of settings) - Boil function (100°C) Consumer information: www.dedietrich-electromenager.com 0892 02 88 04 (€0.50 incl. tax/min from a landline) After Sales Service: +33 0)9 69 39 34 34 (free service) CZ5703843_00_EN...
Need help?
Do you have a question about the dpi7688xt and is the answer not in the manual?
Questions and answers