
Related Manuals for GE DigitalFlo XGM868i


Summary of Contents for GE DigitalFlo XGM868i
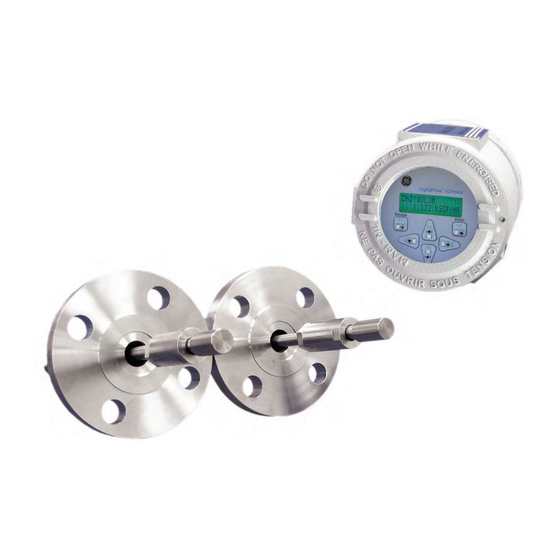
- Page 1 Measurement & Control Flow DigitalFlow™ XGM868i Panametrics General-Purpose Gas Flow Transmitter (1 & 2 Channel) Service Manual 910-197S Rev. F January 2014...
- Page 3 DigitalFlow™ XGM868i Panametrics General-Purpose Gas Flow Transmitter (1 & 2 Channel) Service Manual 910-197S Rev. F January 2014 www.ge-mcs.com ©2014 General Electric Company. All rights reserved. Technical content subject to change without notice.
- Page 4 [no content intended for this page]...
- Page 5 Preface Information Paragraphs • paragraphs provide information that provides a deeper understanding of the situation, but is not essential to Note the proper completion of the instructions. • paragraphs provide information that emphasizes instructions that are essential to proper setup of the Important equipment.
- Page 6 Environmental Compliance Waste Electrical and Electronic Equipment (WEEE) Directive GE Measurement & Control is an active participant in Europe’s Waste Electrical and Electronic Equipment (WEEE) take-back initiative, directive 2002/96/EC. The equipment that you bought has required the extraction and use of natural resources for its production. It may contain hazardous substances that could impact health and the environment.
-
Page 7: Table Of Contents
Contents Chapter 1. Calibration 1.1 Introduction ................... .1 1.2 Accessing the Calibration Menu . - Page 8 Contents Chapter 4. Parts Replacement 4.1 Introduction...................23 4.2 Removing the Circuit Board Assembly .
-
Page 9: Chapter 1. Calibration
Chapter 1. Calibration Chapter 1. Calibration 1.1 Introduction Calibrating the Model XGM868i’s analog outputs and inputs is explained in this chapter. In addition, testing the optional totalizer, frequency and alarm relay outputs is discussed. The chapter includes the following specific topics: •... -
Page 10: Calibrating And Testing Analog Outputs
Chapter 1. Calibration 1.3 Calibrating and Testing Analog Outputs Every Model XGM868i flowmeter includes two built-in analog outputs (A and B) at terminal block J1, which is designated as Slot 0. Additional analog outputs may be added to the Model XGM868i by installing an appropriate option card in Slot 1. -
Page 11: Calibrating The Low End Of The Output Range
Chapter 1. Calibration 1.3.2 Calibrating the Low End of the Output Range 1. From the Keypad Program, press the right arrow key to scroll to the CALIB menu. Press [Enter]. 2. In the Cal menu, scroll to the Slot 0 or Slot 1 option, and press [Enter]. Note: The option only appears in the menu if an option card has been installed in this slot. -
Page 12: Calibrating Analog Inputs
Chapter 1. Calibration 1.3.4 Testing Output Linearity (cont.) Table 1 lists the expected ammeter readings at various % Full Scale settings, for both 4-20 mA and 0-20 mA scales. Refer to this table to verify the accuracy of the ammeter readings taken above. Table 1: Expected Ammeter Readings % Full Scale 4-20 mA Scale*... -
Page 13: Preparing For Calibration
Chapter 1. Calibration 1.4.1 Preparing for Calibration Prepare for the calibration procedure by connecting a Slot 0 analog output (or an independent calibrated current source) to the desired input on the option card. See Figure 4 on page 12 to identify the IN(+) and RTN(-) pins for the desired input on terminal block J2. -
Page 14: Calibrating Rtd Inputs
Chapter 1. Calibration 1.5 Calibrating RTD Inputs RTD analog inputs may be added to the XGM868i by installing an appropriate option card in Slot 1. The option card contains two or four RTD inputs that are designated as A, B, C and D. Both the set point and slope point values for each input must be specified prior to use. -
Page 15: Testing Alarm Relays
Chapter 1. Calibration 1.6 Testing Alarm Relays Alarm relays may be added to the Model XGM868i by installing an appropriate option card in Slot 1. This option card contains two or four alarm relays, which are designated A, B, C and D. 1.6.1 Preparing for Testing Prepare for the testing procedure by connecting an ohmmeter to the NO and COM pins of the desired alarm on the option card. -
Page 16: Testing Totalizer Outputs
Chapter 1. Calibration 1.7 Testing Totalizer Outputs Totalizer outputs may be added to the Model XGM868i by installing an appropriate option card in Slot 1. This option card contains two or four totalizer outputs, which are designated A, B, C and D. 1.7.1 Preparing for Testing Prepare for the testing procedure by connecting a pulse counter to the desired output of the option card. - Page 17 Chapter 1. Calibration 1.7.2 Testing the Output (cont.) 4. Use the arrow keys to enter a value for the minimum pulse on time (between 1 sec and 10,000 sec) for the frequency of the totalizer pulses and press [Enter]. Note: A complete pulse consists of equal amounts of ON and OFF times. Choose a value that is compatible with the pulse counter to be used.
-
Page 18: Testing The Frequency Outputs
Chapter 1. Calibration 1.8 Testing the Frequency Outputs Frequency outputs may be added to the Model XGM868i by installing an appropriate option card in Slot 1. This option card contains two or four frequency outputs, which are designated A, B, C and D. 1.8.1 Preparing for Testing Prepare for the testing procedure by connecting a frequency counter to the desired output on the option card. - Page 19 Chapter 1. Calibration [Esc] [Enter] [Esc] Keypad Pgm. PROG RESET CALIB CNTRS See Programming Manual Reset Totals DARKN LITEN STORE ABORT SLOT0 SLOT1 Slot 1 Option Card Slot 0 Analog Outputs Slot 1 Analog Inputs Slot 1 Alarm Relays ANALOG OUTPUT press [EXIT] key ALARMS 4 mA...
- Page 20 Chapter 1. Calibration -01 (AA,HH) -02 (FF,TT,FT,CT,CF) -03 (FO,TO,CO) -04 (FA,FH,TA,TH,CA,CH) -05 (CI,TI,FI) -06 (CR,FR,TR) Pin 1 Pin 1 Pin 1 Pin 1 Pin 1 Pin 1 -07 (CIR) -08 (AI,HI) -09 (OI) -10 (OR) -11 (AR,HR) -12 (II) Pin 1 Pin 1 Pin 1 Pin 1...
-
Page 21: Chapter 2. Error Codes
Chapter 2. Error Codes Chapter 2. Error Codes 2.1 Introduction The Model XGM868i ultrasonic flow transmitter is a reliable, easy to maintain instrument. When properly installed and operated, as described in the Startup Guide, the meter provides accurate flow rate measurements with minimal user intervention. - Page 22 Chapter 2. Error Codes E0: No Error Problem: No error condition currently exists. This message appears briefly to confirm that the response to another error message has corrected the Cause: problem. No action is required. Action: E1: Low Signal Problem: Poor ultrasonic signal strength or the signal exceeds the limits entered via the Keypad Program.
- Page 23 Chapter 2. Error Codes E4: Signal Quality The signal quality is outside the limits programmed in the Channelx-Set up-Signal submenu of the Problem: Keypad Program. Cause: The peak of the upstream or downstream correlation signals has fallen below the correlation peak limit, as set in the Channelx-Set up-Signal submenu.
- Page 24 Chapter 2. Error Codes E9: Pressure In Problem: This message indicates a pressure input error. The pressure exceeds the specified limits for the analog inputs option card or no input device is connected. Cause: Check the pressure transmitter and the connecting cable. Refer to Chapter 1, Calibration, and recalibrate Action: the analog inputs option card.
-
Page 25: Chapter 3. Diagnostics
Chapter 3. Diagnostics Chapter 3. Diagnostics 3.1 Introduction This chapter explains how to troubleshoot the Model XGM868i if problems arise with the electronics enclosure, the flowcell, or the transducers. Indications of a possible problem include: • display of an error message on the LCD display screen •... - Page 26 Chapter 3. Diagnostics Displaying Diagnostic Parameters (cont.) For a 1-Channel XGM868i, the data for Channel 1 is displayed automatically, and you can skip to step 8. However, for a 2-Channel meter, the channel data to be displayed must be specified at the following prompt. 7.
- Page 27 Chapter 3. Diagnostics Displaying Diagnostic Parameters (cont.) Table 3: Available Diagnostic Parameters Option Bar Description Good SS up Displays the signal strength for the upstream transducer. 50–75 <50 or >75 SS do Displays the signal strength for the downstream transducer. 50–75 <50 or >75 SNDSP...
-
Page 28: Flowcell Problems
Chapter 3. Diagnostics 3.3 Flowcell Problems If preliminary troubleshooting with the Error Code Messages and/or the Diagnostic Parameters indicates a possible flowcell problem, proceed with this section. Flowcell problems fall into two categories: • gas problems • pipe problems. Read the following sections carefully to determine if the problem is indeed related to the flowcell. If the instructions in this section fail to resolve the problem, contact the factory for assistance. -
Page 29: Pipe Problems
The accuracy of the flow rate measurements is no better than the accuracy of the programmed pipe dimensions. For a flowcell supplied by GE, the correct data will be included in the documentation. For other flowcells, measure the pipe wall thickness and diameter with the same accuracy desired in the flow rate readings. Also, check the pipe for dents, eccentricity, weld deformity, straightness and other factors that may cause inaccurate readings. -
Page 30: Transducer Problems
Any transducer damaged in this manner must be replaced. Contact GE for information on transducers in materials suitable for the application. 3. INTERNAL DAMAGE: An ultrasonic transducer consists of a ceramic crystal bonded to the transducer case. The bond between the crystal and the case or the crystal itself may be damaged by extreme mechanical shock and/or temperature extremes. -
Page 31: Chapter 4. Parts Replacement
Chapter 4. Parts Replacement Chapter 4. Parts Replacement 4.1 Introduction The Model XGM868i has been designed to permit easy on-site upgrades and parts replacement. See Figure 6 on page 33 for details of the standard XGM868i electronics enclosure assembly. The instructions in this chapter, along with a few common tools, are all that is required to perform the following tasks: •... -
Page 32: Removing The Circuit Board Assembly
Chapter 4. Parts Replacement 4.2 Removing the Circuit Board Assembly All parts replacement procedures for the Model XGM868i require the removal of the circuit board assembly from the electronics enclosure. Therefore, complete the instructions in this section before attempting any other service tasks. The Model XGM868i circuit board assembly consists of circular front and rear circuit boards with several rectangular circuit boards sandwiched between the circular end boards and oriented perpendicular to them. - Page 33 Chapter 4. Parts Replacement Removing the Circuit Board Assembly (cont.) 4. From the rear of the enclosure, disconnect the power line leads from terminal block TB5. Unplug terminal blocks TB1 to TB6 from connectors J1-J4. 5. Refer to Illustration 2 in Figure 6 on page 33, and remove the four terminal board mounting screws and the ground screw.
-
Page 34: Replacing The Lcd Display/Interconnect Board Subassembly
Chapter 4. Parts Replacement 4.3 Replacing the LCD Display/Interconnect Board Subassembly The LCD display normally provides years of dependable service, but it is easily field-replaceable when necessary. To replace the LCD display, see Figure 7 on page 34 for the component locations, and complete the following steps: 1. -
Page 35: Replacing The Fuse
Chapter 4. Parts Replacement 4.4 Replacing the Fuse Note: This procedure applies only to the fuse on the DC power supply. The fuse on the AC power supply is not field-replaceable; please consult the factory for replacement. If it has been determined that the fuse in the XGM868i has been blown, complete the following steps to install a new fuse: 1. -
Page 36: Replacing The User Program
Chapter 4. Parts Replacement 4.5 Replacing the User Program The Model XGM868i’s User Program is stored on an erasable programmable read only memory (EPROM) chip. The EPROM, which is designated as component U6, is mounted in a socket on the front of the main circuit board. EPROM replacement may be required to replace a defective chip or to upgrade to a newer software version. -
Page 37: Installing An Option Card
Chapter 4. Parts Replacement 4.6 Installing an Option Card The Model XGM868i flowmeter can accommodate up to two option cards. A data logging or RS485 card may be installed in Slot 2 and a variety of I/O option cards are available for installation in Slot 1. To install an option card, see Illustrations 9, 10 and 11 in Figure 8 on page 35 and complete the following steps: 1. -
Page 38: Attaching An Optional Heat Sink To An I/O Option Card
Chapter 4. Parts Replacement 4.6.1 Attaching an Optional Heat Sink to an I/O Option Card If you need to attach an optional heat sink to an I/O option card (the TI, TR, FI or FR options in Appendix B of the Startup Guide), refer to Illustration 9 in Figure 8 on page 35 and complete the following steps: 1. - Page 39 Chapter 4. Parts Replacement 4.7.1 Assembling the Circuit Board Assembly (cont.) Note: If the thermal gap filler pad of the power supply board has been damaged, you must remove and replace it before reinserting the power supply board. First, remove and discard the damaged pad. Then remove the blue protective liner from the new pad and apply it with the white face against the power supply board.
-
Page 40: Installing The Circuit Board Assembly
Chapter 4. Parts Replacement 4.7.2 Installing the Circuit Board Assembly Be sure that the circuit board assembly is completely assembled, as described in the previous section. Then, refer to Illustrations 1, 2 and 3 in Figure 6 on page 33 and install the circuit board assembly into the electronics enclosure as follows: 1. - Page 41 Chapter 4. Parts Replacement Set Screw Set Screw Rear Cover (solid) Front Cover with Window Illustration 1 Electronics Assembly Enclosure Assembly Mounting Screw with Washer Assembly (4 places) Terminal Block on Slot 2 Option Card Ground Screw Label Plate with Ground Symbol Grounding Jumper Wire Illustration 2...
- Page 42 Chapter 4. Parts Replacement Mounting Screw and Fuse Cover DC Power Supply Board Washer Assembly (3 places) P9 Connector on Terminal Board LCD Display, connects to Keypad Board and J10 Connector on Main Board Interconnect Board J2 Connector Sub-Assembly P1 Connector Bracket Screw Green Grounding Jumper P4 Connector...
- Page 43 Chapter 4. Parts Replacement Screw with Washer Assembly and Mating Nut (not shown) I/O Heatsink Bridge (2 places) Gap Filler (white surface Power Supply Heatsink facing the Bridge) Screw, Lock Washer and Flat Washer (2 places) Screw with Washer Assembly (3 places) Gap Filler Power Supply Board (white surface...
- Page 44 Chapter 4. Parts Replacement DigitalFlow™ XGM868i Service Manual...
-
Page 45: Appendix A. Service Record
Appendix A. Service Record Appendix A. Service Record A.1 Introduction Whenever any service procedure is performed on the Model XGM868i flow transmitter, the details of the service should be recorded in this appendix. An accurate service history of the meter can prove very helpful in troubleshooting any future problems. - Page 46 Appendix A. Service Record Table 6: Service Record (cont.) Date Description of Service Performed By DigitalFlow™ XGM868i Service Manual...
-
Page 47: Diagnostic Parameters
Appendix A. Service Record A.3 Diagnostic Parameters After a successful initial installation of the Model XGM868i and whenever any system malfunction is noticed, the values for the diagnostic parameters should be entered in Table 7. Table 7: Diagnostic Parameters Parameter Initial Current Parameter... - Page 48 [no content intended for this page] DigitalFlow™ XGM868i Service Manual...
-
Page 49: Appendix B. Calibration And Testing With Panaview
Appendix B. Calibration and Testing with PanaView Appendix B. Calibration and Testing with PanaView B.1 Introduction This appendix explains how to calibrate the Model XGM868i’s analog outputs and inputs using PanaView™ interface software. In addition, testing the optional totalizer, frequency and alarm relay outputs, and XGM hardware and software is discussed. -
Page 50: Accessing The Calibration/Test Menu
Appendix B. Calibration and Testing with PanaView B.2 Accessing the Calibration/Test Menu The Calibration/Test menu is accessed through the New Meter Browser menu of PanaView software. Use this menu to calibrate and test the analog outputs, as well as to calibrate and/or test any option cards that are installed in Slot 0 expansion . -
Page 51: Calibrating Slot 0 Analog Outputs
Appendix B. Calibration and Testing with PanaView B.3 Calibrating Slot 0 Analog Outputs Every Model XGM868i flowmeter includes two built-in analog outputs (A and B) at terminal block , which is designated as . Both the zero-point and full-scale values for each output must be calibrated. After calibrating the Slot 0 outputs, which have a resolution of 5.0 A (0.03% full scale), their linearity should be tested. - Page 52 Appendix B. Calibration and Testing with PanaView Calibrating Slot 0 Analog Outputs (cont.) 3. Double-click on either Output A or Output B to open the Analog Output menu. ( will be used as an Output A example in this manual.) The procedure for calibrating is identical to that for calibrating .
-
Page 53: Calibrating Slot 1 Option Cards
Appendix B. Calibration and Testing with PanaView Calibrating Slot 0 Analog Outputs (cont.) Table 8: Expected Ammeter Readings % Full Scale 4-20 mA Scale* 0-20 mA Scale* 4.000 0.000 5.600 2.000 7.200 4.000 8.800 6.000 10.400 8.000 12.000 10.000 13.600 12.000 15.200 14.000... -
Page 54: Analog Outputs
Appendix B. Calibration and Testing with PanaView B.4.1 Analog Outputs Additional analog outputs may be added to the Model XGM868i by installing an appropriate option card in Slot 1 . This option card contains two or four analog outputs, which are designated as A, B, C and D. Both the zero-point and full-scale values for each output must be calibrated. -
Page 55: Analog Inputs
Appendix B. Calibration and Testing with PanaView B.4.2 Analog Inputs Analog inputs may be added to the Model XGM868i by installing an appropriate option card in Slot 1 . This option card contains two or four analog inputs, which are designated as A, B, C and D. Both the zero-point and full-scale values for each input must be calibrated. -
Page 56: Rtd Inputs
Appendix B. Calibration and Testing with PanaView B.4.3 RTD Inputs RTD inputs may be added to the Model XGM868i by installing an appropriate option card in Slot 1 . This option card contains two or four RTD inputs, which are designated as A, B, C and D. Both the set and slope temperature values for each input must be calibrated. -
Page 57: Testing Alarm Relays
Appendix B. Calibration and Testing with PanaView B.4.6 Testing Alarm Relays Alarm relays may be added to the Model XGM868i by installing an appropriate option card in Slot 1 . This option card contains two or four alarm relays, which are designated A, B, C and D. Prepare for the testing procedure by connecting an ohmmeter to of the option card. -
Page 58: Testing Totalizer Outputs
5. Repeat steps 2, 3 and 4 to test all of the available totalizer outputs. If any of the totalizer outputs fails the test, contact GE for assistance. Click [Exit Page] to return to the Slot 1 window and calibrate additional inputs/outputs, or click [Exit Page] again to close the Calibration/Test menu. -
Page 59: Testing Frequency Outputs
4. Repeat steps 2 and 3 to test all of the available frequency outputs. If any of the frequency outputs fails the test, contact GE for assistance. Click [Exit Page] to return to the Slot 1 window and calibrate additional inputs/outputs, or click [Exit Page] again to close the Calibration/Test menu. -
Page 60: Testing Xgm868I Software And Hardware
By uploading XGM868i signal array data for examination, a user can check if the transducer signal is the proper shape, and change setup parameters if necessary. Consult GE before using this data to change any parameters. IMPORTANT: 1. In the Calibration/Test menu, double-click on the Signal Array Upload option. - Page 61 Appendix B. Calibration and Testing with PanaView B.5.1 Uploading Signal Array Data (cont.) 4. PanaView now offers two options for Uploading the array data. • If you double-click on To Display, the right pane of the window appears similar to Figure 12, and the data is available for immediate evaluation.
-
Page 62: Uploading Xgm868I Memory
Note: This option is for factory use only. The Upload XGM Memory option is another diagnostic tool. Consult GE before using this data to change any parameters. IMPORTANT: 1. In the Calibration/Test menu, double-click on the Upload XGM Memory option. -
Page 63: Testing Xgm868I Hardware
(either 1 or 2), and • reinitialize the XGM868i to its default values. Contact GE if the XGM868i fails any of the tests covered below. IMPORTANT: B.5.3a EPROM Test To test the EPROM from the Calibration/Test menu: 1. - Page 64 Appendix B. Calibration and Testing with PanaView B.5.3b NVR Test (cont.) Figure 15: Completion of the NVR Test B.5.3c RAM Test To check the RAM: Note: If you are in the Hardware Test option, skip to step 2. 1. From the left pane of the Calibration/Test window, double-click on Hardware Test. 2.
- Page 65 Appendix B. Calibration and Testing with PanaView B.5.3e LCD Test To test the LCD: Note: If you are in the Hardware Test option, skip to step 2. 1. From the left pane of the Calibration/Test window, double-click on Hardware Test. 2.
- Page 66 Appendix B. Calibration and Testing with PanaView B.5.3i Calibration Values To display the calibration values: Note: If you are in the Hardware Test option, skip to step 2. 1. From the left pane of the Calibration/Test window, double-click on Hardware Test. 2.
- Page 67 Appendix B. Calibration and Testing with PanaView B.5.3k Reading an Optional Card EEPROM To read the data of the EEPROM for an optional card: 1. From the left pane of the Calibration/Test window, double-click on Hardware Test. 2. In the center pane, double-click on READ OPCARD EEPROM. 3.
- Page 68 Appendix B. Calibration and Testing with PanaView B.5.3m Initializing the XGM868i to Default Values (cont.) Note: When you first initialize the XGM868i, the number of LCD parameters is set to OFF. You must program the LCD to display any measured parameters. 1.
- Page 69 Appendix B. Calibration and Testing with PanaView Table 10: Available Measurement Parameters Option Bar Description Good Velocity Displays the flow velocity. N.A. N.A. Volumetric Displays the volumetric flow. N.A. N.A. FWD Total Displays the forward totalized volume flow. N.A. N.A. REV Total Displays the reverse totalized volume flow.
- Page 70 [no content intended for this page] DigitalFlow™ XGM868i Service Manual...
-
Page 71: Appendix C. Factory Tests
Appendix C. Factory Tests Appendix C. Factory Tests C.1 Introduction For user security, the XGM868i offers two special functions in a separate menu: selection of single- or dual-channel operation, and the factory-default reset. While the first function enables you to reset the channel configurations set during manufacturing, the reset function, by restoring the meter to its original state, allows you to purge potential errors in program memory. - Page 72 Appendix C. Factory Tests Resetting the XGM868i to Factory Defaults (cont.) 7. Scroll to LCD and press [Enter]. 8. The window now asks for the # of LCD Parameters. Scroll to the desired number (from OFF through 1-4 and KEY) and press [Enter].
- Page 73 Index Channels ..... . 63 Resetting Number of ..... . 15 Acceleration Error - E6 .
- Page 74 Index Error Code Inputs ........14 .
- Page 75 Index ........19 P#up ....42 PanaView, for Calibrating .
- Page 76 Index User Program ....... 28 EPROM ......28 Upgrading .
- Page 77 AUTHORIZATION NUMBER (RAN), and shipping instructions for the return of the instrument to a service center will be provided. 2. If GE Sensing instructs you to send your instrument to a service center, it must be shipped prepaid to the authorized repair station indicated in the shipping instructions.
- Page 78 Warranty [no content intended for this page] DigitalFlow™ XGM868i Service Manual...
- Page 80 Customer Support Centers U.S.A. The Boston Center 1100 Technology Park Drive Billerica, MA 01821 U.S.A. Tel: 800 833 9438 (toll-free) 978 437 1000 E-mail: sensing@ge.com Ireland Sensing House Shannon Free Zone East Shannon, County Clare Ireland Tel: +353 (0)61 470200 E-mail: gesensingsnnservices@ge.com An ISO 9001:2000 Certified Company www.ge-mcs.com/en/about_us/quality.html...
Need help?
Do you have a question about the DigitalFlo XGM868i and is the answer not in the manual?
Questions and answers