iStorage DISKASHUR M2 User Manual
Hide thumbs
Also See for DISKASHUR M2:
- Quick start manual (5 pages) ,
- Quick start manual (36 pages) ,
- User manual (260 pages)
Table of Contents
Advertisement
User Manual
Please make sure you remember your PIN (password), without it, there
is no way to access the data on the drive.
If you are having difficulty using your diskAshur M
please contact our support team by
2
email - support@istorage-uk.com or by phone on +44 (0) 20 8991 6260.
www.istorage-uk.com
Advertisement
Table of Contents

Related Manuals for iStorage DISKASHUR M2


Summary of Contents for iStorage DISKASHUR M2
- Page 1 Please make sure you remember your PIN (password), without it, there is no way to access the data on the drive. If you are having difficulty using your diskAshur M please contact our support team by email - support@istorage-uk.com or by phone on +44 (0) 20 8991 6260. www.istorage-uk.com...
- Page 2 Copyright © iStorage, Inc 2020. All rights reserved. Windows is a registered trademark of Microsoft Corporation. All other trademarks and copyrights referred to are the property of their respective owners. Distribution of modified versions of this document is prohibited without the explicit permission of the copyright holder.
-
Page 3: Table Of Contents
41. Hibernating, Suspending or Logging off from the Operating System .................... 34 42. How to check Firmware in Admin Mode ............................34 43. How to check Firmware in User Mode ............................35 44. Technical Support ..................................36 45. Warranty and RMA information ..............................36 www.istorage-uk.com... -
Page 4: Introduction
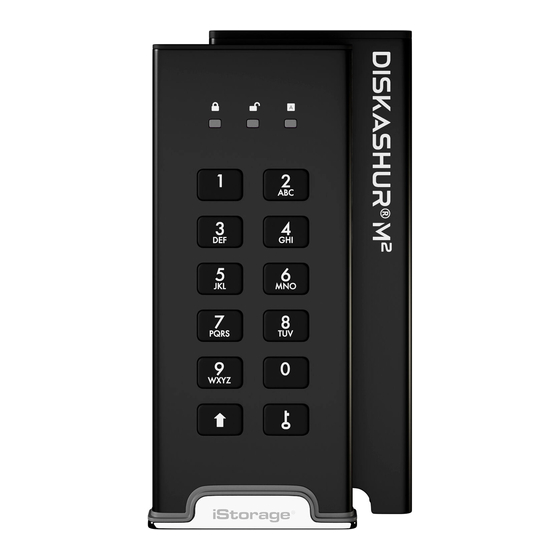
Introduction Thank you for purchasing the new iStorage diskAshur M , an ultra-secure and easy to use, hardware encrypted, PIN authenticated portable Solid State Drive (SSD) with capacities of 128GB to 2TB and rising. Designed to be FIPS 140-2 Level 3, NCSC CPA, NLNCSA BSPA & NATO Restricted certified, the diskAshur M encrypts data in transit and at rest using AES-XTS 256-bit full disk hardware encryption. -
Page 5: Led Indicators And Their Actions
GREEN Initial Shipment State Waiting for configuration of an Admin PIN (First Time Use) Solid Solid Waiting for Admin or User PIN entry Standby Solid Waiting for configuration of an Admin PIN Reset www.istorage-uk.com... -
Page 6: First Time Use
• For “Password” press the following buttons: 7 (pqrs) 2 (abc) 7 (pqrs) 7 (pqrs) 9 (wxyz) 6 (mno) 7 (pqrs) 3 (def) • For “iStorage” press the following buttons: 4 (ghi) 7 (pqrs) 8 (tuv) 6 (mno) 7 (pqrs) 2 (abc) 4 (ghi) 3 (def) Using this method, long and easy to remember PINs can be configured. -
Page 7: Unlocking Diskashur M With The Admin Pin
Admin mode To Exit Admin Mode To immediately exit Admin Mode (solid BLUE LED), press and hold down the SHIFT ( ) button for a second - the solid BLUE switches to a solid LED. www.istorage-uk.com... -
Page 8: Changing The Admin Pin
• For “Password” press the following buttons: 7 (pqrs) 2 (abc) 7 (pqrs) 7 (pqrs) 9 (wxyz) 6 (mno) 7 (pqrs) 3 (def) • For “iStorage” press the following buttons: 4 (ghi) 7 (pqrs) 8 (tuv) 6 (mno) 7 (pqrs) 2 (abc) 4 (ghi) 3 (def) Using this method, long and easy to remember PINs can be configured. -
Page 9: Setting A User Pin Policy
User PIN Policy has been successfully set. Note: To immediately exit Admin Mode (solid BLUE LED), press and hold down the SHIFT ( ) button for a second - the solid BLUE LED switches to a solid LED. www.istorage-uk.com... -
Page 10: How To Delete The User Pin Policy
2 Blinks 1 Blink 12 digit PIN with NO Special Character used 1 Blink 2 Blinks 9 digit PIN with use of a Special Character 9 Blinks 1 Blink 9 digit PIN with NO Special Character used 9 Blinks www.istorage-uk.com... -
Page 11: Adding A New User Pin In Admin Mode
LED indicating a New User PIN has been button again successfully configured Note: To immediately exit Admin Mode (solid BLUE LED), press and hold down the SHIFT ( ) button for a second - the solid BLUE LED switches to a solid LED. www.istorage-uk.com... -
Page 12: Changing The User Pin In Admin Mode
SHIFT ( ) + 3 buttons again PIN has been successfully deleted Note: To immediately exit Admin Mode (solid BLUE LED), press and hold down the SHIFT ( ) button for a second - the solid BLUE LED switches to a solid LED. www.istorage-uk.com... -
Page 13: How To Unlock Diskashur M With User Pin
Changing the User PIN in User mode (GREEN LED) must comply with the ‘User PIN Policy’ if one has been configured as described in section 7, which imposes a minimum PIN length and whether a ‘Special Character’ has been used. www.istorage-uk.com... -
Page 14: Creating A One-Time User Recovery Pin
Time User Recovery PIN has been successfully deleted Note: To immediately exit Admin Mode (solid BLUE LED), press and hold down the SHIFT ( ) button for a second - the solid BLUE LED switches to a solid LED. www.istorage-uk.com... -
Page 15: Activating Recovery Mode And Creating New User Pin
BLUE LEDs GREEN BLUE LEDs will change to a solid GREEN LED and then to a solid BLUE 2. Press the KEY ( ) button once indicating the drive has been configured and restricts User access to Read-Only www.istorage-uk.com... -
Page 16: Enable User Read/Write In Admin Mode
Global access to Read-Only Note: To immediately exit Admin Mode (solid BLUE LED), press and hold down the SHIFT ( ) button for a second - the solid BLUE LED switches to a solid LED. www.istorage-uk.com... -
Page 17: Enable Global Read/Write In Admin Mode
Self-Destruct PIN has been the KEY ( ) button successfully configured Note: To immediately exit Admin Mode (solid BLUE LED), press and hold down the SHIFT ( ) button for a second - the solid BLUE LED switches to a solid LED. www.istorage-uk.com... -
Page 18: How To Delete The Self-Destruct Pin
LEDs will change GREEN BLUE LEDs alternating on and off for 2. Enter the Self-Destruct PIN and press the a few seconds and finally shifts to a solid GREEN KEY ( ) button LED indicating the diskAshur M has successfully self-destructed www.istorage-uk.com... -
Page 19: How To Configure An Admin Pin After A Brute Force Attack Or Reset
In its default state, the diskAshur M Unattended Auto Lock time-out feature is turned off. The Unattended Auto Lock can be set to activate between 5 - 99 minutes. www.istorage-uk.com... -
Page 20: Turn Off The Unattended Auto-Lock
LED indicating the Auto Lock time-out has been successfully disabled Note: To immediately exit Admin Mode (solid BLUE LED), press and hold down the SHIFT ( ) button for a second - the solid BLUE LED switches to a solid LED. www.istorage-uk.com... -
Page 21: How To Check The Unattended Auto-Lock
1. In User mode, press and hold down both “7 + 6” Solid GREEN LED will change to blinking GREEN buttons. (7=Read + 6=Only) BLUE LEDs GREEN BLUE LEDs will change to a solid GREEN LED indicating the drive is configured as 2. Press KEY ( ) button Read-Only www.istorage-uk.com... -
Page 22: Enable Read/Write In User Mode
• The Recovery PIN, the Admin PIN and all data remain intact and accessible. • The Recovery PIN is deleted. Recovery PIN • The Admin PIN and all data remain intact and accessible. Admin PIN • The diskAshur M will reset. All PINs and data are deleted and lost forever. www.istorage-uk.com... -
Page 23: How To Set The User Pin Brute Force Limitation
LED indicating the brute force limitation was successfully configured Note: To immediately exit Admin Mode (solid BLUE LED), press and hold down the SHIFT ( ) button for a second - the solid BLUE LED switches to a solid LED. www.istorage-uk.com... -
Page 24: How To Check The User Pin Brute Force Limitation
5 attempts 5 Blinks 10 attempts 1 Blink Note: To immediately exit Admin Mode (solid BLUE LED), press and hold down the SHIFT ( ) button for a second - the solid BLUE LED switches to a solid LED. www.istorage-uk.com... -
Page 25: How To Perform A Complete Reset
GREEN and needs to be unplugged for next time use. The default setting of the diskAshur M2 is configured as non-bootable. The diskAshur M is equipped with a bootable feature to accommodate power cycling during a host boot process. When booting from... -
Page 26: How To Disable The Diskashur M Bootable Feature
& BLUE) become solid for 1 second. d. LEDs return to solid BLUE Note: To immediately exit Admin Mode (solid BLUE LED), press and hold down the SHIFT ( ) button for a second - the solid BLUE LED switches to a solid LED. www.istorage-uk.com... -
Page 27: Initialising And Formatting Diskashur M
MBR and GPT partition style. GPT stores multiple duplicates of this data over the disk, as a result it’s much more robust. On an MBR disk, the partitioning and boot information is stored inside single place. Select the partition style and click OK. www.istorage-uk.com... - Page 28 Assign a drive letter or path and click Next. Create a volume label, select Perform a quick format, and then click Next. Click Finish. Wait until the format process is complete. The diskAshur M will be recognised and it is available for use. www.istorage-uk.com...
-
Page 29: Initialising And Formatting Diskashur M In Mac Os
To initialize and format the diskAshur M 1. Select diskAshur M from the list of drives and volumes. Each drive in the list will display its capacity, manufacturer, and product name, such as ‘iStorage diskAshur M Media’. 2. Click the ‘Erase’ button under Disk Utility. - Page 30 We recommend using ‘GUID Partition Map’ on drives larger than 2TB. 5. Click the ‘Erase’ button. Disk Utility will unmount the volume from the desktop, erase it, and then remount it on the desktop. www.istorage-uk.com...
-
Page 31: Initialising And Formatting Diskashur M In Linux Os
2. Click to select the drive (500 GB Hard Disk) under ‘Devices’. Next click on the gears icon under ‘Volumes’ and then click on ‘Format Partitons’. 3. Select ‘Compatible with all systems and devices (FAT)’ for the ‘Type’ option. And enter a name for the drive, e.g: diskAshur M . Then, click the ‘Format’ button. www.istorage-uk.com... - Page 32 4. After the format process is finished, click Play button to mount the drive to Ubuntu. www.istorage-uk.com...
- Page 33 5. Now the drive should be mounted to Ubuntu and ready to use. 6. The disk will be shown as seen in the image below. You can click the disk icon to open your drive. www.istorage-uk.com...
-
Page 34: Hibernating, Suspending Or Logging Off From The Operating System
LED will blink twice (2) and the GREEN LED will blink three (3) times. Once the sequence has ended the RED, GREEN & BLUE LED’s will blink together once and then return to Admin mode, a solid BLUE LED. www.istorage-uk.com... -
Page 35: How To Check Firmware In User Mode
LED will blink twice (2) and the GREEN LED will blink three (3) times. Once the sequence has ended the RED, GREEN & BLUE LED’s will blink together once and then return to the User mode, a solid GREEN LED. www.istorage-uk.com... -
Page 36: Technical Support
Citizens’ Advice Bureau or Trading Standards office. The warranties set out in this clause apply only to the original purchaser of a Product from iStorage or an iStorage authorized reseller or distributor. These warranties are non-transferable. EXCEPT FOR THE LIMITED WARRANTY PROVIDED HEREIN, AND TO THE EXTENT PERMITTED BY LAW, ISTORAGE DISCLAIMS ALL WARRANTIES, EXPRESS OR IMPLIED, INCLUD- ING ALL WARRANTIES OF MERCHANTABILITY;... - Page 37 © iStorage, 2020. All rights reserved. iStorage Limited, iStorage House, 13 Alperton Lane Perivale, Middlesex. UB6 8DH, England Tel: +44 (0) 20 8991 6260 | Fax: +44 (0) 20 8991 6277 e-mail: info@istorage-uk.com | web: www.istorage-uk.com www.istorage-uk.com...
Need help?
Do you have a question about the DISKASHUR M2 and is the answer not in the manual?
Questions and answers