
Related Manuals for Hach LightDeck MINI


Summary of Contents for Hach LightDeck MINI
- Page 1 User Guide LightDeck MINI System Please see the test cartridge package insert for test-specific information. Software version 1.0 or greater L-80-00043-SCCC Rev 01...
-
Page 2: Table Of Contents
Laser Warnings ................................3 Other Safety Warnings ..............................3 LightDeck MINI Overview ......................4 Installation ..................................4 LightDeck MINI Front, Back, and Bottom Views ....................4 Instrument Label ................................5 LightDeck MINI Specifications ........................... 5 Calibration ..................................5 Navigation ..................................5 Import Lot-Specific Calibration Data with New Cartridge Lots .......... -
Page 3: Symbols
Symbols Consult instructions for use Serial number Batch code/lot number Catalog number Use by YYYY-MM-DD Temperature limit Caution, consult accompanying documents Biological risk/Biohazard Electrical hazard Manufacturer Date of manufacture Do NOT recycle. In compliance with European Directive 2002/96/EC on waste electrical and electronic equipment (WEEE), this equipment must not be disposed of as unsorted municipal waste. -
Page 5: Introduction
The LightDeck MINI is run by software on a computer that is connected to the LightDeck MINI. The user interface on the computer guides you through the test procedure. Results are displayed at the end of the test and may be viewed, exported, or printed. -
Page 6: Safe Usage And Handling Precautions
Before using the LightDeck MINI, read this User Guide to ensure correct operation. Observe the precautions. Failure to do so may result in injuries, cause property damage, or produce incorrect results. The LightDeck MINI is to be operated by personnel trained for its intended use and correct operation. Biohazards and Waste Wear appropriate Personal Protective Equipment (e.g., wear gloves, lab coat, and... -
Page 7: Laser Warnings
Wear appropriate Personal Protective Equipment for the sample type being tested when using the LightDeck MINI. Only connect the LightDeck MINI to a USB 2.0 or USB 3.0 port of a host computer. Use only the USB cable provided with the LightDeck MINI. -
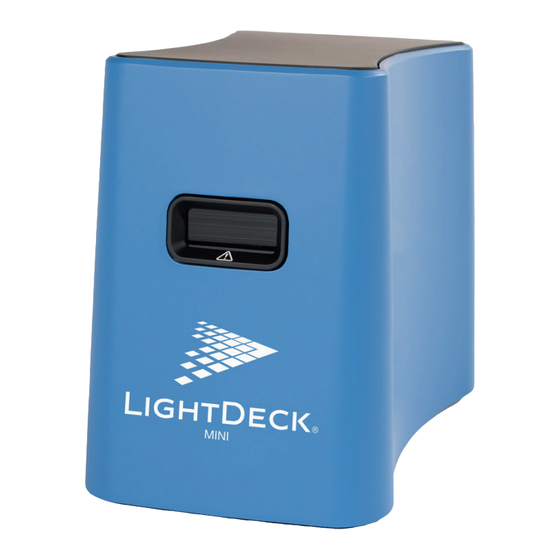
Page 8: Lightdeck Mini Overview
7. User Manual Installation 1. Unpack the LightDeck MINI and place it on a level, stable surface. Inspect for any obvious signs of damage. Report any damage immediately. 2. Install the software from the USB flash drive supplied with the LightDeck MINI. -
Page 9: Instrument Label
112 (W) x 150 (H) x 155 (L) millimeters Calibration The LightDeck MINI is factory calibrated. No user calibration or verification required. Software Interface The Home Screen lets you navigate to modules to run sample or quality control tests, to view stored sample results or QC data, or import cartridge definition files. -
Page 10: Import Lot-Specific Calibration Data With New Cartridge Lots
Overview Import Lot-Specific Calibration Data with New Cartridge Lots Each test cartridge lot is factory calibrated. Lot-specific calibration data must be loaded from the USB flash drive that is included with each box of test cartridges. If the file is missing, you will get a message to load the calibration data from the USB flash drive. -
Page 11: Run Test
Run Test RUN TEST This section tells you how to run a test or QC test. The examples show screen shots for a LightDeck MC + CYN Test Cartridge. If cartridges were refrigerated, allow to warm to room temperature for at least 15 minutes. Start instruments and software 1. -
Page 12: Read Cartridge
Run Test Add sample to reagents. • Add 100 L sample to the microtube containing dried reagents. • Mix by aspirating and dispensing 10 times until the reagents are fully rehydrated and well mixed with the sample. • When using the pipette depress the plunger fully before aspirating. - Page 13 Run Test Insert the cartridge. • Insert the test cartridge. The LightDeck MINI reads the test cartridge bar code and populates the rest of the Sample Information. Test Processing The rest of the test is automatic. For most test cartridge types, the processing time is 10 minutes.
-
Page 14: View Data
Review Results Review Results This section tells you how to view results, create reports, and archive samples. Click VIEW DATA ❶ ❷ ❸ Select PDF Summary to export data as .pdf files. Select Excel Spreadsheet to export data in a spreadsheet format. - Page 15 Review Results Select Raw Files to export the six .png files and one .res file that is associated with the sample measurement. Overview The table gives a summary of samples that have not been archived. Click on the Box and Arrow icon to show the details associated with the sample. The default order in the table is the most recent test first.
-
Page 16: Maintenance And Cleaning
Do not open the LightDeck MINI for cleaning or servicing. How to Clean Outside Surfaces Use a soft cloth to clean the LightDeck MINI with a mild detergent, 70% solution of ethanol or isopropyl alcohol in water, or 10% bleach solution. - Page 17 Appendix High background detected Excessive background Re-run the sample using a new cartridge if error repeats dilute sample prior to measurement with a new cartridge Low Internal Positive Control Flow control reading low Re-run the sample using a new cartridge High Internal Positive Control Flow control reading high Re-run the sample using a...
- Page 18 Appendix...
Need help?
Do you have a question about the LightDeck MINI and is the answer not in the manual?
Questions and answers