Furrion FOS07TASR User Manual
Vision s camera system
Hide thumbs
Also See for FOS07TASR:
- Instruction manual (32 pages) ,
- Instruction manual (32 pages) ,
- User manual (108 pages)
Advertisement
Vision S Camera System
User Manual
*
The packing contents may be different based on the kit you purchased. Please take the actual
product as standard.
Models:
FOS07TASR / FOS07TASF / FOS07TAED / FOS07TAPT / FOS05TASR / FOS05TASF
FOS05TAED / FOS05TAPT / FOS43TASR / FOS43TASF / FCN48TASK / FCN48TASF
FCE48TASL /
FOS05TASM / FOS07TASM / FOS43TASM / FOS07TAPM
FOS43TDDC / FOS05TAEN / FSO07TAEN / FOS05TAEM / FOS07TAEM
Advertisement
Table of Contents

Subscribe to Our Youtube Channel
Related Manuals for Furrion FOS07TASR


Summary of Contents for Furrion FOS07TASR
- Page 1 The packing contents may be different based on the kit you purchased. Please take the actual product as standard. Models: FOS07TASR / FOS07TASF / FOS07TAED / FOS07TAPT / FOS05TASR / FOS05TASF FOS05TAED / FOS05TAPT / FOS43TASR / FOS43TASF / FCN48TASK / FCN48TASF FCE48TASL /...
-
Page 2: Welcome
Welcome Thank you for purchasing the Furrion® Vision S Camera System. Before operating your new product, please read these instructions carefully. This will ensure safe use and reduce the risk of injury. This instruction manual contains information for installation, maintenance of the product and safe use. -
Page 3: Table Of Contents
Contents Welcome ......................... 2 Contents ......................... 3 Important Safety Instructions ..................4 FCC Statement ................................5 IC Statement ................................6 Care and Cleaning ..............................7 Maintenance ........................7 Product Overview ......................8 Install and Use Monitor....................12 Install and Use 4.3” Monitor ..........................12 Install and Use 5”/7”... -
Page 4: Important Safety Instructions
Caution installation of this product does not void or affect the vehicle manufacturer’s ● There are no serviceable parts in the warranty. Furrion is not liable in full or in Furrion Vision S Camera System. Do not ® part for improper installation resulting disassemble or attempt any repairs. -
Page 5: Fcc Statement
Important Safety Instructions FCC Statement Installation ● Installation and wiring of this product The equipment complies with RF exposure require specialist skills. To ensure proper limits. This module is limited to installation and safe installation, please seek a in mobile or fixed applications. The antenna specialist technician. -
Page 6: Ic Statement
Important Safety Instructions IC Statement Reorient or relocate the receiving − antenna. Increase the separation between the − This device complies with Industry Canada equipment and receiver. licence-exempt RSS standard(s). Operation Connect the equipment into an outlet on − is subject to the following two conditions: a circuit different from that to which the (1) this device may not cause interference, receiver is connected. -
Page 7: Care And Cleaning
Maintenance Care and Cleaning Though your monitor requires little care, you will still need to maintain its condition and performance by following the guidelines below. ● Keep the unit away from excessive moisture, or extreme heat or cold. ● Keep liquids away from the monitor. ●... -
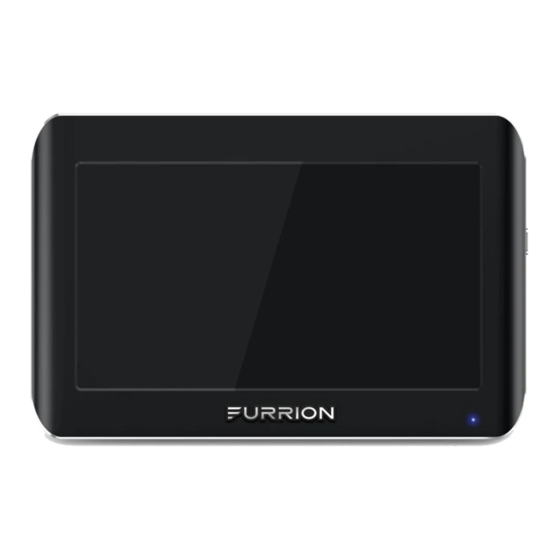
Page 8: Product Overview
Product Overview Furrion offers you abundant options to set up an observation / security system for your vehicle. You can mount Furrion Vision S products onto various types of RVs such as trailers and Class A/B/C motorhomes. The full range of Vision S wireless monitor and camera products available for your selection is listed below, which are sold either separately or as part of a system. - Page 9 Product Overview FOS43TDDC Vision S 4.3” Display 4.3” Vision S 5” 3-Camera FOS05TAEN System with Side LED 5” Marker Lights Vision S 7” 3-Camera FSO07TAEN System with Side LED 7” Marker Lights Vision S 5” 3-Camera FOS05TAEM System with Side and Rear 5”...
- Page 10 Product Overview Note: Product specifications are subject to change without prior notice. Vision S Family Monitor Specification 4.3" Monitor 5" Monitor 7" Monitor Operating Voltage 8 – 30Vdc Wireless Frequency 2.4G Rx Sensitivity -88dBm+/-3dBm Aspect Radio 16:9 Resolution 480x272 800x480 800x480 Max View on Screen View Angle...
- Page 11 Product Overview Vision S Family Camera Specification L/R Side Camera Rear Camera Doorway Camera Model Operating Voltage 8 – 30Vdc Wireless Frequency 2.4G Wireless Range >150m (open area) Delay Time <250ms Tx Power 18dBm+/-1.5dBm Transmitting Speed 6Mbps (Single) Decompression Form H.264 Camera Pixel 720x480...
-
Page 12: Install And Use Monitor
Install and Use Monitor Install and Use 4.3” Monitor The Furrion Vision S 4.3” monitor is typically cab mounted and used as a rear observation system together with a Furrion rear camera. Product overview Antenna Power/Confirm Screen Menu/Return Down Parking Line... - Page 13 Install and Use Monitor Install the monitor 4. Connect the DC connector to the power socket on the monitor. IMPORTANT: Choose a monitor location in your vehicle that does not block your view and complies with local laws for safe driving.
- Page 14 Poor Signal Good Signal If this monitor comes in a bundle with a Furrion Vision S rear camera, it is paired with Activate the Monitor the camera by default. If you cannot find the video from the camera on the monitor screen...
- Page 15 Install and Use Monitor The monitor in a wireless system is Mirror Setting − always watching for a video signal when 1. Use to highlight the MIRROR it is off. Signals from other wireless menu, then press to enter it. camera systems may cause interference.
- Page 16 Install and Use Monitor 2. Press to increase volume or press LCD Auto Off Setting decrease volume. 1. Use to highlight the LCD AUTO OFF menu, then press to enter it. Auto Dim Setting 1. Use to highlight the AUTO DIM 2.
- Page 17 Install and Use Monitor 2. Press to set the camera detection 2. Use to highlight the sensitivity as LOW, MEDIUM, HIGH or BRIGHTNESS, CONTRAST or COLOR (off). Press to confirm your selection or menu, then press to enter it. press to return to the previous page.
-
Page 18: Install And Use 5"/7" Monitor
Install and Use Monitor Install and Use 5”/7” Monitor When mounted in the cab, the Furrion Vision S 5”/7” monitor typically works as an observation system together with a Furrion rear mounted camera (for rear observation) and two side cameras (for traffic observation). - Page 19 Install and Use Monitor Prepare 2. Align the ball on the bracket with the opening on the back of the monitor and ● Prepare tools you may need, including a push firmly to lock into place. #2 Phillips head screwdriver, insulation tape, pencil and/or a 5/8”...
- Page 20 Install and Use Monitor Pair with a camera If this monitor comes in a bundle with one or more Furrion Vision S cameras, it is paired Poor Signal with the camera(s) by default. If you cannot Good Signal find the video from the camera on the monitor 6.
- Page 21 DOOR REAR Install and Use Monitor MODE it is off. Signals from other wireless 3. Tap DOOR (not available in TRI-View mode), LEFT, RIGHT or REAR to select a camera systems may cause interference. LEFT RIGHT For example, security cameras, baby camera and view the image from it.
- Page 22 Install and Use Monitor Tap SETUP to highlight it in red and enter the submenu automatically. Icon Description Auto Display Setting Tap to enter quadrant mode. The selected mode will remain When this function is enabled, the monitor for 10 seconds before returning to can switch back to single-channel display the previous single channel mode.
- Page 23 Install and Use Monitor 4-channel display when H SPLIT is − selected: By default, the monitor screen shows the single-channel image of the last paired On the channel display interface, you can camera. tap a specific section to enter the respective To switch to 3-channel or 4-channel single-channel display mode, no matter display mode:...
- Page 24 Install and Use Monitor 1. Tap MIRROR to enter the submenu. Volume Setting The currently selected setting will be 1. Tap VOLUME to enter the submenu. highlighted red. 2. Tap to decrease or increase 2. Select the camera you are going to set. the volume of the doorway and/or rear cameras.
- Page 25 Install and Use Monitor Motion Detect Setting When this function is enabled while the monitor is off, it will turn on again automatically after any motion is detected by a camera. 1. Tap MOTION DETECT to enter the submenu. LCD Auto Off Setting 1.
- Page 26 Install and Use Monitor Screen Refresh Rate Setting 2. Select the camera you are going to set. Here you can set a suitable screen refresh rate for the monitor. Screen refresh rate indicates the number of times in a second that the monitor redraws the screen image.
- Page 27 Install and Use Monitor Software Version ● Tap VERSION to show the software version of the monitor and the current paired camera(s).
-
Page 28: Install Cameras
− For doorway camera position: Above the top of the door. Note: The RV shown here is for reference only. You can mount Furrion Vision S products onto various types of RVs such as trailers and Class A/B/C motorhomes. - Page 29 Mount camera ” If this camera comes in a bundle with a Furrion Vision S monitor, it is paired with the monitor by default. You can connect it to the female connector on the Y type power cable of the monitor and resume power temporarily 5/8”...
- Page 30 Install Cameras 2. If there is a cover on the bracket housing, remove it first. Connect the female connector of the camera power cable to the male connector on the back of the camera, and put the redundant cables inside the bracket housing. Then attach the camera to the bracket with four #4x1/4”...
-
Page 31: Install Side Cameras & Rear Camera With Marker Light
Always seek professional assistance if you are unsure about the installation and wiring operation. 1. Determine the mounting location on your RV. Ensure that there is no obstacle blocking the camera view. To avoid drilling new holes, you are recommended to replace the original marker lights with Furrion products directly as shown below:... - Page 32 − For left/right side camera position: Note: The RV shown here is for reference You are suggested to use the power only. You can mount Furrion Vision S line for the original side marker lights products onto various types of RVs such as trailers and Class A/B/C motorhomes.
- Page 33 Install Cameras Mount cameras (right side shown) 2. For the left/right side camera, ensure that the lens on the camera 1. Reattach the camera to the marker light face backwards after installation, with bracket. Before fixing the camera, check the MONITOR PAIRING button at the its pairing status with the monitor by bottom.
-
Page 34: Troubleshooting
LED) adapter and fuse box). Power off and on again to reset. Furrion monitor / rearview mirror can only pair with Furrion cameras. Pairing with products from other manufacturers is not supported. Check if the camera is receiving power. - Page 35 Troubleshooting Problem Solution The camera has no power connected. Monitors Blue LED off Ensure the tow vehicle is running. with no picture Ensure the 7 way connector is connected.
- Page 36 ● 52567 Independence Ct., Elkhart, IN 46514, USA ● Toll free:1-800-789-3341 ● Email: support@furrion.com ©2007-2021 Furrion Ltd. Furrion® and the Furrion logo are trademarks licensed for use by Furrion Ltd. and registered in the U.S. and other countries. For Patent Info: www.furrion.com/pages/patents www.furrion.com...
Need help?
Do you have a question about the FOS07TASR and is the answer not in the manual?
Questions and answers