Table of Contents
Advertisement
Advertisement
Table of Contents

Subscribe to Our Youtube Channel
Related Manuals for dji ZENMUSE L1


Summary of Contents for dji ZENMUSE L1
- Page 1 ZENMUSE L1 User Manual v1.0 2021.05...
- Page 2 Navigating to a Topic View a complete list of topics in the table of contents. Click on a topic to navigate to that section. Printing this Document This document supports high resolution printing. © DJI All Rights Reserved. 2021 ...
-
Page 3: Using This Manual
11. Make sure the surface of the gimbal is dry before opening the microSD card slot cover. 12. DO NOT remove or insert the microSD card when taking a photo or recording a video. © DJI All Rights Reserved. 2021 ... -
Page 4: Table Of Contents
Caution Product Profile Introduction Overview Installation Supported Aircraft Installing on Aircraft Remote Controller Controls DJI Pilot App Controls Basic Features Point Cloud Recording View Point Cloud Model Preview Field Data Collection Preparation Setting Camera Parameters Mapping Mission Linear Flight Mission... -
Page 5: Product Profile
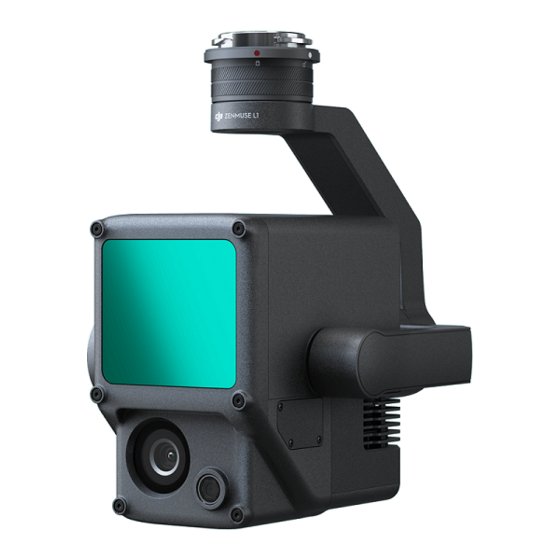
L1 integrates a LIVOX LiDAR module, a high-accuracy IMU, and an RGB mapping camera on a 3-axis stabilized gimbal. When used with compatible DJI aircraft and DJI TERRA , the L1 offers a complete solution that gives real-time 3D data throughout the day, which effectively captures the details of complex structures and delivers highly accurate reconstructed models. - Page 6 ZENMUSE L1 User Manual 2. Press the button on the aircraft used for detaching the gimbal and camera. Rotate the gimbal cap on the aircraft to remove. 3. Align the white dot on the gimbal with the red dot on the aircraft and insert the gimbal.
-
Page 7: Remote Controller Controls
Press to start or stop recording video. 3. Shutter Button Press to take a photo. The photo mode can be set to single or interval in DJI Pilot. Single photos can also be taken during video recording. 4. Right Dial Turn to adjust the pan of the gimbal. -
Page 8: Dji Pilot App Controls
DJI Pilot App Controls The touch interface can be used for capturing photos, recording videos, and viewing playback. Users can create a flight mission to record point cloud data in DJI Pilot. Basic Features The touch interface can display a HD live view and offers professional photography configurations. -
Page 9: Point Cloud Recording View
ZENMUSE L1 User Manual 7. Recording Mode (Shutter/Video Record/Point Cloud Record) Tap to switch between photo, video, and point cloud recording modes. 8. Shooting Button (Shutter/Video Record/Point Cloud Record) Tap to take photos or start or stop recording video or point cloud data. The shutter and record buttons can also be used to take a photo and record video. -
Page 10: Point Cloud Model Preview
ZENMUSE L1 User Manual 15. Model Preview Button Refer to the Point Cloud Model Preview section for more information. 16. Pause Button Tap to pause point cloud recording and tap again to resume. Point Cloud Model Preview Tap to view the current point cloud model from different perspectives. -
Page 11: Field Data Collection
Field Data Collection Users can create a flight mission to record point cloud data in DJI Pilot and import the recorded data into DJI Terra for high-precision model reconstruction. Preparation 1. Make sure the L1 is installed correctly on the aircraft and that the aircraft and remote controller are linked after powering on. -
Page 12: Linear Flight Mission
Connect it to a computer and check the point cloud data, photos, and other files in the DCIM folder. Linear Flight Mission 1. Enter the mission flight screen in DJI Pilot, select Create a Route, and then to choose a Linear Flight mission. -
Page 13: Manual Flight
ZENMUSE L1 User Manual 5. Power off the aircraft after the mission is completed and remove the microSD card from the L1. Connect it to a computer and check the point cloud data, photos, and other files in the DCIM folder. -
Page 14: Point Cloud Data File Description
Station or third-party RTK base station. Rename the file as the same as the .RTB file in the point cloud data file directory and add a .RTCM suffix. 3. Copy the .RTCM file to the folder of the point cloud data file directory. DJI Terra will prioritize .RTCM files over .RTB files. -
Page 15: Office Data Processing
5. In the reconstruction page, the current mission folder can be opened by pressing “Ctrl+Alt+F” to find the file and check the result of the reconstruction. 6. Read the DJI Terra User Manual for more information about how to process data such as optimizing point cloud data accuracy. -
Page 16: Lidar Point Cloud Description
LiDAR sensors within the same time. C. Over time, the point cloud density and coverage inside the FOV increase significantly and reveal more detailed information of the surroundings. Azimuth/ deg Azimuth/ deg Azimuth/ deg Azimuth/ deg © DJI All Rights Reserved. 2021 ... -
Page 17: Repetitive Scanning Patterns
ZENMUSE L1 User Manual FOV Coverage The figure below shows the FOV coverage of the L1 compared with non-L1 LiDAR sensors that use traditional mechanical scanning methods. A. When the integration time is less than The L1 0.3 s, the 70% FOV coverage of the L1 is slightly better than a 64-line LiDAR sensor. -
Page 18: Maintenance
DJI devices used with the aircraft, and that all devices are powered on. 2. Go to HMS in DJI Pilot, select Firmware Update, then Zenmuse L1, and follow the on-screen instructions to update the firmware. Select Update All to update all available devices simultaneously. -
Page 19: Storage, Transportation, And Maintenance
ZENMUSE L1 User Manual Storage, Transportation, and Maintenance Storage The storage temperature range for the L1 LiDAR is from -40° to 85° C (-40° to 185° F). Keep L1 LiDAR sensors in a dry and dust-free environment. 1. Make sure the L1 LiDAR sensors are not exposed to environments containing poisonous or corrosive gases or materials. -
Page 20: Specifications
Real-time: 0.05°, Post-processing: 0.025° Auxiliary Positioning Vision Sensor Resolution 1280×960 95° RGB Mapping Camera Sensor Size 1 in Effective Pixels 20 MP Photo Size 5472×3078 (16:9), 4864×3648 (4:3), 5472×3648 (3:2) Focal Length 8.8/24 mm (equivalent) © DJI All Rights Reserved. 2021 ... - Page 21 Mapping Mission with Calibration Flight enabled in DJI Pilot, and with the RTK in FIX status. The relative altitude was set to 50 m, flight speed to 10 m/s, gimbal pitch to -90°, and each straight segment of the flight route was less than 1000 m. DJI Terra was used for post-processing.
- Page 22 This content is subject to change. Download the latest version from http://www.dji.com/zenmuse-l1 If you have any questions about this document, please contact DJI by sending a message to DocSupport@dji.com. ZENMUSE is a trademark of DJI. Copyright © 2021 DJI All Rights Reserved.
Need help?
Do you have a question about the ZENMUSE L1 and is the answer not in the manual?
Questions and answers