Table of Contents
Advertisement
Quick Links
Advertisement
Table of Contents

Related Manuals for dji L1


Summary of Contents for dji L1
- Page 1 DJI L1 Operation Guidebook V1.1 (June-2022)
-
Page 2: Table Of Contents
3.3 RGB Camera Recalibration..........................16 3.3.1 Calibration data collection ........................16 3.3.2 Use DJI Terra software to generate the calibration files ............17 3.3.3 Run the calibration files in L1 ........................ 18 3.3.4 How to restore factory parameters? ....................18 3.4 Flight Mission Planning ............................ - Page 3 4.4.5 Error Message: LiDAR point cloud POS calculation failed............46 4.4.6 Issue: Quality of point cloud model is poor, or the result has severe data loss....46 4.4.7 How to achieve a good vertical accuracy? ..................47 http://www.dji.com/zenmuse-l1 Copyright © 2022 DJI All Rights Reserved.
-
Page 4: Supported Firmware And Software Versions
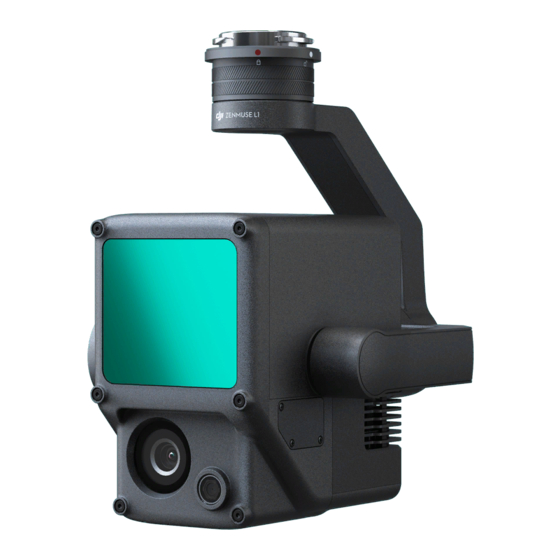
The Zenmuse L1 integrates a Livox LiDAR module, a high-accuracy IMU, and a camera with a 1-inch CMOS on a 3-axis stabilized gimbal. When used with Matrice 300 RTK and DJI Terra, the L1 forms a complete solution that gives you real-time 3D data throughout the day, efficiently capturing the details of complex structures and delivering highly accurate reconstructed models. -
Page 5: Specifications
Figure: L1 components 2.2 Specifications http://www.dji.com/zenmuse-l1 Copyright © 2022 DJI All Rights Reserved. - Page 6 Copyright © 2022 DJI All Rights Reserved.
-
Page 7: Key Parameters
The L1's point cloud data rate is affected by which echo mode is used. Three echo modes are available: single-echo, dual-echo, and triple-echo mode. In single-echo or dual-echo mode, the maximum sampling frequency is 240 kHz (that is, 240,000 laser beams emitted per second). -
Page 8: Scan Mode And Fov
2.3.3 Scan Mode and FOV The L1 can produce different scan shapes in different scan modes. Please note that the shape formed by the LiDAR on the ground is determined by the laser scan mode, the flight direction and speed, and the terrain. - Page 9 Figure: Scan angle in non-repetitive scan mode Note: The effective range of L1 varies based on where the object is within the FOV. The closer to the edge of the L1's FOV, the shorter the effective range. The closer to the center of the L1's FOV, the farther the effective range. See the figure below for details.
-
Page 10: Beam Divergence Angle
3.1.1 Ntrip (Custom Network RTK) Solution In the RTK settings page of the DJI Pilot App, you can choose Custom Network RTK, and enter the NTRIP account information to connect to the Ntrip service. (Note: The remote controller must be http://www.dji.com/zenmuse-l1... -
Page 11: D-Rtk 2 Base Station Solution
3.1.2 D-RTK 2 Base Station Solution Set up D-RTK 2 at a known point. Switch the D-RTK 2 to Mode 5. In the RTK settings page of the DJI Pilot App, select D-RTK 2 as RTK Service Type. Then link the aircraft to the D-RTK 2. In the RTK settings page, go to the Advanced Settings (Pin: 123456 by default). - Page 12 Table: RTK protocol types supported by L1 Note: Base station files are necessary for L1 data processing. If neither Ntrip nor PPK files exist, L1 data cannot be processed. If the RTK is disconnected during the flight, the mission will be automatically paused to ensure data validity.
-
Page 13: Imu Calibration
IMU calibration is a prerequisite for LiDAR accuracy. It is a key factor that impacts the final point cloud accuracy. For the L1, please note that IMU calibration is required before, during (every 100s of the flight mission), and after data collection to ensure the inertial navigation system accuracy. -
Page 14: Imu Calibration In Mapping/Oblique/Linear Flight Missions
(every 100s). The calibration routes are shown in yellow in the figure below. http://www.dji.com/zenmuse-l1 Copyright © 2022 DJI All Rights Reserved. -
Page 15: Imu Calibration In Waypoint Flight Missions
(every 100s between two waypoints) and the end of the flight routes. 3.2.3 IMU Calibration in Waypoint Flight Missions In waypoint flight missions, you can find the IMU Calibration option in the route parameters. Figure: IMU Calibration option in a waypoint flight mission http://www.dji.com/zenmuse-l1 Copyright © 2022 DJI All Rights Reserved. -
Page 16: Rgb Camera Recalibration
Waypoint 5) 3.3 RGB Camera Recalibration When the L1 has regular colorization issues, such as multiple lines appearing in the point cloud with ghosting effect, the user will need to recalibrate the internal and external parameters of the RGB camera of L1 following the below steps. -
Page 17: Use Dji Terra Software To Generate The Calibration Files
Figure: Dewarping Option in the Camera Settings Execute the flight mission and obtain the raw data files collected by L1 and check whether the images are clear and sharp, if not they cannot be used for calibration. 3.3.2 Use DJI Terra software to generate the calibration files ... -
Page 18: Run The Calibration Files In L1
Store the calibration file under the root directory of a microSD card and insert into the L1, connect L1 to a M300 RTK and power on the M300 RTK. Wait for about 5 minutes to complete the calibration. There is no App notification during the calibration currently. -
Page 19: Flight Mission Planning
Copy the .txt text file to the root directory of the microSD card, insert the microSD card into the L1 that needs to be calibrated, install the L1 onto the M300 RTK and power on the aircraft, wait about 5 minutes to complete the calibration. - Page 20 EGM96 altitude. Flight Route The recommended flight altitude is 50~100 meters. Altitude When the ground object's reflectivity is 10%, the L1's measurable distance is 190 meters. The flight altitude should not exceed 150 meters to avoid data loss. Target 0 by default.
-
Page 21: Terrain-Follow Flight
How to enable Terrain Follow Mission? Terrain-follow Flight DJI L1 supports terrain-follow flight for waypoint, mapping, and corridor flight plans. With the DJI Pilot app to perform a precise terrain follow flight, enable terrain follow in the mapping mission and import the DSM file including the altitude information. - Page 22 Terra. When processing, make sure to select Fruit Tree mode and use WGS84 as the coordinate system. After processing with DJI Terra, a .tif file will be generated and it can be imported using a microSD to the remote controller 2.
- Page 23 A. Collect the 2D data of the target area and perform 2D reconstruction in DJI Terra with Fruit Tree mode. A “gsddsm.tif” file will be generated in the “map” folder of the mission files. It can be imported to DJI Pilot App for terrain follow.
- Page 24 Figure: Click on the folder icon, then go to the map folder to find the “gsddsm.tif” file B. You can also download the terrain elevation data from an open database such as SRTM. (2) Import the DSM file to DJI Pilot App Terrain Follow and IMU calibration flight options can be enabled at the same time.
-
Page 25: Riverbank / Road Surveying
Terrain Follow is recommended when the elevation difference of the survey area is greater than 100 meters. 3.4.2 Riverbank / Road Surveying When the survey area is a narrow strip of land such as roads, railways, riverbanks, etc., Linear Flight Mode can be used for L1 mission planning. Category Parameter Name Explanation and recommended value... - Page 26 Echo mode and Triple Echo & 160kHz can be used for better Band- Lidar Sample Rate penetration; Payload Dual Echo & 240kHz can be used for maximum Settings points; Scan mode Repeat RGB Coloring http://www.dji.com/zenmuse-l1 Copyright © 2022 DJI All Rights Reserved.
-
Page 27: Powerline
Settings 3.4.3 Powerline L1 can be used to collect the point cloud data of transmission lines and the power pylons. As there are undulations in the power line corridor, the recommended workflow is to use the “Live Mission Record” function to create a waypoint flight mission so that we can fly with variable heights. - Page 28 (1) In the DJI Pilot App, go to Flight Route - Create a Route - Waypoint - Live Mission Rec. Note that you need to record in RTK mode; (2) Fly the M300 RTK 10~20m above the power pylon and record the current point by pressing the C1 button.
- Page 29 Last waypoint Add an action “Finish point cloud modeling recording” L1 payload Sampling Rate 240 kHz settings (in the MENU button) Scanning Mode Non-repetitive Return Mode Dual RGB Coloring http://www.dji.com/zenmuse-l1 Copyright © 2022 DJI All Rights Reserved.
-
Page 30: Checkpoint Setup
In topographic surveying missions, checkpoints can be used to verify the point cloud accuracy. The output result from the L1 is 3D point cloud data in LAS format. Unlike the 3D models obtained with visual cameras, the point cloud contains no structural information, so its checkpoints differ from those in visible light surveying. - Page 31 Figure: Checkpoints shown in the point cloud (left: RGB; right: reflectivity) In addition, if there are objects with sharp reflectivity differences in the survey area, such as a zebra crossing, they can be also used as checkpoints. http://www.dji.com/zenmuse-l1 Copyright © 2022 DJI All Rights Reserved.
-
Page 32: Elevation Checkpoints
To test the penetrability of LiDAR, it is recommended to set a certain number of checkpoints under trees. Figure: An elevation accuracy report produced by Terrasolid http://www.dji.com/zenmuse-l1 Copyright © 2022 DJI All Rights Reserved. -
Page 33: Field Data Collection
Before recording data, you need to attach the L1 to the single-downward gimbal of M300 RTK and power it on to warm up the L1. The warmup takes about 3–5 minutes. Wait until a “Payload IMU warmed up” prompt appears. -
Page 34: Manual Data Collection
Figure: automated flight screen (LiDAR view) Figure: automated flight screen (SBS view) 3.6.3 Manual Data Collection When you need to collect L1 data of building facades, powerlines, or other complex structures, manual flight is also an option. http://www.dji.com/zenmuse-l1 Copyright © 2022 DJI All Rights Reserved. - Page 35 Figure: Manual flight screen Note: Do not collect data when the drone is static on the ground or hovering in the air, otherwise DJI Terra may encounter reconstruction errors in data post-processing.
-
Page 36: Data Storage
4.1 Prepare Your Computer For L1 data processing, the computer must be equipped with an NVIDIA graphics card and at least 4 GB of VRAM. The CPU must be i5 or above, and 4 GB of memory is required for storing every 1 GB of raw point cloud files. -
Page 37: Reconstruction Steps
This is a premium feature included in DJI Terra Pro and more advanced versions. Each L1 comes with a 6-month license for the Electricity version. You can find the license information in the package. Note: With the complimentary DJI Terra license, you can only bind 1 device and cannot unbind it. - Page 38 You can put the data folders of multiple flights into one directory, and select this parent folder that contains the data files. In this way you will get only one LAS file. Alternatively, you can select multiple L1 data file folders for processing. Then you will get a LAS file for each folder.
- Page 39 However, for power line reconstruction, this option is recommended to be turned off. Also if efficiency matters more than accuracy to you, this feature can be disabled, as the processing time can be significantly longer when it's enabled. http://www.dji.com/zenmuse-l1 Copyright © 2022 DJI All Rights Reserved.
- Page 40 Select the Reconstruction Output Format 3D point clouds in PNTS (the format used for display in DJI Terra) and LAS format (the standard format of airborne LiDAR output) will be selected by default. You can also choose to output the point cloud in PLY (for MeshLab), PCD (for CloudCompare), or S3MB (for SuperMap) format.
- Page 41 Height: Display different colors for different altitudes of the point cloud. Return: Display different colors for result data of different echos. Quality Report The quality report for LiDAR point cloud processing is interpreted as follows: http://www.dji.com/zenmuse-l1 Copyright © 2022 DJI All Rights Reserved.
- Page 42 Figure: Interpretation of LiDAR point cloud report parameters http://www.dji.com/zenmuse-l1 Copyright © 2022 DJI All Rights Reserved.
-
Page 43: Result Files
4.3 Result Files The result files output by DJI Terra include a LAS point cloud result and an OUT trajectory file. Figure: Result files output by DJI Terra *.las: The LAS point cloud output by DJI Terra is the standard result of airborne LiDAR. The LAS version is V1.2 and the file can be directly imported to most analysis software. - Page 44 *_smrmsg.out: Post-processing precision file. It contains the root-mean-square error of the smoothed position, direction, and speed. Its data items, units, and types are as follows. Item Unit Type Size GPS Time (seconds of week) seconds double 8 bytes http://www.dji.com/zenmuse-l1 Copyright © 2022 DJI All Rights Reserved.
-
Page 45: Faq
Possible cause: The RTK was disconnected during the flight, or there was no RTK base station data available; or L1 was static/hovering in the air during data collection. Currently, DJI Terra doesn't support post-processing of data collected by a drone sitting still on the ground. -
Page 46: Error Message: The Raw Data Of The Lidar Point Cloud Is Abnormal
In an area with significant elevation differences, some objects may fall out of the measurable range of L1. (5) Low cutting distance of point cloud: The point cloud cutting distance set is less than the actual effective point cloud distance. http://www.dji.com/zenmuse-l1 Copyright © 2022 DJI All Rights Reserved. -
Page 47: How To Achieve A Good Vertical Accuracy
WGS84 and ellipsoid height in unit m. Restart the M300 and D- RTK2 when there is a base station position change error in Pilot app. You may need to check the geoid height in the survey area. http://www.dji.com/zenmuse-l1 Copyright © 2022 DJI All Rights Reserved.
Need help?
Do you have a question about the L1 and is the answer not in the manual?
Questions and answers