Table of Contents
Advertisement
Quick Links
Introduction
Demonstrate truly interactive presentations using AMX's TakeNote annotation
application, NXA-USBTN (FG070-603). Use your finger or a stylus to draw
directly on the Modero screen. The resulting annotations are displayed both on
Modero and the PC. TakeNote even supports multiple users for the ultimate
collaborative environment.
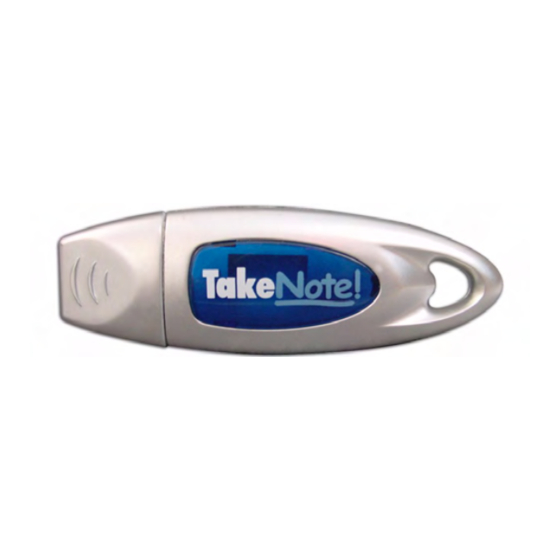
FIG. 1
NXA-USBTN - TakeNote USB Computer Control Stick
This 64MB USB Control Stick contains everything you need to implement both
Computer Control and TakeNote functionality including:
•
The amxCC server application
•
The configCC configuration utility
•
NetLinx cc-GuestPC Code Module
•
Sample Code and Programming/Configuration Pages
•
AMX TakeNote on-screen annotation application
•
RoHS compliant
Specifications
NXA-USBTN (FG070-603) Specifications
Dimensions (HWD):
• 0.32" x 0.87" x 2.87" (8.0 mm x 22.0 mm x 73.0 mm)
Supported OS and
• Windows XP and Windows 2000 operating systems
System Requirements:
• 1 GHz (or higher) Pentium
• USB port
• 256 MB of RAM
Note: Other configurations may experience some per-
formance impact while remote clients are connected.
Included Applications
• TakeNote
• Computer Control (G4CC)
Features:
Port compatibility
• USB 1.1 and USB 2.0
Read/write speed
• 1000 Kb/sec and 900 Kb/sec
LED
• Blue LED indicates the drive connection status
Operating /Storage
• Operating Temperature: 0° C (32° F) to 40° C (104°
Environments:
F)
• Operating Humidity: 20% - 85% RH
• Storage Temperature: -20° C (-4° F) to 60° C (140° F)
• Storage Humidity: 5% - 85% RH
Included Accessories
• Lanyard (neck strap)
• USB extension cable
• Quick Start Guide (93-070-603)
Installing Computer Control and TakeNote
Step 1: Update AMX Hardware and Software
•
Using NetLinx Studio v2.2 (or higher), transfer the most current
product firmware to your Touch Panels and NetLinx Masters. Visit
www.amx.com for the latest firmware files.
•
Use the WebUpdate feature integrated in the TPDesign4 and NetLinx
Studio software to update the applications if necessary. Alternatively, you
could navigate to www.amx.com and download the latest
versions of the programs.
FIG. 2
Step 2: Develop a TPD4 project with G4CC and TakeNote
Support
1.
2.
3.
®
processor
4.
5.
6.
7.
8.
9.
10. Select Transfer > Send to Panel to locate your specific panel.
11.
Note: If the configCC application has not yet been used to configure G4CC, the
panel displays a message stating it cannot connect to the target PC.
Once configCC has been run and G4CC is configured, this message will
disappear and the target PC image will be reflected on the panel.
Quick Start Guide
NXA-USBTN
G4 Computer Control Configuration
Launch TPDesign4 and open an existing project, or create a new one.
Refer to the online help for instructions on using TPDesign4.
If you already have a TPD4 project that utilizes G4CC, then open the
Computer Control page in that project and skip to step 5.
Create or open a panel page and draw a button that covers most or all of
that panel page.
In the General tab of the Button Properties window, set the button's Type to
Computer Control.
Either leave this field blank (preferred) or enter the IP Address of the
Netlinx master in the Remote Host field.
Toggle the Scale To Fit and TakeNote Enabled fields to yes.
In the Programming tab of the Button Properties window, verify that the
Address Port field = 1.
Double-click within the Address Code field and enter a value specific to the
G4CC functionality within this TPD4 project (example: 123).
Create TakeNote functionality buttons (such as Toggle/Annotation, Clear
Screen, Undo, and Color) as needed:
a.
Draw a General-type button on top of the new Computer Control
button.
b.
In the States tab of the Button Properties window, change the fill in
color and label the button Annotation. When complete, navigate to the
the Programming tab.
c.
In the Channel Port field, select 0-setup port.
d.
In the Channel Code field, select Advanced Codes > TakeNote >
Toggle/Activate Annotation.
Repeat these steps to add more TakeNote function buttons to the project
as needed.
Select Transfer > Connect > New to connect the PC to the Master that is
communicating to the target panel.
a.
Enter a Name for the connection and specify the IP Address of the
Master in the Connection Settings dialog. Click OK to create the new
connection type and return to the Connect dialog.
b.
Click Connect to establish the connection to the Master.
Determine your transfer options and click Send to begin the upload
process to the target panel.
™
TakeNote
Advertisement
Table of Contents

Subscribe to Our Youtube Channel
Related Manuals for AMX NXA-USBTN


Summary of Contents for AMX NXA-USBTN
- Page 1 Introduction Demonstrate truly interactive presentations using AMX’s TakeNote annotation application, NXA-USBTN (FG070-603). Use your finger or a stylus to draw directly on the Modero screen. The resulting annotations are displayed both on Modero and the PC. TakeNote even supports multiple users for the ultimate collaborative environment.
- Page 2 ©2007 AMX. All rights reserved. AMX and the AMX logo are registered trademarks of AMX. AMX reserves the right to alter specifications without notice at any time. 3000 RESEARCH DRIVE, RICHARDSON, TX 75082 • 800.222.0193 • fax 469.624.7153 • technical support 800.932.6993 • www.amx.com •...
Need help?
Do you have a question about the NXA-USBTN and is the answer not in the manual?
Questions and answers