AMX NetLinx NI-2100 Hardware Reference Manual
Netlinx integrated controllers
Hide thumbs
Also See for NetLinx NI-2100:
- Hardware reference manual (36 pages) ,
- Installation manual (2 pages) ,
- Quick start manual (2 pages)
Table of Contents

Related Manuals for AMX NetLinx NI-2100


Summary of Contents for AMX NetLinx NI-2100
- Page 1 NI-2100/3100/4100 NetLinx Integrated Controllers Hardware Reference Guide Hardware Reference Guide NI-2100/3100/4100 NetLinx Integrated Controllers N e t L i n x I n t e g r a t e d C o n t r o l l e r s...
- Page 2 AMX is not responsible for products returned without a valid RMA number. AMX is not liable for any damages caused by its products or for the failure of its products to perform. This includes any lost profits, lost savings, incidental damages, or consequential damages.
-
Page 3: Table Of Contents
Modes and Front Panel LED Blink Patterns ............21 Port Assignments and Functionality................ 21 AxLink Port and LED ....................22 Wiring Guidelines ....................22 Wiring length guidelines ....................22 Preparing Captive Wires ....................23 Wiring a Power Connection................... 23 NI-2100, NI-3100, NI-4100 Hardware Reference Guide... - Page 4 IR/Serial Port: Connections and Wiring..............29 NetLinx Control Card Slot Connector (NI-4100 only)..........30 LAN (Ethernet/RJ-45 Port): Connections and Wiring ..........30 LAN LEDs ........................30 LAN Ports Used By the Integrated Controller ............... 31 NI-2100, NI-3100, NI-4100 Hardware Reference Guide...
-
Page 5: Introduction
(< build 300). These NI Controllers are Duet-compatible and can be upgraded via firmware. Duet is a dual-interpreter firmware platform from AMX which combines the proven reliability and power of NetLinx with the extensive ® capabilities of the Java 2 MicroEdition (J2ME) platform. -
Page 6: Timekeeper
The part number for a replacement battery is 57-0032. RISK OF EXPLOSION IF BATTERY IS REPLACED BY AN INCORRECT TYPE. DISPOSE OF USED BATTERIES ACCORDING TO THE INSTRUCTIONS NI-2100, NI-3100, NI-4100 Hardware Reference Guide... -
Page 7: Ni-2100 Specifications
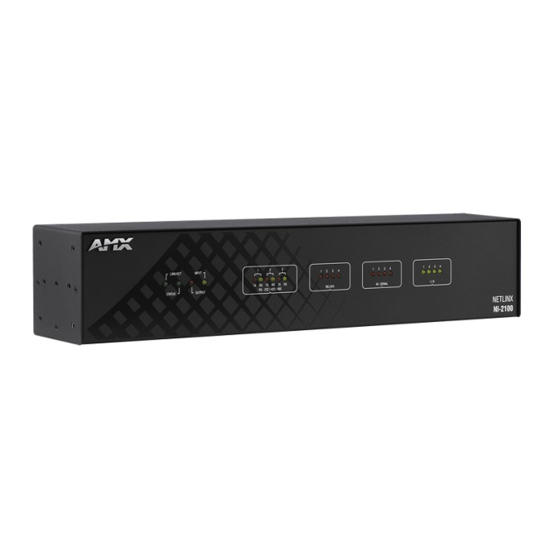
The NI-2100 (FG2105-04) is ideal for control and automation of medium-sized rooms and multi-room applications. The NI-2100 has 64MB of onboard RAM and is Device Discovery enabled to simplify programming by standardizing device and function definitions, default touch panel button assignments, and control and feedback methods. - Page 8 Ethernet data packets. AxLink Port: 4-pin 3.5 mm mini-Phoenix (male) connector that provides data and power to external control devices. Green AXlink LED indicates the state of the AXlink port. NI-2100, NI-3100, NI-4100 Hardware Reference Guide...
- Page 9 • CC-NSER IR/Serial cable (FG10-007-10) • ICSNet daughter card (FG2105-10) • NCK, NetLinx Connector Kit (FG2902) • STS, Serial To Screw Terminal (FG959) • Upgrade Compact Flash (factory programmed with firmware): NXA-CF2NI4G, 4 GB Flash Upgrade (FG2116-07) NI-2100, NI-3100, NI-4100 Hardware Reference Guide...
-
Page 10: Ni-3100 Specifications
• NI-3100/256 256MB Controller (FG2105-25) The NI-3100 & NI-3100+256 can be upgraded to provide one ICSHub and two ICSNet ports by installing the optional ICSNet daughter card (FG2105-10 - see Other AMX Equipment) • NI-3100/ICS 64MB Controller with ICSNet (FG2105-15) •... - Page 11 • 256 MB SDRAM • 1 MB Non-volatile (NV) SRAM Compact Flash: 2GB or greater (upgradeable to 4GB - see Other AMX Equipment). Note: AMX may increase Flash size at any time in response to market availability. Weight: 4.55 lbs (2.06 kg) Enclosure:...
- Page 12 2-pin 3.5 mm mini-Phoenix male connector (41-5026) Equipment: CC-NSER IR/Serial cables (FG10-007-10) ICSNet daughter card (FG2105-10) NCK, NetLinx Connector Kit (FG2902) STS, Serial To Screw Terminal (FG959) Upgrade Compact Flash (factory programmed with firmware): NXA-CF2NI4G, 4 GB Flash Upgrade (FG2116-07) NI-2100, NI-3100, NI-4100 Hardware Reference Guide...
-
Page 13: Ni-4100
The NI-4100’s on-board Master also provides the ability to update installed control card firmware. Verify you are using the latest NI firmware for the on-board Master. Verify you are using the latest version of NetLinx Studio (available for download from www.amx.com). NI-2100, NI-3100, NI-4100 Hardware Reference Guide... -
Page 14: Ni-4100 Specifications
• 256 MB SDRAM • 1 MB Non-volatile (NV) SRAM Compact Flash: 2GB or greater (upgradeable to 4GB - see Other AMX Equipment). Note: AMX may increase Flash size at any time in response to market availability. Weight: 9.15 lbs (4.15 kg) Enclosure:... - Page 15 • 2-pin 3.5 mm mini-Phoenix male connector (41-5026) Equipment: • CC-NSER IR/Serial cables (FG10-007-10) • NCK, NetLinx Connector Kit (FG2902) • STS, Serial To Screw Terminal (FG959) • Upgrade Compact Flash (factory programmed with firmware): NXA-CF2NI4G, 4 GB Flash Upgrade (FG2116-07) NI-2100, NI-3100, NI-4100 Hardware Reference Guide...
-
Page 16: Related Documents
For information on using the on-board Web Console, as well as NetLinx send commands and terminal communications to configure the NI Controllers, refer to the NetLinx Integrated Controller WebConsole & Programming Guide. All product documentation is available to view or download from www.amx.com. NI-2100, NI-3100, NI-4100 Hardware Reference Guide... -
Page 17: Installation And Upgrading
DIP switch setting, 00010101: (0 + 0 + 0 + 96 + 0 + 384 + 1536) + SLOT # (ex:1) = 2017. A card in slot number 1 would be device address 2017. NI-2100, NI-3100, NI-4100 Hardware Reference Guide... -
Page 18: Device:port:system (D:p:s)
Gently grasp the rear edge of the control card and gently pull it out from the unit (along the internal guide slots). Re-secure the faceplate by inserting the three faceplate screws by turning them in a clockwise direction and securing the front plate to the Integrated Controller. Re-apply power and other connections as necessary. NI-2100, NI-3100, NI-4100 Hardware Reference Guide... -
Page 19: Compact Flash Upgrades
Upgrade Compact Flash (factory programmed with firmware): NXA-CF2NI4G, 4 GB Flash Upgrade (FG2116-07) This Compact Flash upgrade module is used by the NI-2100, NI-3100 and NI-4100 Controllers. Accessing The Internal Components On An Integrated Controller Carefully detach all connectors from the rear of the unit. -
Page 20: Installation Of Compact Flash Upgrades
Insert and secure the chassis housing screws back into their respective locations, as shown in FIG. 5 by using a grounded screwdriver. Re-install all connectors and apply power to the unit. NI-2100, NI-3100, NI-4100 Hardware Reference Guide... -
Page 21: Installing Into An Equipment Rack
Refer to the NI Series NetLinx Integrated Controllers WebConsole & Programming Guide (available online at www.amx.com) for detailed instructions. Discharge the static electricity from your body by touching a grounded object. - Page 22 FIG. 7. Secure the AC-RK to the rack by using the four #10-32 screws (80-0186) and four #10 washers (80-0342) supplied in the kit. Apply power to the unit to complete the installation. NI-2100, NI-3100, NI-4100 Hardware Reference Guide...
-
Page 23: Connections And Wiring
Power must be cycled to the unit after activating/deactivating this mode on the Program Port DIP switch #1. NI-2100, NI-3100, NI-4100 Hardware Reference Guide... -
Page 24: Working With The Configuration Dip Switch
When wiring the 422/485 connections, do NOT use pre-made 9-wire cable or connect the wire in the cable to any connection that will not be used by the DB9 serial port. Only use wiring that connects the needed pins. NI-2100, NI-3100, NI-4100 Hardware Reference Guide... -
Page 25: Modes And Front Panel Led Blink Patterns
IR Serial Port #1 IR Serial Port #2 IR Serial Port #3 IR Serial Port #4 IR Serial Port #5 IR Serial Port #6 IR Serial Port #7 IR Serial Port #8 I/O Port NI-2100, NI-3100, NI-4100 Hardware Reference Guide... -
Page 26: Axlink Port And Led
All NI Controllers have an AxLink port and adjacent status LED (FIG. 8). This port allows the NI to support AMX Legacy AXlink devices such as G3 touch panels (ex: CP4/A) and PosiTrack Pilot devices. A green LED shows AXlink data activity. When the AXlink port is operating normally, blink patterns include: ... -
Page 27: Preparing Captive Wires
Connect the 4-pin 3.5 mm mini-Phoenix (female) captive-wire connector to an external NetLinx device as shown in FIG. 10. To the Integrated Controller’s AXlink/PWR connector To the external AXlink device Top view Top view FIG. 10 Mini-Phoenix connector wiring diagram (direct data and power) NI-2100, NI-3100, NI-4100 Hardware Reference Guide... -
Page 28: Using The 4-Pin Mini-Phoenix Connector For Data With External Power
Make sure to connect only the GND wire on the AXlink/PWR connector when using a separate 12 VDC power supply. Do not connect the PWR wire to the AXlink connector’s PWR (+) opening. NI-2100, NI-3100, NI-4100 Hardware Reference Guide... -
Page 29: Db9 Device Port: Connections And Wiring
X (strap to pin 9) Receive data Transmit data Transmit data X (strap to pin 6) Signal ground Receive data X (strap to pin 4) Request to send Clear to send Transmit data X (strap to pin 1) NI-2100, NI-3100, NI-4100 Hardware Reference Guide... -
Page 30: Icsnet Port: Connections And Wiring
ICSNet, but these ports need TX and RX crossed. You must connect an OUT to an IN, or an IN to an OUT port. This is done simply to keep the polarity straight. The Hub bus is still a bus. All Hub connections are bi-directional. NI-2100, NI-3100, NI-4100 Hardware Reference Guide... -
Page 31: Icshub Out Port: Connections And Wiring
Relay Port: Connections and Wiring You can connect up to 8 independent external relay devices on both the NI-4100 and NI-3100 units (4 on the NI-2100) to the Relay connectors on the Integrated Controller. Connectors labeled A are for common; B are for output. -
Page 32: Input/Output (I/O) Port: Connections And Wiring
The GND connector is a common ground and is shared by all I/O ports. A common ground is shared with I/O ports 1 - 8 (NI-3100/NI-4100) or with I/O ports 1 - 3 (NI-2100). I/O Port Wiring Specifications I/O Port Wiring Specifications NI-2100... -
Page 33: Ir/Serial Port: Connections And Wiring
You can connect up to eight IR- or Serial-controllable devices to the IR/Serial connectors on the rear of the NI- 4100 and NI-3100 and up to four on the NI-2100 (FIG. 15). These connectors accept an IR Emitter (CC-NIRC) that mounts onto the device's IR window, or a mini-plug (CC-NSER) that connects to the device's control jack. -
Page 34: Netlinx Control Card Slot Connector (Ni-4100 Only)
SPD - Speed LED lights (green) when the lights (yellow) when the connection speed is 100 Mbps LAN cables are and turns Off when speed is connected and terminated 10 Mbps. correctly. FIG. 18 LAN LEDs NI-2100, NI-3100, NI-4100 Hardware Reference Guide... -
Page 35: Lan Ports Used By The Integrated Controller
1319, or disable ICSP over LAN completely from either Telnet or the Program Port located on the rear of the Master itself. This type of communication is used by the various AMX product for communication amongst themselves. integration! - Page 36 Connections and Wiring NI-2100, NI-3100, NI-4100 Hardware Reference Guide...
- Page 37 Connections and Wiring NI-2100, NI-3100, NI-4100 Hardware Reference Guide...
- Page 38 It’s Your World - Take Control™ 3000 RESEARCH DRIVE, RICHARDSON, TX 75082 USA • 800.222.0193 • 469.624.8000 • 469-624-7153 fax • 800.932.6993 technical support • www.amx.com...
Need help?
Do you have a question about the NetLinx NI-2100 and is the answer not in the manual?
Questions and answers