Table of Contents
Advertisement
Advertisement
Table of Contents

Related Manuals for AMX MX Series


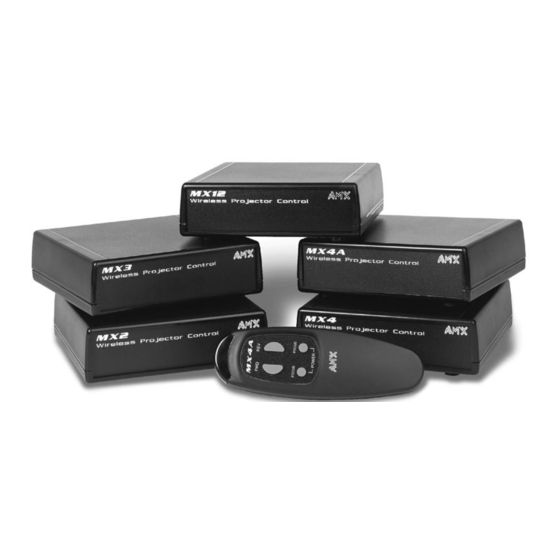
Summary of Contents for AMX MX Series
- Page 1 MX Series NSTRUCTION ANUAL...
-
Page 2: Table Of Contents
Table of Contents MX Series of Wireless Laser Pointer (Optional) ......10 Slide Projector Controllers ......3 MX12 ..............11 Using the MX Series ........4 hand controls ........11 MX12 Installation ( receiver) ......12 MX12 Functional Overview ........5 Single-projector control models ......5 Communications Settings ....14 Dual-projector control model ......5... -
Page 3: Mx Series Of Wireless Slide Projector Controllers
MX Series of Wireless Slide Projector Controllers series of slide projector controllers offers Each transmitter is housed in a durable, hand- total slide projector control combined with freedom held case with easy-to-use, ergonomically placed of movement for convenient, professional audiovisual pushbuttons. -
Page 4: Using The Mx Series
Using the MX Series To operate the series transmitters: 1. To ensure maximum operating range, place the receiver on a non-metallic surface, away from the projector. 2. For the unit to operate, the controlled projector must have its power switch in an position. -
Page 5: Functional Overview
Functional Over view Single-projector control models Figure 1 lists the functionality of the single-projector controllers. AC POWER Figure 1 MODEL FORWARD REVERSE FOCUS ON/OFF Functionality of single-projector • • MX2(L) controllers • • • MX3(L) • • • MX4(L) • •... -
Page 6: Mx2(L), Mx4(L)
MX2(L), MX4(L) Transmitters MX2/MX2L hand controls Figure 3 — Press to advance the projector. • FWD MX2/MX2L transmitter — Press to reverse the projector. • REV — Push the trigger on the bottom of the • TRIGGER (MX2) transmitter to advance the projector. —... -
Page 7: Installation
MX2(L), MX4(L) Re ceivers Installation (MX2, MX4 receivers) Figure 5 shows an illustration of the installation of receivers. To install receivers: 1. Plug the 5-pin receiver cord (A) into the remote receptacle on the projector (B). 2. When a Kodak slide projector is used, the receiver ®... -
Page 8: Mx3(L), Mx4A(L)
MX3(L), MX4A(L) Transmitters MX3/MX3L hand controls Figure 6 • — Press to advance the projector. MX3/MX3L transmitter • — Press to reverse the projector. • — Press both pushbuttons simultaneously to toggle POWER POWER power On/Off. • — Push the trigger on the bottom of the trans- TRIGGER (MX3) mitter to advance the projector. -
Page 9: Receivers
MX3(L), MX4A(L) Re ceivers Installation (MX3, MX4A receivers) Figure 8 shows an illustration of the installation of receivers. To install MX4A MX4A receivers: 1. Plug the 5-pin receiver cord (A) into the remote receptacle on the projector (B). 2. Plug the projector power cord (E) into the AC outlet on the rear of the receiver unit. -
Page 10: Laser Pointer (Optional)
Laser Pointer (Optional) transmitters (except the ) are available with MX12 an optional laser pointer to use in presentations. M transmitters equipped with the laser pointer are the MX2L MX3L MX4L, MX4AL The laser source is located at the front of the trans- mitter, as shown in Figure 9. -
Page 11: Mx12
MX12 Transmitter MX12 hand controls • — Press to advance the projector. • — Press to reverse the projector. • — Press to move the lens out to focus the image. FOCUS (upper) • — Press to move the lens in to focus the image. FOCUS (lower) •... -
Page 12: Installation
MX12 Re ceiver Installation (MX12 receiver) By following these instructions, the left-hand row of pushbuttons on the transmitter will control MX12 Projector 1, and the right-hand row of pushbuttons will control Projector 2. 1. Plug the receiver remote control cable (A) marked Remote 1 into the remote receptacle (B) on Projector 1. -
Page 13: Communications Settings
Communications Settings The Communications DIP switch series slide projector controllers feature a modulated signal for omni-directional operation at 75 feet range, and are effective through walls, glass, or screens. DIP switch Since all units operate at the same frequency, switch coding is used to dedicate one transmitter (or more) to a particular receiver(s). -
Page 14: Communications Settings
Communications Settings switch for the transmitter is shown in Figure 14. MX12 presets the transmitter and receiver with a recommended switch setting at the factory. Resetting the switches may be required to control two or more receivers from a single transmitter or a single receiver from two or more transmitters. - Page 15 Communications Settings Transmitter/receiver DIP switch settings Figure 15 Transmitter switch Receiver switch Transmitter/receiver position Setting position Setting switch settings Battery status LED: On/Off Not used If you have multiple controllers Not used in a single environment, make Not used sure to set each transmitter/ receiver combination to a unique MX2, MX3, MX4, MX4A: MX2, MX3, MX4, MX4A:...
- Page 16 Communications Settings Figure 16 Figure 17 Location of switch in Location of switch in receivers receiver MX4, MX4A MX12 DIP switch DIP switch...
-
Page 17: Battery Replacement
Batter y Replacement transmitters without the laser pointer ( the transmitter and replace the two batteries. ) have a red indicator For the transmitter, replace the two 1.5-volt, MX4A MX12 MX12 to monitor battery status. When a transmitter push- “N” size batteries. Under normal conditions, battery button is pressed, the flashes to indicate a good life will exceed 1 year. -
Page 18: Troubleshooting
Troublesho oting Problem: Slide projector will not turn on when Problem: No operation command pushbuttons are pressed. Solution: Solution: • Check switch settings — the transmitter and • Verify that the slide projector power switch is in the receiver must match. position. -
Page 19: Common Questions
Common Questions This section gives answers to common questions about series transmitters and receivers. Do I need to point the transmitter in the direction I dropped my transmitter or lost it. Can I order of the slide projector? a replacement transmitter only? No. - Page 20 Limite d Warranty and Disclaimer Corporation warrants its MX series products to be free from defects in material and workmanship under normal use for a period of one year from date of purchase from This warranty extends to products purchased directly from or an authorized dealer.
Need help?
Do you have a question about the MX Series and is the answer not in the manual?
Questions and answers