
Related Manuals for Dexter Laundry DTCH 80 V


Summary of Contents for Dexter Laundry DTCH 80 V
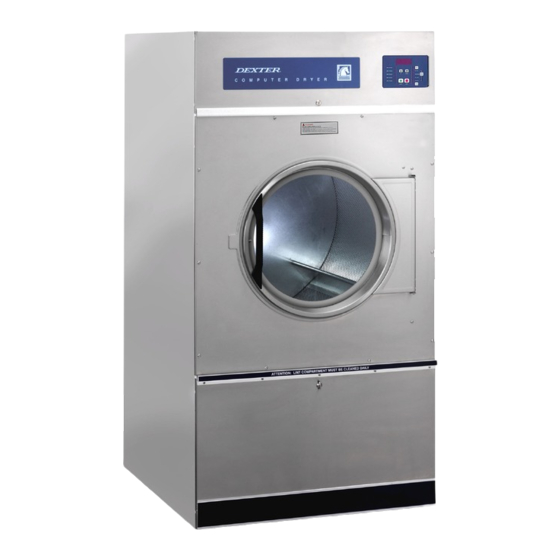
- Page 1 80 LB.OPL MICRO REVERSING DRYER DTCH 80 V Service Procedures and Parts Data The Dexter Company Fairfield Iowa 52556 641-472-5131 Part number # 8533-051-001 FAX: 641-472-6336 3/05...
- Page 2 Disconnect power before servicing WARNING FOR YOUR SAFETY, THE INFORMATION IN THIS MANUAL MUST BE FOLLOWED TO MINIMIZE THE RISK OF FIRE OR EXPLOSION OR TO PREVENT PROPERTY DAMEGE, PERSONAL INJURY OR LOSS OF LIFE. IF YOU SMELL GAS: Do Not try to light any appliace. Do Not touch or operate any electrical switch.
-
Page 3: Table Of Contents
Table of Contents SECTION 1 Specifications ....................page 4 - 5 SECTION 2 Installation & Operation ..................page 7-25 Micro Fault Codes ..................... page 26-27 SECTION 3 Wiring Schematics ..................... page 28-29 SECTION 4 Service Procedures ................... page 30-35 SECTION 5 Trouble Shooting .................... -
Page 4: Specifications
Section 1 Specifications Model DTCH80V Reversing Micro-controlled Industrial Dryer Capacity Maximum 80 pounds dry weight (36kg) Cylinder dimensions 36 1/2" (92.71cm) diameter 38" (96.52cm) depth Cabinet dimensions 38.44" W x 51.13" D x 75.5" H (w/legs) (97.63cm X 129.86cm X 191.77cm w/legs) Motors Drive motor - 1/2 HP (.373 Kw) Blower motor - 1/2 HP (.373 Kw) - Page 5 38.44"(97.63cm) 14.00"(35.56cm) Gas Connection Front 75.13"(190.82cm) Back 64.63"(164.15cm) (25.71cm) 10 1/8" 8.00" (20.32 cm) 31.1"(79.06cm) 12.055" (30.50cm) 12.00" ( 30.48cm) Electrical Connection 1.375"(3.49cm)Max. 5.06" (12.86cm) 3/8"(.952cm) min. 51.13"(129.86cm) 42.38"(107.63cm) Side (30.48cm) 12.09" 30.90" (78.48cm) 11.52" (29.26cm)
-
Page 6: Installation & Operation
Section 2 Installation & Operation Uncrating 1. Remove cardboard and innerpack. Installation 1. All commercial dryer installations must conform with local applicable local codes or in the absence of local codes, with the National Fuel Gas Code ANSI Z223.1A-1988. Canadian installations must comply with current standard CAN/CGA-B149(.1 or .2) Installation Code for Gas Burning Appliances or Equipment, and local codes if applicable. - Page 7 Make-up Air . Adequate make-up air must be supplied to replace air exhausted by dryers on all types of installations. Provide a minimum of 1 1/2 square foot of make-up air opening to the outside for each dryer. This is a net requirement of effective area. Screens, grills or louvers which will restrict the flow of air must be considered.
- Page 8 NOTE: From an operational standpoint, incorrect or inadequate exhausting can cause cycling of the high limit thermostat which shuts off the main burners and results in inefficient drying. NOTE : Individual exhausting of the dryer is recommended. All heat, moisture, and lint should be exhausted outside by attaching a pipe of the proper diameter to the dryer adapter collars and extending it out through an outside wall.
- Page 9 NOTE: Never install the 8" ducts at a right angle into the main discharge duct. The following illustration shows the various round main duct diameters to use with the individual dryer ducts. The main duct can be rectangular or round, provided adequate air flow is maintained. For each dryer, the total exhausting (main discharge duct plus duct outlet from the dryer) should not exceed the equivalent of 20 feet and two elbows.
- Page 10 Controls Transformer This transformer is mounted in the control box on the back of the dryer and steps a range of 208 to 240 volts down to 24 volts for the controls. There are three terminals on the controls transformer for the incoming power. The 208 VAC terminal is for 208 to 220 volts and the 240 VAC terminal is for 221 to 240 volts.
- Page 11 OPERATING INSTRUCTIONS To dry a load of items, you must choose one of the five-programmed dry cycles. Each of these five dry cycles may be modified in two different ways to match your load. Please refer to the “Permanent Programming” or “Temporary Programming” section of these instructions. There are two parts to each dry cycle.
- Page 12 At that point, the wrinkle free cycle will automatically begin. This cycle will wait two minutes, if the door is not opened or the STOP touch pad key on the dryer controller is not pressed, and then rotate the cylinder for 10 seconds and stop. This two minutes of idle time and 10 seconds of tumble time will repeat a total of 10 times, at which time the wrinkle free cycle stops.
- Page 16 TEMPORARY PROGRAMMING The temporary programming mode will allow the change of the stored dry cycle settings in the dryer controller for one complete dry cycle. After the dry cycle is complete, the default settings that existed before the temporary change are restored. The temporary dry cycle can be stopped and cleared at any time during the dry cycle operation.
- Page 17 3) Press and release the CYCLE key on the dryer controller touch pad once you have chosen the dry cycle you want to change. After you press this key, the programming L.E.D. and the dry time L.E.D. will illuminate. The dry cycle L.E.D. will remain illuminated. The total dry time will also be displayed on the 4-digit numeric display.
- Page 18 10)Press and release the UP or DOWN arrow keys to switch between reversing and non- reversing operation. Once either of the arrow keys is pressed, the reversing L.E.D. and the “rEv” (reversing mode) or the “nrEv” (non-reversing mode) shown on the 4-digit numeric display will flash.
- Page 19 TEMPORARY PROGRAMMING EXAMPLE REQUIREMENTS Dry a load, in reverse mode, with 40 minutes of actual heat at F and two minutes of cool down. The following procedure will show you how to temporarily modify the existing dry cycle 5 program for one cycle of drying. It is based on the assumption that the factory defaults have not been permanently changed.
- Page 20 6) Now, press and release the SELECT/ENTER touch pad key on the dryer controller. The number “185” will stop flashing and the temperature L.E.D. will switch off. The dryer control display will now show a number “2”, the cool down L.E.D. will illuminate, and the programming L.E.D.
- Page 21 PERMANENT PROGRAMMING The permanent programming mode will allow the change of the stored dry cycle settings in the dryer controller until the operator physically changes them again. The factory default settings can be restored in the dryer controller by pressing the default settings pushbutton on the back (component) side of the dryer controller circuit board.
- Page 22 7) Press and release the SELECT/ENTER key. Once this key is pressed and released, the dry time L.E.D. will switch off, the dry cycle L.E.D. and programming L.E.D. will remain on, and the temperature L.E.D. will illuminate. The drying temperature will also be shown on the 4-digit numeric display.
- Page 23 12)Press and release the UP or DOWN arrow keys to switch between reversing and non- reversing operation. Once either of the arrow keys is pressed, the reversing L.E.D. and the “rEv” (reversing mode) or the “nrEv” (non-reversing mode) shown on the 4-digit numeric display will flash.
- Page 24 PERMANENT PROGRAMMING EXAMPLE REQUIREMENTS : Dry a load, in reverse mode, with 50 minutes of actual heat at F and three minutes of cool down. The following procedure will show you how to permanently modify the existing dry cycle 5 program for one cycle of drying.
- Page 25 7. Press and release the UP arrow touch pad key four times until the dryer controller display shows the number “195”. 8. Press and release the SELECT/ENTER touch pad key. The dry cycle 5 L.E.D. and the programming L.E.D. will remain on and the temperature L.E.D. will switch off. The cool down L.E.D.
- Page 26 Fault Diagnostic Indicators Fault # Fault Description Action Shorted thermostat sensor. Stop dryer, flash F1 on display. Open thermostat sensor. Stop dryer, flash F2 on display. EEPROM corrupted. Stop dryer, flash F3 on display. Gas valve circuit not operating. Store F4 fault in memory for later recall.
- Page 27 REVERSING DRYER CONTROLLER FACTORY DEFAULT PROGRAM SETTINGS COOL TOTAL DRYING DRYER DOWN CYCLE DRYER LOAD TEMPERATURE CYCLE DIRECTION TIME TIME (MINUTES) (MINUTES) Towels, pads, REV. heavy cotton Sheets, blended REV. materials Cotton REV. Synthetic NON-REV. materials Blended materials NON-REV. REVERSING DRYER FAULT CODES FAULT FAULT# ACTION...
-
Page 30: Service Procedures
Section 4 Service Procedures Clothes Door Removal 1. The clothes door may be removed from the hinge bracket by unscrewing and removing the allen head pivot screw located at the door upper hinge point. 2. Next lean the door out of the top of the hinge bracket and lift the door from the bottom hinge pin. - Page 31 Door Switch Operation & Testing 1. The normally open door switch must be closed (0 ohms resistance) for the motor and heat circuits to operate. When the door is opened, the door switch breaks the 24 volt control circuit. Door Switch Adjustment 1.
- Page 32 Front Panel Removal To remove the front panel, first remove the loading door from the panel. Then remove the two left side screws and the four right side screws. The trim does not have to be removed. (The panel may be removed with the door left in place, although it is much heavier and more awkward to do so.) NOTE: Always remove power from the machine before changing drive belts or...
- Page 33 Spark Electrode Assembly-Removal 1. Remove electrode cover and disconnect wires to electrodes. 2. Remove two screws to detach electrode assembly. NOTE: Proper grounding of the ignition system (yellow wires) is very critical for proper ignition sequence. Ignition System - Function & Sequence During normal dryer operation, the following occurs: 1.
- Page 34 5. If the flame is shut down or blown out during operation, the ignitor will immediately go into “Trial For Ignition” again for 10 seconds. 6. However, if during any 10 second “Trial for Ignition”, the flame is not estab lished, the ignition system goes into “Safety Lock-Out”...
- Page 35 UPPER & LOWER Tension Arm Assembly Removal The tension arm assembly may be removed by removing the snap ring that holds it to the tension arm support assembly pin. If it is necessary the arm assembly is replaced as a complete unit .
-
Page 36: Trouble Shooting
Section 5 Trouble Shooting Symptom Probable Cause Suggested Remedy Tumbler does not turn Drive belts Check both drive belts Drive motor Check capacitor and motor Door switch Check door switch contacts and adjustment Micro control Check that LED's are lit and green start key pushed Motor Relay Check motor relay coils (24v) and contacts. - Page 37 Tumbler turns Gas supply Make sure gas supply is working ignition sparks no flame Gas pressure Make manometer check of gas pressure for 3 .5" W.C. or more at supply side Spark electrode Check electrode for damage to electrode or mounting Gas valve Check coil continuity,replace valve if bad Slow drying...
-
Page 38: Parts Data
Section 6 Parts Data CABINET GROUP Part Number Description Qty. 9960-256-021 Door Assy., Loading Complete-Wht ..........1 9960-256-025 Door Assy., Loading Complete-SS ..........1 9960-255-007 Door Assy.ONLY, Loading-SS ............1 9982-280-002 Plate Assy., Hinge (Wht) ............... 1 9982-280-011 Plate Assy., Hinge (SS) ..............1 9545-012-015 Screw, Hinge to Door 10-32 x 3/8"... - Page 39 14 & 13...
- Page 40 CABINET GROUP (continued) Part Number Description Qty. 9960-281-001 Door Ass’y, Lower Service-SS ............1 9960-281-003 Door Ass’y, Lower Service-White ........... 1 9578-088-001 Trim, Door - Lower Service ............. 1 9435-016-003 Overlay-Trim Lower service door ............ 1 9545-008-021 Screw,Pn Hd Cr., #10Bx3/8 ............5 9277-050-002 Insulation Lower Service Door ............
- Page 41 right left outer shell overlay...
- Page 42 Control Housing Group Part Number Description Qty. 9471-015-001 Electronic Control ................1 9538-157-015 Spacers, Circuit Board - #8 x 1/2 ........... 4 8639-621-007 Screw, #10-32x1/2 GRN..............1 8641-582-006 Lockwasher #10 ext tooth .............. 1 8220-060-001 Wire Assembly Green 12" ............. 1 8640-411-003 Nut, Keps - Circuit Board (for grounding) ........
- Page 44 DOOR SWITCH GROUP Part Number Description Qty. 9041-076-001 Box, Door Switch ................1 9550-159-001 Shield, Door Switch ............... 1 9539-461-001 Switch, Door .................. 1 8640-401-001 Nut, Special Twin #4-40 ..............1 9545-020-001 Screw, Pn Hd Sl.#4-40x5/8 ............2 9074-255-001 Cover, Switch Box ................. 1 9545-008-020 Screw, Box Cover 10 AB x 3/4"...
- Page 45 CONTROL BOX GROUP Part Number Description Qty. 9807-085-001 Box Assembly, Control..........1 9074-284-001 Cover, Control Box............1 9545-008-026 Screw................4 5192-293-001 Relay, Reversing ............1 9545-044-002 Screw................. 2 8640-411-003 Nut................2 9897-035-001 Terminal Block Assembly, Power........1 9558-029-002 Strip, Terminal Marker........... 1 9545-045-002 Screw .................
- Page 46 BEARING HOUSING GROUP Part Number Description Qty. 9803-189-001 Housing, Bearing Ass’y w one ( rear ) bearing ....... 1 9241-183-003 Housing, Bearing ................1 9036-159-001 Bearing, Ball-Rear ................. 1 8641-581-026 Washer, Flat 1/2" ................4 8641-582-004 Lockwasher spring 1/2" ..............4 9545-017-004 Bolt, 1/2-13x1 ................
- Page 47 TUMBLER GROUP Part Number Description 9848-118-001 Tumbler Ass’y ................1 9873-005-001 Spider Ass’y with bearing on ............1 9497-226-001 Rod, Tumbler ................. 4 8640-417-002 Nut 1/2"-13 ................... 4 9552-013-000 Shim ....................4 8641-582-004 Washer, Spring Lock ..............4 8641-590-001 Washer, Tumbler Rod Special ............4 9487-234-001 Ring, Tolerance ................
- Page 48 BURNER HOUSING GROUP Part Number Description Qty. 9803-195-001 Housing Assembly, Burner ............1 9545-008-024 Screw .................... 4 9548-280-001 Support, Front Burner ..............1 9545-008-008 Screw 10T-32 x 1/2" ..............1 9048-018-001 Burner, Main .................. 4 9545-008-008 Screw 10T-32 x 1/2" ..............4 9875-002-002 Electrode, Ignition ................
- Page 49 15 & 16...
- Page 50 DRIVE GROUP Part Number Description Qty. 9376-302-001 Motor, Drive Tumble ..............1 8640-276-003 Wire Nut connector #73B (for302-001) ........... 3 9376-302-002 Motor, Drive Blower ..............1 8640-276-003 Wire Nut connector #73B (for302-002) ........... 3 9545-014-004 Screw, Hx 5/16-18X5/8 ..............8 8640-400-003 Nut 5/16-18 ..................
- Page 51 7&9 5/16"bolt 4&5...
- Page 52 AIR FLOW SWITCH, LINT HOOD & BLOWER IMPELLER GROUP Part Number Description Qty. 9539-461-009 Switch, Air Flow ................1 9550-169-003 Shield, Air Flow Switch.............. 1 9545-020-001 Screw, Hx #4-40x5/8 ..............2 8640-401-001 Nut, Special Twin #4-40 ..............1 9008-007-001 Actuator-Switch, Air Flow .............. 1 9451-169-002 Pin, Cotter ..................
- Page 53 WIRING GROUP Part number Description Qty. 6068-044-008 Conduit 1/2 x 66" use at top motor 8653-068-007 Connector 1/2" 45 use at top motor 8653-068-005 Connector 1/2" Str. use at top motor 2114-018-001 Bushing Anti-short 1/2 use at top motor 8220-088-007 Wire red/yel 79"...
-
Page 54: Maintenance
Section 7 Maintenance MAKE SURE ALL POWER IS DISCONNECTED MAKE SURE ALL POWER IS DISCONNECTED MAKE SURE ALL POWER IS DISCONNECTED MAKE SURE ALL POWER IS DISCONNECTED MAKE SURE ALL POWER IS DISCONNECTED BEFORE BEFORE BEFORE MAKING CHECKS INSIDE MACHINE. MAKING CHECKS INSIDE MACHINE. - Page 55 Specifications Industrial Dryers Timer Model DLH30 DRH55 DRH80 Micro Model DTCH30 DTCH55 DTCH80 Micro Model w/ Reversing Cylinder DTCH80V Capacity Dry Weight Capacity 30 lbs 13.5 kg 55 lbs 24.8 kg 80 lbs 36.3 kg 80 lbs 36.3 kg Cylinder Diameter 30"...
Need help?
Do you have a question about the DTCH 80 V and is the answer not in the manual?
Questions and answers