Table of Contents
Advertisement
Quick Links
Advertisement
Table of Contents

Related Manuals for S&P UTBS PRO-REG Series


Summary of Contents for S&P UTBS PRO-REG Series
- Page 1 SERIE UTBS PRO-REG...
-
Page 3: Table Of Contents
ENGLISH INDEX 1. OVERVIEW ............................5 2. SAFETY STANDARDS AND “EC” MARKING ..................5 3. GENERAL STANDARDS ........................5 4. UNIT LABELING ..........................6 5. TECHNICAL CHARACTERISTICS ......................6 6. HANDLING ............................8 7. INSTALLATION........................... 10 7.1. Overview ............................. 10 7.2. Identifi cation unit parts ......................11 7.3. - Page 4 11.8. Control of isolation damper ..................... 47 12. BOOST FUNCTION (only available in CAV and COP modes) ............. 48 13. REMOTE STOP-START ........................48 14. FREE COOLING BY NIGHT ......................... 49 15. WATER HEATER FROST PROTECTION ....................50 16. RESET THE CORRIGO CONTROLLER ....................50 17.
-
Page 5: Overview
1. OVERVIEW • We appreciate the trust you have placed in us by purchasing this device. You have pur- chased a high-quality product that has been manufactured in strict compliance with re- cognized technical regulations regarding safety, and in accordance with EC standards. •... -
Page 6: Unit Labeling
4. UNIT LABELING • The unit comes with a variety of labels that must not be removed. Herewith sample la- bels and meaning: ICON / LABEL MEANING Signing on fan access door. Indicates that the equipment must be disconnec- ted, followed by a waiting period, since there are moving parts that constitute danger to entry. - Page 7 Motor Frequency Maximum airflow (m UTBS PRO-REG Power range Model Chilled coil/DX Hot coil Without coils (kW) (Hz) 1300 1500 1500 1x0,55 20-55 2500 2500 2500 1x0,75 20-50 3800 4500 5100 2x0,75 20-50 6500 7400 7500 2x1,1 20-50 Coil section Water coils In the section it can be included one or two water coils (one heating or one cooling coil or both at the same time).
- Page 8 Electric heaters The unit can be supplied with electric heaters made of shielded resistances with a galva- nised sheet frame. The heaters are equipped with safety protection with manual and auto- matic reset. The heater has an anti-radiation screen to protect the fi lters. Model Available electric power / Stages UTBS-2...
-
Page 9: Handling
Filtering section The fi ltering section has one fl at fi lters made from galvanised steel frame. This section includes an specifi c rail to fi t a second fi lter (supplied as an accessory). Prefi lters Mounting system via rails included. Available prefi... -
Page 10: Installation
• It is possible to manipulate by the unit using a forklift or crane. Handling machines must be adapted to the conditions of loading and lifting. In all cases, the lift must be carried out from the base of the device. The centre of gravity is NOT in the center of the unit. Before lifting the equipment ensure that gravity center of the device is entering the two blades of the forklift. -
Page 11: Identifi Cation Unit Parts
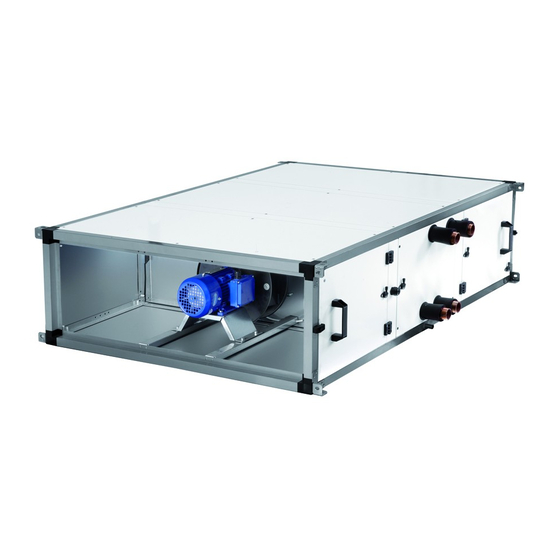
.2. IDENTIFICATION The main module may consist of three different sections: filter, coils and fans. However, one of the first two sections may not be included. The following illustration identifies the main components of the main module. Prefilter Final filter Fouling Drop separator detector filters... -
Page 12: Dimensions
7.4.1. Dimensions Units without batteries AIRE SENSE Version with registers in left side - L Model Externals Connections Supports UTBS-2 UTBS-3 1100 1040 1140 UTBS-5 1500 1440 1540 UTBS-8 1900 1840 1940... - Page 13 Units with electric batteries AIRE SENSE Version with registers in left side - L Model Externals Connections Supports UTBS-2 1159 UTBS-3 1100 1040 1159 1140 UTBS-5 1500 1440 1159 1540 UTBS-8 1900 1840 1159 1940...
- Page 14 Units with battery/ water coils and/or direct expansion AIRE SENSE Version with registers in left side - L Model Externals Connections Supports Battery* UTBS-2 1409 1-¼” UTBS-3 1100 1040 1409 1140 1-¼” UTBS-5 1500 1440 1409 1540 1-¼” UTBS-8 1900 1840 1409 1940...
-
Page 15: Space For Maintenance
7.4.2. Space for maintenance The UTBS can be ordered with access side in the desired hand (according to air sense) Access to fi lters can by done throw the specifi c lateral registers or from the inferior panels. The access to the electrical cabinet is from the lateral panel. To perform the disassembly of coils and batteries, it is necessary to remove the lateral panel and slide the battery until her complete extraction. - Page 16 • For ceiling and floor-mounted applications, the unit must be suspended from the four angle brackets on each module, as follows: CEILING MOUNTED FLOOR MOUNTED To prevent transmission of motor vibrations until wrought, it is necessary to install antivi- brations on each of the anchor points. Use antivibration kits recommended in the following table: Model Antivibration support...
-
Page 17: Assembling The Modules
MOUNTING POSITION Before switch on the unit, verify that the ductwork is free of obstacles to prevent or modify the air passage. .5. ASSEMBLING THE MODULES Exist different accessories that can be supplied with UTBS module: Antivibrator supports Flexible connection Sound attenuator UTBS module... -
Page 18: Additional Filters Mounting
The module frames have mounting brackets on each corner that are used to secure the equipment to the ceiling and to join the various modules to one another. If the unit is made up of different modules, it will be supplied with a joining kit with 4 sets of bolts, washers, nuts and a sealing gasket. -
Page 19: Mixing Module Installation
7.5.3. MIXING MODULE INSTALLATION The mixing module is installed in the intake air side and allows to realize the the mixing between the outdoor air and the recirculated air with proportional regulation of existent dampers in either air intakes. The mix module and the corresponding servomotors are supplied both as accessories. The installer should mount the damper module, using the screws and bolts supplied with the unit. - Page 20 Both the damper module and the corresponding servomotors are supplied as accessories. The installer should mount the damper module, using the supplied hardware with this. Mount the servomotor on the damper shaft. After mounting the servomotor, make the electrical connection to the electrical cabinet according the electrical diagram.
-
Page 21: Connecting The Unit To The Duct System
The water oils must run ounter to the flow of air to rovide the orr forman This means that the fluid inlet must be ted on the manifold lo ated on the air and the fluid outlet must be ted on the manifold situated on the air intak follo We suggest having all the elements needed for the installation on mentioning... -
Page 22: Direct Expansion Coils Connection (Dx)
7.7. DIRECT EXPANSION COILS CONNECTION (DX) Coil characteristics DX 4 rows coil For applications with 100% recirculated air UTBS Volume Phases Tubes Rows Circuits Ø Liquid Ø Gaz Cooling Heating Airfl ow header header power power (mm) (mm) (kW) (kW) UTBS-2 1/2"... -
Page 23: Drainage System
- Evaporative coils are supplied with sealed ends without refrigerant charge or nitrogen load. - The cooling pipe used in the installation must be copper suitable for its use in cooling circuits. - Before fi lling with refrigerant, cleaned dehydration and deoxidized of the entire refri- gerant circuit must be done. -
Page 24: Temperature Probes Location
- The motors must be connected following the instructions in the wiring schematics for the terminal boxes for the various motors. The equipment has glands on the sides where the power is connected for running power cables to the motors. - A power outlet, fuse or “U”... - Page 25 Installation with 100% of Outdoor Air Installation with 100% of Indoor Air (Recirculation) Installation with mixing module ( Variable % Outdoor Air / Indoor Air)
-
Page 26: Start-Up Procedure
Those versions with internal hot water coil or reversible coil included, also integrate a wa- ter temperature probe mounted on the coil return manifold. This probe, which is supplied already assembled and wired from factory, supervises the risk of freezing. Do not manipu- late this probe in any case. -
Page 27: Control Functions
9. CONTROL FUNCTIONS The UTBS PRO-REG units are supplied with integrated electronic control in the unit. It allows to perform the following functions: Without With With Witch batteries water electrical coils battery battery MAIN COMPONENTS General proximity switch over the electrical box •... - Page 28 Without With With Witch batteries water electrical coils battery battery COMMUNICATION Control of polluted filters via pressure switches (included) • • • • Failure in temperature probes • • • • Failure in fan via pressure switches (included) • • •...
-
Page 29: Control Diagram
10. CONTROL DIAGRAM Version with electric batteries... - Page 30 Versions with hot and/or cold water coils...
- Page 31 Versions with reversible water coil...
-
Page 32: Remote Control Operation
11. REMOTE CONTROL OPERATION 11.1. CHANGE LANGUAGE The UTBS PRO-REG units can operate according to 3 modes of operation: 11.2. SIMPLIFIED MENUS / ACCESSES The unit has a quick access to the main functions. Accesses: There are 3 access levels to the controller: •... -
Page 33: Installer Level
Operating mode selection In units with electrical, if the operation mode is changed while the fans are running, the unit will stop sequentially; fi rst switching off the electrical heater, and after 2 minutes switching off the fans, then fi nally the unit will re-stard with the right working mode. 11.2.2. - Page 34 • Type of cold/hot coils thas has the unit. • Enable the mixing module control and confi gurate the type of control. Constants air volume working mode (CAV) Constants pressure working mode (COP) Variable air fl ow working mode (VAV) Constant supply air temperature control Room temperature...
-
Page 35: Operation Fan Modes
11.3. OPERATION FAN MODES The Pro-Reg units can operate in 3 operating modes: CAV: Operation at constant fl ow VAV: Operation at variable fl ow COP: operation at constant pressure 11.3.1. Constant airfl ow operation (CAV) Mode recommended in installations where it is necessary to maintain a constant airfl... - Page 36 Appearance main screen when the unit is confi gured in CAV mode. CAV control mode selection Access to the simplifi ed parameter setting menu (via the password 1111) allows: • The selection of Normal fl ow and Reduced fl ow of each fan. •...
-
Page 37: Variable Airfl Ow Operation (Vav)
Advanced level To modify the proportional and integral bands, from the advanced parameters menu follow the follwowing sequence: 1- Access to system level 2- Adjust the CAV parameters Manual/Auto Temperature control Pressure Ctrl. Supply Change Se ngs Pressure control P.Band: 1000.0Pa parameters Configura on Alarm se ngs... -
Page 38: Constant Pressure Operation (Cop)
Usage example: Connection of a CO probe of a measurement range 0-2000 ppm (0-10V). Speed minimum (25%) below 400 ppm and maximum (100%) over 1600 ppm Vmin = 2 V (400ppm) Vmax = 8V (1600 ppm) Speed at Vmin = 25% Speed at Vmax = 100% The selection of VAV mode in this installer menu automatically confi... - Page 39 Installation diagram pressure sensor In case COP mode is selected, in the Main screen it is showed the actual Pa of the fans with pressure transmitters and also the speed of the fans (as a percentage of the maximum fan speed). COP parameter settings mode Access to the simplifi...
- Page 40 The selection of COP mode in this installer menu automatically confi gures the screen of the user menu. The user can then change the unit’s operation without modyfi ng the settings. Off: stop the unit. Manual Reduced pressure / Manual Normal pressure: Setting manually selection. Auto: Selection of set point is done according to time programming (see Programme schedule section).
-
Page 41: Control Slave Of An External Fan (For All Working Modes)
Factory setting data according to sizes Model Proportionnal Integral band band UTBS-2 5000 Pa UTBS-3 5000 Pa UTBS-5 5000 Pa UTBS-8 5000 Pa 11.3.4. Control slave of an external fan (For all working modes) The PRO-REG controller allows the control of an external fan as slave of the UTBS fan. -
Page 42: Postheater Control
11.4. POSTHEATER CONTROL It is possible selecting between 4 different types of postheating control. To select it follow the following sequence: 11.4.1. Constant supply air temperature maintenance Temperature controller works comparing supply air Heating mode temperature with set point defi ned by console. Constant supply air T°C 11.4.2. -
Page 43: Temperature Set Point Adaptation Vs. Outdoor Temperature
11.4.3. Temperature set point adaptation vs. outdoor temperature Controller operation is similar to fi rst case. In this case, main difference is defi ning a compensation Heating mode curve defi ned from factory with 8 set points instead of fi xing a single temperature set point. Constant supply air T°C with out- door T°C compensation Compensation curve... -
Page 44: Time Programming
11.6. TIME PROGRAMMING The controller has several clocks which allow the individual programming of: Normal Speed, Reduced Speed and Stop. Speed selection is not available in VAV mode. Normal speed: corresponding to normal pressure in COP mode and to normal fl ow in CAV mode Reduced speed: corresponding to reduced pressure in COP mode and to reduced fl... - Page 45 First make sure that the date and the hour set in the controller are correct. Defi ne the time periods when the unit will work at normal fan speed. Defi ne the time periods when the unit will work at reducen fan speed.
- Page 46 The intervals are programmed day by day or copied by selecting either the same program- ming from Monday to Friday and/or the same Saturday and Sunday and Holidays. Holiday periods are to be selected at the end of the table (24 possible periods).
-
Page 47: Mixing Module Control (3 Ways)
11.7. MIXING MODULE CONTROL (3 WAYS) If it exists a mixing module instalated, it is necessary to specify the control type that it want to perform on it. It is possible to select between 3 control modes: 11.7.1. Without mixing module Factory confi... -
Page 48: Boost Function (Only Available In Cav And Cop Modes)
12. BOOST FUNCTION (Only available in CAV and COP modes) By closing an external digital contact, it is possible to force the fan operation at normal speed for a setted time. (30 mins. by default) The speed corresponds to the normal pressure setpoint set in COP mode or to the normal airfl... -
Page 49: Free Cooling By Night
14. FREE COOLING BY NIGHT By default, this feature is disabled. To enable it is necessary to access from Advance Settings. This function is used during the summer to cool off buildings during the night by using fresh outdoor air. This allows reducing the need to resort to air conditioning during the day. To use the free cooling by night function, the information received from the outdoor probe (fresh air) and from the discharge temperature probe is used. -
Page 50: Water Heater Frost Protection
To activate the Free Cooling Night function it is necessary to acces as adminstrator. 1- Access to system level 2- Activate the free cooling function and defi ne the setpoint temperature Manual/Auto In/out Se ngs Se ngs sensor Configura on Func on control Access Rights Fan control... - Page 51 door which gives access to the electronic board. Remove all the connectors attached to the controller with the exception of the 4-way electrical supply green plug connected to terminals 1,2, Earth and 4. Ext. Disp. Ext. Disp. TCP / IP TCP / IP With a screwdriver, release the controller from the DIN rail on which it is mounted.
- Page 52 UTBS 1.0 UTBS 1.0 UTBS 1.0 UTBS 1.0 Isolate the electrical power supply again. Re-connect all of the other cables to the Corrigo controller and fi nally re-energise UTBS PRO-REG and the reset procedure is now complete. The run mode of the system (I.e VAV/CAV/COP) should now be re-set-up, together with ensuring that the additional parameters (K-Constant, heater type etc.) are correct.
-
Page 53: Connection To Building Management Systems (Bms)
Necessary reconfi guration: • Language • Cold and/or hot battery type • Heating/cooling control • Initial temperature setpoint • Fan operation mode • K factor K values corresponding to each model: Model K-factor Number of motors UTBS-2 K=69 UTBS-3 K=84 UTBS-5 K=84 UTBS-8... -
Page 54: Tcp/Ip Bacnet
17.2. TCP/IP BACNET PRO-REG controller is equipped with an integrated RJ45 port for TCP/IP communication, as support for BACnet IP commu- nication. It’s necessary to confi gure the IP address on each controller, and activate and address the BACnet IP using TCP/IP ETOOL software (E tool©... -
Page 55: Operation Anomalies
If the battery can be changed in less than 10 minutes, the program does not have to be reloaded and the clock will continue to run normally. The spare battery is type CR2032. • Using a small screwdriver, pry up the clips on each side of the case to release the cover from the base. -
Page 56: Failure List
Fig.1. Location of the pulser for manual reset of thermal protectors Danger of burns, there is a risk that the metal parts are at a high temperature. 19.2. FAILURE LIST In case an alarm or a failure occurs, a “Maintenance To Do” message appears in red on the main screen. -
Page 57: Emergency Operations
The following table shows the mode to proceed to detect and resolve any incidents shown: Alarm Alarm text Description Tipo number alarma Run Error Supply Air Fan Malfunction of supply air fan Change Filter Prefi lter % Filter need replacement Fire Alarm Fire alarm activated Remote off active... -
Page 58: Water Coils
• A maintenance log should record each component serviced during maintenance, as well as activities performed or repairs made. • Maintenance staff must have access to a specific training programme. • Before starting maintenance operations on the unit, turn off the unit’s main switch. Elec- trical shock can cause personal injury. -
Page 59: Replacing The Filter In The Main Unit And Side-By-Side Or Stacked Recovery Unit
indicates the maximum recommended values for pressure loss before filter replace- ment. Filter Pressure Loss (Pa) • Even if the maximum pressure loss has not been reached, filters should be inspected each month to make sure that the filter and filter housing are sealed. •... -
Page 60: Replacing Filters For In-Line Recovery Modules
.5.2. REPLACING FILTERS FOR IN-LINE RECOVERY MODULES Access to fi lters is also possible through the lower panel. This requires lossen the screws holding the lower panel located under the fi lters and remove it. ATTENTION! Releasing the panel it could fall from heights with the risk of causing an acci- dent. -
Page 61: Silencers
.8. SILENCERS • To remove the baffles unscrew the corresponding side panel. . CONNECTING THE UNIT TO THE WATER NETWORK - Maximum pressure: - Maximum temperature: 1 0ºC - Minimum temperature: For heat exchangers with threaded connections, secure the coil manifold with the appro- priate tool when tightening the threads. -
Page 62: Wiring Diagrams
22. WIRING DIAGRAMS... - Page 72 S&P SISTEMAS DE VENTILACIÓN, S.L.U. C. Llevant, 4 Polígono Industrial Llevant 08150 Parets del Vallès Barcelona - España Tel. +34 93 571 93 00 Fax +34 93 571 93 01 www.solerpalau.com Ref. 9023060600...
Need help?
Do you have a question about the UTBS PRO-REG Series and is the answer not in the manual?
Questions and answers