Table of Contents
Advertisement
Available languages
Available languages
Quick Links
Advertisement
Chapters
Table of Contents

Related Manuals for S&P CAD HE 450 H BASIC


Summary of Contents for S&P CAD HE 450 H BASIC
- Page 1 CAD HE 450 H BASIC...
- Page 3 ESPAÑOL ........................4 ENGLISH ........................20 FRANÇAIS .......................36 ITALIANO .........................51 NEDERLANDS ......................67 CESKY ........................82...
-
Page 4: Table Of Contents
ESPAÑOL ESPAÑOL ENGLISH ENGLISH ENGL ENGL INDICE INDICE 1. INFORMACIÓN GENERAL ..................5 1. INFORMACIÓN GENERAL ..................5 1.1 Introducción ......................5 1.1 Introducción ......................5 1.2 Recepción y almacenaje..................5 1.2 Recepción y almacenaje..................5 1.3 Garantía ....................... 6 1.3 Garantía ....................... -
Page 5: Información General
1. INFORMACIÓN GENERAL 1.1 Introducción Este producto ha sido fabricado conforme a las reglas técnicas de seguridad reconocidas y conformes a las normas de la CE. La Declaración CE y el manual se puede descargar desde Internet. Antes de instalar y utilizar este producto leer atentamente el contenido del presente libro de instrucciones, pues contiene indicaciones importantes para la seguridad del instalador y la de los utilizadores durante la instalación, el uso y mantenimiento de este producto. -
Page 6: Garantía
- Al manipular productos pesados, use elementos de elevación adecuada para evitar dañar a las personas o al propio producto. - Nunca levante un aparato haciéndolo por los cables, la caja de bornes, la hélice o turbina ni por la reja de protección. 1.3 Garantía Los equipos suministrados por S&P tienen una garantía de 2 años –solo piezas–... -
Page 7: Información Técnica
. INFORMACIÓN TÉCNICA . INFORMACIÓN TÉCNICA Información general Información general Extracción del aire viciado y el suministro de aire nuevo en instalaciones públicas/ privadas Extracción del aire viciado y el suministro de aire nuevo en instalaciones públicas/ privadas con un recuperador con intercambiador de calor de aluminio. con un recuperador con intercambiador de calor de aluminio. -
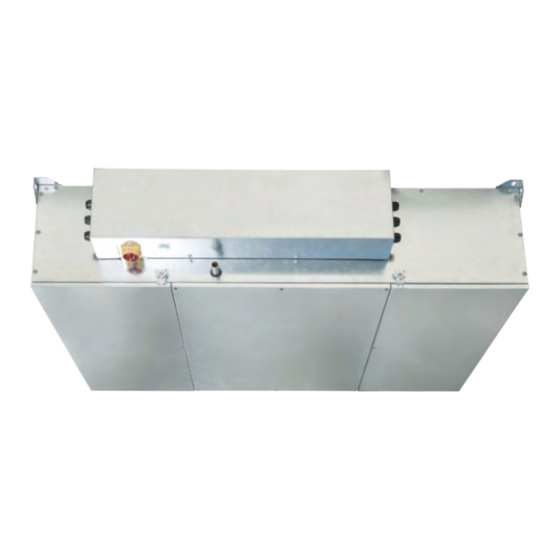
Page 8: Dimensiones
2.3 Dimensiones (en mm) 2.3 Dimensiones (en mm) 2.3 Dimensiones (en mm) Espacio requerido para el acceso y mantenimiento del filtro: Espacio requerido para el acceso y mantenimiento del filtro: Espacio requerido para el acceso y mantenimiento del filtro: Control remoto cableado (10 m incluido) Control remoto cableado (10 m incluido) Control remoto cableado (10 m incluido) Opcional:... -
Page 9: Instalación
3. INSTALACIÓN 3. INSTALACIÓN 3. INSTALACIÓN Estos equipos están diseñados para ser instalados colgados del techo o ubicados en Estos equipos están diseñados para ser instalados colgados del techo o ubicados en Estos equipos están diseñados para ser instalados colgados del techo o ubicados en un falso techo utilizando los cuatro estribos metálicos ubicados en cada una de las un falso techo utilizando los cuatro estribos metálicos ubicados en cada una de las un falso techo utilizando los cuatro estribos metálicos ubicados en cada una de las... -
Page 10: Instalación
Conexión de la bandeja de condensados: Para asegurar un buen drenaje la unidad se debe instalar perfectamente plana (recomendamos una ligera inclinación aprox. 1º hacia el lado del desagüe). -
Page 11: Características Y Conexiones Eléctricas
4. CARACTERÍSTICAS Y CONEXIONES ELÉCTRICAS: Potencia Intensidad Temperatura de Temperatura Modelo motor (W) max (A) trabajo ambiente instalada -25ºC – 40ºC 10ºC – 40ºC CAD HE 450 H... - Page 12 4.1 Conexión sensor Los equipos CAD HE pueden funcionar de forma proporcional a partir de la consigna de una sonda 0-10V que se puede conectar tal y como indicado en el plano de conexiones. La salida de la sonda está ajustada por defecto entre 2 y 8V (salida señal sonda). La señal de 2V de sonda corresponde a una señal salida ventilador de 4V y los 8V señal sonda corresponde a 10V señal ventilador.
-
Page 13: Ajustes Del Control Remoto-Instalador
5. AJUSTES DEL CONTROL REMOTO - INSTALADOR El control remoto permite: 5. AJUSTES DEL CONTROL REMOTO - INSTALADOR Ajuste de los caudales (1 velocidad, 2 velocidad, 3 velocidad) Ajustar la temporización del filtro sucio (6, 9, 12 o 15 meses) (ajuste de fábrica 9 meses) El control remoto permite: Ajuste del balance de los caudales de aire de impulsión y extracción. - Page 14 el cambio del segundo filtro, si se observa que los filtros están limpios se puede aumentar el el cambio del segundo filtro, si se observa que los filtros están limpios se puede aumentar el tiempo (12 o 15 meses), si se observa que los filtros están muy sucios se puede disminuir el tiempo (12 o 15 meses), si se observa que los filtros están muy sucios se puede disminuir el tiempo (6 meses).
-
Page 15: Ajustes Del Control Remoto - Usuario
6. AJUSTES DEL CONTROL REMOTO - USUARIO By-pass manual Ajustes caudal Ajustes velocidad: Presionando los botones del “ajuste del caudal” se puede cambiar la velocidad. La tecla se iluminará en color verde (ver dibujos de abajo). Unidad funciona a la 2 velocidad Unidad funciona a la 3 velocidad... - Page 16 By-pass manual: Presionando el botón “By-pass manual” el By-pass abrirá durante 8 horas. Mientras el By- pass está activado el botón está iluminado en color verde. Para forzar el cierre del By-pass se tiene que pulsar el botón otra vez. (LED se apaga). By-pass activado Función Standby: Mantener pulsado el botón...
-
Page 17: Gestión Defrost
7. GESTIÓN DEFROST CAD HE 450 EC H BASIC: Los equipos standard llevan un sistema de protección automático anti escarcha incorporado. En caso de que la temperatura del aire de expulsión (EHA) descienda de C y la temperatura del aire exterior de 0 C, se activara la gestión defrost. -
Page 18: Encender El Cad He 450
8. ENCENDER EL CAD HE 450 Para poner en marcha la instalación, es necesario seguir el siguiente procedimiento: 1. Verificar que todos los componentes de la instalación se encuentren correctamente colocados y conectados: Toma de aire nuevo realizada en conducto aislado y correctamente conectada (no utilizar una toma de aire nueva equipada con mosquitera), Descarga de aire y de extracción efectuadas en conducto aislado y conectadas correctamente. -
Page 19: Gestión De Alarmas
9. GESTIÓN DE ALARMAS Mediante el led del mando de usuario es posible supervisar el estado del equipo. Este led mostrará una alarma (ver tabla) en caso de producirse una avería de alguno de los componentes críticos del equipo o simplemente para notificación (sustitución filtros, modo manual bypass, temperatura de impulsión <11ºC). - Page 20 ENGLISH ENGLISH CONTENTS CONTENTS 1. GENERAL INFORMATION ..................21 1. GENERAL INFORMATION ..................21 1.1 Introduction......................21 1.1 Introduction......................21 1.2 Acceptance- Storage ..................21 1.2 Acceptance- Storage ..................21 1.3 Warranty and liability ..................22 1.3 Warranty and liability ..................22 2.TECHNICAL INFORMATION ..................
-
Page 21: General Information
1. GENERAL INFORMATION Introduction This product was manufactured according to rigorous technical safety rules in compliance with DC standards. The DC declaration and the manual can be downloaded from the Internet. Before installing and using this product, carefully read these instructions, which contain important indications to ensure your safety and that of the users during the installation, commissioning and servicing of this product. -
Page 22: Warranty And Liability
Warranty and Liability Warranty The equipment supplied by S&P is warranted twelve 2 years –Parts only– starting from the invoicing date. S&P agrees to replace the parts or the equipment whose operation is recognized defective by our departments except for all damages and interests or penalties such as operating losses, commercial prejudice, or other immaterial or indirect damages. -
Page 23: Technical Information
2. TECHNICAL INFORMATION 2. TECHNICAL INFORMATION General information General information Extraction of stale air and supply of fresh air in public/private premises with heat Extraction of stale air and supply of fresh air in public/private premises with heat recovery by a counter flow aluminium heat exchanger. Condensation forms during the recovery by a counter flow aluminium heat exchanger. -
Page 24: Dimensions
2.3 Dimensions (in mm) 2.3 Dimensions (in mm) Remote control via cable (10m included) Remote control via cable (10m included) Optional: Optional: Max. cable length: 50m (control wire type min. H05VV-F-4G 0,25) Max. cable length: 50m (control wire type min. H05VV-F-4G 0,25) -
Page 25: Installation
3. INSTALLATION 3. INSTALLATION These models are designed to be installed under the ceiling, using the 4 mounting These models are designed to be installed under the ceiling, using the 4 mounting brackets. Please assure that the ceiling and the used fixing material can carry the brackets. - Page 26 Connection of condensation drain: To assure a good drainage the unit must be installed horizontally. We recommend a slight inclination of aprox. 1º in direction of the condensation drain.
-
Page 27: Characteristics And Electrical Connections
4. CHARACTERISTICS AND ELECTRICAL CONNECTIONS: Max. Working Installed ambient Model Power (W) Absorbed temperature temperature current (A) CAD HE 450 H -25ºC – 40ºC 10ºC – 40ºC... - Page 28 4.1 Sensor connection The CAD HE can work in proportional mode controlled by a sensor 0-10V (see electrical scheme). The output control voltage for the sensor is adjusted between 2V and 8V. The 2V output signal corres- pond with the output signal to the fans of 4V and the 8V output signal correspond with the 10V output signal to the fans.
-
Page 29: Remote Control Adjustments-Installer
5. REMOTE CONTROL ADJUSTMENTS - INSTALLER 5. REMOTE CONTROL ADJUSTMENTS - INSTALLER The remote control allows: 5. REMOTE CONTROL ADJUSTMENTS - INSTALLER Adjust the airflows (1 speed, 2 speed, 3 speed) The remote control allows: Timer for adjusting the filter maintenance period (6, 9, 12 or 15 months) (factory Adjust the airflows (1 speed, 2 speed, 3... - Page 30 advisable to do this after the second filter change. Of course, after the installation, the filter clogging depends on the pollution of the area where the unit is installed. We extract air is dusty and not representative. During the second filter check, if you notice recommend checking the time in which the filter clogs and adjusting this period.
-
Page 31: Remote Control Adjustments-User
Potentiometer setting % QSupply/QExtraction Example: • Minimum calculated airflow= 90m3/h • Supply airflow necessary= 99 m3/h → Potentiometer position 5 = +10% The adjustment is made on the supply airflow compared with extraction 6. REMOTE CONTROL ADJUSTMENTS – USER airflow. 6. - Page 32 Manual bypass: Pressing the button “manual bypass” the bypass will open for 8 hours. During the bypass is activated the button is green illuminated. To deactivate (close) within the 8 the bypass you have to push the button again (illumination is off). bypass activated Standby function: Push and hold the button...
-
Page 33: Frost Protection Mode
FROST PROTECTION MODE FROST PROTECTION MODE CAD HE 450 EC H BASIC CAD HE 450 EC H BASIC All standard units have an automatic frost protection system installed. In the case that All standard units have an automatic frost protection system installed. In the case that the exhaust air (EHA) temperature fall below 5 C and the outdoor air temperature is the exhaust air (EHA) temperature fall below 5... -
Page 34: Switching On The Cad 450
8. SWITCHING ON THE CAD HE 450 To start your CAD HE 450 unit use the following process: 1. Verify that all system components are correctly installed and connected: Fresh air intake duct insulated and connected correctly (Do not use a fresh air intake equipped with insect screen) Fresh air and exhaust ducts insulated and connected correctly Fresh air and exhaust vents connected... -
Page 35: Alarm Index
9. ALARM INDEX Through the LED located in the user control it is possible to supervise the status of the unit. This Led will show the alarm (check see table) in case of produce the failure of some critical components of the unit or simply by notification (replacement filters, by-pass manual mode, supply temperature <11ºC). - Page 36 FRANÇAIS FRANÇAIS ENGLISH ENGLISH INDEX INDEX 1. GENERALITÉS ......................37 1. GENERALITÉS ......................37 1.1 Introduction......................37 1.1 Introduction......................37 1.2 Réception- stockage .................... 37 1.2 Réception- stockage .................... 37 1.3 Garantie....................... 37 1.3 Garantie....................... 37 2. INFORMATION TECHNIQUE ..................38 2.
-
Page 37: Generalités
1. GENERALITÉS 1.1 Introduction Ce produit a été fabriqué en respectant de rigoureuses règles de sécurité, conformément aux normes de la CE. La déclaration CE, tout comme la notice est téléchargeable depuis le site internet http://www.solerpalau.com/. Avant d’installer et d’utiliser ce produit, lire attentivement ces instructions qui contiennent d’importantes indications pour votre sécurité... -
Page 38: Information Technique
2. INFORMATION TECHNIQUE 2. INFORMATION TECHNIQUE 2.1 Information générale 2.1 Information générale Extraction de l'air vicié et introduction d'air neuf dans les locaux commerciaux et Extraction de l'air vicié et introduction d'air neuf dans les locaux commerciaux et tertiaires, avec récupération de chaleur par un échangeur en aluminium à contre- tertiaires, avec récupération de chaleur par un échangeur en aluminium à... -
Page 39: Dimensions
Commande à distance filaire (10 m de câble inclus) En option: Longueur maximale du câble: 50m (type de câble de contrôle : H05VV-F-4G 0,25) -
Page 40: Installation
3. INSTALLATION 3. INSTALLATION Ces modèles sont conçus pour être installés au plafond, en utilisant les 4 supports de montage. S'assurer que le plafond et les fixations utilisées peuvent supporter le poids Ces modèles sont conçus pour être installés au plafond, en utilisant les 4 supports de de l'unité. - Page 41 Raccordement du conduit d’évacuation des condensats: Pour assurer une bonne évacuation des condensats il est recommandé que l'appareil soit installé horizontalement avec une légère inclinaison d'environ 1º en direction du conduit d’évacuation.
-
Page 42: Charactéristiques Et Raccordements Électriques
4. CARACTERISTIQUES ET RACCORDEMENTS ELECTRIQUES: Intensité Température Alimentation Température des Modèle maximale ambiante pour flux d’air l’installation absorbée (A) -25ºC – 40ºC 10ºC – 40ºC CAD HE 450 H... - Page 43 4.1 Connexion du capteur Le CAD HE peut fonctionner en mode proportionnel contrôlé par un capteur 0-10V (voir schéma élec- trique). La tension de contrôle de sortie du capteur est réglée entre 2V et 8V. Le signal de sortie 2V corres- pond au signal de sortie aux ventilateurs de 4V et le signal de sortie 8V correspond au signal de sortie 10V aux ventilateurs.
-
Page 44: Réglages De La Commande À Distance-Installateur
5. RÉGLAGES DE LA COMMANDE À DISTANCE - INSTALLATEUR 5. RÉGLAGES DE LA COMMANDE À DISTANCE - INSTALLATEUR La commande à distance permet de: La commande à distance permet de: 5. RÉGLAGES DE LA COMMANDE À DISTANCE - INSTALLATEUR ère ème ème Régler les débits (1... - Page 45 pas représentatif d’un encrassement lié à une utilisation normale. pas représentatif d’un encrassement lié à une utilisation normale. Lors du deuxième changement, si vous constatez que les filtres ne sont pas encrassés Lors du deuxième changement, si vous constatez que les filtres ne sont pas encrassés vous pouvez augmenter la période.
-
Page 46: Réglage De La Commande À Distance-Utilisateur
6. RÉGLAGE DE LA COMMANDE À DISTANCE - UTILISATEUR By-pass manuel Réglage des débits Réglage vitesse: En appuyant sur les touches de “réglage des débits” il est possible de changer la vitesse. Le voyant de la touche s’allume en vert pour indiquer la vitesse activée (voir photos ci-dessous). L’appareil fonctionne L’appareil fonctionne L’appareil fonctionne... - Page 47 By-pass manuel: En appuyant sur la touche “By-Pass manuel” le By-Pass s’ouvre pour une période de 8 heures. Durant cette période, le voyant de touche est allumé en vert. Pour annuler cette fonction (fermer le by-pass) au cours de la période des 8 heures, appuyer de nouveau sur la touche “By-Pass manuel”...
-
Page 48: Gestion Degrivage
7. GESTION DEGIVRAGE 7. GESTION DEGIVRAGE 7. GESTION DEGIVRAGE FROST PROTECTION MODE FROST PROTECTION MODE FROST PROTECTION MODE FROST PROTECTION MODE CAD HE 450 EC H BASIC: CAD HE 450 EC H BASIC: CAD HE 450 EC H BASIC: CAD HE 450 EC H BASIC CAD HE 450 EC H BASIC CAD HE 450 EC H BASIC CAD HE 450 EC H BASIC... -
Page 49: Mise En Route De Le Cad 450
8. MISE EN ROUTE DE LE CAD 450 Avant de mettre en route votre installation il est nécessaire de suivre le processus suivant: 1. Vérifier que tous les composants de l’installation sont bien mis en place et raccordés: Prise d’air neuf effectuée en gaine isolée et raccordée correctement (Ne pas utiliser de prise d’air neuf équipée de grillage anti-moustiques), Gaine de soufflage et d’extraction effectuées en gaine isolée et raccordées correctement,... -
Page 50: Gestion Des Alarmes
9. GESTION DES ALARMES , l’utilisateur est informé du fonctionnement de Grace à la Led de la commande son appareil. Cette Led signale une alarme (voir table), en cas de panne sur un des composantes critiques, ou donne simplement une information (filtres à changer, mode manuel du by-pass, température d’insufflation <11ºC). - Page 51 ITALIANO ITALIANO ENGLISH ENGLISH ENGL ENGL INDICE INDICE 1. INFORMAZIONI GENERALI..................52 1. INFORMAZIONI GENERALI..................52 1.1 Introduzione......................52 1.1 Introduzione......................52 1.2 Accetazione- Stoccaggio ..................52 1.2 Accetazione- Stoccaggio ..................52 1.3 Garanzia ......................53 1.3 Garanzia ......................53 2.INFORMAZIONI TECHNIQUE ..................
-
Page 52: Informazioni Generali
1. INFORMAZIONI GENERALI 1.1 Introduzione Questo prodotto è stato fabbricato secondo le rigorose norme tecniche in conformità agli standard internazionali. Le dichiarazioni di conformità ed il manuale possono essere scaricate da internet. Prima dell'installazione ed uso di questo prodotto, leggere attentamente il manuale d'istruzione, che contiene importanti indicazioni per garantire la vostra sicurezza e quella degli utenti durante installazione, messa in funzione e l'utilizzo del prodotto. -
Page 53: Garanzia
1.3 Garanzia e Responsabilità Garanzia L'apparecchio è garantito da S&P Italia Spa, per 2 anni, a partire dalla data di fatturazione. S&P si impegna a sostituire le parti o l'apparecchio il cui funzionamento è ritenuto difettoso dai nostri dipartimenti eccetto per tutti i danni e interessi o penalità, ad esempio perdite operative pregiudizi commerciali o altri danni immateriali o indiretti. -
Page 54: Informazioni Technique
2. INFORMAZIONI TECHNICHE 2. INFORMAZIONI TECHNICHE Informazioni generali Informazioni generali Ricambio d'aria in ambienti privati e pubblici con estrazione di aria calda e stantia e Ricambio d'aria in ambienti privati e pubblici con estrazione di aria calda e stantia e l'immissione di aria fresca nel locali con recupero di calore mediante uno scambiatore l'immissione di aria fresca nel locali con recupero di calore mediante uno scambiatore in alluminio. -
Page 55: Dimensioni
2.3 Dimensioni (in mm) 2.3 Dimensioni (in mm) 2.3 Dimensioni (in mm) 2.3 Dimensioni (in mm) Spazio richiesto per l’accesso e la manutenzione dei filtri: Spazio richiesto per l’accesso e la manutenzione dei filtri: Spazio richiesto per l’accesso e la manutenzione dei filtri: Spazio richiesto per l’accesso e la manutenzione dei filtri: Controllo remoto cablato (10m incluso) Controllo remoto cablato (10m incluso) -
Page 56: Installazione
3. INSTALLAZIONE 3. INSTALLAZIONE Questi kit sono progettati per essere installato al soffitto o posto in un controsoffitto Questi kit sono progettati per essere installato al soffitto o posto in un controsoffitto utilizzando le quattro staffe metalliche poste su ciascuno degli angoli inferiori. utilizzando le quattro staffe metalliche poste su ciascuno degli angoli inferiori. - Page 57 Collegamento della bacinella della condensa: Per assicurare un buon drenaggio, l’unità deve essere installata perfettamente piana (raccomandiamo una leggera inclinazione, circa 1° dal lato dello scarico).
-
Page 58: Collegamenti Elettrici E Caratteristiche
4. COLLEGAMENTI ELETTRICI E CARATTERISTICHE Temperatura Alimentazione Corrente Temperatura di Modello ambiente max (A) lavoro installata -25ºC – 40ºC 10ºC – 40ºC CAD HE 450 H... - Page 59 4.1 Connessione della sonda I modelli CAD HE possono funzionare in modo proporzionale tramite un segnale 0-10V che si può collegare come indicato nello schema di collegamento. Le uscite della sonda devono essere regola- te per difetto tra 2 e 8V (uscita segnale sonda). Il segnale 2V della sonda corresponde ad un segna- le di uscita del ventilatore di 4V e l’8V della sonda corrisponde al 10V del segnale del ventilatore.
-
Page 60: Controllo Remoto. Installazione E Regolazione
5. CONTROLLO REMOTO. INSTALLAZIONE E REGOLAZIONE 5. CONTROLLO REMOTO. INSTALLAZIONE E REGOLAZIONE Il controllo remoto consente: Il controllo remoto consente: Regolazione del flusso dell’aria (1 velocità, 2 velocità, 3 velocità) 5. CONTROLLO REMOTO. INSTALLAZIONE E REGOLAZIONE Regolazione del flusso dell’aria (1 velocità, 2 velocità, 3 velocità) - Page 61 filtro durante il funzionamento della macchina. La regolazione per la manutenzione Noi raccomandiamo di controllare periodicamente comunque l'intasamento del filtro il dei filtri va programmata dopo il secondo cambio. Al primo azionamento, nell'aria filtro durante il funzionamento della macchina. La regolazione per la manutenzione e nella stessa macchina possono esserci polveri che rendono le tempistiche di dei filtri va programmata dopo il secondo cambio.
-
Page 62: Utilizzo Del Controllo Remoto
6. UTILIZZO DEL CONTROLLO REMOTO Bypass manuale Regolazione velocità dell'aria Regolazione di velocità: Premendo il pulsante"Regolazione del flusso dell'aria" è possibile variare la velocità. Il LED sarà illuminato di color verde. Funzionamento alla prima velocità Funzionamento alla terza velocità Funzionamento alla seconda velocità Bypass automatico Le CAD HE 450 lavora con un bypass automatico pre-programmato. - Page 63 Bypass manual: Per attivare il bypass manualmente per 8 ore, premere il pulsante dedicato e il led verde si accende. Per disattivare premere nuovamente, il led si spegne. Bypass attivata Funzione stand-by: Premere e tenere premuto il pulsante per 3 secondi, l'unità si posizionerà sulla modalità by-pass.
-
Page 64: Gestione Defrost
7. GESTIONE DEFROST CAD HE 450 EC H BASIC: La versione standard incorpora un sistema di protezione automatico contro il gelo. Nel caso in cui la temperatura dell'aria di espulsione (EHA) scende a 5°C e la temperatura esterna è di 0°C, automaticamente si attiva la modalità di sbrinamento. Il ventilatore di immissione abbassa la velocità... -
Page 65: Accesione Dell' Cad He 450
8. ACCENSIONE DELL’CAD HE 450 Per mettere in funzione le CAD HE 450, verificare quanto segue: 1. Verificare che tutti i componenti di sistema siano installati e collegati correttamente: Condotto isolato dell'aria interna collegato correttamente (Non utilizzare una presa d'aria esterna provvista di zanzariera o tendina anti insetti). Condotti d'aria di presa e d espulsione isolati e collegati correttamente. -
Page 66: Gestione Di Allarmi
9. GESTIONE DI ALLARME Mediante il led del comando del utilizzatore è possibile controllare lo stato del prodotto. Questo led mostra un allarme ( vedi tabella ) in caso si presenta un avaria su qualche componente critico del prodotto o semplicemente per segnalare ( sostituzione filtri, attivazione By pass, temperatura di immissione <... - Page 67 NEDERLANDS NEDERLANDS ENGLISH ENGLISH ENGL ENGL INDEX INDEX 1. ALGEMEENHEDEN ....................68 1. ALGEMEENHEDEN ....................68 1.1 Inleiding ......................68 1.1 Inleiding ......................68 1.2 Ontvangst-opslag....................68 1.2 Ontvangst-opslag....................68 1.3 Garantie......................68 1.3 Garantie......................68 2.TECHNISCHE GEGEVENS ..................69 2.TECHNISCHE GEGEVENS ..................
-
Page 68: Algemeenheden
1. ALGEMEENHEDEN 1.1 Inleiding Dit toestel is vervaardigd conform de veiligheidsvoorschriften CE. De CE verklaring, evenals gebruiksaanwijzing kunnen worden gedownload site http://www.solerpalau.com/. Alvorens plaatsing en ingebruikname, gelieve de gebruiksaanwijzing grondig te lezen. Dit om de veiligheid van de gebruikers te waarborgen, gedurende de plaatsing en het onderhoud van het toestel. -
Page 69: Technische Gegevens
2. TECHNISCHE GEGEVENS 2. TECHNISCHE GEGEVENS Algemene informatie Algemene informatie Afvoer van vervuilde binnenlucht en toevoer van verse binnenlucht in woonhuizen, Afvoer van vervuilde binnenlucht en toevoer van verse binnenlucht in woonhuizen, burelen, met warmterecuperatie d.m.v. een aluminium platenwisselaar burelen, met warmterecuperatie d.m.v. een aluminium platenwisselaar Door de kruising van warme- en koude luchtstroom ontstaat er condens, deze wordt Door de kruising van warme- en koude luchtstroom ontstaat er condens, deze wordt opgevangen in de condensbak onderaan het toestel en afgevoerd naar de riolering. -
Page 70: Afmetingen
By-pass: Door de platenwisselaar te omzeilen, laat de 100% by-pass toe, om tijdens de avond By-pass: en nacht, frisse buitenlucht binnen te blazen, zonder dat deze zal worden opgewarmd door Door de platenwisselaar te omzeilen, laat de 100% by-pass toe, om tijdens de avond in contact te komen met warmere binnenlucht afkomstig van in de woning. -
Page 71: Plaatsing
3. PLAATSING 3. PLAATSING Deze modellen zijn ontworpen voor montage onder het plafond met behulp van 4 Deze modellen zijn ontworpen voor montage onder het plafond met behulp van 4 montagebeugels. Zorg ervoor dat het plafond en de gebruikte bevestigingsmaterialen montagebeugels. - Page 72 Aansluiting van condensafvoer: Om een goede afvoer te garanderen moet het toestel horizontaal geïnstalleerd worden. Wij raden een lichte helling aan van ongeveer .1º in de richting van de condensafvoer.
-
Page 73: Karakteristieken En Electrische Aansluiting
4. KARAKTERISTIEKEN EN ELECTRISCHE AANSLUITING Maximaal Voeding opgenomen Temperatuur van de Omgevingstemperatuur Model vermogen luchtstroom voor het toestel -25ºC – 40ºC 10ºC – 40ºC CAD HE 450 H... - Page 74 4.1 Sensorverbinding De CAD HE kan in de proportionele modus werken met een sensor 0-10V (zie elektrische schema) De uitgangsstroomspanning voor de sensor wordt ingesteld tussen 2V en 8V. Het 2V uitgangssignaal komt overeen met het uitgangssignaal naar de ventilatoren van 4V en 8V uitgangssignaal komt ove- reen met het 10V uitgangssignaal naar de fans.
-
Page 75: Inregeling Via De Afstandsbediening- Installateur
5. INREGELING VIA DE AFSTANDSBEDIENING- INSTALLATEUR De afstandsbediening laat het volgende toe : 5. INREGELING VIA DE AFSTANDSBEDIENING- INSTALLATEUR Instelling van de debieten (1ste snelheid-2 e snelheid-snelheid 3) Inregeling van de timer voor alarm filters (6, 9, 12, 15 maand) standaard De afstandsbediening laat het volgende toe : regeling fabriek, 9 maand Inregeling van de verhouding tussen pulsie- en extractiedebiet... - Page 76 Bij de opstart is er stof in de kanalen en grotere vervuiling van de omgeving, dit is niet van de buitenfactoren ( vervuiling, pollen, ….) en het gebruik van de binnenhuis (stof, representatief bij normale werking. vet…) Het is aan te raden om deze instelling te wijzigen nadat het alarm 2 x is afgegaan. Bij de opstart is er stof in de kanalen en grotere vervuiling van de omgeving, dit is niet Bij de tweede wisseling van de filters, wanneer u vaststelt dat de filters nog niet erg zijn representatief bij normale werking.
-
Page 77: Bediening Van De Afstandsbediening - Gebruiker
6. BEDIENING VAN DE AFSTANDSBEDIENING - GEBRUIKER 6. BEDIENING VAN DE AFSTANDSBEDIENING - GEBRUIKER 6. BEDIENING VAN DE AFSTANDSBEDIENING - GEBRUIKER Manuele by-pass Manuele by-pass Manuele by-pass Instelling van de debieten Instelling van de debieten Instelling debieten: Instelling van de debieten Door op de knoppen te drukken, is het mogelijk om de snelheid te veranderen. - Page 78 Manuele by-pass: Door op de knop manuele by-pass te drukken, zal de by-pass zich openen gedurende 8 uur. Gedurende deze periode zal de knop gaan groen oplichten. Om deze bewerking stop te zetten dient men terug op deze knop te drukken(.led lichtje dooft) By-pass in werking Stop toets: Door 3 seconden op de...
-
Page 79: Mode Vorstbeveiliging
7. MODE VORSTBEVEILIGING CAD HE 450 EC H BASIC Alle standaard units beschikken over een automatisch vorstbeveiligingssysteem. In het geval dat de temperatuur van de afvoerlucht onder de 5°C zakt en de buitenlucht lager dan 0°C is, dan zal de ontdooifunctie starten. De toevoerventilator verlaagd zijn snelheid terwijl de afvoerventilator aan het nominale debiet werkt. -
Page 80: Opstart Van De Cad 450
8. OPSTART VAN DE CAD 450 Alvorens het toestel op te starten dient men volgend proces te volgen : 1. Nakijken of alle componenten van de installatie goed zijn aangesloten. Kanaal voor de pulsielucht goed geisolleerd en aangesloten (geen rooster met muggengaas gebruiken voor de luchtaanzuig) Pulsie –... -
Page 81: Tabel Van Alarmen
9. TABEL VAN ALARMEN De ledlamp op het bedieningspaneel geeft de status van het toestel weer Deze led toont de alarmcodes (zie tabel) in geval van storingen van de onderdelen of waarschuwingen ( vervanging van de filters, by-pass manuele modus, toevoer temperatuur <11ºC). - Page 82 ČESKY ČESKY ENGLISH ENGLISH ENGL ENGL OBSAH OBSAH 1. VŠEOBECNÉ INFORMACE ..................83 1. VŠEOBECNÉ INFORMACE ..................83 1.1 Uvod ........................83 1.1 Uvod ........................83 1.2 Převzetí - skladování ..................83 1.2 Převzetí - skladování ..................83 1.3 Záruka a odpovědnost ..................
-
Page 83: Všeobecné Informace
1. VŠEOBECNÉ INFORMACE 1.1 Úvod Toto zařízení bylo vyrobeno podle přísných technických bezpečnostních pravidel v souladu s národními standardy. Prohlášení o shodě a návod k použití je k dispozici ke stažení na internetu na našich webových stránkách www.elektrodesign.cz. Před instalací a používáním tohoto zařízení si pozorně přečtěte tyto instrukce, které obsahují důležité... -
Page 84: Záruka A Odpovědnost
1.3 - Záruka a odpovědnost Záruka Na zboží dodané společností S&P se vztahuje záruka dle platných právních předpisů. S&P souhlasí s výměnou prokazatelně vadných dílů nebo zařízení po odsouhlasení naším reklamačním oddělením, s výjimkou škod, úroků nebo sankcí jako jsou provozní ztráty, komerční... - Page 85 Sání čerstvého vzduchu: Sání čerstvého vzduchu: Na toto hrdlo připevněte potrubí pro sání čerstvého venkovního vzduchu. Na toto hrdlo připevněte potrubí pro sání čerstvého venkovního vzduchu. Potrubí pro sání čerstvého vzduchu (vedená zdí nebo střechou) se musí umístit v Potrubí pro sání čerstvého vzduchu (vedená zdí nebo střechou) se musí umístit v dostatečné...
-
Page 86: Rozměry
Zajišťuje obtok odváděného vzduchu z budovy mimo rekuperační výměník. Tím Zajišťuje obtok odváděného vzduchu z budovy mimo rekuperační výměník. Tím nedochází k předávání tepla čerstvému vzduchu. Systém jednotky CAD má 100% by- nedochází k předávání tepla čerstvému vzduchu. Systém jednotky CAD má 100% by- pass. -
Page 87: Umístění Zařízení
3. INSTALACE 3. INSTALACE Tyto modely jsou určeny pro podstropní instalaci, pomocí 4 montážních konzolí. Tyto modely jsou určeny pro podstropní instalaci, pomocí 4 montážních konzolí. Ujistěte se, že strop a použitý fixační materiál unese váhu jednotky. Pro zabránění Ujistěte se, že strop a použitý fixační materiál unese váhu jednotky. Pro zabránění přenosů... - Page 88 Připojení odvodu kondenzátu: Pro zajištění dobrého odvodnění musí být jednotka instalována ve vodorovné poloze. Doporučujeme mírný sklon přibližně 1 k odtoku kondenzátu. °...
-
Page 89: Elektrické Parametry A Elektrická Instalace
4. ELEKTRICKÉ PARAMETRY A ELEKTRICKA INSTALACE Maximální Pracovní Napětí Okolní teplota: Model proud: teplota: -25ºC – 40ºC 10ºC – 40ºC CAD HE 450 H... - Page 90 4.1 Připojení senzorů Jednotka CAD HE (IDEO Ecowatt) může být ovládána vzdáleným senzorem CO2/RH s analogovým výstupem 0 – 10 V (viz. elektrické schema zapojení). Výstupní řídicí napětí senzoru pracuje v rozsahu 2-8 V. Výstupní signál 2 V odpovídá výstupnímu signálu pro ventilátory jednotky o hodnotě...
-
Page 91: Uvádění Do Provozu
5. UVÁDĚNÍ DO PROVOZU Po sejmutí čelního krytu drátového ovladače jednotky DOMEO je možné nastavit: 5. UVÁDĚNÍ DO PROVOZU − nastavení průtoku (minimální, zvýšený „boost“ a nastavení průtoku pro bypass/noční vychlazení) Po sejmutí čelního krytu drátového ovladače jednotky DOMEO je možné nastavit: −... - Page 92 na používání Vašeho domu (prach, tuky z kuchyně,…). Proto doporučujeme tento parametr na používání Vašeho domu (prach, tuky z kuchyně,…). Proto doporučujeme tento parametr po druhém alarmu upravit. Po provádění stavebních prací je odváděný i přiváděný vzduch po druhém alarmu upravit. Po provádění stavebních prací je odváděný i přiváděný vzduch zatížen prachem a nejedná...
-
Page 93: Nastavení Ovládání Pro Uživatele
6. NASTAVENÍ OVLÁDÁNÍ PRO UŽIVATELE Manuální bypass Volba průtoku Nastavení rychlosti: Tisknutím tlačítek “nastavení průtoku” můžete změnit rychlost. LED budou svítit zeleně (viz obrázky níže). Minimální průtok Zvýšený režim „boost“ Bypass/noční vychlazení Automatický bypass: Jednotka CAD pracuje s naprogramovaným automatickým bypassem. Následující... - Page 94 Manuální bypass: Stisknutím tlačítka “manuální bypass” se bypass otevře na 8 hodin. Když je bypass aktivní, svítí tlačítko zeleně. Pro deaktivaci (uzavření) bypassu během těchto 8 hodin znovu stiskněte toto tlačítko (zelené světlo zhasne). Aktivovaný bypass Pohotovostní režim (standby): Držte stisknuté tlačítko po dobu 3 sekund, poté...
-
Page 95: Rezim Protimrazové Ochrany
7. REZIM PROTIMRAZOVÉ OCHRANY CAD HE 450 EC H BASIC Všechny standardní jednotky mají instalován automatický systém protimrazové ochrany. V případě, že teplota na výtlaku odpadního vzduchu (EHA) klesne pod 5 °C a teplota venkovního vzduchu je nižší než 0 °C, pak se spustí režim automatického odmrazování. -
Page 96: Spuštění Jednotky Cad
8. SPUŠTĚNÍ JEDNOTKY CAD K uvedení zařízení do provozu postupujte podle níže uvedených pokynů: 1. Zkontrolujte, zda všechny součástky zařízení jsou správně umístěné a připojené: • Čerstvý vzduch na sání je přiváděn v izolovaném potrubí a je správně připojen (nepoužívejte přívod čerstvého vzduchu vybavený síťkou proti hmyzu). •... -
Page 97: Správa Alarmů
9. SPRÁVA ALARMŮ Pomocí LED diod umístěných na ovladači k jednotce je možné indikovat v jakém stavu se jednotka nachází. Tato LED dioda signalizuje alarm (viz. tabulka) v případě chybového hlášení některých důležitých komponentů zařízení nebo jednoduše oznámí stav (výměna filtrů, manuální ovládání bypassu, přívodní teplota <11ºC). V závislosti na míře rizika oznámené... - Page 100 S&P SISTEMAS DE VENTILACIÓN, S.L.U. C. Llevant, 4 Polígono Industrial Llevant 08150 Parets del Vallès Barcelona - España Tel. +34 93 571 93 00 Fax +34 93 571 93 01 www.solerpalau.com Ref. 7081010800...
Need help?
Do you have a question about the CAD HE 450 H BASIC and is the answer not in the manual?
Questions and answers