
Subscribe to Our Youtube Channel
Related Manuals for Elmi Fugamix3 CM-50MP


Summary of Contents for Elmi Fugamix3 CM-50MP
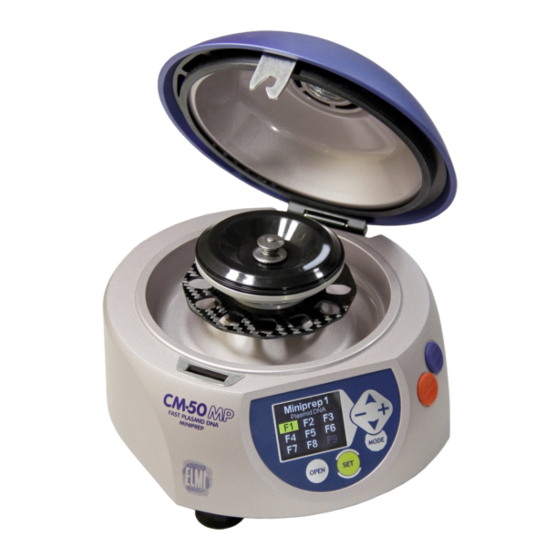
- Page 1 ELMI laboratory equipment Centrifuge-Mixer CM-50MP Video instruction is available! youtube.com/elmimedia/videos User manual ISO 9001:2008 Version 050514...
-
Page 2: Table Of Contents
Contents Page Introduction..........................2 Technical specifications......................2 Delivery package........................2 Getting started...........................3 Rotor assembly and usage......................4 Control buttons..........................5 Additional commands of the buttons...................6 Operating in centrifugation mode “CN”..................7 Operating in “SP” mode......................8 Operating in “Miniprep 1” and “Miniprep 2” modes..............9 Miniprep mode - understanding the interface................10 Operating in “Miniprep 1”... -
Page 3: Introduction
Introduction Dear users! Fugami-3 CM-50MP is a revolutionary system that guides you every step of the way to a faster and better plasmid DNA miniptep. We ask you to carefully read the user manual and follow the instructions for proper operation and maintenance of the CM-50MP. This will insure excellent results and enduring performance. -
Page 4: Getting Started
Getting started Preparation to work · Unpack the device. · Inspect the appearance of the device, the adapter and the power cord for damage. · Open the lid of the CM-50MP with the emergency lid opening lever and remove the packaging material.( see emergency opening of the centrifuge lid). -
Page 5: Rotor Assembly And Usage
Rotor assembly and usage CarbonSpin The CM-50MP fugamix features our patented CarbonSpin(TM) rotor. The rotor is composed of precisely machined proprietary aluminum alloy, significantly improving efficiency and ventilation. To reduce the rotors weight while simultaneously increasing efficiency during intensive shake cycles, a custom carbon fiber layer stability ring was implemented. The dependable design allows the user to spin and vigorously shake any substance, including heavy beads, for as long as the experiment requires. -
Page 6: Control Buttons
Interface and controls Control buttons Timer 13500 12388 BRAKE Fig. 1 Control panel. Lid opening. “Custom”, “Miniprep 1” and “Miniprep 2” mode view and configuration. Mode selection. Up and Down menu scroll and parameter change. Start/stop and custom program launch. Mixer start/stop. -
Page 7: Additional Commands Of The Buttons
Interface and controls Additional commands of the buttons By pressing and holding down “MODE” for 3 seconds you enter “Options” menu to adjust screen brightness, beeper volume and more. Bright. Sound Sleep Lang. English Options Use “START/STOP” and “MIX/STOP” buttons to switch between centrifugation “CN”... -
Page 8: Operating In Centrifugation Mode "Cn
Operation Operating fugamix in centrifugation mode “CN” Timer Rotor icon has a color code. 13500 All the parameters are displayed clearly. 12388 BRAKE - Green color means that the lid is opened. green - Red color means the lid is closed and you can now run the fugamix. -
Page 9: Operating In "Sp" Mode
Operation Operating fugamix in “SP” mode Sample preparation is a programmable sequence of mixing and spin down that allows effectively mix small volumes of reagents and collect them on the bottom of a test tube. Timer “Timer” - Controls the overall duration of the procedure. 03000 “RPM / RCF”... - Page 10 Operation Operating fugamix in “Miniprep 1” and “Miniprep 2” modes Advantages of the Fugamix 3 Miniprep 1 Miniprep 2 Plasmid DNA Fast plasmid DNA F2 F3 F2 F3 F4 F5 F6 F4 F5 F6 Fugamix 3 has two special modes for doing DNA extraction from E-coli in miniprep and FAST-miniprep format.
-
Page 11: Miniprep Mode - Understanding The Interface
Operation Operating fugamix in “Miniprep” mode Understanding the interface Miniprep 1 Plasmid DNA Miniprep plasmid DNA extraction mode is a sequence of F1 F2 F3 preprogrammed steps that follow the standard protocol. F4 F5 F6 Understanding the color code for program steps. - Yellow field: selection marker. - Page 12 Operation Operating fugamix in “Miniprep 1” mode Miniprep 1 Plasmid DNA F1 F2 F3 F4 F5 F6 Miniprep plasmid DNA extraction mode mapped on a standard protocol and a standard kit. Step 1 Timer Load test tubes containing bacteria in to the rotor. Press Start/Stop Mixer and wait 1 min until the cells will be separated.
- Page 13 Operation Operating fugamix in “Miniprep 1” mode Step 6 Timer Remove elution. Apply 700 μl of washing buffer on the Mixer spin column. Press Start/Stop and spin down for 20 sec. Timer 13500 Step 7 Timer Remove elution and press Start/Stop. 1 min spin down will clear out Mixer the remaining wash buffer and dry the membrane.
- Page 14 Operation Operating fugamix in “Miniprep 2” Miniprep 2 Fast plasmid DNA F2 F3 F4 F5 F6 Fast plasmid DNA extraction mode mapped on a standard protocol and a standard kit. Step 1 Timer Add 20 μl RNaseA (10mg/ml) 100 μl of resuspension buffer and Mixer press Start/Stop.
- Page 15 Operation Operating fugamix in “Miniprep 2” Step 6 Timer Mixer Move the spin columns to the elution test tubes. Add 50 μl of elution buffer to the center of a spin columns’ membrane. Timer Press Start/Stop and spin down for 1 min. 13500 Now purified plasmid DNA is eluted.
-
Page 16: Custom" Mode: Understanding The Interface
Operation Operating fugamix in “Custom” mode Understanding the interface Custom Spin mix spin Custom mode is a step by step program with 9 independently F2 F3 programmable steps F1-F9. F4 F5 Understanding the color code for program steps. - Yellow field: selection marker. This step is currently selected for editing or running. - Grey field, grey letters: this step is empty and has no user settings. -
Page 17: Custom" Mode: Creating A Program
Operation Operating fugamix in “Custom” mode Creating a program Custom Spin mix spin Find mode “Custom” in a mode list by pressing “MODE” button. F2 F3 F4 F5 In order to start programming steps of the program press “SET”. Timer Mixer Cell editing screen will open up. - Page 18 Operation Operating fugamix in “Custom” mode Running a program Custom Spin mix spin Selector is automatically placed at the beginning of the program F2 F3 to the fist step F1. F4 F5 Press START/STOP to run the program. Custom Upon completion of every step centrifuge will stop, open the lid Spin mix spin F1 F2 and wait to proceed to the next step F2.
-
Page 19: Mixer" Mode
Operation Operating fugamix in “Mixer” mode Mixer mode is a fully functional vortexer. Easy to set vibration speed from 1 to 12. Timer Settings adjustments are made using the “+/- up/down” keyboard. Mixer Parameters can also be change while the centrifuge is running. Mixer To run vortexing just press “MIX/STOP”... - Page 20 Troubleshooting Error codes and solutions Error code Cause Solution Check connection of the power cable. No main power connection. “BLACK Check if the power supply adapter is SCREEN” functioning. Power failure Centrifuge lid is left open. Close and press on the lid till you hear a click.
- Page 21 Troubleshooting Restoring factory settings using special “TO” menu Timer Short run When in “CN” mode turn the fugamix off by clicking the main power 15000 switch to “off” position. 15294 BRAKE Press and hold down both buttons (-) and (+). While holding down the buttons click the power switch to “on”...
-
Page 22: Disinfection And Cleaning
General information Safety features Service personnel are prohibited to: · Plug the devie in to a power outlet with configuration that differs from the power adapters configuration. · Use the device with damaged adapter, power cord, rotor aerodynamic lid or housing. ·... -
Page 23: Certificate Of Approval
Certificate of sale Organization _______________________________________________. Address __________________________________________________. Phone____________________________________________________. Vendor ___________________________________________________. (name) (signature) Date of sale ___________________. Default factory settings Manufacturers' address. Rotor 21-136 Aizkraukles Str., Riga LV-1006 Tel: (+371) 6755 8743 Fax: (+371) 6755 1934 Disbal. E-mail: info@elmi-tech.com WWW: www.elmi-tech.com Current... - Page 24 ELMI Ltd. 21-136 Aizkraukles Str. Riga, LV-1006, Latvia T: +371 6755 8743 F: +371 6755 1934 E: info@elmi-tech.com W: www.elmi-tech.com...
Need help?
Do you have a question about the Fugamix3 CM-50MP and is the answer not in the manual?
Questions and answers