Table of Contents
Advertisement
Quick Links
Advertisement
Table of Contents

Related Manuals for Sekonic RT-GX


Summary of Contents for Sekonic RT-GX
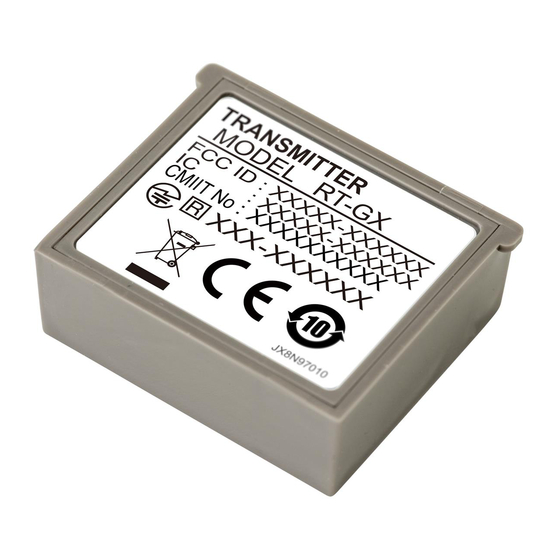
- Page 1 Transmitter RT-GX Operating Manual This manual is specific for Godox ® operation. Please read the "Operating Manual" and "Safety Precaution" so that you will fully understand the features and operation of this product. Keep the operating manual in a safe place for future use.
-
Page 2: Safety Precautions
● Do not under any circumstances remodel or disassemble this product for modification or part replacement purposes. ■ Terms and Trademarks ® Godox is the registered trademark of Godox Photo Equipment Co. Ltd. © 2020 SEKONIC CORPORATION All Rights Reserved. -
Page 3: List Of Applicable Model
List of Applicable Model This transmitter is an accessory dedicated to the following model (light meter). Model Transmitter Model Manufacturer/Frequency L-858D Series Serial No. JY10-XXXXXX (For Japan) JY11-XXXXXX (For Europe and Canada) RT-GX Godox : 2.4GHz JY1L-XXXXXX (For US) JY1G-XXXXXX (For China) -
Page 4: Intended Use
NOTICE ● Check if L-858D firmware is the latest version by using "Update Settings" function of Data Transfer Software connected with L-858D. ● Download the Data Transfer Software from www.sekonic.com, and install it on your computer. URL: https://www.sekonic.com/support/downloads/dtssoftwareformacandwindows.aspx To use this software, connect your computer to the L-858D using a USB cable (micro-B type, available commercially). -
Page 5: Features Of The Rt-Gx
Light source (with a receiver built-in/installed) Camera Subject Subject Figure 1 Figure 2 ® Note that this transmitter of RT-GX only supports the Godox radio system. Manufacturer Radio CH/Group Function Godox Channel : 1 to 32 Flash light triggering and output power... -
Page 6: Accompanying Accessories
(Colors, letters, etc.) ■ Accompanying Accessories The following items are included with the Transmitter RT-GX. Please be sure to check that all noted items are included. If any items are missing, please contact the distributor or the reseller you purchased the transmitter from. -
Page 7: Table Of Contents
■ List of Applicable Model ..............................■ Intended Use ..................................■ Intended Users ..................................■ Disclaimer ....................................■ Features of the RT-GX ..............................■ Restrictions ....................................■ Accompanying Accessories ............................1. Before Use ..................................1-1 Installing the Transmitter .......................... 2. About Godox Radio System ......................... - Page 8 3. Product Information ............................. 4. Regulation ..................................5. Radio Channel Frequencies ........................6. Specifications ................................7. Legal Requirements ............................. 8. Troubleshooting ............................... 9. After-sales Services .............................
-
Page 9: Before Use
1. Before Use ● Before Use 1-1 Installing the Transmitter WARNING ● Please refrain from opening the product packaging with wet hands or in a dusty environment as this may cause damage to the product. ● Keep the materials used in this product out of the reach of children to prevent accidental ingestion and misuse. - Page 10 1. Before Use ● Insert the Battery Cover tabs (three) into the receiving holes in the meter body, press the Battery Cover down and close the Battery Cover Latch Battery Cover Tabs (three) Transmitter Battery Cover Latch...
-
Page 11: About Godox Radio System
2. About Godox Radio System ● About Godox Radio System 2-1 Overview Triggering and controlling Godox Wireless Flash require using Godox Wireless Flash units receiver attached or installed. Once the transmitter module is installed in your L-858D, you will be able to adjust the power level and trigger flashes to get the look you desire. For more information about the meter, refer to the L-858D Operating Manual. -
Page 12: Setting The Radio Ch/Group
2. About Godox Radio System ● 2-2 Setting the Radio CH/Group Set the radio channel and Group used on Godox radio system. 2-2-1 Setting on the Tool Box Screen Operation Select any Radio Mode in the Measuring Mode Screen. ( P13 “ ”, ... - Page 13 2. About Godox Radio System ● Select "CH" (Radio Channel) to use. Touch the arrows , or slide your finger over the screen to select the channel from 1 to 32. [Radio CH/Group Setting Screen] Radio CH [OK] Button [Cancel] Button Select the desired Group.
- Page 14 2. About Godox Radio System ● To change the Group to be displayed, touch the selected Group again. Select Group Screen is displayed and a hidden Group can be selected. Touch the [Group] Button (A to F, 0 to 9) you want to set and select the group. [Select Group Screen ] [Select Group Screen ] [Group] Button...
- Page 15 2. About Godox Radio System ● Touch [OK] Button. The setting is entered, and the display returns to the Measuring Screen. Touch the [Cancel] Button to return to the Measuring Screen without making the modification. NOTE ● The last selected Group in Radio CH/Group Setting Screen is activated in Measuring Screen.
-
Page 16: Setting In Measuring Screen (Group Setting Only)
2. About Godox Radio System ● 2-2-2 Setting in Measuring Screen (Group setting only) Operation Touch the [Flash Power Control] Icon ( ) on the Measuring Screen. The Flash Power Control Screen is displayed. [Measuring Screen] [Flash Power Control Screen] [Flash Power Control] Icon [Group]... - Page 17 2. About Godox Radio System ● To change the Group to be displayed, touch the selected Group again. Select Group Screen is displayed and a hidden Group can be selected. Touch the [Group] Button (A to F, 0 to 9) you want to set and select the group. [Select Group Screen ] [Select Group Screen ] [Group] Button...
- Page 18 2. About Godox Radio System ● NOTE ● The last selected Groups in Radio CH/Group Setting Screen is activated in Measuring Screen. ● CH can be set only in Radio CH/Group Setting in Tool Box. ( P4) ● For touch/slide operations, refer to the Operating Manual of the light meter. ●...
-
Page 19: Setting The Wireless Id
2. About Godox Radio System ● 2-3 Setting the Wireless ID To use Wireless ID with Godox radio system, the same Wireless ID should be set to the light meter. If your receiver (flash) doesn’t have Wireless ID setting, please make sure to select OFF. - Page 20 2. About Godox Radio System ● Touch a number to select 1 to 99. You can set the Wireless ID from 1 to 99 or OFF. [Wireless ID Setting Screen] [Wireless ID Setting Screen] The entered number is displayed [OK] Button [Cancel] Button Touch [OK] Button.
-
Page 21: Measuring
2. About Godox Radio System ● 2-4 Measuring Radio Triggering measurement is available in the following modes: Radio Triggering Flash Mode ● Radio Triggering Multiple (cumulative) Flash Mode ● HSS (High Speed Synchro) Flash Radio Triggering Mode ● Flash Duration Analysis Radio Triggering Mode ●... - Page 22 2. About Godox Radio System ● Set the light receiving method. Switch to the incident light, extended lumisphere ( )/retracted lumisphere ), or reflected light. [Measuring Screen] Set the ISO sensitivity value on the [ISO] Icon. Set the shutter speed on the [T] Icon. Setting Value NOTICE Make sure that the settings are within the specifications of the camera and flash system.
- Page 23 2. About Godox Radio System ● Press the Measuring Button 6. The flash will fire and the measured value (F-stop) will be displayed. [Measuring Screen] Measured value (F-stop) NOTICE In case of the following, please follow “Cord Flash Mode” ( ●...
-
Page 24: How To Use Flash Power Control
2. About Godox Radio System ● How to use Flash Power Control Touch the [Flash Power Control] Icon ( ) on the Measuring Screen. The Flash Power Control Screen is displayed. Take measurements by placing the meter at the subject’s position with the light receptor (retracted lumisphere) facing toward the light sources of main light and fill light directly. - Page 25 2. About Godox Radio System ● Press the Measuring Button 6. The flash of the selected Group will fire, and the measured value (F-stop) will be displayed. The measured value is displayed in the main display and the Group display over the selected Group in the Flash Power Control Screen.
- Page 26 2. About Godox Radio System ● Press the Measuring Button again. The measured value (F-stop) will be displayed. Check that the output power of the flash is the desired value. Repeat Steps 2 to 5. Repeat the procedure for other Groups until each flash unit’s brightness is set to proper value for the effect you want.
- Page 27 2. About Godox Radio System ● With [ALL] Button selected, touch [+] or [-] Button. Press the Measuring Button again. You can adjust the total power level while the lighting ratio of each Group is being fixed. [Flash Power Control [Flash Power Control Screen] Screen]...
-
Page 28: How To Use Modeling Lamp Power Control
2. About Godox Radio System ● How to use Modeling Lamp Power Control Touch the [Modeling Lamp Power Control] Icon ( ) on the Flash Power Control Screen. The Modeling Lamp Power Control Screen is displayed. [Flash Power Control Screen] [Modeling Lamp Power Control] Icon Select a [Group] Button (default setting: A to E), and touch the... - Page 29 2. About Godox Radio System ● Press the Measuring Button 6. The modeling lamp of selected Group is measured. The measured value is displayed in the main display and the Group display over the selected Group in the Modeling Lamp Power Control Screen. Touch [+] or [-] Button.
- Page 30 2. About Godox Radio System ● Touch [ALL] Button, then press the Measuring Button 6. Point the meter (lumisphere) at the camera from the position of subject to make a measurement. All modeling lamp of the selected Group will fire, and the total exposure (F-stop) will be displayed in the main display.
- Page 31 2. About Godox Radio System ● NOTICE ● Use the measurement with retracted lumisphere to see the lighting ratio of each Group, and use the extended lumisphere for final exposure. ● The measurements between extended lumisphere and retracted lumisphere are different due to light distribution characteristic.
-
Page 32: Radio Triggering Multiple (Cumulative) Flash Mode
2. About Godox Radio System ● 2-4-2 Radio Triggering Multiple (Cumulative) Flash Mode This Measuring Mode is used when the light generated by the flash at one time is inadequate for the desired F-stop setting. Repeated flash pops can be accumulated until the desired F-stop value is displayed. - Page 33 2. About Godox Radio System ● Set the ISO sensitivity value on the [ISO] [Measuring Screen] Icon. Set the shutter speed on the [T] Icon. Setting Value NOTICE Make sure that the settings are within the specifications of the camera and flash system. Make sure that the set CH (channel), Group and Wireless ID are the same between the light meter and the receivers in use.
- Page 34 2. About Godox Radio System ● Press the Measuring Button 6. The measured value (F-stop) will be displayed. Press the Measuring Button again to fire a flash and measure until the desired F-stop is displayed. The accumulated measured value (F-stop) and the cumulative count will be displayed.
-
Page 35: Multi Clear
2. About Godox Radio System ● Multi Clear Touch the [Tool Box] Icon ( ) on the Measuring Screen. The Tool Box Screen is displayed. Touch the [Next Page] Icon ( ) of the Tool Box to display the Tool Box showing [Multi Clear]. This button is only enabled during measurement. -
Page 36: Hss (High Speed Synchro) Flash Radio Triggering Mode
2. About Godox Radio System ● 2-4-3 HSS (High Speed Synchro) Flash Radio Triggering Mode Select this mode to measure the brightness of a flash activated in HSS (High Speed Synchro) mode. Detects flash brightness after Measuring Button is pressed to send radio transmitted signal to radio receiver connected to flash. - Page 37 2. About Godox Radio System ● Set the ISO sensitivity value on the [ISO] [Measuring Screen] Icon. Set the shutter speed on the [T] Icon. Setting Value NOTICE Make sure that the settings are within the specifications of the camera and flash system. Make sure that the set CH (channel), Group and Wireless ID are the same between the light meter and the receivers in use.
- Page 38 2. About Godox Radio System ● Press the Measuring Button 6. The flash will fire and the measured value (F-stop) will be displayed. [Measuring Screen] Measured Value (F-stop) NOTICE ● In the following cases, measurement may not be possible. • When firing the flash, if the flash brightness is lower than the ambient light, the meter may fail to detect the light.
-
Page 39: How To Use Flash Power Control
2. About Godox Radio System ● How to use Flash Power Control Touch the [Flash Power Control] Icon ( ) on the Measuring Screen. The Flash Power Control Screen is displayed. Take measurements by placing the meter at the subject’s position with the light receptor (retracted lumisphere) facing toward the light sources of main light and fill light directly. - Page 40 2. About Godox Radio System ● Press the Measuring Button 6. The flash of the selected Group will fire, and the measured value (F-stop) will be displayed. The measured value is displayed in the main display and the Group display over the selected Group in the Flash Power Control Screen.
- Page 41 2. About Godox Radio System ● Press the Measuring Button again. Check that the output power of the flash is the desired value. Repeat Steps 2 to 5. Repeat the procedure for other Groups until each flash unit’s brightness is set to proper value for the effect you want.
- Page 42 2. About Godox Radio System ● With [ALL] Button selected, touch [+] or [-] Button Press the Measuring Button again. You can adjust the total power level while the lighting ratio of each Group is being fixed. [Flash Power Control [Flash Power Control Screen] Screen]...
-
Page 43: Flash Duration Analysis Radio Triggering Mode
2. About Godox Radio System ● 2-4-4 Flash Duration Analysis Radio Triggering Mode The meter detects flash brightness after Measuring Button is pressed to send radio transmitted signal to radio receiver connected to flash. F-stop, flash duration time and graph of flash waveform are displayed for input ISO sensitivity and shutter speed. Depending on the receivers in use, the meter controls the output power of flash units and modeling lamp with turning ON/OFF, however, flash duration time and graph of flash waveform are not measured in Modeling Lamp Power Control Screen because it is... - Page 44 2. About Godox Radio System ● Set the ISO sensitivity value on the [ISO] [Measuring Screen] Icon. Set the shutter speed on the [T] Icon. Setting Value NOTICE Make sure that the settings are within the specifications of the camera and flash system. Set the Flash Duration Analysis t value.
- Page 45 2. About Godox Radio System ● Press the Measuring Button 6. The flash will fire, and the flash duration time and the measured value (F-stop) for input ISO sensitivity and shutter speed will be displayed. [Measuring Screen] Flash Duration Time Measured Value (F-stop) NOTICE ●...
- Page 46 2. About Godox Radio System ● NOTE ● For red-eye prevention and auto-flash light adjustment, some devices can pre-flash before main flash burst. With the normal setting, the light meter will measure the pre-flash bursts and not the main flash burst. To take a successful reading, activate the pre-flash feature in the Tool Box.
-
Page 47: How To Use Flash Power Control
2. About Godox Radio System ● How to use Flash Power Control Set the Flash Duration Analysis t value. ( P43) Make sure that the CH (channel), Group and Wireless ID are the same between the light meter and the receivers in use. ( P4, P8, P11) Touch the [Flash Power Control] Icon ( ) on the Measuring... - Page 48 2. About Godox Radio System ● Press the Measuring Button 6. The flash of the selected Group will fire, and the measured value (F-stop) will be displayed. The measured value (F-stop) is displayed in the main display and the Group display over the selected Group in the Flash Power Control Screen.
- Page 49 2. About Godox Radio System ● Press the Measuring Button again. Check that the output power of the flash is the desired value. [Flash Power Control Screen] Main Display Measured Value (F-stop) Group Display Adjusted Value [-] Button [+] Button Press the [Flash Duration Analysis Radio Triggering Mode] Icon The display returns to the Measuring Screen, and the flash duration time and the measured value (F-stop) for input ISO sensitivity and shutter speed will be...
- Page 50 2. About Godox Radio System ● NOTE ● When the measured value display area is touched, both flash waveform graph and measured value are displayed. When it is touched again, the display returns to the previous screen. [Flash Duration Analysis Mode Flash Waveform Graph Screen] [Measuring Screen]...
-
Page 51: Flash Duration Analysis T Value
2. About Godox Radio System ● Flash Duration Analysis t Value The t value can be set in steps of 0.1 at a range of 0.1 to 0.9. The flash duration time varies depending on the input t value. Touch the [Tool Box] Icon ( ) on the Measuring Screen. - Page 52 2. About Godox Radio System ● Enter the "Reference" of 0.1 to 0.9 by touching the numeric value. The t value can be set in steps of 0.1 at a range of 0.1 to 0.9. The first "0." is fixed. Enter the first digit decimal only. (To set "0.1", enter "1".) [Flash Duration Analysis [Flash Duration Analysis t Value Screen]...
-
Page 53: Product Information
3. Product Information ● Product Information This screen displays the detailed information not displayed in the Measuring Screen. [Product Information Screen] Item Description Displays the model number of Model Name the meter. Displays the serial number of Serial Number the meter. Version Displays the firmware version. - Page 54 3. Product Information ● Touch the [Close] Button. The display return to the Menu Screen. Touch the [Close] Button. The display returns to the Measuring Screen.
-
Page 55: Regulation
4. Regulation ● Regulation The Regulation screen displays the symbols, approved number, regulation names, etc. which the meter is compliance with. Operation Touch the Menu Button on the meter. The Menu Screen is displayed. Touch the [Next Page] Icon ( ) to display page 2 of the Menu Screen, and touch the [Regulation] Button. -
Page 56: Radio Channel Frequencies
5. Radio Channel Frequencies ● Radio Channel Frequencies Radio CH frequencies (CH 1 to 32) Channel Freq. (MHz) Channel Freq. (MHz) 2413.0 2439.5 2414.5 2441.7 2416.0 2443.0 2418.0 2444.5 2419.5 2446.7 2421.0 2448.0 2423.0 2449.5 2424.5 2451.7 2426.7 2453.0 2428.0 2454.5 2429.5 2456.7... -
Page 57: Specifications
6. Specifications ● Specifications Radio Channel Setting Range 1 to 32 ● Radio Group Setting Range A to F, 0 to 9, ALL ● Wireless ID Setting Range OFF, 0 to 99 ● Radio Triggering Range 30 meter (100 feet) ●... -
Page 58: Legal Requirements
7. Legal Requirements ● Legal Requirements This product complies with the following legal requirements. Destination Standard Details Europe Wireless EN 300 440 EN 50663 North FCC (US) Wireless FCC Part15 SubpartC America IC (Canada) Wireless RSS-210 Japan Radio Act Certification of construction type prescribed in Article 38-24, paragraph (1) of the Radio Act FCC &... -
Page 59: Troubleshooting
Sekonic. Non-operation can be due to incorrect, mis-setting of the meter or battery condition. Should your meter be malfunctioning, please contact place where meter was purchased or Sekonic for service and repair. -
Page 60: After-Sales Services
9. After-sales Services ● After-sales Services 伪 Contact your local distributor or camera store that you purchased from for warranty and service. 伪 Even within the warranty period, repair services may be provided on a paid basis. Check the conditions of warranty provided by local distributor or retailer. 伪... - Page 61 7-24-14, Oizumi-Gakuen-cho, Nerima-ku Tokyo 178-8686 JAPAN Tel +81-3-3978-2335 Fax +81-3-3978-5229 https://www.sekonic.com JX8N97630 September 2020...
Need help?
Do you have a question about the RT-GX and is the answer not in the manual?
Questions and answers