Advertisement
Quick Links
HARDWARE •
QUINCAILLERIE
bolt (4X)
boulon (x 4)
tornillo (4X)
Use only the
approved hardware
included with this kit.
REQUIRED TOOLS •
Drill
Perceuse
Taladro
REFER TO YAKIMA SKYLINE OR CONTROL TOWER
INSTRUCTIONS FOR IMPORTANT WARNING AND LOAD
LIMITATIONS, AND YAKIMA'S LIMITED WARRANTY.
CONSULTER LES INSTRUCTIONS
ACCOMPAGNANT LES PIEDS SKYLINE OU
CONTROL TOWER YAKIMA : ON Y TROUVERA
DES AVERTISSEMENTS IMPORTANTS ET LES
LIMITES DE CHARGEMENT, AINSI QUE LA
GARANTIE LIMITÉE YAKIMA.
If installing Landing Pad™ 24 with Yakima
LockNLoad™ Platform size B direct to tower,
it will require Pivot Mounts (mounting blocks)
with two mounting locations for the U-bracket. If
your LockNLoad did not come with Pivot Mounts
with two threaded mounting locations, please
call Yakima customer service at 888-925-4621 to
request Yakima Part #8881302.
Pour le français, aller à la page 7.
Instruction #1036057B - Page 1 of 11
®
•
PIEZAS DE FIJACIÓN
washer (4X)
center punch (2X)
rondelle (x 4)
pointeau (x 2)
arandela (4X)
punzón de centrado (2X)
N'employer que la
quincaillerie approuvée
incluse dans cette trousse.
OUTILS NÉCESSAIRES
masking tape
ruban-cache
cinta de enmascarar
3/8" Drill Bit
foret 10 mm (3/8 po)
Mecha de 3/8"
CONSULTE LAS INSTRUCCIONES DE
LAS TORRES SKYLINE O CONTROL
DE YAKIMA PARA CONOCER LAS
ADVERTENCIAS IMPORTANTES, LOS
LÍMITES DE CARGA Y LA GARANTÍA
LIMITADA DE YAKIMA.
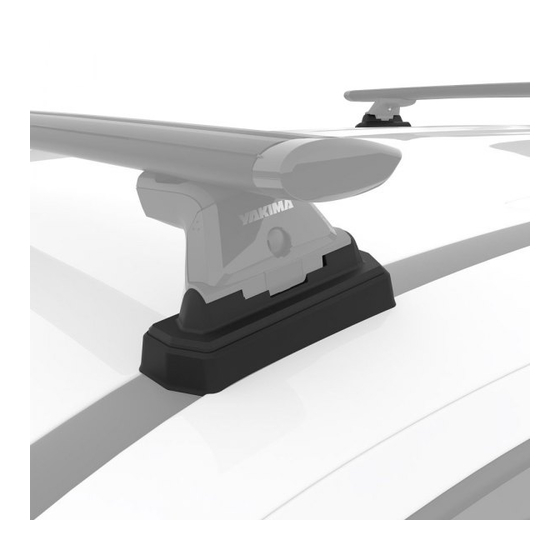
Landing Pad ™ 24
INCLUDED TOOLS
OUTILS INCLUS
HERRAMIENTAS
INCLUIDAS
Utilice solamente las
piezas aprobadas e
incluidas en este kit.
•
HERRAMIENTAS NECESARIAS
utility knife
couteau
cúter
tape measure
ruban à mesurer
Cinta para medir
La limite de charge sur
le Landing Pad 24 est
de 75 kg (165 lb), ou de
100 kg (220 lb) avec
les barres Yakima HD.
Si l'on pose les Landing Pad
MC
directement sur le pied, il faudra des balanciers (blocs de montage) comportant deux points
de montage pour le support en U. Si la plateforme LockNLoad que l'on installe n'a pas été
livrée avec des balanciers comportant deux points de montage filetés, prière d'appeler le
service à la clientèle Yakima au 888-925-4621 et de demander l'article Yakima n° 8881302.
Si instala la Landing Pad™ 24 con la plataforma LockNLoad™ tamaño B de Yakima
directamente en la torre, necesitará los Pivot Mounts (bloques de montaje) con dos puntos
de fijación para el soporte en U. Si la plataforma LockNLoad que compró vino sin los Pivot
Mounts con los dos puntos de fijación roscados, por favor llame al número 888-925-4621
del Servicio al Cliente de Yakima para solicitar la pieza #8881302 de Yakima.
Para español ir a la página 7.
hex wrench (1X)
silicone (1X)
clé hexagonale (x 1)
Mastic (x 1)
llave hexagonal (1X)
Sellador (1X)
diagonal cutter
pinces coupantes diagonales
alicate de corte diagona
Pen
rubber mallet
Marqueur
maillet en caoutchouc
Marcador
mazo de caucho
Landing Pad 24 has a load limit of
165 lbs. (75 kg) or 220 lbs. (100 kg)
when paired with Yakima HD Bars.
El peso límite para las
almohadillas Landing Pad 24
es 165 lbs. (75 kg) o 220 lbs.
(100 kg) cuando se instalan
con las barras HD de Yakima.
24 avec la plateforme LockNLoad
Cover (4X)
Cache (x 4)
Tapa (4X)
Base (4X)
Patin (x 4)
Base (4X)
Pad (4X)
socle (x 4)
porta-base (4X)
MC
Yakima de taille B
Advertisement

Subscribe to Our Youtube Channel
Related Manuals for Yakima Landing Pad 24


Summary of Contents for Yakima Landing Pad 24
- Page 1 U-bracket. If service à la clientèle Yakima au 888-925-4621 et de demander l’article Yakima n° 8881302. your LockNLoad did not come with Pivot Mounts Si instala la Landing Pad™...
- Page 2 IMPORTANT WARNING! It is critical that all Yakima racks and accessories be properly and securely attached to your vehicle. Improper attachment could result in an automobile accident, and could cause serious bodily injury or death to you or to others. You are responsible for securing the racks and accessories to your car, checking the attachments prior to use, and periodically inspecting the products for adjustment, wear, and damage.
- Page 3 APPLY TAPE AND MARK THE CORRECT MOUNTING POINTS. • Apply masking tape above the mounting points you identified in step 2. • Use a marker to make a mark on the masking tape that corresponds to the center of the mounting point hole.
- Page 4 TRIM THE UNDERSIDE OF THE WEATHER-STRIPPING. underside dessous WARNING: Do not trim the topside of the weather lado inferior stripping! In this step you most cut away the underside portion of the weather-stripping as directed below. Use the marks you made on the topside of the weather- stripping in step 5 as a guide and cut away the underside of...
- Page 5 DRILL A HOLE THROUGH THE WEATHER-STRIPPING. Find the puncture you made in step 8 on the weather- stripping and use a drill to drill a 3/8” hole through the weather-stripping. APPLY SILICONE TO THE HOLES. WARNING: If you do not adequately apply the silicone sealant to the holes then water from outside of the vehicle will enter the cab.
- Page 6 • Re-insert the SkyLine or Control Tower into the Landing Pad, fully tighten the tower (refer to tower instructions) and close the cover. 1.5 Nm If you are installing Yakima LockNLoad platform ensure your left and right landing pads are installed parallel to one another INSTALL...
- Page 7 ¡ADVERTENCIA IMPORTANTE! ES FUNDAMENTAL QUE TODOS LOS ET LES ACCESSOIRES YAKIMA SOIENT CORRECTEMENT ET SOLIDEMENT RACKS Y ACCESORIOS YAKIMA ESTÉN FIJADOS DE MANERA CORRECTA FIXÉS AU VÉHICULE. UN MONTAGE MAL RÉALISÉ POURRAIT PROVOQUER Y SEGURA AL VEHÍCULO. UNA INSTALACIÓN DEFICIENTE PODRÍA UN ACCIDENT D’AUTOMOBILE, QUI POURRAIT ENTRAÎNER DES BLESSURES...
- Page 8 FRANÇAIS ESPAÑOL INSTALLER LE POINTEAU. INSTALE EL PUNZÓN DE CENTRADO. Avec son bout pointu tourné vers le haut, Con el extremo en punta hacia arriba, En utilisant le bout Utilice el extremo en punta visser le pointeau dans le trou jusqu’à ce atornille el punzón de centrado en el pointu du pointeau, del punzón de centrado...
- Page 9 Pacifique. hora estándar del Pacífico. Retirer le porte-bagage YAKIMA et ses accessoires avant d’entrer Retire el portaequipaje y los accesorios YAKIMA antes de ingresar a dans un lave-auto automatique. un lavadero automático de vehículos. Instruction #1036057B - Page 9 of 11...
-
Page 10: Important Warnings
In order to replace any lost or defective keys, note the lock and key du numéro de la serrure et des clés ci-dessous et les enregistrer à www. numbers below and register them at www.yakima.com. yakima.com. Instruction #1036057B - Page 10 of 11... -
Page 11: Advertencias Importantes
Usted debe respetar al pie de la letra estas instrucciones de uso y utilizar solamente las piezas de origen provistas. Para reemplazar una llave perdida o defectuosa, anote más abajo los números de la cerradura y de la llave y regístrelos en www.yakima.com. Instruction #1036057B - Page 11 of 11...
Need help?
Do you have a question about the Landing Pad 24 and is the answer not in the manual?
Questions and answers