Advertisement
Quick Links
Advertisement

Related Manuals for WOODLAND SCENICS DPM FIRE STATION 3


Summary of Contents for WOODLAND SCENICS DPM FIRE STATION 3
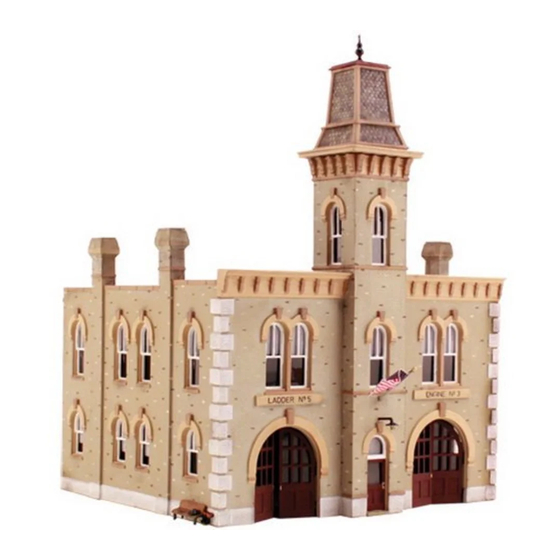
- Page 1 S E L E C T BUILDING KIT Setting Superior Standards in Design, Detail and Assembly • Architectural Works of Art • Craftsmanship Detailing • Positive Alignment System FIRE STATION N Woodland 6 3/4" W x 5 13/16" D x 8 7/8" H Scenics ®...
- Page 2 Cutting tools We guarantee the quality of all Hazard! Small parts. Not intended for children recommended. Woodland Scenics products. If this product Use with care. under 3 yrs. Adult supervision required. does not perform properly, please contact us. MODELING AND CARE INFORMATION This kit suggests the use of products which may stain or cause damage.
-
Page 3: Before You Begin
Walls, Roof and Details are numbered for ease of installation. Before You Begin • Read through instruction booklet. • Check kit contents. • Collect additional supplies. • Cover project area with newspaper. Additional Supplies Plastic Cement* Fine Grade Sandpaper ... - Page 4 1. Building, Roof and Detail Preparation Fig. 1a • Remove any mold flash from Building Walls, Tower Walls and Roof using a hobby knife and sandpaper (Fig. 1a). • Pay special attention to mold flash in grooves on backside of Walls. •...
- Page 5 3. Assemble Tower cont. Fig. 3b • Square Walls and apply glue along inside seam. • Place Back Tower Wall face-down. • Align two locking tabs on Left Tower Wall with Back Tower Wall and snap in place (Fig. 3b). •...
- Page 6 5. Assemble Walls Fig. 5b and Roof cont. • Align Roof in Wall grooves and slide into place (Fig. 5b). • Apply glue along inside seams. • Snap Back Wall into place and apply glue along inside seams. 6. Install Chimney Backs Fig.
-
Page 7: Window Treatments
8. Prime and Paint Fig. 8a NOTE: Do not prime or paint placement posts. • Apply a thin coat of primer to Building and Details. • Allow to dry. • Paint Building and Details, as desired. • Allow to dry. • Optional: Add a realistic mortar-look Fig. - Page 8 10. Install Details To install Details, apply glue to placement posts, then align placement posts in placement holes. Back (Fig. 10a): Downspout Fig. 10a Downspout , Ladder 28, 29 Ladder Top Section , Electric Meter and Junction Box , Trash , Door Light NOTE: Apply glue at connection points on Ladder Assembly...
- Page 9 12. Blackout Paper • Cut two sheets of Blackout Paper: each measuring 8 1/4" x 3 3/4". • Lay the two sheets on top of each other, then cut a slit half-way up the center (Fig. 12a). • Assemble as shown (Fig.
-
Page 10: Second Floor
13. Upper Tower Assembly Fig. 13a • Attach Upper Tower Assembly to Tower (Fig. 13a). TIPS AND TECHNIQUES Lighting The Fire Station is light- ready! The interior is molded with a raceway and socket holder to support most lighting kits. Roof •... - Page 11 TIPS AND TECHNIQUES cont. Concrete Mortar To add a realistic mortar-look to brickwork, apply a Concrete Mortar Wash (formula follows). • Lay building flat so Wash will spread evenly. Using a paintbrush, dab on small amounts until desired look is achieved. Sponge off excess. Concrete Mortar Wash: Mix together 1-part acrylic paint (color suggestion: Floquil ®...
- Page 12 We make every effort to ensure our kits are manufactured complete. However, if this kit is missing a part, please make note of the kit model number and missing part and contact the Woodland Scenics Sales and Customer Service Department.
Need help?
Do you have a question about the DPM FIRE STATION 3 and is the answer not in the manual?
Questions and answers