Table of Contents
Advertisement
Quick Links
Advertisement
Table of Contents

Related Manuals for WOODLAND SCENICS Grand valley ST1483


Summary of Contents for WOODLAND SCENICS Grand valley ST1483
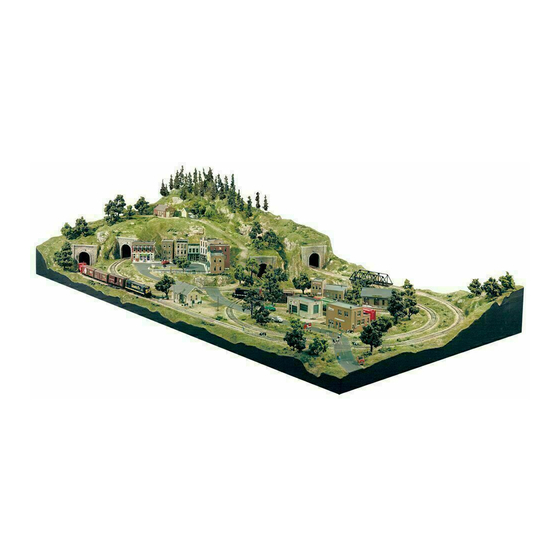
- Page 1 HO SCALE LIGHTWEIGHT LAYOUT KIT ST1483 INSTRUCTION BOOKLET Woodland ScenicS ®...
-
Page 2: Table Of Contents
Table of Contents Introduction Add Plaster Cloth, Track-Bed and Track Make and Place Newspaper Wads ........ 14 Kit Contents Plaster Cloth ..............14 Household Items Needed Test Track ..............15 Lay Track-Bed ..............15 Special Note Install Track ..............15 Track Rock Castings, Terrain and Tunnel Portals Adhesives and Special Tools... -
Page 3: Introduction
(ST1437). These tools make building the Grand Valley Layout Kit easier and more efficient. Find them at your favorite hobby shop. When building Grand Valley, know that mistakes can be fixed. Woodland Scenics Systems are designed to leave room for error and modelers can go back and fix problem areas. -
Page 4: Adhesives And Special Tools
Adhesives and Special Tools Woodland Scenics offers two types of adhesive for use with SubTerrain Lightweight Layout System. Each has advantages for different jobs. The general instructions for using both appear below. The Grand Valley Layout Kit Instructions were written using Low Temp Foam Glue Gun and Low Temp Foam Glue Sticks to complete the kit. -
Page 5: Begin Layout Assembly
Pin Seams After Gluing 24" x 48" Printed Foam Base Panel ITEMS NEEDED Woodland Scenics ❏ Pre-printed Foam Base Panels, 24" x 48" ❏ Foam Nails ❏ Low Temp Foam Glue Gun ❏ Low Temp Foam Glue Sticks Household ❏ Track ❏... -
Page 6: Install Inclines And Risers
Pattern A (see key on Fig. 4) indicates first tier Inclines and Risers and is ITEMS NEEDED composed of two 1"-2" Inclines and one 1" Riser. All 2" Risers are shown with Woodland Scenics no pattern. Position Inclines and Risers centered over printed track plan. Pin ❏ Foam Nails pieces in place with Foam Nails. -
Page 7: Install Second Tier Inclines
Install Second Tier Inclines The second tier is indicated by Pattern B (Fig. 9). Pin second tier pieces to first tier and trim if necessary for proper fit. 1. Place 3" end of a 2"-3" Incline at Point 3, working counter-clockwise. Follow with 2" end of a 1"-2" Incline and then 1" end of a 0"-1"... -
Page 8: Tunnel Work
Tunnel Work ITEMS NEEDED Woodland Scenics Tunnel Portal Fig. 11 Placement ❏ Plaster Cloth ❏ Low Temp Foam Glue Gun ❏ Low Temp Foam Glue Sticks ❏ Foam Tack Glue ❏ 1/2" Foam Sheets ❏ Buff Medium Ballast Tunnel Portal ❏... -
Page 9: Install Track And Ballast In Tunnel Areas
Install Track and Ballast in Tunnel Areas Fig. 19 In a spray bottle, make “wet water” by mixing 2 drops of liquid dish soap in one cup of water. This will keep Ballast from clumping when applying diluted Scenic Cement. 1. -
Page 10: Profile Boards
Profile Boards ITEMS NEEDED Profile Boards are 8" x 24" ribbed sheets that interlock in a tongue and groove Woodland Scenics fashion. When measuring top and bottom edges, one edge is 1" thick and the ❏ Profile Boards opposite is 1/2" thick. Profile Boards that run along the front and back of the ❏... -
Page 11: Fill Corner Joints
Fig. 27 8" x 6" ACCESS 8" 8" PA NE L 2" 8" x 6" 18 1/2" x 6" ACCESS ACCESS 14" 2" 2 1/2" 3" PA NE L PA NE L 2" 2" Start with front of layout and assemble Profile Boards with Connectors as shown (Fig. 25, 26 and 27). The ends of each side assembly are 1/2"... -
Page 12: Tunnel Roofs And Platforms
Tunnel Roofs and Platforms ITEMS NEEDED Fig. 32 Fig. 33 Woodland Scenics Trim ❏ Foam Sheets Test Fit ❏ Low Temp Foam Glue Gun ❏ Low Temp Foam Glue Sticks ❏ Foam Nails ❏ Foam Pencil ❏ Scrap Foam Scrap Household ❏... -
Page 13: Test Fit Buildings
Add Plaster Cloth and Track-Bed on page 14 for ITEMS NEEDED instructions on how to make newspaper wads.) Hold Woodland Scenics newspaper wads in place with strips of masking tape. ❏ 1" Risers 2. Pieces of scrap Foam Sheets can also be used to ❏... -
Page 14: Add Plaster Cloth, Track-Bed And Track
Before adding Plaster Cloth, make sure all foam components are glued in place and Foam Nails are removed. ITEMS NEEDED Make and Place Newspaper Wads Woodland Scenics 1. Begin at outer edge of newspaper sheet and roll edges under in a circular pattern to ❏ Plaster Cloth form a pillow shape (Fig. -
Page 15: Test Track
6. Working from left to right, overlap previous sheet of Plaster Cloth by 50% to form a double-thick plaster surface. Working from top to bottom, overlap previous strip by 1". 7. When applying Plaster Cloth alongside of Risers, butt sheet against Riser without overlapping. There should be no bumps, wrinkles or folds on Risers or problems could occur when laying track. -
Page 16: Rock Castings, Terrain And Tunnel Portals
Rock Castings, Terrain and Tunnel Portals ITEMS NEEDED Woodland Scenics ❏ Lightweight Hydrocal ❏ Rock Molds ❏ Tunnel Portals ❏ Rock Colors ❏ Earth Undercoat ❏ Foam Pad Applicator ❏ Stir Stick Household ❏ Measuring Cups ❏ Plastic Mixing Bowl ❏... -
Page 17: Color Rocks
Color Rocks Fig. 51 Color rocks using the Leopard Spot painting technique. It is easy to do and has realistic results. Let colors run together naturally. Dilute Rock Colors liquid pigments in individual cups. If color is too light when applied, add more pigment to the wash. If they are too dark, add more water. -
Page 18: Plaster Cloth Sides Of Layout
❏ Paintbrush ❏ Spray Bottle Mark Roads and Streets Woodland Scenics Road System consists of Smooth-It, Paving Tape and two Fig. 57 colors of Top Coat, Asphalt and Concrete. It makes it easy to add realistic roads, streets, sidewalks and pavement to a layout. -
Page 19: Install Hydrocal Inclines At Rail Crossings
Fig. 58 Install Hydryocal Inclines at Rail Crossings Fig. 59 Remove 1. For rail crossings, cut and remove Track-Bed material the width of the Hydrocal Incline from both sides of track (Fig. 59). Use a hobby knife to cut Track-Bed. 2. -
Page 20: Make Roads And Streets
Fig. 65 Fig. 66 Fig. 67 Low End of Hydrocal Incline Press Foam Gently Tape Make Roads and Streets Fig. 68 Sections marked “A” and “B” in Fig. 58 require a piece of 1/4" Foam Sheet placed between the tracks as a level foundation for the road. Notch Track-Bed 3-1/2"... -
Page 21: Paint Roads, Streets, Sidewalks And Foundations
4. When gravel roads are complete, spray a final coat of Scenic Cement to seal landscape materials in place. Ballast Track ITEMS NEEDED Fig. 71 Woodland Scenics ❏ Buff Medium Ballast ❏ Scenic Cement Household ❏ Spray Bottle ❏ Paintbrushes ❏... -
Page 22: Landscape
Landscape Fig. 73 ITEMS NEEDED Woodland Scenics ❏ Scenic Cement ❏ Scenic Sprayer ❏ Variety of Fine Turf ❏ Medium Green Coarse Turf ❏ Various Colors of Clump-Foliage ❏ Buff Fine/Medium Talus ❏ Harvest Gold Field Grass ❏ Hob-e-Tac Adhesive ❏... -
Page 23: Low Ground Cover
Low Ground Cover Low ground cover is dirt and soil and the smallest plants and grasses. After a base layer of Blended Turf, add Fine Turf to blend in additional colors for realism. Turf colors should be subtly blended together as they are in nature. Blended Turf Fig. -
Page 24: High Ground Cover
High Ground Cover High ground cover is bushes, shrubs, tall grasses and trees. Fig. 78 Fig. 79 Fig. 80 Fig. 81 Model and Plant Trees Fig. 82 Deciduous and Pine Armatures are included. 1. Remove optional bases from Tree Armatures. 2. -
Page 25: Paint Sides Of Layout
Paint to paint sides of layout. Begin at the front and paint all sides (Fig. 88). 3. Be careful to avoid edges where landscape begins. ITEMS NEEDED Woodland Scenics ❏ Gray Base Paint Household Fig. 88 ❏ 2" Paintbrush ❏ 220-grit Sandpaper Finishing Touches The final step is detailing. -
Page 26: Other Possibilities
A Final Word Woodland Scenics offers additional lightweight layout systems and companion kits designed to work together or separately with other N and HO scale layouts. N scale Scenic Ridge Layout Kit (ST1482) –... -
Page 27: Products
Products Below is the list of Woodland Scenics’ products used to construct the Grand Valley Layout. If you would like to build a new layout or add landscape to your Grand Valley Layout, refer to the item name and number, then purchase at your favorite hobby store. - Page 28 WOODLAND SCENICS • PO Box 98, Linn Creek, MO 65052 • woodlandscenics.com • G3 ©2000 O CO...
Need help?
Do you have a question about the Grand valley ST1483 and is the answer not in the manual?
Questions and answers