
Subscribe to Our Youtube Channel
Related Manuals for VOX electronics CHM-950IX


Summary of Contents for VOX electronics CHM-950IX
- Page 1 CHM - 950IX OPERATING INSTRUCTIONS COOKER HOOD UPUTSTVO ZA UPOTREBU ASPIRA T OR...
- Page 2 CHM - 950IX OPERATING INSTRUCTIONS COOKER HOOD...
- Page 3 HOOD USER GUIDE ENGLISH CHM950IX Read this manual prior to performing any task!
- Page 4 1, en_US ENGLISH 09.10.2019...
-
Page 5: Table Of Contents
Table of contents Table of contents INPUT................... 4 Technical Drawing.............. 5 WARNING AND SAFETY PRECAUTIONS......6 3.1 LETHAL RISK, DANGER OF POISONING....8 USAGE WITH AND WITHOUT CARBON FILTER.... 12 4.1 CARBON FILTER REPLACEMENT......12 4.2 CARBON FILTER REPLACEMENT......13 CLEANING AND PREVENTIVE MAINTENANCE..... -
Page 6: Input
INPUT INPUT This guideline and the safety data includes all necessary informa- tion for a safe mounting as well as a safe use without defects. Please read all of this guideline and safety data before using the device. Keep the guideline in an appropriate place. If you pass the device onto others, make sure you also give this guideline and safety data. -
Page 7: Technical Drawing
Technical Drawing Technical Drawing Fig. 1 09.10.2019 ENGLISH... -
Page 8: Warning And Safety Precautions
WARNING AND SAFETY PRECAUTIONS WARNING AND SAFETY PRECAUTIONS WARNING AND SAFETY PRECAU- This appliance can be used by children of 8 years and older, TIONS people with physical, sensory or mental capability deficiency or people with lack of experience or knowledge; as long as they are provided supervision or instructions for the safe use of the appliance and they comprehend the dangers. - Page 9 WARNING AND SAFETY PRECAUTIONS If your product's periodic cleaning is not made in a timely manner, it could pose risk of fire. De-energize the appliance before any maintenance operations. (Plug off the appliance or turn off the main switch.) When electric cooker hood and devices fed with energies other than electricity operate simultaneously, the negative pressure in the room must not exceed 4 Pa ( 4 X 10 bar ).
-
Page 10: Lethal Risk, Danger Of Poisoning
WARNING AND SAFETY PRECAUTIONS LETHAL RISK, DANGER OF POISONING 3.1 LETHAL RISK, DANGER OF POISONING DANGER! Warning - Choking Hazard The packaging materials are dangerous for chil- dren. Never allow children to play with packaging materials. DANGER! Warning - Death Hazard There are life-threatening danger and poisoning danger due to reabsorbed combustion gases. - Page 11 WARNING AND SAFETY PRECAUTIONS LETHAL RISK, DANGER OF POISONING WARNING! Fire danger! – The oil residue in the oil filter may catch fire.Clean the oil filter at least once every 3 months.Never operate the device without the oil filter. – The oil residue in the oil filter may catch fire.
- Page 12 WARNING AND SAFETY PRECAUTIONS LETHAL RISK, DANGER OF POISONING DANGER! Danger of physical injury! – During the installation, there is a danger of physical injury due to the sharp edges. Use protective gloves throughout the installation process of the appliance. –...
- Page 13 WARNING AND SAFETY PRECAUTIONS LETHAL RISK, DANGER OF POISONING NOTICE! If the feeder cable is damaged, it must be replaced by its manufacturer or its authorized technical service or any other personnel qualified at the same level, in order to avoid any dangerous situa- tion.
-
Page 14: Usage With And Without Carbon Filter
USAGE WITH AND WITHOUT CARBON FILTER CARBON FILTER REPLACEMENT USAGE WITH AND WITHOUT CARBON FILTER 4.1 CARBON FILTER REPLACEMENT You can use this appliance in exhaust air mode and ventilated air mode. Exhaust air mode The absorbed air is cleaned by the grease filters, and is discharged through a piping system.Fig. -
Page 15: Carbon Filter Replacement
USAGE WITH AND WITHOUT CARBON FILTER CARBON FILTER REPLACEMENT Under circumstances without a flue, an active carbon filter should be used to resend the inside air by re-filtering. An active carbon filter should be obtained from the service or your dealer. Discon- nect the device prior to replacing the carbon filter. -
Page 16: Cleaning And Preventive Maintenance
CLEANING AND PREVENTIVE MAINTENANCE Washing in Dishwasher CLEANING AND PREVENTIVE MAINTENANCE CAUTION! Cleaning and user maintenance of the appliance shall not be performed by unattended children. The surface could be damaged due to aggressive and abrasive cleaning agents. Never use aggressive and abrasive cleaning agents. -
Page 17: Hand Wash
CLEANING AND PREVENTIVE MAINTENANCE Hand Wash 5.2 Hand Wash For stubborn dirts, you can use a special grease solvent. You can buy such an agent from the authorized sales centre. – Soften the metal grease filters in a hot water with dish-washing liquid. -
Page 18: Appliance Position
APPLIANCE POSITION Installation Scheme APPLIANCE POSITION Fig. 7: INSTALLATION OF APPLIANCE After completing the installation of hood, the minimum distance must be 65 cm between the product and any electric cooker; and 75 cm between it and any gas ranges or cookers burning other fuels (Fig. -
Page 19: Installation And Unpacking Of The Appliance
APPLIANCE POSITION Recommendations for Energy Saving 6.2 Installation and Unpacking of the Appliance Check that your appliance is not deformed. Report the transport issues immediately to transport operator. Any faults encountered shall be reported to the dealer, too. Do not allow children to play the with packaging materials! 6.3 Recommendations for Energy Saving Replace the carbon filters on a regular basis. -
Page 20: Content Of Package
CONTENT OF PACKAGE CONTENT OF PACKAGE Fig. 9: PACKAGE CONTENT Product Ø6mm Plastic Pin Internal Flue Ø10mm Plastic Pin External Flue 5.5x60 Wall Mount Screw Flue Connection Metallic Sheet 3.9x22 Flue Connection Sheet Screw Operation Manual 10- 3.5x9.5 Flue Connection Screw ENGLISH 09.10.2019... -
Page 21: Overview Of Hood
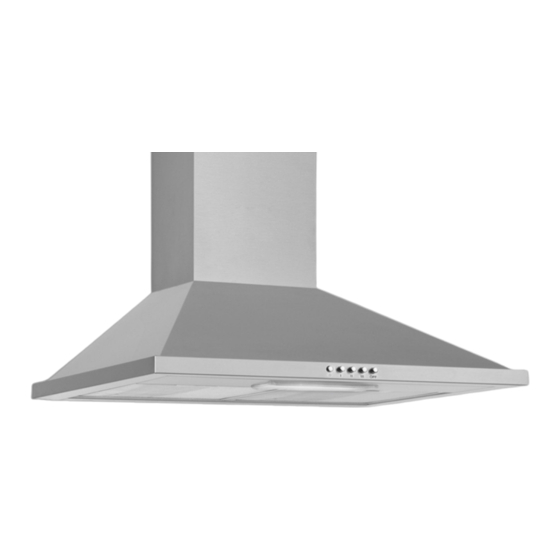
OVERVIEW OF hood OVERVIEW OF hood Fig. 10: OVERVIEW OF THE HOOD 1- Internal Flue 2- External Flue 3- Body 4- Cooker Lighting 5- Aluminum filter 6- Control Panel 09.10.2019 ENGLISH... -
Page 22: Assembly Of Product
ASSEMBLY OF PRODUCT Installation Diagram and Components ASSEMBLY OF PRODUCT 9.1 Installation Diagram and Components Fig. 11: INSTALLATION AND PARTS 1- Internal Flue 6- 2x Ø10mm Plastic Pin 2- External Flue 7- 2x 3.9x22 Screw 3- Body 8- Flue Connection Metallic Sheet 4- Product Rack Sheet 9- 2x Ø6mm Plastic Pin 5- 2x 5.5x60 Wall Rack Screw... -
Page 23: Assembly Of Sheet Metal Flues
ASSEMBLY OF SHEET METAL FLUES ASSEMBLY OF SHEET METAL FLUES 1- Internal Flue 2- Internal Flue Connection Sheet Fixing Screws 3- Flue Connection Metallic Sheet 4- External Flue 5- External flue fixing screws Install air exhaust connection of the appliance. Internal and external sheet flues are inserted to each other. -
Page 24: Use Of Product
USE OF PRODUCT Using Push Button Product USE OF PRODUCT 11.1 Slider Rocker Button Use Fig. 13 Bring to this position to turn off the lamp (Fig. 13). Bring to this position to turn on the lamp ( Fig. 13 ). Bring to this position to turn off the lamp (Fig. -
Page 25: Spd Digital Product Use
USE OF PRODUCT 3 Spd Digital Product Use 11.3 3 Spd Digital Product Use Fig. 15: 3 Spd Dig Button Press this button to turn on the product. Product will also run on 1st speed level when this button is pressed.Fig. 15 Product will run on 2nd speed level when this button is pressed.Fig. -
Page 26: Replacing The Lamps
REPLACING THE LAMPS Plug Lamp Replacement REPLACING THE LAMPS 12.1 Plug Lamp Replacement WARNING! Disconnect the electrical supply of the hood. Leave the lamps to cool down first because they could burn your hands when they are hot. It indicates the maximum power consumption of the lamp. A lamp with same power rating should be used when replacing the lamp. -
Page 27: Authorized Service
AUTHORIZED SERVICE AUTHORIZED SERVICE If Lighting is Not Functioning: Make sure that the plug is plugged in, and that the fuses are intact. Check the bulbs. Make sure you unplugged the device before performing this check. Tighten the bulbs if they are loose; you can replace the bulbs if they still don't work. - Page 28 AUTHORIZED SERVICE Fault description Cause Remedy It Does Not Discharge Air (in Check The Alumi- The aluminium cartridge filter should be washed flueless use) nium Filter. once a month under normal conditions. It Does Not Discharge Air (in Check The Carbon In products that work with carbon filters, carbon flueless use) Filter.
-
Page 29: Technical Table
TECHNICAL TABLE TECHNICAL TABLE Supply Voltage 220 - 240 V 50Hz Insulation Class of Motor Insulation Class CLASS I This product complies with the 2014/30/EC (Regulation on Electro- magnetic Compliance) and 2014/35/EC (Regulation on Low Voltage Devices (LVD)) Directives. This device complies with the Directive on the Control of Waste Electrical and Electronic Equipment. - Page 30 CHM - 950IX UPUTSTVO ZA UPOTREBU KUHINJSKI ASPIRATOR...
- Page 31 ASPIRATOR KORISNIČKO UPUTSTVO SRPSKI CHM950IX Pročitajte ovo uputstvo pre rukovanja uređajem!
- Page 32 SRPSKI 09.10.2019...
- Page 33 Sadržaj Sadržaj Uvod..................Tehnički crtež..............5 UPOZORENJA I MERE BEZBEDNOSTI ......6 3.1 OPASNOST PO ŽIVOT, OPASNOST OD TROVANJA. 8 UPOTREBA SA ILI BEZ KARBON FILTERA..... 12 4.1 ZAMENA KARBON FILTERA ........12 4.2 ZAMENA KARBON FILTERA ........13 ČIŠĆENJE I PREVENTIVNO ODRŽAVANJE....14 5.1 Pranje u sudomašini...........
-
Page 34: Uvod
UVOD UVOD Ovo uputstvo i podaci o sigurnosti uključuju sve potrebne informacije za sigurnu montažu kao i za sigurnu upotrebu bez nedostataka. Pre upotrebe uređaja, pročitajte celo uputstvo i bezbednosne podatke. Držite uputstvo na odgovarajućem mestu. Ako uređaj prosledite drugima, obavezno im dajte ovo uputstvo i podatke o bezbednosti. -
Page 35: Tehnički Crtež
Tehnički crtež Tehnički crtež Sl. 1 09.10.2019 SRPSKI... -
Page 36: Upozorenja I Mere Bezbednosti
UPOZORENJA I MERE BEZBEDNOSTI UPOZORENJA I MERE BEZBEDNOSTI UPOZORENJA I MERE BEZBEDNOSTI ■ Ovaj aparat mogu koristi samo deca starija od 8 godina i pojedinci bez fizičkih, čulnih ili mentalnih nedostataka, sa potrebnim iskustvom i znanjem, onda kada su ima dati nadzor ili uputstva o bezbednom korišćenju i konstatovano je da razumeju opasnosti. - Page 37 UPOZORENJA I MERE BEZBEDNOSTI ■ Ako ne čistite aparat redovno, on može predstavljati rizik od požara. ■ Isključite aparat pre radova na održavanju. (Isključite uređaj ili isključite glavni prekidač). ■ Negativan pritisak u sobi, dok su istovremeno uključeni aspirator električnog šporeta i uređaji koji rade na drugim izvorima električne energije, ne sme da pređe 4 PA (4 k 10 bar).
-
Page 38: Opasnost Po Život, Opasnost Od Trovanja
UPOZORENJA I MERE BEZBEDNOSTI OPASNOST PO ŽIVOT, OPASNOST OD TROVANJA 3.1 OPASNOST PO ŽIVOT, OPASNOST OD TROVANJA OPASNOST! Upozorenje - Opasnost od gušenja Ambalažni materijali opasni su za decu. Nikad ne dopustite deci da se igraju s ambalažnim materijalima. OPASNOST! Upozorenje - Opasnost od smrti Postoje opasnosti po život i opasnosti od trovanja usled upijanih gasova sagorevanja. - Page 39 UPOZORENJA I MERE BEZBEDNOSTI OPASNOST PO ŽIVOT, OPASNOST OD TROVANJA UPOZORENJE! Opasnost od požara! – Ostaci ulja u uljnom filteru mogu se zapaliti. Uljni filter očistite najmanje jednom u tri meseca. Uređajem ne upravljajte bez filtera za ulje. – Ostaci ulja u uljnom filteru mogu se zapaliti. Nikada ne radite sa otvorenim plamenom u blizini uređaja.
- Page 40 UPOZORENJA I MERE BEZBEDNOSTI OPASNOST PO ŽIVOT, OPASNOST OD TROVANJA OPASNOST! Opasnost od fizičke povrede! – Tokom instalacije postoji opasnost od fizičke povrede zbog oštrih ivica. Koristite zaštitne rukavice tokom procesa instalacije uređaja. – Zbog opasnosti od pada uređaja montaža svih sigurnosnih zavrtnja i poklopca mora biti izvedena kao što je navedeno u uputstvu za upotrebu.
- Page 41 UPOZORENJA I MERE BEZBEDNOSTI OPASNOST PO ŽIVOT, OPASNOST OD TROVANJA OBAVEŠTENJE! Ako je oštećen kabl napajanja, mora biti zamenjen od strane proizvođača, njegove servisne agencije ili bilo kog osoblja ekvivalentnih kvalifikacija, da bi se izbegla bilo kakva opasna situacija. OBAVEŠTENJE! Ukoliko je sijalica uređaja oštećena, isključite osigurač...
-
Page 42: Upotreba Sa Ili Bez Karbon Filtera
UPOTREBA SA I BEZ KARBON (UGLJENIK) FILTERA ZAMENA KARBON FILTERA UPOTREBA SA I BEZ KARBON (UGLJENIK) FILTERA 4.1 ZAMENA KARBON FILTERA Možete koristiti ovaj uređaj u režimu izduvavanja vazduha i režimu ventilacije vazduha. Režim izduvavanja vazduha Apsorbovani vazduh se čisti filterima masti, a zatim se izbacuje kroz sistem cevi. -
Page 43: Zamena Karbon Filtera
UPOTREBA SA I BEZ KARBON (UGLJENIK) FILTERA ZAMENA KARBON FILTERA Kada nema ventilatora, filter sa aktivnim ugljem treba koristiti da bi se ponovo poslao unutrašnji vazduh putem filtriranja. Filter sa aktivnim ugl- jem treba biti nabavljen od servisa ili od vašeg distributera. Isključite aparat pre zamene karbon filtera. -
Page 44: Čišćenje I Preventivno Održavanje
ČIŠĆENJE I PREVENTIVNO ODRŽAVANJE Pranje u sudomašini ČIŠĆENJE I PREVENTIVNO ODRŽAVANJE OPREZ! Čišćenje i korisničko održavanje uređaja ne smeju obavljati deca bez nadzora. ■ Površina može da se ošteti kao rezultat sredstva za čišćenje koja su agresivna i abrazivna. Nikad ne koristite sredstva za čišćenje koja su agresivna ili abrazivna. -
Page 45: Ručno Pranje
ČIŠĆENJE I PREVENTIVNO ODRŽAVANJE Ručno pranje 5.2 Ručno pranje Možete koristiti posebni rastvarač masti da uklonite uporne fleke. Možete kupiti takav agens preko ovlašćenog prodajnog centra. - Omekšajte metalne filtere masnoće u toploj vodi sa deterdžentom. - Koristite četku za čišćenje u ostavite da se tečnost na metalnim filterima masnoće da potpuno oteče. -
Page 46: Postavljanje Uređaja
POSTAVLJANJE UREĐAJA Šema za montažu 6 POSTAVLJANJE UREĐAJA Sl. 7: POSTAVLJANJE UREĐAJA Kada se montira aspirator, mora da postoji najmanje 650 mm razdaljine između proizvoda i bilo koje vrste električnih šporeta i 750 mm za šporete koji rade na gas ili druga goriva. (Slika 7) 6.1 Šema za montažu Sl. -
Page 47: Postavljanje I Raspakivanje Uređaja
POSTAVLJANJE UREĐAJA Preporuke za uštedu energije 6.2 Postavljanje i raspakivanje uređaja Proverite da li ima oštećenja na uređaju. Ukoliko postoje oštećenja zbog transporta to treba odmah prijaviti odgovornim licima. Takođe treba prijaviti sve vidljive defekte. Nemojte dozvoliti deci da se igraju s ambalažom! 6.3 Preporuke za uštedu energije Redovno menjajte karbon (ugljene) filtere. -
Page 48: Sadržaj Paketa
SADRŽAJ PAKOVANJA SADRŽAJ PAKOVANJA SL. 9: SADRŽAJ PAKOVANJA Proizvod Ø6mm plastični tipl Unutrašnji dimnjak Ø10mm plastični tipl Spoljašnji dimnjak 5.5x60 šraf za zid Metalni lim za spajanje dimnjaka 3.9x22 šraf za spajanje lima Uputstvo za upotrebu 10- 3.5x9.5 šraf za spajanje dimnjaka SRPSKI 09.10.2019... -
Page 49: Izgled Aspiratora
IZGLED ASPIRATORA IZGLED ASPIRATORA Sl. 10: IZGLED ASPIRATORA 1- Unutrašnji dimnjak 2- Spoljni dimnjak 3- Telo aspiratora 4- Svetlo 5- Aluminijumski filter 6- Kontrolna tabla 09.10.2019 SRPSKI... -
Page 50: Sklapanje Proizvoda
SASTAVLJANJE PROIZVODA Dijagram postavljanja i delova SASTAVLJANJE PROIZVODA 9.1 Dijagram postavljanja i delova SL. 11: POSTAVLJANJE I DELOVI 1- Unutrašnji dimnjak 6- 2x Ø10mm plastični tipl 2- Spoljašnji dimnjak 7- 2x 3.9x22 zavrtanj 3- Telo uređaja 8- Ploča za povezivanje dimnjaka 4- Ploča za spajanje proizvoda 9- 2x Ø6mm plastični tipl 5- 2x 5.5x60 zavrtanj za montiranje na zid... -
Page 51: Sklapanje Metalnih Limova Dimnjaka
SASTAVLJANJE METALNIH LIMOVA DIMNJAKA SASTAVLJANJE METALNIH LIMOVA DIMNJAKA 1- Unutrašnji dimnjak 2- Šrafovi za spajanje delova unutrašnjeg dimnjaka 3- Metalni lim za spajanje dimnjaka 4- Spoljašnji dimnjak 5- Šrafovi za spajanje spoljašnjeg dimnjaka Ugradite priključak za izduvni vazduh uređaja. Unutrašnji i spoljašnji delovi dimnjaka su ubačeni jedan u drugi. () Postavite na centralni deo lim za povezivanje (3) na aspirator, držite ispod poklopca i označite tačke C, D (Sl. -
Page 52: Upotreba Proizvoda
UPOTREBA PROIZVODA Upotreba proizvoda preko kliznog prekidača UPOTREBA PROIZVODA 11.1 Upotreba uređaja preko kliznog prekidača Sl. 13 Stavite prekidač u ovu poziciju da isključite svetlo (Sl. 13). Stavite prekidač u ovu poziciju da uključite svetlo (Sl. 13). Stavite prekidač u ovu poziciju da isključite svetlo (Sl. 13). Stavite prekidač... -
Page 53: Upotreba Tastera Sa 3 Brzine
UPOTREBA PROIZVODA Upotreba tastera sa 3 brzine 11.3 Upotreba tastera sa 3 brzine Sl. 15: Dugme sa 3 brzine Pritisnite ovaj taster da uključite proizvod. Kada je ovaj taster pritisnut proizvod će raditi na prvom nivou brzine (Slika 15). Kada je ovaj taster pritisnut proizvod će raditi na drugom nivou brzine (Slika 15). -
Page 54: Zamena Lampi
ZAMENA LAMPI Zamena lampi ZAMENA LAMPI 12.1 Zamena lampi UPOZORENJE! Isključite električno napajanje aspiratora. Sačekajte da se lampa ohladi jer možete opeći ruke. Označava maksimalnu potrošnju energije lampe. Pri zameni lampe treba koristiti lampu istog stepena snage. Da biste saznali snagu lampe koja se koristi u proizvodu, pogledajte nalepnicu deklaracije na proizvodu. -
Page 55: Ovlašćeni Servis
OVLAŠĆENI SERVIS OVLAŠĆENI SERVIS Ako osvetljenje ne radi: ■ Uverite se da utikač priključen, kao i da su osigurači netaknuti. ■ Proverite sijalice. Isključite aparat bez kvara kada sprovodite ovu kontrolu. Zategnite sijalice ako su labave i zamenite ih ako ne sijaju čak i nakon tog procesa. - Page 56 OVLAŠĆENI SERVIS Opis kvara Razlog Pomoć Proverite Kertridž aluminijumskog filtera mora da se pere bar Ne ispušta vazduh (korišćenje jednom mesečno u normalnim uslovima. aluminijumski filter. bez ventilatora) Kod proizvoda koji koriste karbon filtere, oni moraju Ne ispušta vazduh (korišćenje Proverite karbon da se menjaju jednom u tri meseca u normalnim bez ventilatora)
-
Page 57: Tehnička Tabela
TEHNIČKA TABELA TEHNIČKA TABELA Napon 220 - 240 V 50Hz Klasa izolacije motora Insulation Class CLASS I Ovaj proizvod je u skladu sa direktivama 2014/30 / EC (Uredba o elektro-magnetnoj saglasnosti) i 2014/35 / EC (Uredba o uređajima sa niskim naponom (LVD)). Ovaj uređaj je u skladu sa direktivom o kontroli električne i elektronske opreme.
Need help?
Do you have a question about the CHM-950IX and is the answer not in the manual?
Questions and answers