Ruckus Wireless SmartZone 300 Quick Setup Manual
Spare hard disk drive
Hide thumbs
Also See for SmartZone 300:
- Quick setup manual (4 pages) ,
- Command line interface reference manual (583 pages) ,
- Reference manual (341 pages)
Advertisement
Quick Links
SmartZone 300
Spare Hard Disk Drive
Quick Setup Guide
This
Quick Setup Guide provides basic instructions for
ordering and installing a spare hard disk drive (HDD) into the
Ruckus SmartZone 300 (SZ300) controller.
For information on advanced configuration and management
Getting Started Guide and other appropriate
options, see the
documents, which are available for download from the Ruckus
Wireless Support website:
https://support.ruckuswireless.com/documents.
This Guide in Other Languages
请从以下网站获得该指南的简体中文版
https://
support.ruckuswireless.com.
Vous trouverez la version française de ce guide à l'adresse
suivante https://support.ruckuswireless.com.
このガイドの日本語版は
https://support.ruckuswireless.com
でご覧ください。
이 가이드의 한국어 버전은 웹 사이트
(https://
support.ruckuswireless.com) 에서 확인하시기 바랍니다.
Veja a versão em português (Brasil) deste guia em
support.ruckuswireless.com.
Puede ver la versión en español (América Latina) de esta guía
en
https://support.ruckuswireless.com.
Hard Disk Drive Ordering Information
To order a spare hard disk drive for the SmartZone 300
controller, contact Ruckus Wireless Support.
For information on how to contact Ruckus Wireless Support,
visit https://support.ruckuswireless.com/contact-us. When
asked for the part number, provide the information in the
following table.
Part Number
Description
902-S350-0000
Kit, Spare (FRU), hard disk drive, SZ300
©
Copyright
2017 Brocade Communications, Inc.
Published 27 October 2017, Part Number 800-71716-001 Rev A
Opening the Front Bezel
The front bezel helps prevent accidental access to the
controller's modules. Before you can install a module, you
must open the front bezel.
NOTE: If the controller is mounted in a rack with adjacent
units below the unit where a module needs to be serviced,
Ruckus Wireless recommends extracting the controller from
the rack approximately 5cm (2 in.). This will provide
clearance of the bezel when rotated out towards you.
Follow these steps to open the front bezel.
1. With the controller in front of you, place your fingers on
both sides of the front bezel.
2. Pull the bezel toward you until it opens.
3. Gently lower the bezel to expose the controller's
replaceable modules.
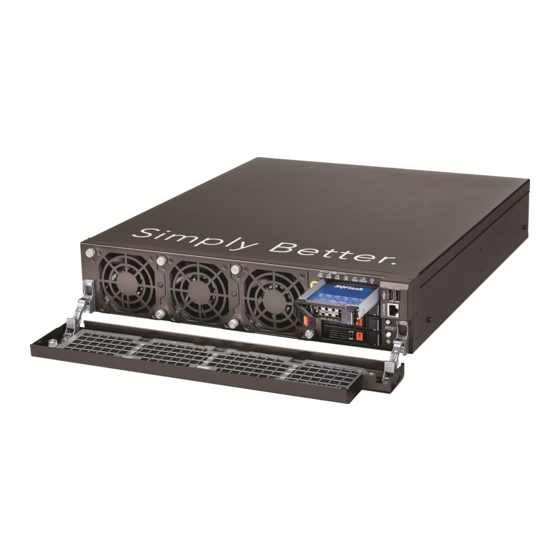
FIGURE 1 Controller with the front bezel open
https://
Installing a Spare Hard Disk Drive
After you have obtained a spare hard disk drive and opened
the front bezel of the SmartZone 300 controller, you are ready
to install the drive.
NOTE: Both hard disk drives (HDDs) are redundant and
hot-swappable. You do not need to power off the controller
to swap a single failed HDD.
Follow these steps to install the hard disk drive.
1. On the front panel, identify the HDD that you want to
replace. From the top of the front panel, disk tray 1 is for a
solid state drive (SSD), and disk trays 2 and 3 are for
HDDs (see the following figure).
NOTE: Tray 4 is unused.
FIGURE 2 Disk trays on the front panel of the controller
NOTE: If you are replacing a failed disk, check the LED
of each tray. A red or amber LED indicates that the disk
is not operational.
2. Unlock the disk tray by moving the orange disk tray lock
to the left (unlock) position.
3. Press the black/blue tray button to open the tray handle.
Page 1 of 2
Advertisement

Related Manuals for Ruckus Wireless SmartZone 300


Summary of Contents for Ruckus Wireless SmartZone 300
- Page 1 Puede ver la versión en español (América Latina) de esta guía https://support.ruckuswireless.com. After you have obtained a spare hard disk drive and opened the front bezel of the SmartZone 300 controller, you are ready Hard Disk Drive Ordering Information to install the drive.
- Page 2 © Copyright 2017 Brocade Communications Systems, Inc. All rights reserved. Ruckus, Ruckus Wireless are trademarks of Ruckus Wireless, Inc. All other company and product names mentioned in the documentation are held to be trademarked (and registered) by the primary holders.
Need help?
Do you have a question about the SmartZone 300 and is the answer not in the manual?
Questions and answers