Advertisement
Quick Links
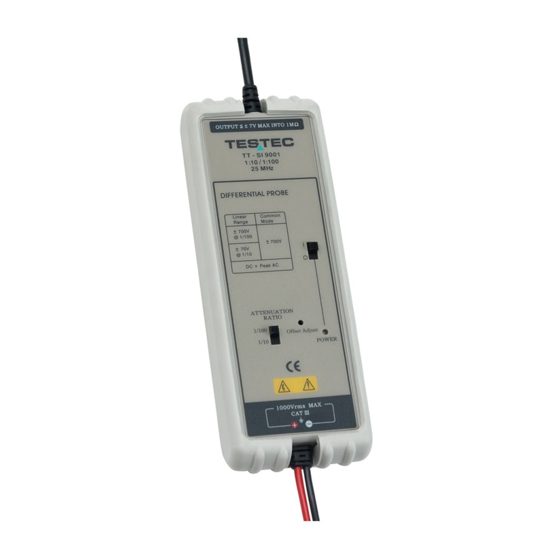
MODIFIED CALIBRATION GUIDE FOR SI-9001/9002 (Offset):
Explanation of adjustment point. Please refer to Fig. 7.
(1) SW1: Switch for selecting attenuation ratio.
(2) SW2: Power switch.
(3) VR4: Variable resistor for adjusting offset.
(4) VR2: Variable resistor for adjusting offset.
(5) VR1: Variable resistor for adjusting low frequency CMRR.
(6) VR3: Variable resistor for adjusting accuracy.
(7) VC1: Variable capacitor for adjusting square wave compensation.
(8) VC2: Variable capacitor for adjusting square wave compensation.
(9) CON1: Power jack for connecting to 6VDC power adapter
Adjustment Procedure:
Please connect a 6VDC power adaptor to CON1 as shown in the Figure above, and
turn "on" SW2, the LED indicator must light up. Keep the unit turned "on" for 10
minutes to keep it warm before the calibration starts. Then follow the steps below.
Offset Adjustment:
A. Referring to the Figure below, connect both input lines (black and red) together,
thus actually shorting the two input-leads. Make sure they are shorted to ensure that the
unit is calibrated properly. (Use an alligator clip for contact on the input lead, if
possible).
B. Connect BNC connector output to a DMM as shown in the Figure below. The
DMM should be properly set to mV range, better if the DMM have an auto-range
capability.
C. Put SW1 at 1/10 (or 1/20) attenuation setting as indicated at the front plastic
cover of the probe.
D. By referring to the Figure above, adjust VR2 using a ceramic screw or any tools
appropriate for adjusting variable component to make the output voltage approach to
zero. (This way the Offset is adjusted into range within 0.1mV).
E. Put SW1 at 1/100 (or 1/200) attenuation setting as indicated again at the front
Advertisement


Need help?
Do you have a question about the SI-9001 and is the answer not in the manual?
Questions and answers