Advertisement
Advertisement

Related Manuals for MasterCraft 068-1575-6


Summary of Contents for MasterCraft 068-1575-6
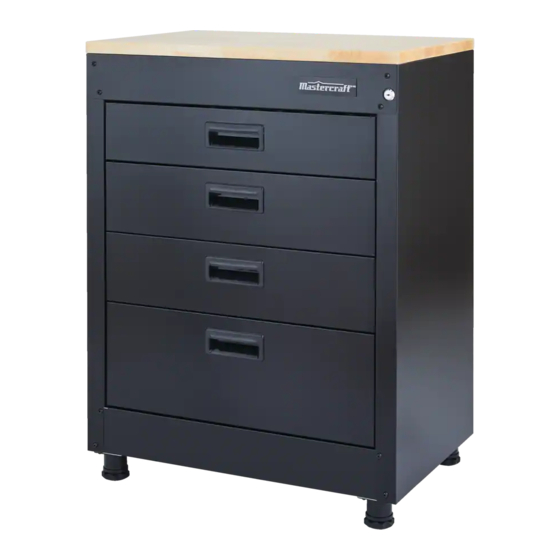
- Page 1 068-1575-6 28" (71 cm) Base Cabinet with Drawers INSTRUCTION IMPORTANT MANUAL Please read this manual carefully before assembling and Due to continuing improvements, using this product, and save it for reference. the actual product may differ slightly from the product described herein.
-
Page 2: Table Of Contents
068-1575-6 I contact us 1-800-689-9928 TABLE OF CONTENTS SAFETY MAINTENANCE EXPLODED VIEW / PARTS LIST ASSEMBLY INSTRUCTIONS COORDINATING PRODUCTS WARRANTY NOTE: If any parts are missing or damaged, or if you have any questions, please call our toll-free helpline at: 1-800-689-9928. -
Page 3: Safety
SAFETY To reduce the risk of serious injury, read and follow the safety instructions below before assembling and using this product. This product is intended for indoor use only. This product is not designed for commercial nor industrial usage. Keep the product on level surfaces. The product could become unstable and it may tip over if stored or moved on an uneven surface, which may cause personal injury, death or product damage. -
Page 4: Exploded View / Parts List
068-1575-6 I contact us 1-800-689-9928 EXPLODED VIEW / PARTS LIST Qty. Description Qty. Description Part No. Part No. 12 M6 x 16 hex socket Right side panel 121613 320327 head screw * 304236 Lock (001-010) Adjustable foot 313066... -
Page 5: Assembly Instructions
ASSEMBLY INSTRUCTIONS TOOLS REQUIRED FOR ASSEMBLY • Hex Wrench (23) Cross-head Screwdriver (not included; magnetic is preferable) • • Power Drill (not included) • Measuring Tape (not included) NOTE: Assemble on a flat surface. A piece of cardboard is recommended to keep the product from being scratched during assembly. - Page 6 068-1575-6 I contact us 1-800-689-9928 STEP 2 ATTACH THE BACK TOP BEAM AND BACK PANELS The top edge of the top back panel (18) should be inserted under the back top beam (20). Attach the back top beam (20) and back panels (18) to the back. Insert sixteen M6 x 16 hex socket head screws (12) by hand.
- Page 7 STEP 4 ATTACH THE FRONT TOP BEAM Stand up the cabinet. • • Attach the front top beam (3) to the side panels (1 & 16) with four M6 x 16 hex socket head screws (12). DO NOT tighten. Screw four M6 x 16 hex socket head screws (12) through the side panels (1 & 16) into the •...
- Page 8 068-1575-6 I contact us 1-800-689-9928 • Slide the back clip of the outer rail of a right slide (4) into the back slot at the right slide panel (1) and slide the front clip of the outer rail into the slot at the front of the right slide panel (1).
- Page 9 STEP 7 SECURE THE CABINET TO WALL Place the cabinet on a flat floor against a wall. Use a power drill to attach the cabinet to the wall with two M6 x 40 hex tapping bolts (19) through the holes at the back top beam (20). Tighten securely.
- Page 10 068-1575-6 I contact us 1-800-689-9928 STEP 9 ASSEMBLE THE DRAWERS (continued) • Lay down the drawer front panel (5 & 6 & 8) on its face with a soft mat underneath for protection. Put the drawer body's front onto the drawer front panel.
- Page 11 STEP 10 ATTACH THE DRAWERS BOTTOM-UP NOTE: Read the procedure to attach the top drawer (the fourth point) carefully. Otherwise, the product may be scratched. Extend the bottom slides and attach the bottom drawer to the slides by sliding the slots at •...
- Page 12 068-1575-6 I contact us 1-800-689-9928 Before attaching the top drawer, extend the slides first. There are two black release levers on • each side of inner rails. Pull one up and push the other one down until you see a silver dot.
-
Page 13: Coordinating Products
Wall Cabinet 28" (71 cm) Base Cabinet 28" (71 cm) Base 068-0005-0 068-1554-6 Cabinet with Drawers 068-1575-6 54" (137 cm) 2-Door Tall Cabinet 48 x 72" (122 x 183 cm) Workstation Tall Cabinet 068-0006-8... -
Page 14: Warranty
068-1575-6 I contact us 1-800-689-9928 LIMITED WARRANTY This product is guaranteed for 1 year from the date of original retail purchase against defects in materials and workmanship. Subject to the conditions and limitations described below, this product, if returned to us with a proof of purchase within the stated warranty period and if covered under this warranty, will be repaired or replaced (with the same model, or one of equal value or specification), at our option.
Need help?
Do you have a question about the 068-1575-6 and is the answer not in the manual?
Questions and answers