Table of Contents
Advertisement
Quick Links
TPD/VPD Series – Programming Guide v.1.0.6
Copyright@ 2020 ICP DAS CO., LTD. All Rights Reserved. E-mail: service@icpdas.com
TouchPAD
TPD/VPD Series HMI Devices
Programming Guide
Version: 1.0.6
Usage information for
TPD-2.8 inch series
TPD-4.3 inch series
TPD-7.0 inch series
VPD-3.5 inch series
VPD-4.3 inch series
VPD-7.0 inch series
June 2020
Page I
Advertisement
Table of Contents

Related Manuals for ICP DAS USA TPD Series


Summary of Contents for ICP DAS USA TPD Series
- Page 1 TouchPAD TPD/VPD Series HMI Devices Programming Guide Version: 1.0.6 June 2020 Usage information for TPD-2.8 inch series TPD-4.3 inch series TPD-7.0 inch series VPD-3.5 inch series VPD-4.3 inch series VPD-7.0 inch series TPD/VPD Series – Programming Guide v.1.0.6 Page I Copyright@ 2020 ICP DAS CO., LTD.
- Page 2 Warranty All products manufactured by ICP DAS are under warranty regarding defective materials for a period of one year, beginning from the date of delivery to the original purchaser. Warning ICP DAS assumes no liability for any damage resulting from the use of this product.
-
Page 3: Table Of Contents
Table of Contents Chapter 1. Introduction ------------------------------------------------ 5 1.1 Hardware Specifications -------------------------------------------------------- 6 Chapter 2. Software Installation ------------------------------------- 7 2.1 Install the HMIWorks Software ------------------------------------------------ 7 2.2 Create a New Project ------------------------------------------------------------- 9 2.3 HMIWorks Working Environment ------------------------------------------- 11 2.4 Downloading Methods for TouchPAD ------------------------------------- 12 Applications are downloaded through RS-485. - Page 4 Appendix A. Downloading Information ----------------------------- 74 Appendix B. Creating Your Own GUI ---------------------------------75 Revision History ----------------------------------------------------------- 76 TPD/VPD Series – Programming Guide v.1.0.6 Page 4 Copyright@ 2020 ICP DAS CO., LTD. All Rights Reserved. E-mail: service@icpdas.com...
-
Page 5: Chapter 1. Introduction
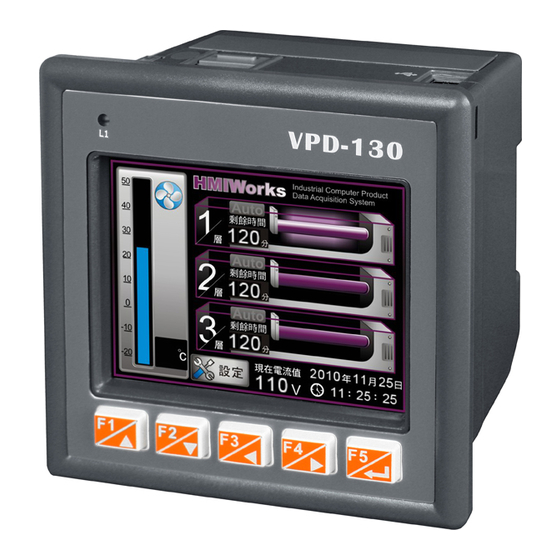
Chapter 1. Introduction The TPD series and VPD series devices are part of the TouchPAD series that includes a tiny touch HMI interface and are designed for building and home automation. The TouchPAD series is equipped with a high resolution TFT color touch screen and can be installed using a regular electrical wall-mount outlet. -
Page 6: Hardware Specifications
1.1 Hardware Specifications If you are interested in learning more about the hardware specifications for the various TouchPAD models, please refer to our website: http://www.icpdas.com/en/product/guide+Panel__Products+TouchPAD+TPD__Series TPD Series TPD Series TPD Series (2.8” Touch Screen) (7.0” Touch Screen) (4.3” Touch Screen)... -
Page 7: Chapter 2. Software Installation
Chapter 2. Software Installation First, install the HMIWorks development software on your PC. To download the latest version, visit the website at: http://www.icpdas.com/en/download/show.php?num=944&nation=US&kind1=&model= &kw=HMIWORKS 2.1 Install the HMIWorks Software Step 1: Double click the execution file, i.e., HMIWorks_STD_vxxx_setup.exe, to install the HMIWorks software. (This manual uses V2.10.02)... - Page 8 Step 3: Double click the execution file, i.e., HMIWorks_STD_vXXX_Update_XX.exe, to update the HMIWorks software. (This manual uses V2.10.46) Step 4: Follow the instructions in the update wizard and click “Finish” to complete the update. Default directory TPD/VPD Series – Programming Guide v.1.0.6 Page 8 Copyright@ 2020 ICP DAS CO., LTD.
-
Page 9: Create A New Project
2.2 Create a New Project Step 1: After the HMIWorks software has been successfully installed, execute the software “ HMIWorks_Standard.exe” from the installed folder. (Default : C:\ICPDAS\HMIWorks_Standard\bin) Step 2: Select the “New Project” icon to create a new project. TPD/VPD Series – Programming Guide v.1.0.6 Page 9 Copyright@ 2020 ICP DAS CO., LTD. - Page 10 Step 3: Select the TouchPAD model name (a), enter a project name (b) and it’s the location where the project should be saved (c), then select the display orientation (d) and the default programming type (e), and click “OK”. Select the TouchPAD model name Enter a project name Enter the location...
-
Page 11: Hmiworks Working Environment
2.3 HMIWorks Working Environment Function Menu HMI Design area Workspace / Properties Inspector Toolbox / Picture libraries Result section (output/errors) Status bar Toolbox: TPD/VPD Series – Programming Guide v.1.0.6 Page 11 Copyright@ 2020 ICP DAS CO., LTD. All Rights Reserved. E-mail: service@icpdas.com... -
Page 12: Downloading Methods For Touchpad
2.4 Downloading Methods for TouchPAD Applications are downloaded through RS-485. Applicable Model: TPD-280-H TPD-280-M1 / M2 / M3 Step 1: Connect the TouchPAD model and the computer using the RS-485 converter. For example : The ICPDAS product I-7520 (RS-232 / RS-485 Converter) or I-7561 (USB / RS-485 Converter) Power supply, I-7561,... - Page 13 NOTE:The default setting of Rotary Switch on TouchPAD is “0” (Run mode) Step 3: Select the “Set up Device (TouchPAD)” item from the “Run” menu to open the “Setup Serial Device” dialog box. Select the COM Port that connects the TouchPAD.
-
Page 14: Applications Are Downloaded Through Ethernet
Step 5: Wait until the Download are completed(100%). Adjust the Rotary Switch to “0” (Run mode), and then reboot the TouchPAD. After rebooting the TouchPAD, the screen of the TouchPAD will display the project. Applications are downloaded through Ethernet. Applicable Model: TPD-283(U)-H TPD-283(U)-M1 / M2 / M3 TPD-433-H(-EU) - Page 15 Step 2: Adjust the Rotary Switch to “0” (Run & Update mode) and then reboot the TouchPAD model. Step 3: Select the “Set up Device (TouchPAD)” item from the “Run” menu to open the “Setup Ethernet Device” dialog box. Select the “DHCP” and “Ethernet” options, and then click the “Search for TouchPAD…”...
- Page 16 Step 4: Select the TouchPAD model that has the correct MAC address, and then click the “OK” button. NOTE : If the TouchPAD can’t be found, please power off the TouchPAD model first, then adjust the Rotary Switch to “1”(Ethernet Force Update mode), and try to search again.
-
Page 17: Applications Are Downloaded Through Usb
Step 6: In the HMIWorks application, click the “Run (Render, Compile, Download) F9” item from the “Run” menu, or press F9. The program will now be compiled. Step 7: Wait until the Build and Download are completed(100%), the screen of the TouchPAD will display the project. - Page 18 Step 1: Connect the TouchPAD model to the Host PC using a CA-USB10 cable. Power supply, DP-665, 24V VDC (+10 ~+30 VDC) And Ground Frame Ground Earth TPD-280U-H Step 2: Adjust the Rotary Switch to “9” (USB Force Update mode) and then reboot the TouchPAD model.
- Page 19 Step 3: Select the “Set up Device (TouchPAD)” item from the “Run” menu to open the “Setup Ethernet Device” dialog box. Select the “DHCP” and “USB” options, and then click the “OK” button to confirm setting. NOTE:If your network doesn’t have access to a DHCP, you can use the Static IP and enter the effective IP information.
- Page 20 Step 4: In the HMIWorks application, click the “Run (Render, Compile, Download) F9” item from the “Run” menu, or press F9. The program will now be compiled. Step 5: Wait until the Build and Download are completed(100%). Adjust the Rotary Switch to “0”...
-
Page 21: Chapter 3. Demo Programs
Chapter 3. Demo Programs In this chapter, you will be detailed instructions in how to write simple demo programs in either the C or LD language. Before beginning programming, please ensure that both the hardware and the software are installed (Chapter This chapter use the TPD-703-64 to design the demo. - Page 22 Step 2: Create a “BitButton” (picture button). a. Switch to the “Toolbox” tab, as shown in the picture below. b. Click the “Widget (Ctrl+2)” heading to unfold the “Toolbox” panel. c. Select the “BitButton” icon, then move your mouse to the design area. You will notice that the cursor becomes a “+”.
- Page 23 Step 4: Create a “Timer” and a “Label”. a. As shown in the picture below, click the “System (Ctrl+3)” heading to unfold the “Toolbox” panel. b. Select the “Timer” icon, then move your mouse to the Frame1 design area. You will notice that the cursor becomes a “+”.
- Page 24 Step 6: Edit the control codes for the “BitButton” component. a. Double click the “BitButton” component in the design area to open the programming window. b. Edit the code in the programming window using the C language. (Users can copy the code from the picture below.) In this demo, each click of the button will add 1 to the counter and beep once until it reaches 100, and will then reset to 0 before beginning to accumulate again.
- Page 25 Step 7: Configure the properties for the “Label” component. a. Select a Label ("Label5" or "Label7"). b. The following properties can be modified from the Properites Inspector area on the right hand side: Alignment: Sets the text alignment position in the display box of the “Label” component.
- Page 26 Step 8: Configure the properties of the “Timer” component. a. Select the “Timer6” component in the design area as shown in the picture below. b. Set the “Interval” property in the Properties Inspector area. The units are milliseconds (ms), so if the control function is to be executed every 1 second, set the value as “1000”.
- Page 27 Step 9: Edit the control codes for the “Timer” component. a. Double click the “Timer6” component in the design area to open the programming window. b. Edit the code in the programming window using the C language. (The User can copy the code from the picture below.) In this demo, the counter will increase by 1 each time the button is clicked until it reaches 100, and will then reset to 0 before beginning to accumulate again.
-
Page 28: Demo 2 (Use Slider To Control The Object)
3.1.2 Demo 2 (Use Slider to control the object) Demo 2 is programmed using the C language. This demo combine the CheckBox and ObjectList to implement the effect of image changes, and the CheckBox will be change by the value of the Slider. Step 1: Create a new TPD-703-64 project based on the C language (refer to Section... - Page 29 Step 2: Create a “CheckBox” (Choice button). a. Switch to the “Toolbox” tab, as shown in the picture below. b. Click the “Widget (Ctrl+2)” heading to unfold the “Toolbox” panel. c. Select the “CheckBox” icon, and then move your mouse to the design area. You will notice that the cursor becomes a “+”.
- Page 30 Step 4: Create the list of picture in the “ObjectList”. a. Double click the “ObjectList5” to open the setting dialog box. b. Select the “DigitalClock” in the drop-down menu. c. Double click the Digit0.hwd to Digit9.hwd in order; the list will be created on right block.
- Page 31 Step 6: Create a “Slider”. a. Switch to the “Toolbox” tab, as shown in the picture below. b. Click the “Widget (Ctrl+2)” heading to unfold the “Toolbox” panel. c. Select the “Slider” icon, and then move your mouse to the design area. You will notice that the cursor becomes a “+”.
- Page 32 Step 8: Edit the control codes for the “Slider” component. a. Double click the “Slider” component in the design area to open the programming window. b. Edit the code in the programming window using the C language. (Users can copy the code from the picture below.) In this demo, the “CheckBox4”...
-
Page 33: Demo 3 (Digital Clock)
3.1.3 Demo 3 (Digital Clock) Demo 3 is programmed using the C language and implements a digital clock that will update the real time using built-in RTC. And this demo shows how to add the background which is designed by user. NOTE : Demo 3 use the built-in RTC in the TPD/VPD model, the TPD-280-H/Mx and TPD-283-H/Mx model are not support the RTC function. - Page 34 Step 2: Import a picture as the background. a. Select the “Import Images to Library” in the “File” menu to open the dialog box. b. Click the “Select Files” button and choice the picture, i.e., the background. c. After choosing the picture, the dialog box will show the path of related file, and that means the importation is completed.
- Page 35 Step 3: Create a “Label” (text display). a. Switch to the “Toolbox” tab, as shown in the picture below. b. Click the “Widget (Ctrl+2)” heading to unfold the “Toolbox” panel. c. Select the “Label” icon, then move your mouse to the design area. You will notice that the cursor becomes a “+”.
- Page 36 Step 4: Repeat the step 3 to create others Label. Label7 Label8 Label6 Label11 Label9 Label10 Step 5: Create a “Timer”. a. As shown in the picture below, click the “System (Ctrl+3)” heading to unfold the “Toolbox” panel. b. Select the “Timer” icon, then move your mouse to the Frame1 design area. You will notice that the cursor becomes a “+”.
- Page 37 Step 6: Edit the control codes for the “Timer” component. a. Double click the “Timer” component in the design area to open the programming window. b. Edit the code in the programming window using the C language. (Users can copy the code from the picture below.) In this demo, we use the “hmi_GetDateTime”...
- Page 38 Step 7: Build and Download the demo to the TouchPAD model. Please refer 2.4 Downloading Methods for TouchPAD TPD/VPD Series – Programming Guide v.1.0.6 Page 38 Copyright@ 2020 ICP DAS CO., LTD. All Rights Reserved. E-mail: service@icpdas.com...
-
Page 39: Demo 4 (Remotely Control The Icpdas I/O Model)
3.1.4 Demo 4 (Remotely control the ICPDAS I/O model) Demo 4 is programmed using the C language and implements that remotely control the ICPDAS I/O model. In this demo, we use the ICPDAS M-7055 model to demonstrate. This demo will use the switch on the screen of the TPD model to control the DO of the M-7055 model, and the TPD also update the DI status of the M-7055 model at any time on its screen. - Page 40 Step 2: Create a “CheckBox” (Choice button) to display the status of DI0. a. Switch to the “Toolbox” tab, as shown in the picture below. b. Click the “Widget (Ctrl+2)” heading to unfold the “Toolbox” panel. c. Select the “CheckBox” icon, and then move your mouse to the design area. You will notice that the cursor becomes a “+”.
- Page 41 Step 4: Create the list of picture in the “ObjectList”. a. Double click the “ObjectList5” to open the setting dialog box. b. Select the “Light(M)” in the drop-down menu. c. Double click the LMB0.hwd and then double click the LMB1.hwd, the list will be created on right block.
- Page 42 Step 6: Repeat Step 2 to Step 5 to create a button which designed to control the DO0. Step 7: Create a “Timer”. a. As shown in the picture below, click the “System (Ctrl+3)” heading to unfold the “Toolbox” panel. b.
- Page 43 Step 8: Edit the control codes for the “Frame1” component. a. Click the blank at the design area to open the Property Inspector of the “Frame12”. b. Click the “…” button at “OnCreate” field to open the programming window. c. Edit the code in the programming window using the C language. (Users can copy the code from the picture below.) d.
- Page 44 e. Click the “…” button at “OnDestroy” field to open the programming window. f. Edit the code in the programming window using the C language. (Users can copy the code from the picture below.) g. When finished, click “OK” to store. HANDLE h;...
- Page 45 Step 9: Edit the control codes for the “Timer” component. a. Double click the “Timer” component in the design area to open the programming window. b. Edit the code in the programming window using the C language. (Users can copy the code from the picture below.) c.
- Page 46 Step 10: Edit the control codes for the Button component. a. Double click the “CheckBox6” component in the design area to open the programming window. b. Edit the code in the programming window using the C language. (Users can copy the code from the picture below.) c.
-
Page 47: Using The Ladder Designer
3.2 Using the Ladder Designer 3.2.1 Demo 1 (Beep & Count) Demo 1 is programmed using the Ladder Designer and implements a single button that will beep when clicked on and will increase the counter by one. The counter will reset to zero when it reaches to ten. - Page 48 Step 2: Create a “BitButton” (picture button). a. Switch to the “Toolbox” tab, as shown in the picture below. b. Click the “Widget (Ctrl+2)” heading to unfold the “Toolbox” panel. c. Select the “BitButton” icon, then move your mouse to the design area. You will notice that the cursor becomes a “+”.
- Page 49 Step 4: Create two tags, “beep_tag” and “count”. a. As shown in the picture below, right click the “Virtual” in the Workspace to create the tags. b. Enter the name of the tag in the “Edit variable” window. Here we use “beep_tag” for the first tag and “count”...
- Page 50 Step 5: Configure the properties for the “BitButton” component. a. Select the “BitButton” component in the design area. b. Click the “Text” field in the Properties Inspector panel and enter the string “Click Me”. c. Click the “Font” field to change the font to a suitable style, size and color. d.
- Page 51 Step 6: Configure the properties for the “Label” component. a. Select the Label component in the design area. b. The following properties can be modified from the Properties Inspector area on the right hand side: Alignment: Sets the text alignment position in the display box of the “Label” component.
- Page 52 Step 7: Use the Ladder Designer to program the logic – the first rung. a. Click the menu [HMI] > [Ladder Designer]. b. Press the F2 button (or F2 key on the keyboard) to create a new rung. c. Move the cursor (the highlighted rectangle) to the first contact symbol and then press F7 to add a new function block to the right of it.
- Page 53 f. Double-click on the second function block to set the function to it. Here we set it the function, “Beep”, of the category, “system”. g. Double-click on the contact symbol to select variable “beep_tag”. h. Similarly, double-click on the neighborhood of the input parameter “in” as below figure to select variable “count”.
- Page 54 Step 8: Use the Ladder Designer to program the logic – the second rung. a. Similar to Step 7. Move the cursor to an empty position and then press the F6 button to add a new rung with a function block. b.
- Page 55 j. The second rung does the followings: if( count >= 10 ) count = 0; //set the count to zero Step 9: Save and Close (the Ladder). Step 10: Tune the scan time if necessary. a. Click the menu [Project] > [Project Configuration] to set the scan time. b.
-
Page 56: Demo 2 (Displaying The Decimal Point)
3.2.2 Demo 2 (Displaying the Decimal Point) The numbers used in the “Ladder Designer” are displayed in integer format without decimal digit. In some case, you may need to calculate or display the decimal. Please magnify the value enough to calculate it with integer type, and then display the result using the “DecimalDigits”... - Page 57 Step 2: Create a Label and adjust its “DecimalDigits” property to “3”. Step 3: Create two Virtual Tags, i.e., A and B, which have the default value “50” and “7”, respectively. And then create a Virtual Tag, i.e., Divide, which have the default value “0”.
- Page 58 Step 4: Use the Ladder Designer to program the logic. Step 5: Let the “TagName” of Label to select the “Divide” tag. Step 6: Build and Download the demo to the TouchPAD model. Please refer 2.4 Downloading Methods for TouchPAD TPD/VPD Series –...
-
Page 59: Demo 3 (Digital Clock)
3.2.3 Demo 3 (Digital Clock) Demo 3 is programmed using the Ladder Designer and implements a digital clock that will update the real time using built-in RTC. And this demo shows how to add the background which is designed by user. NOTE : Demo 3 use the built-in RTC in the TPD/VPD model, the TPD-280-H/Mx and TPD-283-H/Mx model are not support the RTC function. - Page 60 Step 2: Import a picture as the background. a. Select the “Import Images to Library” in the “File” menu to open the dialog box. b. Click the “Select Files” button and choice the picture, i.e., the background. c. After choosing the picture, the dialog box will show the path of related file, and that means the importation is completed.
- Page 61 Step 3: Create a “Label” (text display). a. Switch to the “Toolbox” tab, as shown in the picture below. b. Click the “Widget (Ctrl+2)” heading to unfold the “Toolbox” panel. c. Select the “Label” icon, then move your mouse to the design area. You will notice that the cursor becomes a “+”.
- Page 62 Step 4: Create the corresponding Virtual Tag. a. As shown in the picture below, right click the “Virtual” in the Workspace to create the tags. b. Enter the name of the tag in the “Edit variable” window. Here we use “Hour”. c.
- Page 63 Step 5: Repeat the step 3 and step 4 to create others Label and the corresponding Virtual Tag. Step 6: Use the Ladder Designer to program the logic. a. Click the menu [HMI] > [Ladder Designer]. b. Press the F7 button (or F7 key on the keyboard) to create a new function block. TPD/VPD Series –...
- Page 64 c. Double-click on the function block to set the function to it. Here we set it the function, “Get_Date_Time”, of the category, “system”. d. Double-click on the neighborhood of the input parameter “year” as below figure. e. Select variable “Year” to store the output of “Get_Date_Time” block. f.
- Page 65 Step 7: Save and Close (the Ladder). Step 8: Build and Download the demo to the TouchPAD model. Please refer 2.4 Downloading Methods for TouchPAD TPD/VPD Series – Programming Guide v.1.0.6 Page 65 Copyright@ 2020 ICP DAS CO., LTD. All Rights Reserved. E-mail: service@icpdas.com...
-
Page 66: Demo 4 (Remotely Control The Icpdas I/O Model)
3.2.4 Demo 4 (Remotely control the ICPDAS I/O model) Demo 4 is programmed using the Ladder Designer and implements that remotely control the ICPDAS I/O model. In this demo, we use the ICPDAS M-7055 model to demonstrate. This demo will use the switch on the screen of the TPD model to control the DO of the M-7055 model, and the TPD also update the DI status of the M-7055 model at any time on its screen. - Page 67 Step 2: Set up the connection. a. Right click the “Connection” item in the “Workspace” tab and select the “New Connection” option to set up the connection. b. For this demo, Select the “COM1” interface and set the “Baud Rate”, the “Data Bit”, the “Parity”...
- Page 68 Step 3: Import the Device tag of the I/O model. a. Right click the “Device” item in the “Workspace” tab, then select the “New Device” option. b. Select “Modbus RTU Master” from the “TouchPAD is” dropdown menu. c. Select “M-7000” from the “Device Series” dropdown menu and then select the created “SER_1”...
- Page 69 Step 4: Create the display LED and the control button. (This demo uses eight DI and DO respectively) a. Click the “Libraries” tab on the right hand side, and select the type of graphic (GUI) you want to use. b. Select and drag the corresponding I/O tag from the left hand side into the frame. c.
- Page 70 Step 6: Create a Label to display the sum of all DI tag. a. Switch to the “Toolbox” tab, as shown in the picture below. b. Click the “Widget (Ctrl+2)” heading to unfold the “Toolbox” panel. c. Select the “Label” icon, then move your mouse to the design area. You will notice that the cursor becomes a “+”.
- Page 71 d. Click the “Label39” and then click the “TagName” property in the Inspector and there shows a little button “…”. Click on the “…” button. e. Select the tag you want. Here we select the tag, “DI_total”. f. Finally, we can see the tag we just choose Step 8: Use the Ladder Designer to program the logic.
- Page 72 c. Double-click on the function block to set the function to it. Here we set it the function, “Pack”, of the category, “user_define”. d. Double-click on the neighborhood of the input parameters “bits_1” to “bits_16” and adding the corresponding Device Tag, as shown in the picture below. Step 9: Save and Close (the Ladder).
-
Page 73: Demo List
3.3 Demo List We have introduced you four basic demos in the previous chapter respectively. Please refer the demo list to view the more detailed application. http://www.icpdas.com/en/download/show.php?num=1000&nation=US&kind1=&model =&kw=HMIWORKS Demo Descriptions Convert This demo shows how to convert between data types Demo_All_Widgets This demo shows how to use widgets in HMIWorks. - Page 74 Appendix A. Downloading Information This manual is only a brief introduction to the TouchPAD functions. Please visit the following websites for more detailed information about the TouchPAD series. User Manual: http://www.icpdas.com/web/product/download/software/development_tool/hmiworks/ document/manual/HMIWorks_Software_User_Manual_en.pdf Products Website & Datasheets: http://www.icpdas.com/en/product/guide+Panel__Products+TouchPAD+TPD__Series FAQ: http://www.icpdas.com/en/faq/index.php?type=&model=&fkw=HMIWORKS#882 I-7000 I/O Modules (Support for the DCON Protocol): http://www.icpdas.com/en/product/guide+Remote__I_O__Module__and__Unit+RS-485_ _I_O__Modules+I-7000 M-7000 I/O Modules (Support for the Modbus RTU &...
- Page 75 Appendix B. Creating Your Own GUI The HMIWorks Libraries provide many images and icons for integration into the GUI (Graphical User Interface), and users can also create their own custom GUIs. a. First, open an image file in MS “Paint”, then click the toolbox to select the entire image (or press Ctrl+A on the keyboard) and then choose the copy option from the “Edit”...
- Page 76 Revision History Revision Date Description 1.0.5 Apr. 2012 Initial issue Update the screenshot of HMIWorks(v2.10.46) 1.0.6 Jun. 2020 Modify the content to the universal version. Divide the demos of the C language and Ladder to two chapters. ...
Need help?
Do you have a question about the TPD Series and is the answer not in the manual?
Questions and answers