Table of Contents
Advertisement
Available languages
Available languages
Quick Links
Advertisement
Chapters
Table of Contents

Related Manuals for auna Vertico 10035100


Summary of Contents for auna Vertico 10035100
-
Page 3: Table Of Contents
Sehr geehrter Kunde, wir gratulieren Ihnen zum Erwerb Ihres Gerä- tes. Lesen Sie die folgenden Hinweise sorgfäl- tig durch und befolgen Sie diese, um möglichen Schäden vorzubeugen. Für Schäden, die durch Missachtung der Hinweise und unsachgemäßen Gebrauch entstehen, übernehmen wir keine Haf- tung. - Page 5 ERKLÄRUNG DER SYMBOLE AUF DEM GERÄT CAUTION RISK OF ELECTRIC SHOCK DO NOT OPEN VORSICHT: DAS GEHÄUSE NICHT ÖFFNEN, UM EINEN STROMSCHLAG UND ERNSTE PERSONENVERLETZUNGEN ZU VERMEIDEN. IM INNEREN KEINE VOM KUNDEN ZU WARTENDEN KOMPONENTEN. WENDEN SIE SICH AUSSCHLIESSLICH AN QUALIFIZIERTE FACHLEUTE. WARNUNG: UM DIE GEFAHR EINES BRANDS ODER EINES STROMSCHLAGS ZU VERRINGERN, DAS GERÄT NICHT IN WASSER, REGEN ODER FEUCHTIGKEIT AUSZUSETZEN.
-
Page 6: Sicherheitshinweise
SICHERHEITSHINWEISE Lesen Sie die Anleitung. Alle Anwendungshinweise müssen vor der Verwendung des Geräts gelesen werden. • Kinder ab 8 Jahren, psychisch, sensorisch und körperlich eingeschränkte Menschen dürfen das Gerät nur benutzen, wenn sie vorher von einer für sie verantwortlichen Aufsichtsperson ausführlich mit den Funktionen und den Sicherheitsvorkehrungen vertraut gemacht wurden und die damit verbundenen Risiken verstehen. - Page 7 auf das Gerät gestellt werden. • Um die Stromzufuhr vollständig zu trennen, muss der Netzstecker des Gerätes vom Netz getrennt werden, da die Trennvorrichtungen der Netzstecker des Gerätes sind. • Der Netzstecker des Geräts darf nicht verstopft sein ODER sollte bei bestimmungsgemäßer Verwendung leicht zugänglich sein.
-
Page 8: Geräteübersicht
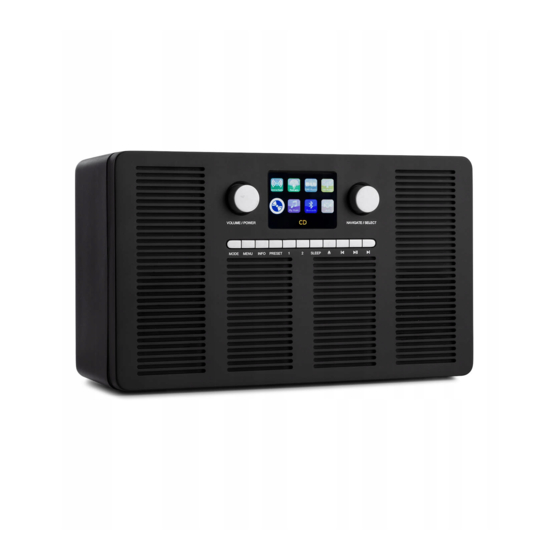
GERÄTEÜBERSICHT Frontansicht VOLUME / POWER NAVIGATE / SELECT 9 10 11 12 13 14 MODE MENU INFO PRESET SLEEP MODE Drehknopf Lautstärke / Ein-Aus Display Drehknopf Navigation/Auswahl NAVIGATE/SELECT Modus MODE Menü MENU Info INFO Programmspeicher PRESET Speicherplatz 1 Speicherplatz 2 10 SLEEP Abschalt-Timer ⏏... - Page 9 Draufsicht 15 Antenne 16 CD-Schacht Rückansicht AUX IN 17 Kopfhöreranschluss 18 Aux-Eingang 19 USB-Anschluss 20 Anschluss Netzadapter...
-
Page 10: Inbetriebnahme Und Bedienung
INBETRIEBNAHME UND BEDIENUNG Stromversorgung Überprüfen Sie vor der ersten Verwendung, ob die Spannnung Ihrer Steckdose mit den Angaben auf dem Typenschild übereinstimmt. Stecken Sie den Gleichstromstecker des Netzadapters in den Anschluss des Geräts. Wenn das Gerät an die Stromversorgung angeschlossen ist, geht es in den Standby-Modus. -
Page 11: Internetradio
• Das Netzwerkgerät muss eine drahtlose WLAN-Verbindung (802.11 b/g/n) unterstützen. Stellen Sie sicher, dass eine WLAN-Verbindung verfügbar ist und dass Sie das WEP, WPA oder WPA2 Passwort für die Verbindungsherstellung bereithalten. Sie können ebenfalls WPS (WiFi Protected Setup) zur einfacheren Verbindungsherstellung zwischen dem Netzwerkgerät und Ihrem DAB-Radio nutzen. -
Page 12: Dab/Dab+ Radio
DAB/DAB+ RADIO 40 Radiosender können Sie speichern. Halten Sie die Taste PRESET gedrückt, um einen Sender speichern. Mit einem kurzen Druck auf PRESET rufen Sie die Sender wieder auf. Halten Sie die Taste "1" oder "2" gedrückt, um einen DAB-Sender auf diesem Platz zu speichern. -
Page 13: Usb-Medienwiedergabe
USB-MEDIENWIEDERGABE Stecken Sie ein USB-Speichermedium mit MP3-Dateien in den USB- Anschluss. Mit den Tasten und wählen Sie den vorigen bzw. nachfolgenden Titel aus. ⏯ pausieren Sie die Wiedergabe. Bei einem erneuten Druck auf die Taste setzen Sie die Wiedergabe fort. Aktivieren Sie im BT-Modus des Geräts BT auf Ihrem mobilen Endgerät. -
Page 14: Alarm
ALARM • Es gibt zwei verfügbare Wecker mit Schlummerfunktion. Für jeden Alarm kann ein bestimmter Modus eingestellt werden. • Wählen Sie im Hauptmenü einen Alarm aus oder verändern Sie die Uhrzeit eines Alarms. Drücken Sie alternativ die Taste ALARM auf der Fernbedienung um den Wecker anzupassen. -
Page 15: Reinigung Und Pflege
Gerät im ausgewählten Modus sowohl am Radio als auch über das mobile Endgerät bedienen. Hinweis: Beachten Sie, dass wenn sich ein anderes Smartphone/Tablet, auf welchem ebenfalls die App installiert ist, im gleichen Netzwerk befindet, wird die originale Verbindung getrennt. REINIGUNG UND PFLEGE •... -
Page 16: Fehlersuche Und Fehlerbehebung
FEHLERSUCHE UND FEHLERBEHEBUNG Fehler Lösung Das Gerät lässt sich nicht Überprüfen Sie, ob der Netzstecker richtig einschalten. in der Steckdose steckt. Kein Ton. 1. Der Ton könnte stummgeschaltet sein. Drehen Sie den Ton auf. 2. Erhöhen Sie die Lautstärke. 3. Ziehen Sie das Kopfhörer- oder Lautsprecherkabel aus dem entsprechenden Anschluss heraus. - Page 17 Rauschen im FM-Modus. 1. Überprüfen Sie die FM-Antenne und richten Sie diese neu aus. 2. Stellen Sie das Gerät an einen anderen Ort. Keine Sender 1. Stellen Sie das Gerät an einen anderen verfügbar/ Rauschen/ Ort. Unterbrechungen im DAB- 2. Suchen Sie ausschließlich nach lokalen Modus.
-
Page 18: Hinweise Zur Entsorgung
HINWEISE ZUR ENTSORGUNG Befindet sich die linke Abbildung (durchgestrichene Mülltonne auf Rädern) auf dem Produkt, gilt die Europäische Richtlinie 2012/19/EU. Diese Produkte dürfen nicht mit dem normalen Hausmüll entsorgt werden. Informieren Sie sich über die örtlichen Regelungen zur getrennten Sammlung elektrischer und elektronischer Gerätschaften. - Page 19 Dear Customer, Congratulations on purchasing this equipment. Please read this manual carefully and take care of the following hints to avoid damages. Any failure caused by ignoring the items and cautions men- tioned in the instruction manual are not covered by our warranty and any liability.
- Page 21 EXPLANATION OF THE WARNING SYMBOLS CAUTION RISK OF ELECTRIC SHOCK DO NOT OPEN AUTION: TO REDUCE THE RISK OF ELECTRIC SHOCK AND SERIOUS PERSONAL INJURY, DO NOT REMOVE ANY COVER. NO USER-SERVICABLE PARTS INSIDE. REFER SERVICING TO QUALIFIED SERVICE PERSONNEL ONLY. WARNING.
-
Page 22: Safety Instructions
SAFETY INSTRUCTIONS Read these instructions. All uses guidelines must be read before using the device. Keep the instructions for future use. • Children over the age of 8 and persons with reduced physical, sensory or mental capabilities or those with a lack of experience and knowledge may only use the device if they are instructed on how to do so by a person responsible for their safety, or if they are supervised and understand the hazards associated with the use of the device. - Page 23 easily accessed during intended use. • Battery shall not be exposed to excessive heat such as sunshine, fire or the like. • Excessive sound pressure form earphones and headphones can cause hearing loss. • Minimum distance (8 cm) around the apparatus for sufficient ventilations;...
-
Page 24: Product Overview
PRODUCT OVERVIEW Front View VOLUME / POWER NAVIGATE / SELECT 9 10 11 12 13 14 MODE MENU INFO PRESET SLEEP VOLUME/POWER Rotary knob Volume / On-off Display Rotary knob Navigation/Selection NAVIGATE/SELECT Switch between modes MODE Menu MENU Display information INFO Station memory PRESET... - Page 25 Top view 15 Antenna 16 CD slot Rear view AUX IN 17 Headphone jack 18 Aux input 19 USB connection 20 Power adapter connection...
-
Page 26: Setup And Operation
SETUP AND OPERATION Power supply Before first use, check that the voltage of your socket corresponds to the specifications on the rating plate. Insert the DC plug of the AC adapter into the connector on the unit. When the machine is connected to the power supply, it goes into standby mode. Switch on Press the VOLUME/POWER knob to turn it on. -
Page 27: Internet Radio
the correct state. Selecting the operating mode Press the MODE button repeatedly to scroll through the following operating modes: • Internet Radio • DAB/DAB+ Radio • FM Radio • CD player • USB storage device • BT device • AUX IN connection Adjust volume Turn the VOLUME/POWER volume knob clockwise to increase the volume. -
Page 28: Dab/Dab+ Radio
DAB/DAB+ RADIO 40 radio stations can be saved. Press and hold the PRESET button to store a station. Press PRESET briefly to recall the stations. Press and hold the 1 or 2 button to store a DAB station in that location. Press the "1"... -
Page 29: Usb Media Playback
USB MEDIA PLAYBACK Insert a USB memory device containing MP3 files into the USB port. Use the and buttons to select the previous or next track. Press ⏯ to pause playback. Press the button again to resume playback. In the BT mode of the device, activate BT on your mobile device. In the BT menu, set the radio to be visible to other devices. -
Page 30: Undok
At the set time, the alarm will sound. To temporarily silence, press any key excepted pressing the VOLUME knob You can change the snooze period. The radio returns to standby for the set period, with the silencted alarm icon flashing. Press the any button to turn off the alarm. -
Page 31: Cleaning And Care
CLEANING AND CARE • Always unplug the appliance from the power outlet before cleaning. Never use abrasive cleaners or scouring pads to clean the product, as they may damage the surface of the product. • Wipe the product with a soft and dry cloth. If the unit is very dirty, the dirt can be removed with a slightly damp cloth. -
Page 32: Troubleshooting
TROUBLESHOOTING Error Remedy The device does not switch Check it the power adaptor is connected properly. No sound. 1. Turn on the sound as it may be muted 2. Increase the volume. 3. Pull any connected headphone or speaker from the connector jack. No network connection can 1. - Page 33 Alarm does not work. 1. Switch on the alarm. 2. Due to the volume setting, refer to the solutions of “No sound”. 3. The source of alarm was set to be station but there is no network connection. Change the source of alarm or reconfigure the connection.
-
Page 34: Disposal Considerations
DISPOSAL CONSIDERATIONS According to the European waste regulation 2012/19/EU this symbol on the product or on its packaging indicates that this product may not be treated as household waste. Instead it should be taken to the appropriate collection point for the recycling of electrical and electronic equipment. - Page 35 Cher client, Toutes nos félicitations pour l’acquisition de ce nouvel appareil. Veuillez lire attentivement les instructions suivantes de branchement et d’utilisation afin d’éviter d’éventuels dommages. Le fabricant ne saurait être tenu pour responsable des dommages dus au non-respect des consignes de sécurité...
- Page 37 EXPLICATION DES SYMBOLES SUR L'APPAREIL CAUTION RISK OF ELECTRIC SHOCK DO NOT OPEN ATTENTION : N'OUVREZ PAS LE BOÎTIER POUR ÉVITER LES CHOCS ÉLECTRIQUES ET LES BLESSURES GRAVES. PAS DE COMPOSANTS INTERNES À ENTRETENIR PAR LE CLIENT. NE CONTACTER QUE DES PROFESSIONNELS QUALIFIÉS.
-
Page 38: Consignes De Sécurité
CONSIGNES DE SÉCURITÉ Lisez les instructions. Toutes les instructions d'utilisation doivent être lues avant d'utiliser l'appareil. • Les enfants à partir de 8 ans ainsi que les personnes aux capacités physiques, mentales ou sensorielles réduites ne doivent utiliser l’appareil qu'après avoir été familiarisés par une personne responsable de leur sécurité... - Page 39 • La fiche d'alimentation de l'appareil ne doit pas être bloquée OU doit être facilement accessible lorsqu'elle est utilisée comme prévu. • N'exposez pas la batterie à une chaleur excessive comme le soleil, le feu ou autre. • Une pression sonore excessive provenant des écouteurs et des casques peut entraîner une perte d'audition.
-
Page 40: Aperçu Des Appareils
APERÇU DES APPAREILS Vue de face VOLUME / POWER NAVIGATE / SELECT 9 10 11 12 13 14 MODE MENU INFO PRESET SLEEP MODE Bouton rotatif Volume / Marche-Arrêt Display Bouton rotatif Navigation/sélection NAVIGATE/SELECT Mode MODE Menu MENU Info INFO Mémorisation de station PRESET Emplacement mémoire 1... - Page 41 Vue de haut 15 Antenne 16 Tiroir à CD Vue de dos AUX IN 17 Prise casque 18 Entrée Aux 19 Port USB 20 Prise de l'adaptateur secteur...
-
Page 42: Mise En Marche Et Utilisation
MISE EN MARCHE ET UTILISATION Alimentation Avant de l'utiliser pour la première fois, vérifiez si la tension de votre prise correspond aux informations figurant sur la plaque signalétique. Insérez la fiche CC de l'adaptateur secteur dans la prise de l'appareil. Lorsque l'appareil est connecté... -
Page 43: Radio Internet
Assurez-vous qu'une connexion WiFi est disponible et que vous avez le mot de passe WEP, WPA ou WPA2 prêt à être utilisé lors de la connexion. Vous pouvez également utiliser WPS (WiFi Protected Setup) pour une connexion plus facile entre le périphérique réseau et votre radio DAB. Vérifiez que les voyants du périphérique réseau affichent le bon état. -
Page 44: Dab/Dab+ Radio
DAB/DAB+ RADIO Vous pouvez enregistrer 40 stations de radio. Appuyez sur PRESET et maintenez-le pour enregistrer une station. En appuyant brièvement sur PRESET, vous appelez à nouveau les stations. Appuyez sur "1" ou "2" et maintenez-le pour enregistrer une station DAB à cet emplacement. -
Page 45: Support De Média Usb
SUPPORT DE MÉDIA USB Insérez un support de stockage USB avec des fichiers MP3 dans le port USB. Utilisez les touches et pour sélectionner le titre précédent ou suivant. ⏯ Appuyez sur pour interrompre la lecture. Appuyez à nouveau pour reprendre la lecture. -
Page 46: Alarme
ALARME • Il y a deux réveils disponibles avec fonction sommeil. Un mode spécifique peut être défini pour chaque alarme. • Sélectionnez une alarme dans le menu principal ou modifiez l'heure d'une alarme. Vous pouvez également appuyer sur ALARM sur la télécommande pour régler le réveil. -
Page 47: Nettoyage Et Entretien
Vous pouvez utiliser l'appareil dans le mode sélectionné à la fois sur la radio et l'appareil mobile. Remarque : Notez que si un autre smartphone / tablette, sur lequel l'application est également installée, se trouve sur le même réseau, la connexion d'origine sera déconnectée. -
Page 48: Identification Et Résolution Des Problèmes
IDENTIFICATION ET RÉSOLUTION DES PROBLÈMES Problème Solution Impossible d'allumer Vérifiez que la fiche d'alimentation est l'appareil. correctement insérée dans la prise. Pas de son. 1. Le son pourrait être coupé. Montez le son. 2. Augmentez le volume. 3. Débranchez le casque ou le cordon de l'enceinte de sa prise. - Page 49 Parasites en mode FM. 1. Vérifiez l'antenne FM et réalignez-la. 2. Déplacez l'appareil. Aucune station disponible / 1. Déplacez l'appareil. parasites / interruptions en 2. Recherchez uniquement les stations mode DAB. locales (puissance de signal plus élevée). 3. Vérifiez la couverture de la station DAB locale.
-
Page 50: Informations Sur Le Recyclage
INFORMATIONS SUR LE RECYCLAGE Vous trouverez sur le produit l’image ci-contre (une poubelle sur roues, barrée d‘une croix), ce qui indique que le produit se trouve soumis à la directive européenne 2012/19/UE. Renseignez-vous sur les dispositions en vigueur dans votre région concernant la collecte séparée des appareils électriques et électroniques. - Page 51 Estimado cliente: Le felicitamos por la adquisición de este producto. Lea atentamente el siguiente manual y siga cuidadosamente las instrucciones de uso con el fin de evitar posibles daños. La empresa no se responsabiliza de los daños ocasionados por un uso indebido del producto o por haber desatendido las indicaciones de seguridad.
- Page 53 EXPLICACIÓN SÍMBOLOS DEL DISPOSITIVO CAUTION RISK OF ELECTRIC SHOCK DO NOT OPEN ATENCIÓN: PARA REDUCIR EL RIESGO DE DESCARGAS ELÉCTRICAS Y LESIONES PERSONALES, NO ABRA LA CARCASA. NO HAY PIEZAS QUE PUEDAN SER REPARADAS POR EL USUARIO DENTRO DE LA UNIDAD. EN CASO DE REPARACIÓN, CONTACTE SÓLO CON PERSONAL CUALIFICADO.
-
Page 54: Instrucciones De Seguridad
INSTRUCCIONES DE SEGURIDAD Lea las instrucciones. Todas las instrucciones de uso deben ser leídas antes de usar el aparato. • Los niños a partir de los 8 años de edad y las personas con discapacidades mentales, sensoriales y físicas sólo podrán utilizar el dispositivo si un supervisor responsable les ha familiarizado a fondo con las funciones y las precauciones de seguridad y comprenden los riesgos asociados. - Page 55 • dispositivos de desconexión son los enchufes del dispositivo. • El enchufe de la red del aparato no debe estar bloqueado O debe ser fácilmente accesible cuando se utiliza según lo previsto. • La batería no debe ser expuesta a un calor excesivo como la luz del sol, el fuego o similares.
-
Page 56: Descripción Del Aparato
DESCRIPCIÓN DEL APARATO Vista frontal VOLUME / POWER NAVIGATE / SELECT 9 10 11 12 13 14 MODE MENU INFO PRESET SLEEP MODE Volumen / Encendido / Apagado Display Mando de NAVEGACIÓN / SELECCIÓN NAVIGATE/SELECT Modo MODE Menú MENU Información INFO Memoria de programa PRESET... - Page 57 Vista superior 15 Antena 16 Ranura para CD Vista posterior AUX IN 17 Puerto de auriculares 18 Puerto de entrada auxiliar 19 Puerto USB 20 Puerto de adaptador de corriente...
-
Page 58: Puesta En Marcha Y Funcionamiento
PUESTA EN MARCHA Y FUNCIONAMIENTO Alimentación eléctrica Antes de utilizar el aparato por primera vez, compruebe que el voltaje de su toma de corriente se corresponde con las especificaciones de la placa de características e inserte el enchufe CC del adaptador de corriente en la toma del aparato. -
Page 59: Radio Internet
(802.11 b/g/n). Asegúrese de que una conexión LAN inalámbrica esté disponible y que tenga la contraseña WEP, WPA o WPA2 lista para establecer la conexión. También puedes usar WPS (WiFi Protected Setup) para facilitar la conexión entre el dispositivo de red y tu radio DAB. Asegúrese de que las luces del dispositivo de red estén en el estado correcto. -
Page 60: Dab/Dab+ Radio
DAB/DAB+ RADIO Se pueden guardar 40 estaciones de radio. Mantenga pulsado el botón PRESET para guardar una emisora. Presione brevemente PRESET para recuperar las estaciones, y mantenga presionado el botón "1" o "2" para almacenar una estación en ese lugar. Presione el botón "1"... -
Page 61: Reproducción Usb
REPRODUCCIÓN USB Inserte un dispositivo de memoria USB que contenga archivos MP3 en el puerto USB. Utilice los botones y para seleccionar la pista anterior o siguiente. ⏯ Pulse el botón para pausar la reproducción. Presione el botón de nuevo para reanudar la reproducción. -
Page 62: Alarma
ALARMA • Hay dos relojes despertadores disponibles con función de repetición. Se puede ajustar un modo específico para cada alarma • Seleccione una alarma en el menú principal o cambie la hora de una alarma. Alternativamente, pulse el botón ALARM del mando a distancia para ajustar la alarma. -
Page 63: Limpieza Y Mantenimiento
Puedes usar el dispositivo en el modo seleccionado tanto en la radio como en el dispositivo móvil. Nota: Tenga en cuenta que si otro smartphone/tablet en el que también está instalada la aplicación está en la misma red, la conexión original se desconectará. -
Page 64: Solución De Problemas Y Corrección De Errores
SOLUCIÓN DE PROBLEMAS Y CORRECCIÓN DE ERRORES Error Solución No hay sonido. Compruebe que la clavija de alimentación esté correctamente insertada en el enchufe. No se puede establecer una 1. El sonido puede ser silenciado Suba el conexión de red. sonido. - Page 65 Ruido en modo FM. 1. Revise la antena de FM y re-sintonícela 2. Mueva la unidad a otro lugar. No hay emisoras 1. Mueva la unidad a otra ubicación. disponibles/ ruido/ 2. Busque sólo estaciones locales (mayor interrupciones en el modo intensidad de la señal).
-
Page 66: Retirada Del Aparato
RETIRADA DEL APARATO Si el aparato lleva adherida la ilustración de la izquierda (el contenedor de basura tachado) entonces rige la normativa europea, directiva 2012/19/UE. Este producto no debe arrojarse a un contenedor de basura común. Infórmese sobre las leyes territoriales que regulan la recogida separada de aparatos eléctricos y electrónicos. - Page 67 Gentile cliente, La ringraziamo per aver acquistato il dispositivo. La preghiamo di leggere attentamente le seguenti istruzioni per l’uso e di seguirle per evitare possibili danni tecnici. Non ci assumiamo alcuna responsabilità per danni scaturiti da una mancata osservazione delle avvertenze di sicurezza e da un uso improprio del dispositivo.
- Page 69 SPIEGAZIONE DEI SIMBOLI DEL DISPOSITIVO CAUTION RISK OF ELECTRIC SHOCK DO NOT OPEN ATTENZIONE: NON APRIRE L’ALLOGGIAMENTO ONDE EVITARE SCOSSE ELETTRICHE E GRAVI LESIONI PERSONALI. IL PRODOTTO NON CONTIENE COMPONENTI CHE NECESSITANO DI ASSISTENZA DA PARTE DEL CLIENTE. RIVOLGERSI ESCLUSIVAMENTE A TECNICI QUALIFICATI.
-
Page 70: Avvertenze Di Sicurezza
AVVERTENZE DI SICUREZZA Leggere le istruzioni. Tutte le istruzioni per l'uso devono essere lette prima di utilizzare l'apparecchio. • Questo dispositivo può essere utilizzato dai bambini maggiori di 8 anni e dalle persone con limitate capacità fisiche, sensoriali o mentali o da persone con esperienza e conoscenze insufficienti, solo se sono stati informati sulle funzioni del dispositivo e sono consapevoli dei rischi e dei pericoli connessi. - Page 71 • necessario staccare la spina del dispositivo. • La spina di rete dell'apparecchio non deve essere bloccata OPPURE deve essere facilmente accessibile quando viene utilizzata come previsto. • La batteria non deve essere esposta a calore eccessivo come la luce del sole, il fuoco o simili.
-
Page 72: Descrizione Del Dispositivo
DESCRIZIONE DEL DISPOSITIVO Lato anteriore VOLUME / POWER NAVIGATE / SELECT 9 10 11 12 13 14 MODE MENU INFO PRESET SLEEP MODE Manopola Volume/On/Off Display Manopola Navigazione/Selezione NAVIGATE/SELECT Modalità MODE Menú MENU Informazioni INFO Memoria di programmazione PRESET Posizione di salvataggio 1 Posizione di salvataggio 2 10 SLEEP Timer... - Page 73 Lato superiore 15 Antenna 16 Vano CD Lato posteriore AUX IN 17 Connessione cuffie 18 Ingresso AUX 19 Connessione USB 20 Connessione adattatore di rete...
-
Page 74: Messa In Funzione E Utilizzo
MESSA IN FUNZIONE E UTILIZZO Alimentazione Prima di procedere all’utilizzo, controllare che la tensione della presa elettrica corrisponda alle indicazioni sulla targhetta del dispositivo. Collegare la spina a corrente continua dell’adattatore nella presa del dispositivo. Quando il dispositivo è collegato all’alimentazione passa in modalità... -
Page 75: Radio Internet
Assicurarsi che sia disponibile una connessione Wi-Fi e di avere a portata di mano la password per WEP, WPA o WPA 2 per stabilire la connessione. Per una connessione più semplice tra radio DAB e dispositivo di rete si può anche usare la funzione WPS (Wi-Fi Protected Setup). -
Page 76: Dab/Dab+ Radio
DAB/DAB+ RADIO È possibile salvare 40 emittenti. Tenere premuto PRESET per salvare un’emittente. Premendo brevemente PRESET si accede all’emittente. Tenere premuto “1” o “2” per salvare un’emittente nella relativa posizione. Premere “1” o “2” per accedere all’emittente salvata. Con la manopola NAVIGATE/SELECT si scorre la lista delle emittenti. Premere brevemente per selezionare una voce del menu. -
Page 77: Riproduzione Di File Usb
RIPRODUZIONE DI FILE USB Inserire un supporto USB con file MP3 nell’apposita connessione. Selezionare il titolo successivo o precedente con e. ⏯ Avviare e mettere in pausa la riproduzione con Attivare la modalità BT sul dispositivo esterno. Impostare nel menu BT la possibilità... -
Page 78: Sveglia
SVEGLIA • Sono disponibili due sveglie con snooze. Per ogni sveglia è possibile selezionare una determinata modalità. • Nel menu principale, selezionare una sveglia o cambiare l’ora della sveglia. In alternativa, premere ALARM sul telecomando per regolarla. • Per attivare la sveglia, salvarla dopo aver impostato tutti i parametri. Con un simbolo sul lato basso sinistro, lo schermo mostra la sveglia è... -
Page 79: Pulizia E Manutenzione
Il dispositivo è gestibile nella modalità selezionata sia dalla radio che dal dispositivo mobile. Nota: tenere presente, che se nella rete in questione c’è un altro smartphone/tablet su cui è installata la app, viene interrotta la connessione originale. PULIZIA E MANUTENZIONE •... -
Page 80: Ricerca E Correzione Degli Errori
RICERCA E CORREZIONE DEGLI ERRORI Problema Soluzione Non è possibile accendere il Controllare che la spina sia collegata dispositivo. correttamente. Nessun audio. 1. Potrebbe essere stata attivata la funzione muto. 2. Alzare il volume. 3. Staccare il cavo delle cuffie o delle casse dalla relativa connessione. - Page 81 La radio FM gracchia. 1. Controllare e riposizionare l’antenna. 2. Spostare il dispositivo. Nessuna emittente 1. Riposizionare la radio. disponibile/la radio DAB 2. Effettuare una nuova ricerca emittenti gracchia/interruzioni in con l’opzione di ricerca limitata a modalità DAB. emittenti con segnale intenso. 3.
-
Page 82: Smaltimento
SMALTIMENTO Se sul prodotto è presente la figura a sinistra (il cassonetto dei rifiuti mobile sbarrato), si applica la direttiva europea 2012/19/UE. Questi prodotti non possono essere smaltiti con i rifiuti normali. Informarsi sulle disposizioni vigenti in merito alla raccolta separata di dispositivi elettrici ed elettronici. Non smaltire i vecchi dispositivi con i rifiuti domestici.
Need help?
Do you have a question about the Vertico 10035100 and is the answer not in the manual?
Questions and answers