Table of Contents
Advertisement
Advertisement
Table of Contents

Subscribe to Our Youtube Channel
Related Manuals for CSL GradeShift


Summary of Contents for CSL GradeShift
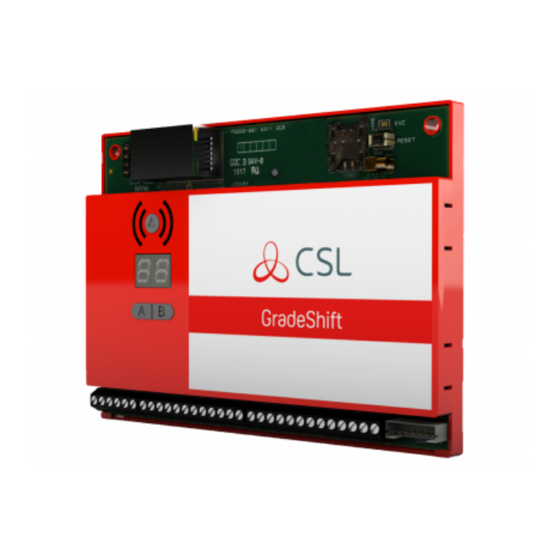
- Page 1 GradeShift INSTRUCTION MANUAL...
- Page 2 CONTENTS Description Part Numbers Installation Procedure: Site Survey Installation - Checklist System Testing 6 - 8 Troubleshooting 9 - 10 Technical Support & Web Site The Details: Aerial Siting 12 - 13 DualCom Mounting Security Aerial Connection SIM Card CS5355 - Lan(IP) Card 16 - 17 CS2351 and CS5351 - Expander Boards CS2325 - Plug-on Adapter...
- Page 3 DualCom GPRS Installation Manual Description DualCom GPRS is an advanced auto-dialling Digital Communication Device for secure alarm reporting. It is supplied as a ‘dual path’ Alarm Transmission Sys- tem (ATS) that when fully installed will meet EN50136 standard for ATS 4 & 5 that is suitable for EN50131 Security Grade 1, 2, 3 and 4 installations.
- Page 4 Part Numbers CS 2200 DualCom GPRS G2 (+ SIM Card, NVM) and CS2058 box aerial). CS 2210 DualCom GPRS G2 (+ SIM Card, NVM) and CS2057 ext. aerial). CS 2300 As CS2200 but to Grade 3 standard CS 2310 As CS2210 but to Grade 3 standard CS 2400 As CS2200 but to Grade 4 standard CS 2410...
- Page 5 DualCom GPRS to confirm that adequate GPRS signal strength is available at the site. Before visiting the site, call CSL Technical Support. See page 11. Ask for a GPRS signal strength prediction. For this, you will need to have the Post Code of the site available.
- Page 6 Installation 1. Site the aerial at the point of strongest signal ensuring that it is within the protected area. This is usually the highest point in the building and well away from metal roofs and metal walls. See Page 12. The DualCom may be ordered with the CS2058 Box aerial for internal use only or the CS2057 External aerial.
- Page 7 The NVM has been incorrectly programmed. The NVM is blank or un-programmed. See Appendix 1. Contact CSL Technical Support for further advice. Path problems are indicated by the Yellow GSM path LED, the Red PSTN path LED & the Green LAN path LED. See Appendix 1, Table15, 18 & 21.
- Page 8 System Testing (continued) 4. From the Control Panel’s keypad, trigger calls for all used channels, e.g. Intruder, Open/close, P/A and Fire circuits. Note: When alarm calls are made (i.e. not Test calls), all DualCom paths are activated, but only one alarm call will be received. This will be via the path that is the first to send the alarm call to the ARC.
- Page 9 System Testing (continued) 7. If the quiescent (non-active) states of the input terminals are incorrect, i.e. ‘positive applied/removed is inverted, then the ARC will report that the Alarm/ Restore or Open/Close is the ‘wrong way round’. To correct this, use the A & B buttons to start the Input Learning feature. See Appendix 1, Tables 30 &...
- Page 10 Troubleshooting Q. What if there appears to be random triggering of the DualCom ? Ensure that 0 volts is common across all parts of the alarm system. If the DualCom receives its power from a Power Supply that is additional to the alarm system, ensure that the 0 volt connection on the additional power supply is connected to the 0 volt connection on the alarm system.
- Page 11 Troubleshooting (continued) Q. What if the Radio path signal has not been received by the Alarm Receiving Centre ? Check, using the 7 segment display that the radio signal is sufficient (FSSI = 40 or greater) and that the GSM path status = OK. Check with a meter that the voltage supply to the DualCom is correct and does not dip when the DualCom is signalling.
- Page 12 09.00 to 16.00 Saturday The CSL web site: http://www.csldual.com contains the latest copies of all manuals for all CSL products. Please ensure that you are working from the latest version. You can also download associated information and software sam- plers. Sales, shipping and contact information is here too.
- Page 13 Aerial Siting ALWAYS do a site survey to find an area of strong signal before installation. Installing a DualCom with a weak signal is bad installation practice. The DualCom is likely to suffer signal failure causing wasted site vists, wasted time & money. The aerial should be mounted vertically at the point of strongest signal.
- Page 14 No installation or user programming of the NVM is necessary. See Appendix 1, Tables 30, 31 & 32 for setup options using the A & B buttons. Contact CSL Technical Support with any programming or other queries. See page 11.
- Page 15 Aerial Connection The CS2057 aerial is available with a 5 metre lead. This item is weatherproof and may be mounted internally or externally where installation standards allow. Do not cut, rejoin or lengthen the lead. CS2057 Install the aerial vertically. Fig 3 Aerial If the signal strength is...
- Page 16 The DualCom GPRS is supplied with a Vodafone SIM Card already fitted. The supplied SIM card is programmed for DualCom GPRS only. SIM Cards from other suppliers may be available through CSL. Call Tech Support for details. DualCom SIM Card...
- Page 17 IP address on the LAN, or... b). the LAN(IP) Card must be programmed with a Fixed/Static IP address. CSL will dispatch a DualCom and LAN(IP) Card fully programmed for operation providing that the ‘default gateway’, IP address options and mask information are provided with the order.
- Page 18 The CS5355 Wired LAN(IP) Card (continued) To install: 1. Follow steps 1, 2 and 3 on the next page. 2. Using a Cat5 lead fitted with RJ45 connectors, connect the metal boxed socket on the Wired LAN Card to a LAN connection point. See Fig 6. 3.
- Page 19 The CS2351 and CS5351 Expander Boards The CS2351 and CS5351are plug-on Expander Boards that provide an additional 4 inputs to the DualCom. These will trigger channels 9, 10, 11 and 12. Note that the DualCom GPRS uses channels 13, 14, 15 and 16 to report path and polling faults to the ARC, thus only 4 extra inputs (9 to 12) can be used on security installations.
- Page 20 The CS2325 Plug-on Adapter The CS2325 Plug-on Adapter provides a connection between the CS2300-R DualCom GPRS and Control Panels that have a facility for plug-on comms. Power to the DualCom, connections to the DualCom’s 8 input channels, the DualCom’s ATS Test input and the Fault output are all made via the plug-on pins.
- Page 21 The CS2325 Plug-on Adapter (continued) Operation 1. When first powered, the DualCom will detect the Plug-on Adapter and there- after will always remember that it must be connected. The Operation LED on the Plug-on Adapter will flash continuously when connection to the DualCom is established.
- Page 22 THIS SHEET LEFT INTENTIONALLY BLANK FOR EDITORIAL PURPOSES THE PREVIOUS PAGE = 20 THE NEXT PAGE = 28...
- Page 23 Fault & Auxilliary Relay Outputs The Fault and Aux relays operate when the DualCom has a path fault and under other conditions (e.g. comms sent successfully). Where the installation is specified to the EN 50131 and PD6662 standards then connect the Fault (and Aux) output(s) to the Control Panel. Fault output options may be selected using the A &...
- Page 24 CS0054 Programmer. Using the Programmer, any Fault Output option may be used with any Aux Output option. See Table 4 & 5. Contact CSL Technical Support for Outputs, Programming or further advice. a i l...
- Page 25 ‘ATS Test’ output from the Control Panel to the DualCom will be required. For ‘ATS Test’ output connections and the Input Learning feature see Remote Serv- icing below. Contact CSL Technical Support for Outputs, Programming or further advice. Remote Servicing EN 50131 and PD6662 standards describe Remote Servicing. Where the Con- trol Panel needs to trigger the DualCom to send test calls to the ARC, the Test output on the Control Panel will need to be connected to the DualCom.
- Page 26 DualCom’s in Grade 2 installations may be temporarially upgraded to G3 per- formance. This will ensure that your customer does not suffer any reduction in their security. When the upgrade schedule and other information becomes available, addi- tions will be made to the CSL DualCom website: www.csldual.com Table 6...
- Page 27 Monitoring (Network Connection) The paths used by DualCom for sending alarm and other messages are also monitored for their connections to the various networks. On the PSTN this is done by the DualCom measuring the DC voltage supplied by the telephone exchange. Optionally, the absence of the dial tone may be selected to indicate a failed connection.
- Page 28 Telephone Line Connection There are several different types of telephone line available from different service providers. DualCom requires an analogue telephone line connection. ‘Earth Loop Call- ing’ or ‘Earth Calling’ types of analogue telephone line can not be used. DualCom can not be directly connected to any type of digital telephone line. For Broadband connection see page 39 - 40.
- Page 29 PSTN Line Connection Options DualCom’s PSTN connection requires an analogue telephone line (also called a POTS line). Where the analogue telephone line also carries ADSL (Broadband) signals refer to ADSL later in this section. Connecting other telecoms equipment IN PARALLEL to the analogue telephone line used by DualCom can stop the unit sending polling calls and alarm calls to an Alarm Receiving Centre.
- Page 30 PSTN Line Connection (DualCom ALONE on line) Your Telecom Service Provider should be asked to supply and fit an analogue line and an NTP with terminals near the alarm system. The alarm installer should then follow steps 1 & 2 below. See Fig 15 & 16. Series Connection (DualCom &...
- Page 31 PABX (Private Automatic Branch Exchange) A PABX is a telephone exchange in one business or building (where a dial 9 is needed for an outside line). It connects to one or more outside telephone lines and has two or more extentions within the business or building. See Fig 17. DualCom may be connected to one of the outside telephone lines where they are the analogue PSTN type.
- Page 32 PABX (Private Automatic Branch Exchange) PABX with Analogue extension Fig 18 ISDN (Integrated System Digital Network) The digital ISDN is a communication network where the line from the exchange and the service supplied to the subscriber is ‘digital’, i.e. not ‘analogue’. An ISDN line can carry several calls simultaneously.
- Page 33 Home Highway, Business Highway Home Highway or Business Highway is the marketing name for a ‘basic rate’ ISDN2 line supplied by BT with an NTE9 NTP. The NTE9 NTP provides two digital sockets, it includes an ISDN-Analogue con- verter and two analogue telephone sockets. This type of NTP can have an analogue phone, fax, modem etc.
- Page 34 ADSL (Broadband) digital data is allowed into them from the telephone line. The CSL CS0730 Security ADSL Filter is designed specifically for use with security systems. It includes spare terminals to aid wiring that are labelled ‘Pass Through’.
- Page 35 ADSL (Asynchronous Digital Subscriber Line) or ‘Broadband’ DUALCOM Serial PSTN Connection using the CS0730 Security ADSL Filter Fig 26 Why is a Broadband Filter necessary ? When ADSL (Broadband) digital data is supplied on a normal PSTN tele- phone line then an ADSL (Broadband) Filter must be fitted between that tele- phone line and each item of ‘non digital’...
- Page 36 System Power Supply and Battery DualCom requires a supply of 9.0 to 30.0 volts DC. At 12 volt supply, the quiescent current is 30mA. At 24 volt supply, the quiescent current is 15mA. Dualcom requires 100mA for the few seconds that it is activated. The CS5351 Expander Card and the CS5355 LAN(IP) Card requires a supply of 9.0 to 30.0 volts DC.
- Page 37 NVMs from other types of DualCom will not work in DualCom GPRS. The CS0054 Programmer for DualCom is available from CSL. This will read the DualCom’s operational parameters and the diagnostic information, e.g. received signal strength.
- Page 38 THIS SHEET LEFT INTENTIONALLY BLANK FOR EDITORIAL PURPOSES THE PREVIOUS PAGE = 42 THE NEXT PAGE = 47...
- Page 39 APPENDIX 1 LED Indications Status LEDs There are 4 Status LEDs next to the A & B buttons. See Fig 31 below. These LEDs indicate Call Progress, Faults and other activity on the Radio, LAN and PSTN paths. See Tables 14 to 21. The Radio Service LED indicates status of the GSM/GPRS radio module.
- Page 40 APPENDIX 1 LED Indications (continued) Yellow GSM Status LED (GSM & GPRS radio). See Fig 31, page 47. & i t c . s t v i t i t c l a i n i l v i t l a i n i l v i t...
- Page 41 APPENDIX 1 LED Indications (continued) Red PSTN Status LED (Telephone line). See Fig 31, page 47. i t c . s t v i t i t c l a i n i l v i t l a i n i l v i t .
- Page 42 APPENDIX 1 LED Indications (continued) Green LAN Status LED (Wired IP). See Fig 31, page 47. i t c . s t v i t i t c l a i n i l v i t l a i n i l v i t .
- Page 43 APPENDIX 1 A & B buttons & the 7 Segment Display The A & B buttons are used for setup and measurement functions. When no buttons are pressed for a 1 minute period, the display will automati- cally return to the received radio signal strength (FSSI) display. The DualCom 7-segment display has 3 distinct modes.
- Page 44 ‘tE’ = Speed-up the PSTN path failure detection and the radio path failure detection for 10 minutes. Press B button once = Display CSL (& end ‘tE’ mode) Press B button 3 times = Start the Test Call sequence. LED test Press B button once = Switch on all LEDs and all display segments for 1 second.
- Page 45 APPENDIX 1 The 7 Segment Display - Normal Mode - Program Menu B B B Program Menu - PSTN n flashing = PSTN disabled n on = PSTN enabled Press B button 3 times = Change PSTN state. B B B Program Menu - PABX A flashing = PABX disabled (no dial ‘9’...
- Page 46 APPENDIX 1 The 7 Segment Display - Normal Mode - Relay Menu Relay Menu - Fault Outputs Number flashing = Option not selected. Number on = Selected option. Press B button = Go to next option (1, 2, 3, 4), then... Press A button = Select the displayed option.
- Page 47 APPENDIX 1 The 7 Segment Display - Communication Mode Radio Communications (lower c display) Call to ARC. E.g. intruder, PA, open, close, test On radio path. Radio Communications (upper c display) Polling call. On radio path. Wired Communications (large C) Call to ARC.
- Page 48 APPENDIX 1 The 7 Segment Display - Power-up - Reset Mode 8. 8. Lamp Test & Software Version number At Power-up or Reset, Lamp Test. The display shows 8. 8. and all LEDs will be on for 1 sec. The Software Version Number is then displayed. E.g.
- Page 49 APPENDIX 1 Error Codes Where errors exist, Error Codes may be displayed. This will be the letter 'E' followed by a number. The sounder will beep with each digit. Where there are several errors then only the highest priority (the lowest E number) will be shown.
- Page 50 APPENDIX 1 Error Codes (continued) l l a y t l & l l a . t n t n I o i t & a t l . c t . c t o i t h t i i l p o i t o i t...
- Page 51 APPENDIX 1 Error Codes (continued) i f t e l l i n i i l l . r e l l a d i l , r e y t l o i t i h t y t l o i t &...
- Page 52 APPENDIX 1 99 error detected at Power-up/Reset (continued) If PSTN polling is enabled: there must be a PSTN polling number and a PSTN account number. If this fails PSTN Polling Service is disabled. If ALL of the above fail, and if any Polling Service is ticked in the NVM, and... if Polling was previously enabled, then an immediate E99 will occur.
- Page 53 APPENDIX 2 Input Connections There are 8 input terminals on DualCom (12 with the CS2351 and CS2355 Expanders). When DualCom is triggered, the voltages on the input terminals are 0 volts changing to a positive voltage, (normally +5 volts to +30 volts), or they may be a positive voltage changing to 0 volts.
- Page 54 APPENDIX 2 Input Connections (continued) Examples of ‘Positive Applied’ triggering Contact is ‘Normally Open’. Input is normally at 0 volts. When contact closes the input becomes +12 volts. Examples of ‘Positive Applied’ triggering Contact is ‘Normally Closed’. Input is normally at 0 volts. When contact opens the input becomes +12 volts.
- Page 55 APPENDIX 2 Input Connections (continued) Examples of ‘Positive Removed’ triggering Contact is ‘Normally Closed’. Input is normally at +12 volts. When contact opens the input becomes 0 volts. Examples of ‘Positive Removed’ triggering Contact is ‘Normally Open’. Input is normally at +12 volts. When contact closes the input becomes 0 volts.
- Page 56 APPENDIX 2 Input Connections (continued) Input Learning To aid installation, DualCom can learn the quiescent state of its inputs, i.e. the ‘non-active’ state. ‘Non-active’ means that the voltage on the alarm inputs are in the ‘not in alarm’ condition and open/close inputs are in the ‘open/unset/day’ condition.
- Page 57 APPENDIX 3 Plug-on Footprint ‘Plug-on’ pins are mounted on some Control Panels for connection to commu- nication devices. The pins are fitted on a plastic spacer, 0.156 inches (3.96mm) pin centre to centre. There are two rows of 8 pins spaced apart by 4.25 inches (108mm) pin centre to centre.
- Page 58 APPENDIX 4 Specification Models CS2300-R Stand Alone CS2301 Plug-on (CS2300-R + CS2325) Dimensions (h x w x d) 95 x 125 x 25 mm Weight 250 grams Temperature -20C to +60C transit, -10C to +50C operating Humidity 0 - 80% non-condensing Mounting Any orientation Warranty...
- Page 59 APPENDIX 4 Specification (continued) Standards: Suitable for use in alarm systems complying to: Security Grade EN50136 Security Grade 1,2,3 & 4 ATS Classification EN50136 ATS classification 4 & 5 ATS 4 parameters: D2 M2 T3 S1 I2 ATS 5 parameters: D3 M3 T4 S2 I3 Environmental EN50136 Environmental classifications 1 &...
- Page 60 APPENDIX 5 European PSTN Approval The CS2300 range of DualCom products meet the requirements of the EU PSTN standard CTR21 and is approved for connection to any exchange line forming part of a Public Switched Telephone Network (PSTN). AHCTR210 001 Declaration of Network Compatibility The equipment has been approved in accordance with Council Decision 98/ / EC ( 5 ) for pan-European single terminal connection to the Public Switched...
- Page 61 APPENDIX 6 Glossary of Terms ADSL Asynchronous Digital Subscriber Line A ‘wideband’ digital communication service from a network provider to a subscriber that carries a high volume of digital data, most commonly for internet access. Sometimes called ‘Broadband’. An ADSL service is often provided with a simultaneous analogue PSTN service on a Hybrid line.
- Page 62 APPENDIX 6 Glossary of Terms (continued) Digital PSTN Digital Public Switched Telephone Network. The digital national telephone system. Service is available to customers on twisted-pair wires that may carry a DC supply provided from the network telephone exchange, on optical fibre or other digital transmission medium. The digital service may be in ISDN format or another digital format.
- Page 63 APPENDIX 6 Glossary of Terms (continued) ISDN Integrated Services Digital Network A digital communication network where services are provided via electrical or optical cables. This may also be a digital PSTN. The network is usually provided as a 2 channel or 30 channel ISDN service. Local Area Network A digital communication network within buildings where services are pro- vided via wired electrical or optical cables, or by radio (WiFi).
- Page 64 WEB SITE The CSL Internet Web Site The CSL web site: http://www.csldual.com contains the latest copies of all manuals for all CSL products. Please ensure that you are working from the latest version. You can also download associated information and software samplers.
- Page 65 CSL DualCom Limited Tel: +44(0) 1895 474 474 Fax: +44(0) 1895 474 440 Email: sales@csldual.com Website: http://www.csldual.com Technical Support Desk Tel: +44(0) 1895 474 444 Fax: +44(0) 1895 474 440 Email: support@csldual.com Hours: 08.00 to 18.00 weekdays 09.00 to 16.00 Saturday...
Need help?
Do you have a question about the GradeShift and is the answer not in the manual?
Questions and answers