Table of Contents
Advertisement
Quick Links
Advertisement
Table of Contents

Related Manuals for Drobo 5C


Summary of Contents for Drobo 5C
- Page 1 Drobo 5C Getting Started Guide...
-
Page 2: Table Of Contents
2.6 Formatting drives ......................... 24 2.6.1 Selecting a file system and volume size ......................24 2.6.2 Formatting drives for your Drobo 5C ......................25 2.7 Using Drobo 5C with Time Machine or backup software ............28 2.7.1 Overview ...................................28 2.7.2 Creating a backup volume ..........................28 2.8 Safely shutting down your Drobo 5C ................... - Page 3 3.3 Using online user guide ....................... 33 3.4 Using context-sensitive help ......................33 3.5 Using knowledge base ......................... 33 3.6 Registering your Drobo 5C ......................34 3.7 Getting technical support ......................34 3.8 Guide to meaning of indicator lights (LEDs) ................35 3.8.1 Indicator light messages ............................35...
-
Page 4: 1: Before You Begin
1: Before You Begin Before you begin to set up your Drobo 5C, it is recommended to check the operating system and hardware requirements. This section covers the following topics: Product features at a glance Checking box contents ... -
Page 5: Checking Box Contents
Figure 2: Back view of Drobo 5C 1.2 Checking box contents Ensure that your product's box contains all the components listed below. Drobo 5C 3.3 ft. (1 m) USB Type A to Type C cable 6.6 ft. (1.8 m) power cord with power adaptor ... -
Page 6: Operating Systems Supported
1.3.2 Connectivity interface supported Your Drobo 5C device has USB 3.0, Type C interface. Drobo provides USB Type A to Type C cable with the device. Depending on the model of your computer, it may have USB Type A or Type C interface. You have to buy a Type C to Type C cable if your computer has a Type C interface. -
Page 7: Selecting Drives
For a performance comparison of these options, see the following illustration. Notes: - If an incompatible SSD is inserted into the Drobo 5C, the drive light will blink red, indicating the need to replace that drive. Please refer to our web page on compatible drive options for more information. -
Page 8: Determining Drive Space Requirements
1.4.3 Determining drive space requirements In order to protect your data from drive failure, your Drobo 5C requires more space than what you will use for your data. It may, sometimes, use as much as double or more the amount of space. -
Page 9: 2: Setting Up Drobo 5C
Drobo 5C. Note: Once you insert the drives into your Drobo 5C, they function as a unit or “pack.” To access the data on them, you will need the entire pack. -
Page 10: Connecting Usb And Power Cables
(LEDs). 2.2 Connecting USB and power cables After inserting the drives into your Drobo 5C, you are ready to connect the power and data cables on your Drobo 5C. 2.2.1 How to connect USB and power cables You can connect the Drobo 5C directly to your computer using the USB port. -
Page 11: Installing Drobo Dashboard
2. Plug the other end of the cable into your host computer. 3. Connect the power supply to the power connection at the back of your Drobo 5C. 4. Connect the other end of the power supply to a power source. - Page 12 2. After downloading, double-click the Drobo Dashboard Installer to launch it. 3. A pop up will appear asking you to choose the language for installation. Select the language of your choice and click OK. 4. The Drobo Dashboard Installer (or Installation Wizard) will appear.
- Page 13 10. The Drobo Dashboard application launches and you will be prompted to register your Drobo 5C. You can either register the Drobo 5C or skip the step and register it later. Select an option based on you preference. The serial number is printed on the compliance label at the bottom of the device.
- Page 14 We highly recommend to register your product in order to obtain support. 11. Click the Next button to view the All Drobos page. After a few seconds, Drobo "discovers" all Drobo devices currently connected and displays them on this page.
-
Page 15: How To Install Drobo Dashboard On Mac
After the Drobo Dashboard launches, you may be asked if Drobo can collect anonymous information on your usage. Click Yes or No, as desired. 12. If you have no Drobo device connected to the computer or powered on, a "No Drobos Detected" message displays until you do. - Page 16 5. The Firewall Warning page appears. Click Continue. 6. Next, the Installation Wizard page appears. Click Continue to proceed. Drobo 5C Getting Started Guide...
- Page 17 8. After choosing the desired language, Click Continue. A dialog box will appear asking you to Agree or Disagree the terms of the license agreement. Click Agree to proceed. Drobo 5C Getting Started Guide...
- Page 18 11. You will be prompted to enter the administrator password. Enter the password and click Install Software. 12. Then, you will be prompted to restart your computer in order to complete the installation. Click Continue Installation to proceed. Drobo 5C Getting Started Guide...
-
Page 19: Updating Your Drobo 5C To The Latest Firmware
14. Once the computer restarts, launch the Drobo Dashboard application. 15. The application will prompt you to register your Drobo 5C. You can either register it or skip the step and register it later. Select an option based on you preference. - Page 20 - The Drobo 5C device will not be usable until you have upgraded the firmware. - If you are a first-time Drobo user, then install the latest version of Drobo Dashboard. If you are an existing Drobo user and have a Drobo Dashboard version earlier than 2.8.2 installed, then you must follow the instructions to uninstall Drobo Dashboard prior to installing the latest version.
-
Page 21: Registering Your Drobo 5C
Guide to meaning of indicator lights (LEDs). 2.5 Registering your Drobo 5C If you did not register your Drobo 5C during setup, then you register it from the Drobo Dashboard. Note: Make sure you are connected to the Internet before performing this action. - Page 22 3. In the Drobo Registration area, click the Register my Drobo devices link. This opens the Registration page. 4. Do one of the following: Drobo 5C Getting Started Guide...
- Page 23 If you do not have a Drobo account, click the Create a new Drobo account link. The Login page opens in your web browser. Then, click the Create an Account button to open the Signup page. Enter the required information and create your account, and then return to this step to log in to your account.
-
Page 24: Formatting Drives
2.6.1 Selecting a file system and volume size When you turn on your Drobo 5C, you will be prompted to format the drives in your Drobo 5C with a particular file system. The file system formats available to you depend on your operating system. (See Figure 3 below.) -
Page 25: Formatting Drives For Your Drobo 5C
Ignore, as appropriate, and continue with the formatting procedure from the Drobo Dashboard. To format the drives: 1. Double-click on the Drobo 5C icon on the All Drobos page in the Drobo Dashboard. A message appears asking if you would like to format the device. - Page 26 3. Then, click the Next button. This opens the Volume Name page (see image below). 4. If applicable, from the Drive Letter drop-down list, select the drive letter to assign to the volume. 5. In the Name text box, modify the default name for the volume as you like. Drobo 5C Getting Started Guide...
- Page 27 9. Click the OK button. The newly created volume will appear under the Volumes tab for your Drobo 5C. Important Note: The Drobo Dashboard automatically assigns “Drobo” as the default name for your Drobo 5C, which you can rename later. Drobo 5C Getting Started Guide...
-
Page 28: Using Drobo 5C With Time Machine Or Backup Software
Drobo volume. Having this dedicated, fixed-size backup volume will prevent backup software from filling your main Drobo volume with daily backups. Follow these steps: 1. Open the Drobo Dashboard, and wait for your Drobo 5C to appear under in the All Drobos page. 2. Double-click the image of your Drobo 5C. - Page 29 6. Click OK button. 7. When you see the "Confirm Restart" dialog, take a moment to stop any activity on the Drobo 5C, because it must restart. When you are ready, click Yes to continue. 8. Wait until you receive the message that "Volume management changes have been made successfully,"...
-
Page 30: Safely Shutting Down Your Drobo 5C
2.8 Safely shutting down your Drobo 5C If you plan to shut down your Drobo 5C for any reason, it is very important that you always do so safely. Improper Drobo device shutdowns may cause file corruption and/or data loss. -
Page 31: 3: What To Do Next
Drobo 5C has shut down. 3: What To Do Next Once you set up the Drobo 5C device and start to use it, we recommend you to read the following topics to understand the different ways to enhance the performance of the device. -
Page 32: Using Best Practices For Protecting Data
Photographers, Here’s A Bulletproof Backup Method Using Drobo. Important Note: To help protect your data, if you are unsure on how to proceed when using your Drobo 5C, it is very important that you review the Online User Guide for your product, review our... -
Page 33: Using Online User Guide
3.3 Using online user guide After you have set up your Drobo 5C, you are ready to use it to store and back up data. To learn how to manage and use your Drobo 5C, refer to the Online User Guide for your product available at the Drobo 5C page. -
Page 34: Registering Your Drobo 5C
Drobo Support page. 3.6 Registering your Drobo 5C If you did not register your Drobo 5C during setup, you can do so from the Drobo Dashboard. For more information on registering your Drobo 5C, see Registering your Drobo 3.7 Getting technical support... -
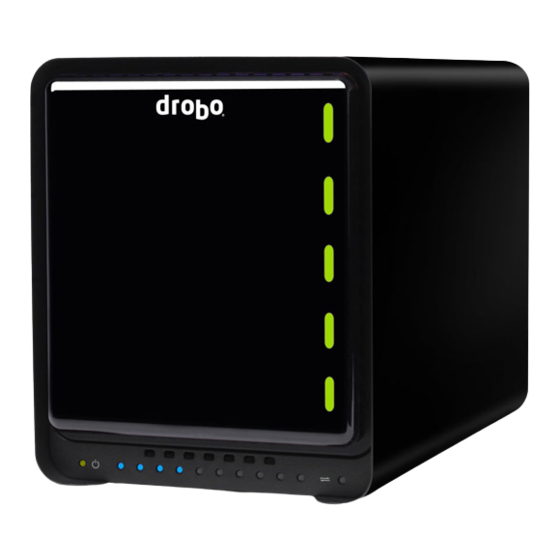
Page 35: Guide To Meaning Of Indicator Lights (Leds)
3.8 Guide to meaning of indicator lights (LEDs) Your Drobo 5C provides a variety of status information via its indicator lights, as described in the table below. 3.8.1 Indicator light messages Light Color Meaning Drive Bay Green (solid) Drive is healthy. No action required.
Need help?
Do you have a question about the 5C and is the answer not in the manual?
Questions and answers