Sign In
Upload
Download
Table of Contents
Contents
Add to my manuals
Delete from my manuals
Share
URL of this page:
HTML Link:
Bookmark this page
Add
Manual will be automatically added to "My Manuals"
Print this page
×
Bookmark added
×
Added to my manuals
Manuals
Brands
Motorola solutions Manuals
Radio
APX P25 Mobile
User manual
Motorola solutions APX P25 Mobile User Manual
Two-way radio
Hide thumbs
1
2
3
4
5
6
7
8
9
10
11
12
13
14
15
16
17
18
19
20
21
22
23
24
25
26
27
28
29
30
31
32
33
34
35
36
37
38
39
40
41
42
43
44
45
46
47
48
49
50
51
52
53
54
55
56
57
58
59
60
61
62
63
64
65
66
67
68
69
70
71
72
73
74
75
76
77
78
79
80
81
82
83
84
85
86
87
88
89
90
91
92
Table Of Contents
93
page
of
93
Go
/
93
Contents
Table of Contents
Bookmarks
Table of Contents
Read Me First
What Your Dealer/System Administrator Can Tell You
Radio Care
Cleaning Your Radio
Battery Recycling and Disposal
Radio Overview
Assignable Radio Functions
Getting Started
Attaching and Removing the Battery
Removing the Antenna
Attaching the Accessory Connector Cover
Charging the Radio
Turning off the Radio
Adjusting Display Brightness
Setting the Clock
Keyboard Overview
Home Screen
Status Indicators
LED Indications
General Radio Operation
Scan Lists
Making a Dynamic Priority Change (Conventional Scan Only)
Restoring a Nuisance Channel
Selecting a Zone
Selecting a Channel
Accessing the Radio Information
Viewing the Control Assignments
Checking Device Status
Selecting a Radio Profile
Emergency Operation
Emergency Keep-Alive
Secure Operations
Smart Connect
Creating Waypoints
Editing Waypoints
Managing Waypoints
Contacts Tab
Searching Contacts
Creating New Contacts
Viewing Contact Details
Managing Contacts
Instant Recall
Viewing Messages
Deleting All Messages
Composing and Sending a New Text Message
Sending a Quick Text Message
Sending a Group Message
Voice Announcement
Radio Inhibit
Conventional Squelch Operation
Using the PL Defeat Feature
Smart PTT (Conventional Only)
Trunking System Controls
Dynamic Regrouping (Trunking Only)
Requesting a Reprogram
Declaration of Conformity
Important Safety Information
FCC Licensing Information
Non-Commercial Call Channel
Operating Frequency Requirements
Limited Warranty
General Provisions
Patent and Software Provisions
Governing Law
For Australia Only
Advertisement
Quick Links
1
Read Me First
2
Radio Overview
3
Home Screen
Download this manual
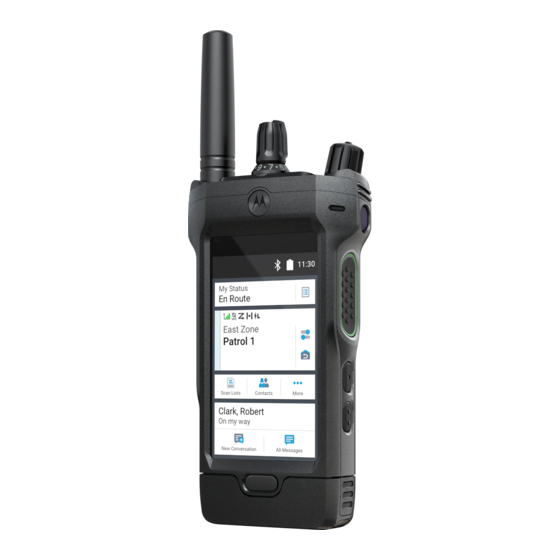
APX
P25 Mobile
™
Two-Way Radio
™
APX NEXT
APX NEXT™XE
User Guide
OCTOBER 2020
*MN005642A01*
MN005642A01-AG
©
2020 Motorola Solutions, Inc. All rights reserved
Table of
Contents
Previous
Page
Next
Page
1
2
3
4
5
Advertisement
Table of Contents
Need help?
Do you have a question about the APX P25 Mobile and is the answer not in the manual?
Ask a question
Questions and answers
Related Manuals for Motorola solutions APX P25 Mobile
Radio Motorola solutions ASTRO APX E5 Quick Reference Manual
Control head mobile radio (82 pages)
Radio Motorola solutions ASTRO APX E5 CONTROL HEAD Quick Reference Manual
(8 pages)
Radio Motorola solutions SNO911 Quick Reference Card
(2 pages)
Radio Motorola solutions APX 900 User Manual
(128 pages)
Radio Motorola solutions APX NEXT User Manual
Two-way radio (93 pages)
Radio Motorola solutions APX 1000 User Manual
(110 pages)
Radio Motorola solutions APX6500 O5 Quick Reference Card
Steuben county ny (2 pages)
Radio Motorola solutions APX4500 O2 Quick Reference Card
Steuben county ny (2 pages)
Radio Motorola solutions APX N70 Quick Start Manual
(8 pages)
Radio Motorola solutions APX NEXT XN Quick Start Manual
(29 pages)
Radio Motorola solutions ATS 2500p User Manual
(88 pages)
Radio Motorola solutions MTP3500 Feature User Manual
(151 pages)
Radio Motorola solutions MTP3000 Feature User Manual
(163 pages)
Radio Motorola solutions MTP3550 Feature User Manual
(158 pages)
Radio Motorola solutions ST7500 Basic Service Manual
(104 pages)
Radio Motorola solutions MINITOR 7 Quick Reference Manual
(12 pages)
This manual is also suitable for:
Apx next
Apx next xe
Table of Contents
Save PDF
Print
Rename the bookmark
Delete bookmark?
Delete from my manuals?
Login
Sign In
OR
Sign in with Facebook
Sign in with Google
Upload manual
Upload from disk
Upload from URL


Need help?
Do you have a question about the APX P25 Mobile and is the answer not in the manual?
Questions and answers