Table of Contents
Advertisement
Advertisement
Table of Contents

Related Manuals for Plustek eScan A350


Summary of Contents for Plustek eScan A350
- Page 1 ® eScan Square9 Global Search Network Scanner User’s Guide...
- Page 2 Trademarks © 2020 Plustek Inc. All rights are reserved. No portion of this document may be reproduced without permission. All trademarks and brand names mentioned in this publication are property of their respective owners. Liability While all efforts have been made to ensure the accuracy of all contents in this manual,...
-
Page 3: Table Of Contents
Table of Contents ......................1 VERVIEW How to Use This Guide ..................... 1 Conventions of This Guide ..................2 A Note about Icons ....................... 2 Safety Precautions ....................3 Box Contents ......................4 Scanner Overview ..................... 5 Network Environment ....................6 I. - Page 4 Device Information ....................30 TIFF Filename extension ..................31 TWAIN(Win) *** must update software version *** ..........31 Administrator Management ..................32 Remote Setting ....................... 33 II. S ..................34 HAPTER CANNING Preparing Documents ..................... 34 Checking Document Conditions ..................34 Loosening Documents ......................
-
Page 5: Overview
VERVIEW Thank you for choosing us as your scanner supplier. Like all of our products, your new scanner is thoroughly tested and backed by our reputation for unsurpassed dependability and customer satisfaction. We hope you will continue to turn to us for additional quality products as your computing needs and interests grow. -
Page 6: Conventions Of This Guide
Chapter I describes how to install and configure the scanner. Chapter II describes how to use your scanner. Chapter III describes how to maintain and clean your scanner. Chapter IV contains technical support information that can help you solve simple problems. -
Page 7: Safety Precautions
AFETY RECAUTIONS Before using this device, please read the following important information to eliminate or reduce any possibility of causing damage and personal injury. Warning 1. Usage, the product is for indoor use in dry locations. Moisture condensation may occur inside this device and cause malfunction at these conditions: ... -
Page 8: Box Contents
ONTENTS 1. Scanner 2. Power Cable 3. AC Adapter 4. Paper Chute 5. Quick Guide 6. Application CD-ROM 7. Calibration Sheet Save the box and packing materials in case you need to transport this scanner in the future. -
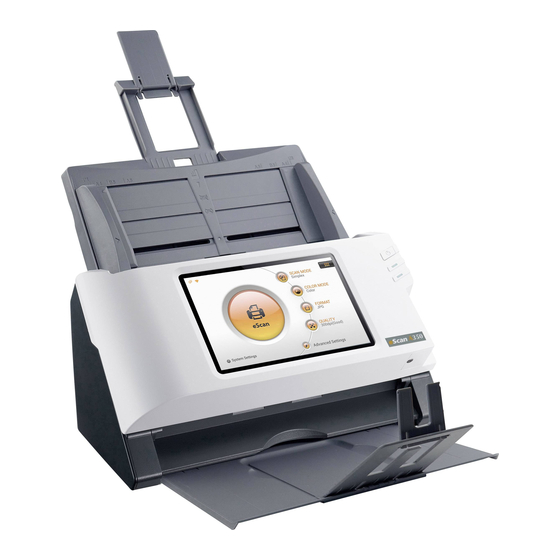
Page 9: Scanner Overview
CANNER VERVIEW 1. STACKER—Keeps the paper in place. Extend it in case of longer paper. 2. PANEL UNIT—ADF cover with the touch panel. 3. TOUCH PANEL—Use this touch panel to operate the scanner. 4. PANEL UNIT OPEN LEVER—Opens the panel unit. Pull it to open the panel unit when you need to clear paper jam or clean the scanner. -
Page 10: Network Environment
13. POWER SWITCH—Use this to turn the scanner ON or OFF. 14. POWER RECEPTOR—Connects the scanner to a standard AC power outlet by the included AC adapter. 15. ETHERNET PORT—Connects the scanner to a port on the Ethernet hub by the Ethernet cable. -
Page 11: Chapter I. Installing The Scanner
A list of the package contents is provided in the “Box Contents” section of this guide. NSTALLING AND ETTING UP THE CANNER Please follow the step-by-step procedures described below to install the Plustek scanner. Choose a Proper Site First! Always place your scanner on a level,... -
Page 12: Step 1. Installing The Paper Chute
Step 1. Installing the Paper Chute 1. Open the panel unit by pulling the lever, and get the paper chute ready. Panel unit open lever Panel unit 2. Install the paper chute by aligning and inserting the tabs of the paper chute into their slots on the scanner. -
Page 13: Step 2. Connecting The Scanner
Step 2. Connecting the Scanner Please make sure the scanner is turned OFF before you plug or unplug the scanner power Attention adapter. 1. Plug the AC adapter into the scanner’s power receptor 2. Attach the power cable to the AC adapter. 3. -
Page 14: Ain Creen
CREEN Configurations Create accounts, job buttons and scanning profiles, as well as configure system settings. Job Button Job buttons created are displayed directly on the interface. Each page contains six job buttons, each group contains a maximum of twelve buttons. Swipe right/left to view and access. -
Page 15: Create A New Job Button
REATE A NEW JOB BUTTON Select the login method and add an account by tapping on and enter information as shown on ‘New Account’ interface. Accounts created are show on ‘Select Account’ menu Add job Create job buttons, by tapping on ⊕ button. Enter Job Name, Group (or Owner), and optional password can be setup for button access control. - Page 16 Return to the job button interface to edit settings at any time. Duplicate Job Button Rename Job Button Edit Job Settings Delete Job Button...
-
Page 17: Scan Settings
ETTINGS Tap the checkbox in the ‘Selectable’ column to enable the respective settings adjustable in the user’s/Operator’s interface. User/Operator can adjust the selected scan settings from the administrator view in the User’s/Operator’s interface prior to each scanning batch. Note: ... -
Page 18: Scan Mode
Enable Date / Time/ Serial Number to display the date in the file name. Select the desired format of Date / Time/ Serial Number in the following dialog. Note: Please make sure there is an active internet connection before you power on the scanner. The scanner requires access to the internet to set the device date and time. -
Page 19: Color Mode
Color Mode Switch Color Mode in the popup dialog. Available color modes: Color, Gray and Black & White. Tap the OK button to confirm the settings and to exit this dialog. Select Color to scan color documents. Color scan produces the largest file size. ... -
Page 20: Format
Format Select the file saving format in the popup dialog. Available file formats: JPG, PDF, TIFF, PNG, Multi-Page PDF and Multi-Page TIFF. Tap the OK button to confirm the settings or tap Cancel to exit this dialog. Tap to enable PDF/A function to preserve the static visual appearance of electronic documents over time, which are self-contained, self-describing, and more device- independent. -
Page 21: Brightness
Brightness Brightness is the overall lightness of the image. Move the slider left or right to darken or lighten the image. Adjusting the brightness level adjusts the tone of the pixels, without changing the true color of the pixels. Contrast Contrast refers to the differences between the light and dark portions in the image. -
Page 22: Split Pdf/Tiff
Note: When scanning Black & White we strongly recommend the transparency setting to be set at 150%. Color of the image overlay will correspond to your scanning color mode. Please adjust transparency of the image accordingly. Split PDF/TIFF Output file in Multi-PDF/Multi-TIFF can be split (divided) by enabling one of the following methods: ... -
Page 23: Blank Page Removal
Blank Page Removal Switch on this function to remove blank pages after the document is scanned. Adjust the Sensitivity level left or right from the slider. The higher the sensitivity, the more scanned pages will be treated as blank pages and removed. Fill Edges Enable Fill Edges (aka, edge filler), to automatically fill the shadow or streaks around the edge of the scanned image. -
Page 24: Double Feed Detection
Double Feed Detection Enable Double Feed Detection, allows the network scanner to automatically stop when it detects multiple documents have been fed through the scanning passage at the same time. User can continue scanning after resorting the documents or save the pages that have already been digitalized. -
Page 25: Auto Density
brightness level. As the gamma value is adjusted higher, the tone curve bends and the highlights of the image are expanded, lightening the highlights without overall lightening the image with white as seen with raising the brightness level. Auto Density Enable Auto Density, allows the network scanner to automatically adjust the image density to the optimal that best suited to the quality of the original. -
Page 26: Aving Destination
AVING DESTINATION Enable and configure scan destination; depending on your provider, number of available destination may vary accordingly. Enable/Disable Button ® AVE TO QUARE LOBAL EARCH ® Choose save to Square9 GlobalSearch Setup the host, username and password. Host Enter your host IP address or domain name For example: 59.59.59.159 or example.mysquare9.com... -
Page 27: Save To Usb
AVE TO Enable ‘USB’ as your scan to destination. Tap on to configure. Enable save to USB > to configure > Select the destination to save scan images. -
Page 28: Save To Share Folder (Smb/Cifs)
You can choose the folder or manually type your path. *If your folder sets as a hide folder, you need to manually type your path. Import Profile (Azure SMB File Share) *You need to have a Microsoft Azure account. See the link. http://plustek.com/us/products/network-scanners/smbazure.html... -
Page 29: System Settings
YSTEM SETTINGS System settings allows you to configure network scanner’s Internet connection (WiFi/Ethernet), adjust, duplicate, import/export device settings, as well as enable administrator management rights. Alteration should be kept protected (for more info refer Administrator Management section). I AND THERNET ... - Page 30 There will be a mark showed on the upper-left corner of the main screen, you may use this eScan as a portable Information hotspot. Static IP Settings Tap on Ethernet and Static IP Settings to configure static IP settings. Select the Use static IP option and enter the IP address, Gateway, Netmask, DNS 1 and/or DNS 2.
- Page 31 To setup the duration of time before the touch screen display goes to "sleep", please refer to the System Settings --> General --> Power Saving Information for setup. Security Settings To set up screen security, please tap on the security section. You may set screen lock by pattern or by password.
-
Page 32: Calibration
Tap on More Settings > Display > Sleep to open the Sleep dialog, select the desired time period. ALIBRATION Calibrate the scanner if colors appear in areas that should be white, or original document varies in color from the scanned image. By calibrating the scanner, it allows you to adjust and compensate for variations that can occur in the optical component over time by its nature. -
Page 33: Update
PDATE Tap on ‘Update’ to check if you are running on the latest software. The scanner will automatically download and guide you through, if connected to the Internet; if no updates are available, you’ll be prompt with a message as well. XPORT ETTINGS Administrator can export device settings, and replicate the settings to other devices. -
Page 34: Clear All Settings
LEAR ETTINGS Tap on ‘Clear All Settings’ to clear all user data, reset all settings to factory settings. EVICE NFORMATION Tap on ‘Device Information’ to display device related information. You may modify the device name here. -
Page 35: Tiff Filename Extension
TIFF F ILENAME EXTENSION You may select TIFF filename extension here. Tap on ‘Configuration’ ‘System Settings’ ‘TIFF Filename extension’ to select the desire setting. TWAIN(W MUST UPDATE SOFTWARE VERSION If you want to use the TWAIN interface of the eScan, you have to install the Network Twain Finder on your computer. -
Page 36: Administrator Management
DMINISTRATOR ANAGEMENT Administrator can have more control on the network scanner device by activating password protection on the settings menu (Configuration/ System Settings/ Add Accounts) Configuration → System Settings→ To enable administrator management, tap on Administrator Management ... -
Page 37: Remote Setting
EMOTE ETTING Plustek eScan SharePoint remote setting is an application that can conveniently allow IT personnel remotely support eScan in other locations via browsers on computer or smartphones. eScan remote setting feature connections, with proprietary Plustek server, is highly encrypted and thus protected from being accessed by third parties. -
Page 38: Chapter Ii. Scanning
II. S HAPTER CANNING REPARING OCUMENTS Proper document preparation prior to the scan can prevent paper feed errors and damages to the scanner. Checking Document Conditions Loosening Documents Checking Document Conditions Make sure the size and ream weight of your documents are acceptable by the scanner. -
Page 39: Loosening Documents
However, don’t use the ADF to scan documents if they meet any of the following conditions: Paper lighter than 40 g/m (12 lb.) or heavier than 157 g/m (40 lb.) Paper with clips or staples attached Paper with inconsistent thickness, e.g., envelops ... -
Page 40: Placing Documents
This will allow documents being fed into the ADF one at a time and prevent paper- feeding errors. LACING OCUMENTS 1. Load the documents, headfirst and face down, toward the center of the ADF paper chute and all the way into the ADF until touching the bottom. For single-sided scans, load the documents face down so that the side to be scanned faces towards the paper chute. -
Page 41: Placing Business Cards
3. Adjust the paper width slider for the paper size you are using. The paper width slider should be gently touching both sides of the documents. DO NOT load more than 50 sheets of paper (70 g/m , 18 lb.) to the ADF. ... -
Page 42: Placing Plastic Cards
Make sure the business cards you wish to scan are horizontally loaded into the ADF. Do not load more than 30 business cards in a Attention batch. LACING LASTIC ARDS Please disable the Double Feed Detection function in the Advanced Settings. The plastic card can be embossed credit card, driver license, ID card, insurance card, medic-care card or any membership card. - Page 43 Make sure the plastic cards you wish to scan are horizontally loaded into the ADF. Maximum thickness of each plastic card is 1.2 Attention...
-
Page 44: Scanning Documents
CANNING OCUMENTS Tap on any of the job button on the main menu to start scanning. If the respective job button have any ‘Selectable’ scan settings selected, the relevant interface will display on the panel for user to modify or make adjustments. Tap on Next > to continue to the next step. - Page 45 After editing, tap on Next > to continue. You maybe prompt to enter information such as the database and archive folders you wish to upload to, if it was made as ‘Selectable’ during configuration. Indexing of each batch of scan document will be prompt on the panel.
-
Page 46: Chapter Iii. Care And Maintenance
III. C HAPTER ARE AND AINTENANCE Your scanner is designed to be maintenance-free. However, constant care and maintenance can keep your scanner working smoothly. LEANING THE CANNER Paper powder, dust, ink and toner from paper being scanned may make the inner ADF dirty, which leads to poor image quality or document-feeding errors. -
Page 47: Cleaning The Adf
Cleaning the ADF 1. Open the panel unit by pulling the lever. Panel unit open lever Panel unit 2. Gently wipe the following areas with the cloth dampened with the cleaner. Be careful NOT to scratch their surfaces. Clean Feed Roller: Wipe the Feed Roller from side to side and then rotate it. - Page 48 Clean Pad Module: Wipe the Pad Module from top to bottom (in the direction of arrow shown in below picture). Be careful not to damage the pick springs of the pad. Clean ADF Glass: Do not spray cleaner directly onto the scanner glass.
-
Page 49: Replacing Consumables
4. Close the panel unit by pushing it back down until it snaps back into place. EPLACING ONSUMABLES As a guideline, it is recommended to replace the pad module every 50000 sheets of scans (A4, 70 g/m or 18 lb.), and it is recommended to replace the feed roller every 300000 sheets of scans (A4, 70 g/m or 18 lb.). - Page 50 2. Remove the pad module by pinching both sides of the pad module and pull it out. 3. Install the new pad module by inserting the tabs on the module onto their slots on the scanner. 4. Close the panel unit by pushing it back down until it snaps back into place.
-
Page 51: Replacing The Feed Roller
Replacing the Feed Roller 1. Open the panel unit by pulling the panel unit open lever. Panel unit open lever Panel unit 2. Remove the paper chute by pinching both sides of the handles on the paper chute to remove it. 3. - Page 52 4. Install the new feed roller by aligning and inserting the feed roller onto the roller pitman on the scanner.
- Page 53 5. Install the paper chute by aligning and inserting the tabs of the paper chute into their slots on the scanner. 6. Close the panel unit by pushing it back down until it snaps back into place.
-
Page 54: Chapter Iv. Troubleshooting
IV. T HAPTER ROUBLESHOOTING If you encounter problems with your scanner, please review the installation and scanning instructions contained in this guide. LEARING APER If a paper jam in the ADF happens, please perform the following steps: 1. Remove any unjammed documents still loaded into the ADF. 2. - Page 55 Do not try to pull jammed or half-scanned documents out of the ADF without first opening the panel unit. Doing so may permanently Attention damage the ADF. 4. Close the panel unit by pushing it back down until it snaps back into place.
-
Page 56: Appendix A: Specifications
A: S PPENDIX PECIFICATIONS eScan A350 Image Sensor CIS x 2 Light Source Optical Resolution 600 dpi Hardware Resolution 600 x 600 dpi 50 sheets (70 g/m², 18 lbs) ADF Capacity Note: Maximum ADF capacity varies, depending upon paper weight. -
Page 57: Service & Support Information
ERVICE AND ARRANTY Please visit our website www.plustek.com for more customer service information. For further assistance, visit our website or call our customer support phone number listed on the website. One of our representatives will be happy to assist you from Monday through Friday in office working hours. - Page 58 The manufacturer warranty includes all parts and labor, and is not valid without the receipt of original purchase. To obtain warranty service, you may contact the authorized dealer or distributor, or visit our website to check out the available service information, or send a request via E-mail for further help.
-
Page 59: Federal Communication Commission Interference Statement
EDERAL OMMUNICATION OMMISSION NTERFERENCE TATEMENT Note: This equipment has been tested and found to comply with the limits for a Class B digital device, pursuant to part 15 of the FCC Rules. These limits are designed to provide reasonable protection against harmful interference in a residential installation. This equipment generates, uses and can radiate radio frequency energy and, if not installed and used in accordance with the instructions, may cause harmful interference to radio communications. - Page 60 Plustek Inc. www.plustek.com All rights reserved. The information and specifications contain in this document are subject to change without notice. For further details, please consult your local distributors or email us at sales@plustek.com...
Need help?
Do you have a question about the eScan A350 and is the answer not in the manual?
Questions and answers