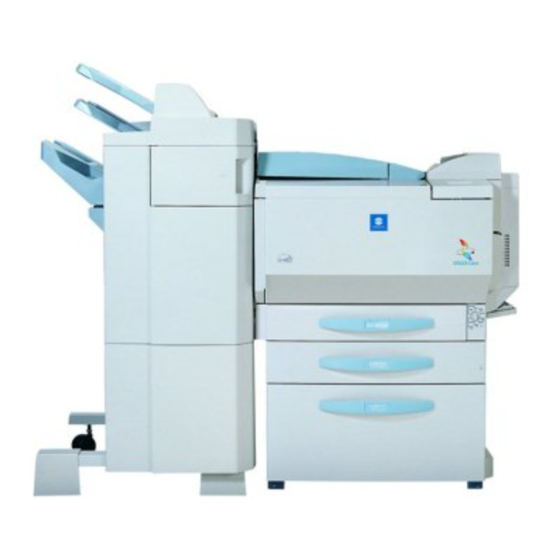
Minolta DiALTA Color CF2002 Operation Manual
Hide thumbs
Also See for DiALTA Color CF2002:
- Service manual (298 pages) ,
- User manual (162 pages) ,
- Advanced information (496 pages)

Related Manuals for Minolta DiALTA Color CF2002


Summary of Contents for Minolta DiALTA Color CF2002
- Page 1 Operations Guide [ Enlarge Display mode ] CF2002/CF3102 Before Making Copies Basic Copy Operations Copy Paper Original Documents Specifying Copy Settings Job List Screen...
-
Page 2: Table Of Contents
Contents Contents The topics listed below are described in the Enlarge Display Mode Operation Guide. Note The descriptions in this guide show sample screens with inch measurements. The same setting in screens with metric mea- surements can be specified using the same pro- cedure. - Page 3 Contents To raise the angle of the control panel..........1-11 1.5 Touch Panel ........1-12 Description of the Standard-Sized Screen ..........1-12 Description of the Enlarged Display Screen ..........1-12 Initial Mode of the Enlarge Display Screen ..........1-13 Operating the Touch Panel ....1-13 Keys That Appear in the Screen ..
- Page 4 Contents To make an reduced copy of the document..........2-10 To reduce paper use ......2-12 To copy a postcard......2-16 2.3 Stopping/Restarting/ Deleting a Print Job......2-21 To stop a print job.......2-21 To restart a print job ......2-21 To delete the stopped print job...2-22 2.4 Interrupting a Copy Job....2-24 3 Copy Paper 3.1 Specifying the Paper Size....3-2...
- Page 5 Contents 5 Specifying Copy Settings 5.1 Selecting the Color Setting ....5-2 To select the Color setting....5-2 5.2 Selecting Finishing Settings .... 5-3 To specify Finishing settings ....5-4 5.3 Specifying a Zoom Setting ....5-6 To specify a Zoom setting ....5-7 To specify a zoom ratio .......
- Page 6 Contents To select a Screen Pattern setting ..5-24 To select the Background, Density and Text Enhancement settings..5-25 5.8 Checking the Settings......5-27 To check the settings ......5-27 To change the settings .......5-29 6 Job List Screen 6.1 Displaying the Job List Screen ..6-2 6.2 Overview of Jobs........6-3 Job............6-3 Multi-job feature........6-3...
- Page 7 Contents Administrator Operations For details on the following topics, refer to the Administrator Operations volume of this User Manual. 1 Introduction 2 Safety Information 3 Precautions 4 Part Names and Their Functions 5 Utility Mode Operations 6 Touch Panel Messages 7 Troubleshooting 8 Appendix Basic Operations...
- Page 8 Contents Advanced Operations For details on the following topics, refer to the “Advanced Operations” volume of this User Manual. Available Features 1 Auxiliary Functions 2 Scanning Operations CF2002/CF3102...
- Page 9 Contents viii CF2002/CF3102...
-
Page 10: Before Making Copies
Before Making Copies... -
Page 11: Introduction
1.1 Introduction 1.1 Introduction Structure of the Manual The various explanations for this copier are divided into four parts: the Administrator Operations, Basic Operations and Advanced Operations volumes of the User Manual, and the Enlarge Display Mode Operation Guide. Administrator Operations ❍... - Page 12 1.1 Introduction Advanced Operations ❍ This volume includes descriptions on the Auxiliary functions in addition to precautions for the use of the copier. ❍ Read the Advanced Operations volume for more information on the various functions that this copier provides for any need. Enlarge Display Mode Operation Guide ❍...
-
Page 13: Explanation Of Guide Conventions
1.2 Explanation of Guide Conventions 1.2 Explanation of Guide Conven- tions CAUTION Failure to observe instructions highlighted in this manner may result in serious injuries or property damage. ➜ Observe all cautions in order to ensure safe use of the copier. Note* Text highlighted in this manner contains useful in- formation and tips to ensure safe use of the copi-... - Page 14 1.2 Explanation of Guide Conventions Basic Operations Basic Advanced Operations Advan. CF2002/CF3102...
-
Page 15: Names Of Control Panel Parts And Their Functions
1.3 Names of Control Panel Parts and Their Functions Basic p.1-12 1.3 Names of Control Panel Parts and Their Functions Part Name Description Touch panel • Displays various screens and messages Keypad • Use to type in the number of copies to be made. •... - Page 16 1.3 Names of Control Panel Parts and Their Functions Part Name Description [Interrupt] • Press to enter Interrupt mode. Press the key again to cancel Interrupt mode. [Panel • Press to reset all copy Reset] key modes and functions to their default settings.
- Page 17 1.3 Names of Control Panel Parts and Their Functions Part Name Description Control • Use when adjusting the panel angle of the control panel. release lever [Enlarge • Use to enter the Enlarge Display] key Display mode. Contrast- • Use to adjust the contrast adjusting of the touch panel.
- Page 18 1.3 Names of Control Panel Parts and Their Functions CF2002/CF3102...
-
Page 19: Adjusting The Angle Of The Control Panel
1.4 Adjusting the Angle of the Control Panel Basic 1.4 Adjusting the Angle of the p.1-12 Control Panel The control panel can be adjusted to any of three angles. Adjust the control panel to the angle that allows for easy operation. 1-10 CF2002/CF3102... -
Page 20: To Lower The Angle Of The Control Panel
1.4 Adjusting the Angle of the Control Panel To lower the angle of the control panel ➜ Pull the control panel release lever toward you, and then push down on the control panel. To raise the angle of the control panel ➜... -
Page 21: Touch Panel
1.5 Touch Panel 1.5 Touch Panel Description of the Standard-Sized Screen When the copier is turned on (when the power switch is set to [I]), the screen shown below ap- pears in the touch panel. This is the standard-sized screen. Description of the Enlarged Display Screen Press the [Enlarge Display] key in the control panel. -
Page 22: Initial Mode Of The Enlarge Display Screen
1.5 Touch Panel The screen appears as shown below. Press the [Enlarge Display] key again to return the screen to the standard-sized screen. Initial Mode of the Enlarge Display Screen The initial mode is the mode that is selected when the copier is turned on (when the power switch is set to [I]). -
Page 23: Keys That Appear In The Screen
1.5 Touch Panel CAUTION Be careful not to damage the touch panel. ➜ Never push down on the touch panel with force, and never press it using a hard or pointed object. Keys That Appear in the Screen Touch this key to display the Basic screen in Enlarge Display mode. -
Page 24: Paper Type Icons
1.5 Touch Panel Touch this key to return to standard-sized screen from the enlarged display screen. Touch this key to display a screen that shows the status of the copier. Check the code that appears in the screen showing the status of the copier, and then contact the technical represen- tative. -
Page 25: Paper Supply Icons
1.5 Touch Panel Second side of a double-sided copy on plain paper Second side of a double-sided copy on thick paper 1 Second side of a double-sided copy on thick paper 2 Second side of a double-sided copy on thick paper 3 Paper Supply Icons The icons shown below may appear, indicating the amount of paper that remains. -
Page 26: Auto Panel Reset
1.6 Auto Panel Reset Basic p.1-16 1.6 Auto Panel Reset If no key on the copier is pressed or the copier per- forms no operation for one minute, the machine au- tomatically resets all modes and functions to their default settings. When the touch panel is reset, all settings that have not been stored, such as the number of copies, re- turn to their default settings (page 1-12) and the... -
Page 27: Confirming The Cancellation Of The Enlarge Display Mode
1.7 Confirming the Cancellation of the Enlarge Display Mode Admin. p.5-17 1.7 Confirming the Cancellation of the Enlarge Display Mode If no key on the copier is pressed or the copier per- forms no operation for one minute, the machine au- tomatically resets all modes and functions to their default settings and the standard-sized screen is displayed. - Page 28 1.7 Confirming the Cancellation of the Enlarge Display Mode If no key is touched, the Enlarge Display mode will be cancelled and the standard-sized screen is displayed after the length of time (30, 60, 90 or 120 seconds) specified using one of the User’s Choice functions has passed.
-
Page 29: Outline Of The Confirmation To Cancel The Enlarge Display Mode
1.7 Confirming the Cancellation of the Enlarge Display Mode Outline of the Confirmation to Cancel the Enlarge Display Mode The following diagram shows when the message requesting confirmation to cancel the Enlarge Dis- play mode appears if the “Auto Panel Reset” func- tion is set to “1 min.”... - Page 30 1.7 Confirming the Cancellation of the Enlarge Display Mode CF2002/CF3102 1-21...
-
Page 31: Key Repeat Start Time/Interval Function
1.8 Key Repeat Start Time/Interval function Admin. p.5-18 1.8 Key Repeat Start Time/Interval function is kept pressed when specifying a zoom ratio, the zoom ratio continues to increase or decrease. The length of time for the zoom ratio to change from that shown in illustration A to that shown in illustra- tion B after is kept pressed is the length of time... - Page 32 1.8 Key Repeat Start Time/Interval function The settings for the length of time until the repeat feature for the keys starts and for the repeat inter- val can be changed using a “User’s Choice” func- tion. For details, refer to “Specifying Default Settings (“User’s Choice”...
- Page 33 1.8 Key Repeat Start Time/Interval function 1-24 CF2002/CF3102...
-
Page 34: Basic Copy Operations
Basic Copy Operations... -
Page 35: Making Basic Copies
2.1 Making Basic Copies Basic p.2-2 2.1 Making Basic Copies The procedure for making basic copies is described below. Check that the [Copy] key indica- tor is lit in green and that the copier is in Copy mode. Press the [Panel Reset] key. ❍... - Page 36 2.1 Making Basic Copies Position the document(s) to be copied. ❍ For details, refer to “Speci- fying the Document Size” on page 4-2. Make sure that the Color set- ting [Color] is selected. Make sure that the Finishing setting [Finishing] is selected. Make sure that the Zoom set- ting [Zoom] is selected.
- Page 37 2.1 Making Basic Copies To specify the type of original and the desired type of copy, touch [Orig Ö Copy], and then select the desired settings. To adjust the density or to copy a photo document, touch [Pho- to/Density], and then select the desired settings.
- Page 38 2.1 Making Basic Copies Touch ❍ The printing status of the pro- grammed job and the job's settings can be viewed. To quit copying, press the [Stop] key. CF2002/CF3102...
-
Page 39: Practical Copy Examples
2.2 Practical Copy Examples Basic p.2-5 2.2 Practical Copy Examples Examples of the various basic copy operations are described below. Refer to the following procedures for details on per- forming the various copy operations. To make a copy that is the same size as the original An example for making one single-sided copy that is the same size as the single-sided original is de-... - Page 40 2.2 Practical Copy Examples Make sure that the number of copies is set to “1”. Press the [Start] key. ❍ The copy operation is pro- grammed as a copy job. ❍ Printing is performed in the or- der that the job was programmed. CF2002/CF3102...
-
Page 41: To Make An Enlarged Copy Of The Document
2.2 Practical Copy Examples Basic p.2-6 To make an enlarged copy of the docu- ment An example for making one single-sided 11" × 17" enlargement from a single-sided Letter-size original is described below. Position the document(s) to be copied. Touch [Zoom]. Touch [Enlarge]. - Page 42 2.2 Practical Copy Examples Touch [Letter Ö 11 × 17]. Touch [Enter]. Touch [Basic]. Touch [Paper]. Make sure that 11" × 17" paper is loaded into a paper drawer. Make sure that the number of cop- ies is set to “1”. Press the [Start] key.
-
Page 43: To Make An Reduced Copy Of The Document
2.2 Practical Copy Examples Basic p.2-7 To make an reduced copy of the docu- ment An example for making one single-sided Letter-size reduction from a single-sided 11" × 17" original is described below. Position the document(s) to be copied. Touch [Zoom]. Touch [Reduce]. - Page 44 2.2 Practical Copy Examples Touch [11 × 17 Ö Letter]. Touch [Enter]. Touch [Basic]. Touch [Paper]. Make sure that Letter-size pa- per is loaded into a paper drawer. Make sure that the number of cop- ies is set to “1”. Press the [Start] key.
-
Page 45: To Reduce Paper Use
2.2 Practical Copy Examples Basic p.2-8 To reduce paper use An example for copying four single-sided Letter- size documents onto one double-sided Letter-size page is described below. Load the document into the duplexing document feeder in the landscape ori- entation. Touch [Orig Ö... - Page 46 2.2 Practical Copy Examples Touch [Original]. Touch [1], and then touch [Original Direction]. Touch the key for the setting with the top of the document pointing to the top, and then touch [Enter]. Touch [Enter] in the screen that appears. CF2002/CF3102 2-13...
- Page 47 2.2 Practical Copy Examples Touch [Copy]. Touch [2-2in1], and then touch [Enter]. Touch [Basic], and then touch [Paper]. Make sure that Letter- size paper is loaded into a pa- per drawer. Make sure that the number of cop- ies is set to “1”. 2-14 CF2002/CF3102...
- Page 48 2.2 Practical Copy Examples Press the [Start] key. ❍ The copy operation is pro- grammed as a copy job. ❍ Printing is performed in the or- der that the job was programmed. CF2002/CF3102 2-15...
-
Page 49: To Copy A Postcard
2.2 Practical Copy Examples Basic p.2-10 To copy a postcard An example for making a single-sided copy from a single-sided postcard onto a postcard loaded into the manual bypass tray is described below. Position the postcard docu- ment face down onto the original glass. - Page 50 2.2 Practical Copy Examples Touch [Original]. Touch [1], and then touch [Original Direction]. Touch the key for the setting with the top of the document pointing to the right, and then touch [Enter]. Touch [Enter] in the screen that ap- pears.
- Page 51 2.2 Practical Copy Examples Touch [Copy]. Touch [1], and then touch [Enter]. Touch [Basic]. Touch [Paper]. Touch [Bypass]. 2-18 CF2002/CF3102...
- Page 52 2.2 Practical Copy Examples Touch [Inch] or [Metric]. ], touch [4 × 6 Touch [Inch ], and then touch [Enter]. Or, touch [Metric ], touch [A6 ], and then touch [Enter]. CF2002/CF3102 2-19...
- Page 53 2.2 Practical Copy Examples Prepare one postcard, and then load it into the manual bypass tray as shown. Adjust the paper guides to the size of the post- card. Lightly slide the postcard into the feed slot as much as possible. ❍...
-
Page 54: Stopping/Restarting/Deleting A Print Job
2.3 Stopping/Restarting/Deleting a Print Job 2.3 Stopping/Restarting/Deleting a Print Job To stop a print job ➜ Press the [Stop] key while the job is being print- The printing stops. The message that the job has been stopped ap- pears. To restart a print job ➜... -
Page 55: To Delete The Stopped Print Job
2.3 Stopping/Restarting/Deleting a Print Job To delete the stopped print job Touch [Delete] while a job is stopped. Select the job that you wish to delete, and then touch [Delete]. ❍ To quit deleting the job, touch [Delete], and then press the [Start] key. 2-22 CF2002/CF3102... - Page 56 2.3 Stopping/Restarting/Deleting a Print Job After touching [Delete], the message “Job has been done improperly. Check the record.” ap- pears and the job being printed is deleted. Touch , touch [Print Log], and then check the print results. CF2002/CF3102 2-23...
-
Page 57: Interrupting A Copy Job
2.4 Interrupting a Copy Job Basic p.2-13 2.4 Interrupting a Copy Job With this mode, the current copy job can be paused so that a copy of a different document can be made. This is convenient if you wish to quickly make cop- ies of a short document while a large job is being printed. - Page 58 2.4 Interrupting a Copy Job Press the [Start] key. ❍ The copy operation is pro- grammed as a copy job. ❍ If the copy job that printing was interrupted for is ready for printing, the inter- rupted job stops being printed and the job that printing was interrupted for is printed.
- Page 59 2.4 Interrupting a Copy Job 2-26 CF2002/CF3102...
-
Page 60: Copy Paper
Copy Paper... -
Page 61: Specifying The Paper Size
3.1 Specifying the Paper Size Basic p.3-13 3.1 Specifying the Paper Size Setting the Paper Size for the 1st Drawer The following procedure describes how to specify the paper size in Enlarge Display mode. Touch [Paper]. Select the 1st drawer, and then touch [Size Change]. - Page 62 3.1 Specifying the Paper Size Touch either [Inch] or [Metric]. Select the setting for the size of paper that is loaded, and then touch [Enter]. As an example, the following screen is the one that appears when [Inch], then [Letter ] is touched.
-
Page 63: Setting A 1St Drawer/Non-Standard Paper Size
3.1 Specifying the Paper Size Setting a 1st drawer/Non-Standard Paper Size If non-standard-sized (custom) paper is loaded, it will be necessary to enter the paper size. Touch [Paper]. Select the 1st drawer, and then touch [Size Change]. Touch [CustomSize]. ❍ To specify a paper size in inch measurements, con- tinue with step 4. - Page 64 3.1 Specifying the Paper Size Touch , and to select the length of side X for the paper that is loaded. (between 5 1/2 inch and 18 inch) ❍ Touch until the cursor moves below the fraction that you wish to change. The entered length of side X appears.
- Page 65 3.1 Specifying the Paper Size If custom paper sizes have been pro- grammed, instead of performing steps 4 and 5, a programmed pa- per size setting can be selected by pressing [1] or [2]. Use the keypad to type in the length of side X for the paper that is loaded.
- Page 66 3.1 Specifying the Paper Size Touch [Y], and then use the keypad to type in the length of side Y for the paper that is loaded. (between 90 mm and 311 mm) The entered length of side Y appears. (For this example, 300 mm is specified.) If custom paper sizes have been pro-...
-
Page 67: Storing A 1St Drawer/Non-Standard Paper Size
3.1 Specifying the Paper Size Storing a 1st drawer/Non-Standard Paper Size Two non-standard (custom) paper sizes can be stored. Touch [Paper]. Select the 1st drawer, and then touch [Size Change]. Touch [Size Registration]. ❍ To specify a paper size in inch measurements, con- tinue with step 4. - Page 68 3.1 Specifying the Paper Size Touch , and to select the length of side X for the paper that is loaded. (between 5 1/2 inch and 18 inch) ❍ Touch until the cursor moves below the fraction that you wish to change. The entered length of side X appears.
- Page 69 3.1 Specifying the Paper Size Use the keypad to type in the length of side X for the paper that is loaded. (between 140 mm and 457 mm) The entered length of side X appears. (For this example, 200 mm is specified.) Touch [Y], and then use the keypad to type in the length of side Y for the paper that is...
- Page 70 3.1 Specifying the Paper Size Touch [Enter], and then touch [Enter] in the next screen that appears. CF2002/CF3102 3-11...
-
Page 71: Setting The Paper Size For The Manual Bypass Tray
3.1 Specifying the Paper Size Setting the Paper Size for the Manual By- pass Tray Paper can be fed manually through the manual by- pass tray if you wish to copy onto paper that is not loaded into a drawer, or if you wish to copy onto special paper. - Page 72 3.1 Specifying the Paper Size Select the setting for the size of paper that is loaded, and then touch [Enter]. ❍ The paper size for the manual bypass tray is set. For a paper size other than the standard sizes listed on the screen, touch [Cancel], and then touch [CustomSize].
- Page 73 3.1 Specifying the Paper Size Touch , and to select the length of side X for the paper that is loaded. (between 5 1/2 inch and 18 inch) ❍ Touch until the cursor moves below the fraction that you wish to change. The entered length of side X appears.
- Page 74 3.1 Specifying the Paper Size If custom paper sizes have been pro- grammed, instead of performing steps 6 and 7, a programmed pa- per size setting can be selected by pressing [1] or [2]. Use the keypad to type in the length of side X for the paper that is loaded.
- Page 75 3.1 Specifying the Paper Size If custom paper sizes have been pro- grammed, instead of performing steps 8 and 9, a programmed pa- per size setting can be selected by pressing [1] or [2]. Touch [Enter]. ❍ A custom paper size is set. Touch [Paper Type].
- Page 76 3.1 Specifying the Paper Size Open the manual bypass tray. Prepare one sheet of the paper. Load the paper into the manual bypass tray so that the front side of the paper (the side facing up when the package was unwrapped) faces down.
- Page 77 3.1 Specifying the Paper Size Lightly slide the paper into the feed slot as much as possible so that the edge of the paper is fed into the copier. ❍ Feed only one sheet of paper at a time. Printing can begin. ❍...
-
Page 78: To Store A 1St Drawer/Custom Paper Size
3.1 Specifying the Paper Size To store a 1st drawer/custom paper size Two custom paper sizes can be stored. Touch [Paper]. Touch [Bypass]. Touch [Size Registration]. ❍ To specify a paper size in inch measurements, continue with step 3. ❍ To specify a paper size in metric measure- ments, skip to step 5. - Page 79 3.1 Specifying the Paper Size Touch , and select the length of side Y for the paper that is loaded. (between 3 9/16 inch and 12 1/4 inch) ❍ Touch until the cursor moves below the fraction that you wish to change. The entered length of side Y appears.
- Page 80 3.1 Specifying the Paper Size Touch [1] or [2]. ❍ The paper size specified in steps 3-4 and steps 5-6 appear on the selected key. ❍ The paper size is programmed. Touch [Enter]. CF2002/CF3102 3-21...
- Page 81 3.1 Specifying the Paper Size 3-22 CF2002/CF3102...
-
Page 82: Original Documents
Original Documents... -
Page 83: Specifying The Document Size
4.1 Specifying the Document Size Basic p.4-5 4.1 Specifying the Document Size Multi-Sheet Feeding The following procedure describes how a document is loaded into the duplexing document feeder. Load the document face up in the document feed tray. ❍ If the pages of the doc- ument have different sizes, stack the pages so that all pages are... - Page 84 4.1 Specifying the Document Size Select the desired copy settings. For more details, refer to chapter 5 “Specifying Copy Settings”. Touch [Orig Ö Copy], and then touch [Original]. Depending on the type of document that is load- ed, touch either [1] or [2]. CF2002/CF3102...
- Page 85 4.1 Specifying the Document Size Touch [Original Direction]. Select the setting for the orientation of the document that is loaded, and then touch [Enter]. ❍ If the orientation of the document is different from that selected with the “Original Direc- tion”...
- Page 86 4.1 Specifying the Document Size Touch [Copy]. Select the desired Copy setting, and then touch [Enter]. Press the [Start] key. The pages of the document are fed in, starting with the topmost page. Each page is scanned and fed out into the doc- ument output tray.
-
Page 87: Manual Feeding
4.1 Specifying the Document Size Manual Feeding The following procedure describes how a document is placed on the original glass. Lift open the original cover, or the duplexing document feeder if it is installed. ❍ Lift open the original cover, or the duplexing document feeder if it is installed, 15°... - Page 88 4.1 Specifying the Document Size Select the desired copy settings. For more details, refer to chapter 5 “Specifying Copy Settings”. Touch [Orig Ö Copy], and then touch [Original]. Touch [1]. CF2002/CF3102...
- Page 89 4.1 Specifying the Document Size Touch [Original Direction]. Select the setting for the orientation of the doc- ument that is loaded, and then touch [Enter]. ❍ If the orientation of the document is different from that selected with the “Original Direc- tion”...
- Page 90 4.1 Specifying the Document Size Touch [Enter]. Touch [Copy]. Select the desired Copy setting, and then touch [Enter]. Press the [Start] key. Scanning of the document begins. When using a setting where multiple pages are to be scanned, such as when making 2in1 cop- ies, the message shown below appears.
- Page 91 4.1 Specifying the Document Size To continue scanning, remove the document, position the next page of the document on the original glass, and then press the [Start] key. When all of the document pages have been scanned, touch [Finish]. Press the [Start] key. ❍...
-
Page 92: Specifying Copy Settings
Specifying Copy Settings... -
Page 93: Selecting The Color Setting
5.1 Selecting the Color Setting Basic p.5-2 5.1 Selecting the Color Setting Three Color settings are available for making cop- ies: [Auto Color], [Full Color] and [Black]. To select the Color setting Touch [Color]. Select the desired Color setting. Touch [Basic]. CF2002/CF3102... -
Page 94: Selecting Finishing Settings
5.2 Selecting Finishing Settings Basic p.5-3 5.2 Selecting Finishing Settings Various settings for sorting and finishing copies are available. The following finishing methods are available: Non-sorting (“Non-Sort” setting) Sorting (“Sort” setting) Stapling (“Corner Staple” setting) Stapling (“2-Point Staple” setting) Hole-punching (“2-Hole Punch” setting, for metric measurements) Hole-punching (“3-Hole Punch”... -
Page 95: To Specify Finishing Settings
5.2 Selecting Finishing Settings To specify Finishing settings Touch [Finishing]. The Finishing screen appears. Select the desired Finishing settings. ❍ To change the position of the punched holes, touch [Hole Punch], touch [Change Position], and then select the desired setting. ❍... - Page 96 5.2 Selecting Finishing Settings For this example, [2-Hole Punch] / [Change Po- sition] Touch [Enter], and then touch [Basic]. CF2002/CF3102...
-
Page 97: Specifying A Zoom Setting
5.3 Specifying a Zoom Setting Basic p.5-8 5.3 Specifying a Zoom Setting Copies of documents can be enlarged or reduced. There are eight methods for changing the zoom ratio. Zooming (“Zoom ratio” setting) Automatic Scaling (“Auto Size” setting) Full size (“1.000” setting) Minimizing (“Minimal”... -
Page 98: To Specify A Zoom Setting
5.3 Specifying a Zoom Setting To specify a Zoom setting Touch [Zoom]. Select the desired Zoom setting. If [Reduce] or [Enlarge] was touched, select the desired Zoom setting from the screen that ap- pears, and then touch [Enter]. Example) Touch [Reduce], then [11 × 17 Letter]. CF2002/CF3102... - Page 99 5.3 Specifying a Zoom Setting Example) Touch [Enlarge], then [Legal 5 1/2 × 8 1/2]. Touch [Basic]. CF2002/CF3102...
-
Page 100: To Specify A Zoom Ratio
5.3 Specifying a Zoom Setting To specify a zoom ratio Touch [Zoom]. Touch to specify the desired zoom ratio (between 0.250 and 4.000). is held pressed, the zoom ratio continues increasing or de- creasing in increments of 0.001. To change the time until the value continues changing auto- matically when the key is held pressed, refer to page 5-18 of the Administrator Operations vol-... -
Page 101: To Specify A Custom Zoom Ratio
5.3 Specifying a Zoom Setting To specify a custom zoom ratio Touch [Zoom]. Touch [CustomZoom]. Use the keypad to type in the desired zoom ratio (between 0.250 and 4.000). ❍ The entered zoom ratio appears on the key. Example) ×3.000 Touch [Enter]. -
Page 102: To Store Customzoom And Minimal Zoom Ratios
5.3 Specifying a Zoom Setting To store CustomZoom and Minimal zoom ratios Touch [Zoom]. Touch [CustomZoom], and then touch [Zoom Input]. Use the keypad to type in the desired zoom ratio (between 0.250 and 4.000). ❍ To store a Minimal zoom ratio, type in the de- sired zoom ratio between 0.900 and 0.999. - Page 103 5.3 Specifying a Zoom Setting Touch [1], [2] or [Minimal], and then touch [En- ter]. The specified zoom ratio is stored. Touch [Enter], and then touch [Basic]. 5-12 CF2002/CF3102...
-
Page 104: To Recall A Stored Custom Zoom Ratio
5.3 Specifying a Zoom Setting To recall a stored custom zoom ratio Touch [Zoom]. Touch [CustomZoom]. Touch [1], [2] or [Minimal]. Touch [Enter]. The stored zoom ratio is recalled. Touch [Basic]. CF2002/CF3102 5-13... -
Page 105: To Specify Different Vertical And Horizontal Scaling Proportions (X/Y Zoom Setting)
5.3 Specifying a Zoom Setting To specify different vertical and horizon- tal scaling proportions (X/Y Zoom setting) Touch [Zoom]. Touch [CustomZoom]. Touch [X/Y Zoom]. Use the keypad to type in the desired length of side X (between 0.250 and 4.000). Touch [Y], and then use the keypad to type in the desired length of side Y (between 0.250 and 4.000). -
Page 106: Selecting The Paper Setting
5.4 Selecting the Paper Setting Basic p.5-12 5.4 Selecting the Paper Setting The paper used for making copies can be selected in three ways: automatically (“Auto Paper” setting), manually, or to the manual bypass tray (“Bypass” setting). To select the Paper setting Touch [Paper]. - Page 107 5.4 Selecting the Paper Setting To use paper loaded into the manual bypass tray, touch [Bypass]. For details on changing the settings, specifying custom paper sizes and storing a custom pa- per size, refer to chapter 3 “Copy Paper”. Touch [Basic]. 5-16 CF2002/CF3102...
-
Page 108: Selecting The Orig > Copy Settings (Original Setting)
5.5 Selecting the Orig > Copy Settings (Original Setting) Basic p.5-14 5.5 Selecting the Orig > Copy Set- tings (Original Setting) The type of original and the desired type of copy can be specified. The following four Original settings can be specified. -
Page 109: To Specify An Original Setting
5.5 Selecting the Orig > Copy Settings (Original Setting) To specify an Original setting Touch [Orig Ö Copy], and then touch [Original]. Select the setting appropriate for your docu- ment. ❍ To specify the orientation of the document, touch [Original Direction], and then select the setting appropriate for your document. - Page 110 5.5 Selecting the Orig > Copy Settings (Original Setting) ❍ To specify the position of the binding margin, touch [Margin], and then select the setting ap- propriate for your document. Touch [Enter], and then touch [Enter] again in the screen that appears. CF2002/CF3102 5-19...
-
Page 111: Selecting The Orig > Copy Settings (Copy Setting)
5.6 Selecting the Orig > Copy Settings (Copy Setting) Basic p.5-18 5.6 Selecting the Orig > Copy Set- tings (Copy Setting) The type of original and the desired type of copy can be specified. The following five Copy settings can be specified. Single-sided (“1”... -
Page 112: To Specify A Copy Setting
5.6 Selecting the Orig > Copy Settings (Copy Setting) To specify a Copy setting Touch [Orig Ö Copy], and then touch [Copy]. Select the desired Copy setting. ❍ To specify the position of the binding margin, touch [Binding Direction], and then select the desired setting. -
Page 113: Selecting A Photo/Density Setting
5.7 Selecting a Photo/Density Setting Basic p.5-27 5.7 Selecting a Photo/Density Setting The image quality of the original can be specified. The following twelve Photo/Density settings can be specified. Text combined with images (Text setting) Printed photos (Printed Image setting) Maps (Map setting) Photographs (Photo Image setting) Text only (Text setting) -
Page 114: To Select An Original Type Setting
5.7 Selecting a Photo/Density Setting To select an Original Type setting Touch [Photo/Density]. Touch [Original Type]. Select the setting appropriate for your docu- ment. ❍ [Dot Matrix Original] appears only after [Text] is touched. Touch [Enter]. CF2002/CF3102 5-23... -
Page 115: To Select A Screen Pattern Setting
5.7 Selecting a Photo/Density Setting To select a Screen Pattern setting Touch [Photo/Density]. Touch [Original Type]. Touch [Screen Pattern]. Note [Screen Pattern] does not appear if [Map] or [Text] are been selected. (These settings can- not be used together.) Select the desired image quality setting. Touch [Enter], and then touch [Enter] again in the screen that appears. -
Page 116: To Select The Background, Density And Text Enhancement Settings
5.7 Selecting a Photo/Density Setting To select the Background, Density and Text Enhancement settings Touch [Photo/Density]. Select the desired settings. If [Background] is touched: Touch [Lighter] or [Darker] to select the desired background density level, and then touch [En- ter]. ❍... - Page 117 5.7 Selecting a Photo/Density Setting If [Density] is touched: Touch [Lighter] or [Darker] to select the desired copy density level, and then touch [Enter]. If [Text Enhancement] is touched: Touch [ ] or [ ] to select the desired text density level, and then touch [Enter].
-
Page 118: Checking The Settings
5.8 Checking the Settings 5.8 Checking the Settings Press the [Mode Check] key to display the screens that show the current copy settings. From these screens, the copy settings can also be changed. To check the settings Press the [Mode Check] key. The first screen showing the current settings ap- pears. - Page 119 5.8 Checking the Settings Touch [Next] to display the second screen of settings. Touch [Next] to display the third screen of set- tings. Touch [Next] to display the fourth screen of set- tings. 5-28 CF2002/CF3102...
-
Page 120: To Change The Settings
5.8 Checking the Settings ❍ If the “Dot Matrix Original” parameter was se- lected. To change the settings Press the [Mode Check] key. Touch [Next] or [BackUp] until the screen con- taining the setting that you wish to change ap- pears. - Page 121 5.8 Checking the Settings 5-30 CF2002/CF3102...
-
Page 122: Job List Screen
Job List Screen... -
Page 123: Displaying The Job List Screen
6.1 Displaying the Job List Screen 6.1 Displaying the Job List Screen If a job has been programmed, the key for dis- playing the Job List screen appears in the Basic screen. Touch this key to display the Job List screen. To return to the Basic screen, touch [Basic]. -
Page 124: Overview Of Jobs
6.2 Overview of Jobs Basic p.6-2 6.2 Overview of Jobs Any set of consecutive operations, such as those for making copies, scans or computer printouts Multi-job feature While one job is being printed, another job can be queued. As many as 49 jobs can be queued. Queuing jobs ➜... -
Page 125: Deleting A Job
6.3 Deleting a Job Basic p.6-3 6.3 Deleting a Job To delete a queued job Jobs marked as “Waiting Print” can be deleted. The queued job appears in the Job List screen. Select the job that you wish to delete, and then touch [Delete]. -
Page 126: Job List Screens
6.4 Job List Screens Basic p.6-4 6.4 Job List Screens When the key for a screen is touched, the list or de- tails of programmed jobs can be viewed. Print List Screen When the key for displaying the Job List screen is touched, the Print List screen appears and the pro- grammed details of the print jobs can be viewed. -
Page 127: Scan List Screen
6.4 Job List Screens Scan List Screen When [Scan List] in the Job List screen is touched, the Scan List screen appears and the programmed details of the scan jobs can be viewed. CF2002/CF3102... -
Page 128: Stocked List Screen
6.4 Job List Screens Stocked List Screen When [Stocked List] in the Job List screen is touched, a list of scanned images appearing as jobs can be viewed. Note The scanned jobs cannot be removed from the Stocked List screen. To remove a scanned job, touch [Basic], and then press the [Enlarge Display] key to display the standard-sized screen, and then remove the... -
Page 129: Locked List Screen
6.4 Job List Screens Locked List Screen When [Locked List] in the Job List screen is touched, a list of jobs that are locked can be viewed. Note The locked jobs cannot be removed from the Locked List screen. To remove a locked job, touch the [Basic] and then press the [Enlarge Display] key to display the standard-sized screen, and then remove the locked job from the Unlock Job screen, displayed... -
Page 130: Print Log Screen
6.4 Job List Screens Print Log Screen When [Print Log] in the Job List screen is touched, a log of all jobs that have been printed can be viewed. To view a list of completed print jobs, touch [Complete]. To view a list of print jobs that have been deleted after being programmed, touch [Delete]. -
Page 131: Scan Log Screen
6.4 Job List Screens Scan Log Screen When [Scan Log] in the Job List screen is touched, a log of all jobs that have been scanned can be viewed. To view a list of completed scan jobs, touch [Complete]. To view a list of scan jobs that have been deleted after being programmed, touch [Delete]. - Page 132 Copyright 2003 MINOLTA CO., LTD. The information contained in this manual is subject to change without notice to incorporate improvements made on the product or products the manual covers. MINOLTA CO., LTD. 2003. 02 3-13, 2-chome, Azuchi-Machi, Chuo-ku, Osaka. 541-8556, Japan...
Need help?
Do you have a question about the DiALTA Color CF2002 and is the answer not in the manual?
Questions and answers