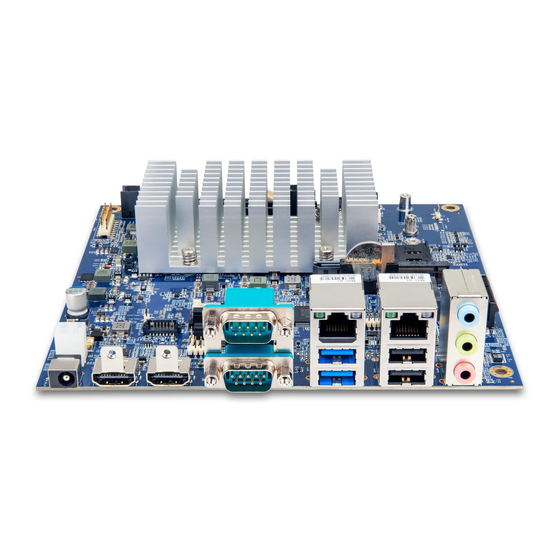
VIA Technologies VAB-950 Quick Start Manual
Yocto 2.6 evk
Hide thumbs
Also See for VAB-950:
- User manual (39 pages) ,
- Quick start manual (18 pages) ,
- How to connect (4 pages)
Table of Contents
Advertisement
Quick Links
Advertisement
Table of Contents

Summary of Contents for VIA Technologies VAB-950
- Page 1 QUICK START GUIDE VIA VAB-950 Yocto 2.6 EVK 1.00-23112020-173700...
- Page 2 VIA Technologies, Inc. reserves the right the make changes to the products described in this manual at any time without prior notice.
- Page 3 VIA VAB-950 Yocto 2.6 EVK Quick Start Guide Revision History Version Date Remarks 1.00 23/11/2020 Initial release...
-
Page 4: Table Of Contents
VIA VAB-950 Yocto 2.6 EVK Quick Start Guide Table of Contents Introduction ..............................1 EVK Package Contents ........................... 1 1.1.1 Firmware Folder Contents ......................1 1.1.2 Document Folder Contents ......................1 1.1.3 Tool Folder Contents ........................1 Version Information and Supported Features ..................2 Image Installation ............................ -
Page 5: Introduction
VIA VAB-950 Yocto 2.6 EVK Quick Start Guide 1. Introduction This Quick Start Guide provides an overview on how to boot the Yocto image for the VIA VAB-950 and configure the supported hardware functions in the build. The VIA VAB-950 Yocto 2.6 EVK is developed based on the MediaTek Yocto 2.6 BSP and it enables the hardware features of the VIA VAB-950. -
Page 6: Version Information And Supported Features
VIA VAB-950 Yocto 2.6 EVK Quick Start Guide 1.2 Version Information and Supported Features • Kernel version: 4.4.146 • Evaluation image: Yocto 2.6 • Development based on MediaTek Yocto 2.6 BSP • Supports eMMC boot • Supports HDMI display •... -
Page 7: Image Installation
Then connect the Windows 10 host machine and the VIA VAB-950 through the Micro USB 2.0 port using the Micro USB cable. Micro USB 2.0 port diagram Next, on the VIA VAB-950, set the two OS image jumpers (J7 and J5) to download mode as shown in the diagram below. OS image jumpers diagram... - Page 8 Plug in the AC-to-DC power adapter to power on the VIA VAB-950. Note: Make sure the Windows 10 host machine detects the VAB-950 as ADB device. Press and hold the SW3 button + Reset button at the same time and then release them.
- Page 9 VIA VAB-950 Yocto 2.6 EVK Quick Start Guide When the image installation is completed, the color of the bar will change to yellow. Then you will see the "Download OK" pop-up message as shown below.
- Page 10 Unplug the Micro USB cable and plug the power adapter back in. Press the Power Button for 2 seconds and then release it to power on the VIA VAB-950. When the boot process is completed, you will see the Yocto desktop.
-
Page 11: Hardware Functions
3.1 Using the Debug Console The first step is to connect the host machine and the VIA VAB-950 through the COM connector labeled as "COM". Use a serial port communication program such as PuTTY or Tera Term to connect the debug console. -
Page 12: Dvfs
3.5 Display The VIA VAB-950 supports a choice of HDMI and LCD Panel display devices. To set the display device, first connect the Windows 10 host machine and the VIA VAB-950 through the Micro USB 2.0 port using the Micro USB cable. -
Page 13: Video Playback
VIA VAB-950 Yocto 2.6 EVK Quick Start Guide Power off the VIA VAB-950 and set the two OS image jumpers (J7 and J5) back to the normal mode setting. Unplug the Micro USB cable, and then power on the VIA VAB-950. -
Page 14: Wi-Fi
VIA VAB-950 Yocto 2.6 EVK Quick Start Guide To record a video file from the CSI camera, use the following command. root@aiv8385-linux:~# gst-launch-1.0 -v v4l2src device="/dev/video3" ! video/x-raw,format=\ (string\)YUY2,width=1280,height=720, framerate=30/1 ! mtkmdp width=1280 height=720 ! video/ x-raw,format=I420 ! v4l2h264enc bitrate= 9000000 gop=1 ! avimux ! filesink location=/data/ test.avi... -
Page 15: Bluetooth
GAP set_scan_mode 2 …… Press <Enter> btut_cli> Use your mobile phone or tablet with Bluetooth enabled to scan the VAB-950. Then you will see the “i500_bt” device name. To exit “interactive mode”, type in the "quit" command. btut_cli> quit ……... - Page 16 Taiwan Headquarters Japan China 1F, 531 Zhong-zheng Road, 940 Mission Court 3-15-7 Ebisu MT Bldg. 6F, Tsinghua Science Park Bldg. 7 Xindian Dist., New Taipei City 231 Fremont, CA 94539, Higashi, Shibuya-ku No. 1 Zongguancun East Road, Taiwan Tokyo 150-0011 Haidian Dist., Beijing, 100084 Japan China...


Need help?
Do you have a question about the VAB-950 and is the answer not in the manual?
Questions and answers