ATEN VS481 User Manual
Hide thumbs
Also See for VS481:
- User manual (14 pages) ,
- User manual (18 pages) ,
- User manual (14 pages)
Table of Contents
Advertisement
Quick Links
Advertisement
Table of Contents

Subscribe to Our Youtube Channel
Related Manuals for ATEN VS481


Summary of Contents for ATEN VS481
- Page 1 HDMI Switch USER MANUAL VS481...
- Page 2 Note: This equipment has been tested and found to comply with the limits for a Class B digital device, pursuant to Part 15 of the FCC Rules. These limits are designed to provide reasonable protection against harmful interference in a residential installation. This equipment generates, uses and can radiate radio frequency energy, and if not installed and used in accordance with the instruction manual, may cause interference to radio communications.
- Page 3 Read this guide thoroughly and follow the installation and operation procedures carefully in order to prevent any damage to the units and/or any devices that connect to them. Package Contents The VS481 HDMI Switch package contains the following items: 1 User Manual ...
- Page 4 Overview The VS481 4 Port HDMI Switch allows you to quickly and easily share your HDMI display device with 4 HDMI input sources (one is conveniently located on the front). The VS481 allows convenient switching between digital devices such as DVD players, satellite receivers, video cameras, and computers (Mac and PC).
-
Page 5: System Requirements
System Requirements Source Device(s) HDMI Type A output connector(s) Note: A DVI/HDMI adapter is required when connecting a DVI source device. Load Device A display device or receiver with an HDMI Type A input connector Cables 4 HDMI cables Note: Not all cables are included in this package. -
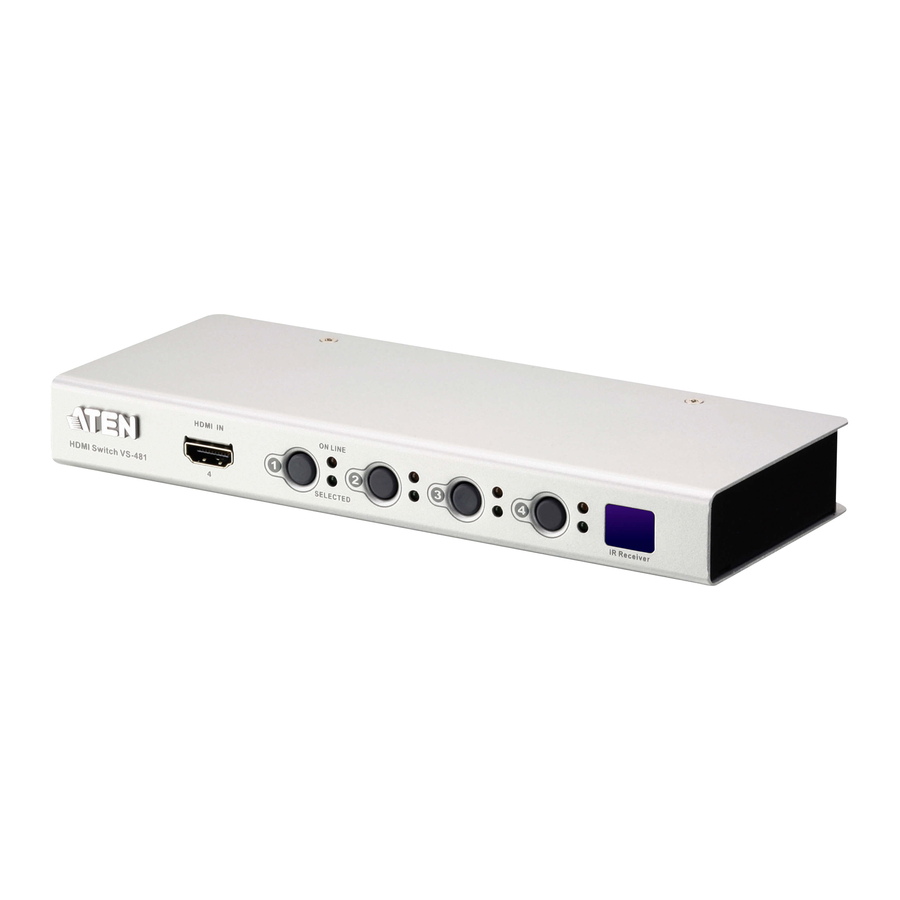
Page 6: Hardware Overview
Hardware Overview VS481 Front View Component Function HDMI In (Type A) Plug the cable from an HDMI source device into this port (number 4). Port Selection Pressing a port selection pushbutton Pushbuttons routes the source from the corresponding input port to the output port for display. - Page 7 VS481 Rear View Component Function Power Jack The power adapter cable plugs in here. HDMI Out (Type The cable from the HDMI display device plugs in here. HDMI In (Type A) The cables from the HDMI source devices can plug into any of the three available ports.
-
Page 8: Ir Remote Control
IR Remote Control Component Function Port Up / Port Press the Port Up button to cycle forward Down Buttons through ports (1 to 2; 2 to 3; 3 to 4; 4 to 1). Press the Port Down button to cycle backward through the ports (4 to 3;... -
Page 9: Installation
1. Use an HDMI cable to connect the HDMI input port on the video display device to the HDMI output port on the rear of the VS481. 2. Use HDMI cables to connect the HDMI output ports on the source device(s) to the HDMI input ports on the switch. The fourth HDMI port is located on the front of the switch. -
Page 10: Installation Diagram
Installation Diagram - 10 -... -
Page 11: Manual Selection
Source Device Selection The VS481 HDMI Switch offers easy and flexible source device selection with either the front panel pushbuttons, or with the remote control. Note: Whenever the VS481 is powered on, it automatically selects Port 1. You may choose one of the two methods listed below to select a different port. -
Page 12: Powering Off And Restarting
Powering Off and Restarting If you power off the VS481, follows these steps before powering it on again: 1. Power off the attached devices. 2. Unplug the power adapter cable from the HDMI switch. 3. Wait 10 seconds, and then plug the power adapter cable back 4. -
Page 13: Specifications
Specifications Function VS481 Display Connections Connectors Display HDMI Out 1 x HDMI Type A Female (Black) Port Device HDMI In 4 x HDMI Type A Female (Black) Port Power LEDs On Line 4 (Orange) Selected 4 (Green) Buttons Port Selection... -
Page 14: Getting Help
Getting Help If you need to contact ATEN technical support with a problem, visit our website at www.aten.com. Limited Warranty ATEN warrants its hardware in the country of purchase against flaws in materials and workmanship for a Warranty Period of two [2] years (warranty period may vary in certain regions/countries) commencing on the date of original purchase.
Need help?
Do you have a question about the VS481 and is the answer not in the manual?
Questions and answers