Table of Contents
Advertisement
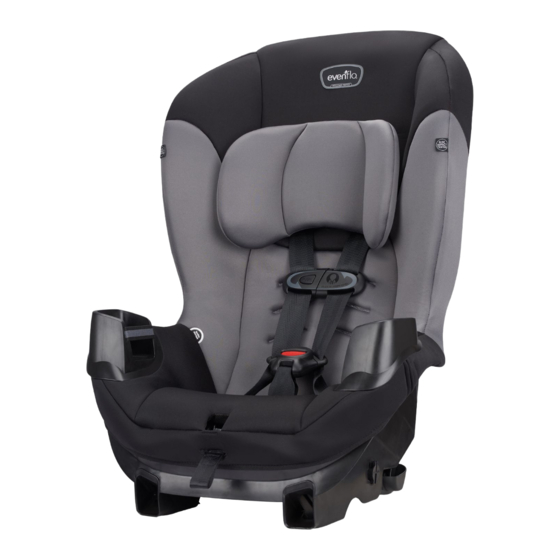
Sonus™
Child Restraint System
Owner's Manual
Keep instructions for future use.
See inside back cover to remove
Owner's Manual.
Rear-facing*
2.3 to 18 kg
(5 to 40 lbs)
48 to 102 cm
(19 to 40 in.)
Forward-facing*
10 to 22.6 kg
(22 to 50 lbs)
71 to 127 cm
(28 to 50 in.)
At least 2 years old
* See page
Para instrucciones en Español,
llamar al: 1-800-233-5921
WARNING!
To reduce the risk of serious injury
or death, read this owner's manual and warnings
prior to installing and using this child restraint.
© 2019 Evenflo Company, Inc.
for complete requirements.
4
25701490
1/19
Advertisement
Table of Contents

Related Manuals for Evenflo Sonus


Summary of Contents for Evenflo Sonus
- Page 1 Para instrucciones en Español, llamar al: 1-800-233-5921 WARNING! To reduce the risk of serious injury or death, read this owner’s manual and warnings prior to installing and using this child restraint. © 2019 Evenflo Company, Inc. 25701490 1/19...
-
Page 2: Table Of Contents
More children are killed every year as passengers Table of Contents(TOC) in car crashes than by any other type of injury. To reduce the risk of SERIOUS INJURY or DEATH, read Important Information this owner’s manual and warnings and your vehicle Child Requirements ............ -
Page 3: Child Requirements
MUST meet the size and and tops of the child’s ears age requirements below. In addition, Evenflo recommends are at or below the top of consulting with your child’s physician before allowing your the child restraint seat back child to transition from rear-facing to forward-facing •... -
Page 4: Premature Infant Use
Air bags may cause serious when placed in a child restraint. Evenflo requires that the injury or death to children under 12. If your vehicle evaluation recommended by the AAP be conducted for all has an air bag, please refer to your vehicle owner’s... -
Page 5: Warnings
DO NOT use the child restraint. Consult vehicle harness straps. Fully restrain the child. owner’s manual, try a different seating location, or call Evenflo for further assistance. • ONLY use this child restraint on forward-facing WARNING vehicle seats. - Page 6 WARNING! DEATH or SERIOUS WARNING! DEATH or SERIOUS INJURY can occur. INJURY can occur. Rear-Facing ONLY Warnings Seat Belt Warnings • When using this restraint rear-facing, DO NOT loosen • ALWAYS read your vehicle owner’s manual to the vehicle seat belt to provide more leg room, as this determine what vehicle belts and retractors are used may keep the child restraint from protecting the child.
- Page 7 WARNING! DEATH or SERIOUS WARNING! DEATH or SERIOUS INJURY can occur. INJURY can occur. Seat Belt Warnings (cont.) Seat Belt Warnings (cont.) DO NOT • use with lap/shoulder belts with If you have any of these types of vehicle belt systems two retractors.
-
Page 8: Latch Warnings
WARNING! DEATH or SERIOUS WARNING! DEATH or SERIOUS INJURY can occur. INJURY can occur. LATCH/UAS Warnings LATCH/UAS Warnings What is LATCH? Vehicle Top Tether • In addition to these instructions, read and follow your Anchor Points vehicle owner’s manual regarding installation of the LATCH is an acronym for child restraint and LATCH. -
Page 9: Safe Practices
You must register this restraint to be reached in a devices not made by Evenflo or described in these recall. Send your name, address, e-mail address if instructions for the child restraint. Items not tested available, and the restraint’s model number and... -
Page 10: Public Notice For Canadian Customers
The information you provide must be complete. Evenflo Company, Inc., Or register online at www.evenflo.com/registercarseatcanada. ATTENTION : Cette carte pourait être importante à la sécurité de votre enfant. Veuillez remplir cette carte à l’encre bleue ou noire et la poster afin de pouvoir être contacté... -
Page 11: Child Restraint Features
Child Restraint Features Front Description Seat Pad Head Pillow Harness Straps Chest Clip Buckle Crotch Strap Harness Release Button Harness Adjust Strap Harness Covers* Buckle Tongue Holder* Cup Holder* Body Pillow* Tether Strap and Hook (Shown fastened to storage clip) Harness Straps Back Splitter Plate... - Page 12 Child Restraint Features (cont.) Child Restraint Features (cont.) Body Pillow Harness Covers (only on certain models) The optional Body Pillow, when placed in the restraint, as shown, helps Install Harness Covers above support your child. Velcro® Chest Clip. Harness covers strips are optional for added comfort.
-
Page 13: Rear-Facing Use
Using the Child Restraint Rear-facing Installation with Lower Anchor Connectors Rear-facing LATCH is a system for attaching the child restraint to your vehicle seat. It is to be used in place of your vehicle’s seat Child Requirements: belts and can be used in vehicles with LATCH anchors. DO NOT install this child restraint with LATCH •... - Page 14 Rear-facing Installation with Rear-facing Installation with Lower Anchor Connectors Lower Anchor Connectors (cont.) WARNING Attach the harness straps DO NOT use the two upper harness slots rear-facing. The to the splitter plate using harness may not properly restrain the child during a crash. the infant position (page 43) on the harness straps.
-
Page 15: Rear-Facing Installation With Lower Anchor Connectors
Rear-facing Installation with Rear-facing Installation with Lower Anchor Connectors Lower Anchor Connectors Know Your Lower Anchor Connector Assembly The lower anchor connector assembly that comes with your child restraint will be one of the two types below. SecureRight™ Quick Connector™ Adjuster Strap Clip... - Page 16 Rear-facing Installation with Rear-facing Installation with Seat Belt Seat Belt (cont.) WARNING WARNING NEVER turn a child restraint DO NOT use the two upper harness slots rear-facing. The forward-facing with a child who harness may not properly restrain the child during a crash. weighs less than 10 kg (22 lbs).
-
Page 17: Rear-Facing Installation With Seat Belt
Rear-facing Installation with Rear-facing Installation Checklist Seat Belt (cont.) 1. Secure child restraint to the vehicle seat. Recline stand is flipped to the recline position (page 44). Install with Lower Anchor Connector Assembly (page 25) or vehicle seat belt (page 30). Towel rolled up and placed beneath the recline stand, if necessary (page 44). -
Page 18: Forward-Facing Use
Forward-facing Installation Using the Child Restraint with Lower Anchor Connectors Forward-facing LATCH is a system for attaching the child restraint to your vehicle seat. It is to be used in place of your vehicle’s seat belts and can be used in vehicles Child Requirements: with LATCH anchors. -
Page 19: Forward-Facing Installation With Lower Anchor Connectors
You will need answered by an authorized dealer/vehicle manufacturer, call Evenflo’s ParentLink at 1-800-233-5921 (U.S.) to try again, find another location for your child restraint, or or 1-937-773-3971 (Canada), or 01-800-706-12-00 install with the vehicle seat belt (page 38). -
Page 20: Forward-Facing Installation With Seat Belt
Forward-facing Installation Forward-facing Installation with Seat Belt (cont.) with Seat Belt WARNING Lap & Shoulder Belt Lap Belt Only DO NOT use the three lower harness slots forward-facing. The harness may not properly restrain the child in the event of a crash. Make sure that the harness straps Fasten the vehicle seat belt as shown depending on your type are in one of the three upper... -
Page 21: Forward-Facing Installation Checklist
Check with your vehicle dealer. If you have questions regarding tether anchors that are not addressed by the vehicle owner’s manual or answered by an authorized dealer/vehicle manufacturer, call Evenflo’s ParentLink at 1-800-233-5921 (U.S.) or 1-937-773-3971 (Canada), or 01-800-706-12-00 (Mexico). -
Page 22: General Information
General Information Positioning the Harness Strap (cont.) Positioning the Harness Strap Pull harness strap through to the front of Forward-facing ONLY the child restraint. Top Two Harness Thread each harness Positions strap through the appropriate slot. Pull Rear-facing or the harness strap to Forward-facing the back of the child This set of harness... -
Page 23: Adjusting The Recline Stand
Adjusting the Recline Stand Securing the Child in the Child Restraint Lift the child restraint and flip the recline stand, located under the child restraint seat, to either the upright or recline position. Note: Recline position is to be used for rear-facing ONLY. The baby’s back and Place baby in the child restraint. -
Page 24: Adjusting The Crotch Strap
Adjusting the Crotch Strap Adjusting the Harness Strap This Child Restraint Has Two Crotch Strap Positions To reposition the crotch strap, first turn the child restraint upside down. Turn the crotch strap harness anchor sideways and push it through the slot in the bottom of the seat shell. -
Page 25: Removing The Child From The Child Restraint
Removing the Child from the Child Removing the Tether Strap (cont.) Restraint Press the tab and twist, then remove the hook from the anchor. WARNING • To avoid a strangulation hazard, you MUST tightly roll or fold excess tether strap and secure with the strap/rubber band. -
Page 26: Removing The Lower Anchor Connectors
Removing the Lower Anchor Removing the Lower Anchor Connectors (cont.) Connectors When the Lower Anchor Connector assembly is not in use you MUST attach the hooks to the Using your full bottom of the child weight, push the child restraint. A loose Lower restraint into the vehicle Anchor Connector seat while loosening... -
Page 27: Securing Your Child Restraint In Aircraft
Installing Child Restraint Securing Your Child Restraint in Rear-facing in Aircraft (cont.) Aircraft The Federal Aviation Administration (FAA) recommends that you secure your child for air travel in an appropriate child restraint based on your child’s weight and size. Turbulence can happen with little or no warning. When turbulence occurs, the safest place for your child is in a properly installed child restraint, not in an adult’s lap or on the aircraft seat with its seat... - Page 28 Installing Child Restraint Installing Child Restraint Rear-facing in Aircraft (cont.) Forward-facing in Aircraft IMPORTANT: Before installing the child restraint, make sure the aircraft seat is in a fully upright position. Aircraft Seat Belt The aircraft seat belt must be as tight as possible. Route the excess seat belt strap back through the rear-facing belt path opening, as shown above.
-
Page 29: Installing Child Restraint Forward-Facing In Aircraft
Note: Because of the fixed length of aircraft seat belts, the belt buckle could be behind the child’s back after tightening the belt. For your child’s comfort, Evenflo recommends cushioning the child’s back by placing a small pillow or folded-up blanket, or a folded-up jacket, over the belt buckle. -
Page 30: Replacement Parts
Evenflo. When you contact us, please have the product either side of the child restraint. You may also store the model number and date of manufacture (found on the back of the instructions behind the seat pad. -
Page 31: Limited Warranty
Evenflo’s sole obligation under this express limited warranty shall be, at Evenflo’s option, to repair or replace any Product that is determined to be defective by Evenflo and determined to be covered by this warranty.
Need help?
Do you have a question about the Sonus and is the answer not in the manual?
Questions and answers