Table of Contents
Advertisement
Quick Links
Advertisement
Table of Contents

Related Manuals for AGFA Anapurna H3200i LED


Summary of Contents for AGFA Anapurna H3200i LED
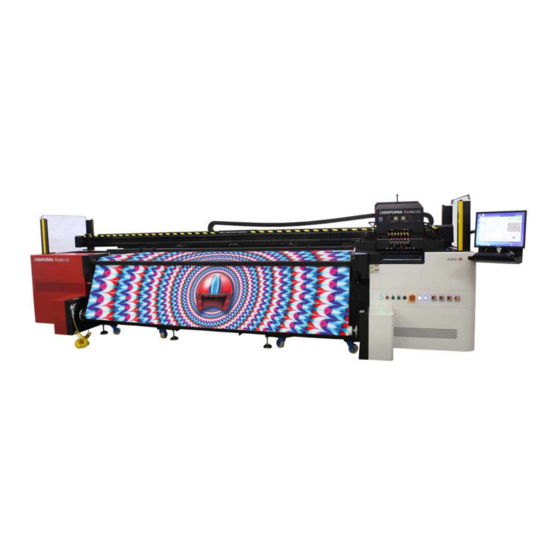
- Page 1 Anapurna H3200i LED Advanced Operator Manual (v1.0)
- Page 2 Agfa and the Agfa rhombus are trademarks of Agfa-Gevaert N.V., Belgium or its affiliates. :Anapurna is a trademark of Agfa Graphics N.V., Belgium or one of its affiliates. All other trademarks are held by their respective owners and are used in an editorial fashion with no intention of infringement.
- Page 3 Preface This manual must be considered as part of the :Anapurna H3200i LED Hybrid 6 Color White (referred to as H3200i LED hereafter). This manual explains how to use, operate and maintain the H3200i LED in order to keep it in opti- mal condition.
- Page 4 www.agfagraphics.com...
-
Page 5: Table Of Contents
Front ..........................21 Shuttle ........................22 Ink supply drawer ....................23 Powered winding axle ..................23 Media transport belt ................... 24 Front media set bar ..................... 24 Cutting slit ......................24 Back..........................25 :Anapurna H3200i LED Advanced Operator Manual (v1.0) - Page 6 Vacuum unit ......................26 Transport vacuum regulators................26 Media tension roll ....................26 Unwinding axle for roll media................26 Chapter 4 Operator panels ......................27 Front control panel ....................27 Back control panel ....................28 Shuttle control panel ....................29 Vacuum control print heads ................
- Page 7 UV Controls in the Printing Panel ................. 96 LED Combinations of the UV Modes ..............96 Chapter 10 Maintenance procedure ....................101 Maintenance Schedule ..................101 Daily Maintenance .................... 101 Weekly Maintenance ..................101 Monthly Maintenance..................101 :Anapurna H3200i LED Advanced Operator Manual (v1.0)
- Page 8 Quarterly Maintenance..................101 Semi-annual Preventive Maintenance ............101 Maintenance section on the control screen............102 Cleaning........................103 General Cleaning of the Printing Area ............103 Print head cleaning wiper................103 Cleaning the Encoder Strips ................103 Cleaning the Base Plate................... 104 Cleaning the glasses of the UV LED units ............
-
Page 9: Chapter 1 Introduction
• Predefined color configurations that meet the ISO 12647-2 standard. 1.1 Support information Printer SN: _______________________________________________________________ Installation date: _______________________________________________________________ Your local Agfa representative Address: _______________________________________________________________ _______________________________________________________________ _______________________________________________________________ Tel.: ______________________________________________________ (hardware) ______________________________________________________ (software) ______________________________________________________ (spare parts) Fax.: ______________________________________________________ :Anapurna H3200i LED Advanced Operator Manual (v1.0) -
Page 10: Technical Specifications
230V +/-10% System Integration RIP • Integrated production solution with Asanti, other RIPs on request. • Ready to use Anapurna H3200i LED media/ink profiles available (Asanti). 1.2.3 Productivity (with starter pack inks) Printing speed Ink consumption... -
Page 11: Ink Consumption White
Anapurna 1500 Magenta Light Ink 2x1L 40V9F Anapurna 1500 Cyan Ink Anapurna 1500 Cyan Ink 2x1L 1.2.7 Text Quality (only for color) Specification Text quality positive 4 point Text quality negative 6 point :Anapurna H3200i LED Advanced Operator Manual (v1.0) -
Page 12: Media/Substrate Flexibility
1.2.8 Media/Substrate flexibility Specification Minimum printable substrate • Rigid/sheet media (printing single board): size A2 landscape (60 x 42 cm / 1,97 x 1,4 ft) • Flexible roll media: 60 cm wide (1,97 ft) Flexible media (roll-to-roll, roll-to-sheet and sheet printing). All printable flexible media, except ‘mesh’... -
Page 13: Options
1.5 Transport, (re)placement, installation and commissioning Transport, (re)placement, installation and commissioning may only be done by your local Agfa representative. For that reason these activities are not written in this manual. Please contact your local Agfa representative for these activities. - Page 14 www.agfagraphics.com...
-
Page 15: Chapter 2 Safety
The Inkjet Printer is a machine with fast moving parts and powerful chemicals that present some risks. Agfa Graphics has taken measures to mitigate these risks, but it is impossible to make the printer work completely risk-free. There are always (new) risks. -
Page 16: Safety Devices
2.2 Safety devices 2.2.1 Safety sensors (light curtains) Vertical safety light curtains are installed at the front and back of the printer. A safety light curtain consists of two opto-electronic beams with a sensing field (curtain) in between. The light curtains are used to detect the presence of a person’s finger, hand, limb or other obstacle. -
Page 17: Emergency Stop
The stirrer of the white ink tank will stop, as the electrical switch is NOT driven by the battery backup. An empty battery takes 5 days to completely charge again. Restart the machine according to the normal start procedure. :Anapurna H3200i LED Advanced Operator Manual (v1.0) -
Page 18: Special Points Of Danger
All such cleanup materials must be considered as chemical waste. 2.7 Material Safety Data Sheets (MSDS) Material Safety Data Sheets (MSDS) about Agfa ultraviolet reactive inks are available from your local Agfa Graphics sales organization, or on the Agfa Graphics website: http://www.agfagraphics.com/msds. -
Page 19: Warning Stickers And Labels
For work on certain parts of the printer (for example, UV inks and UV LED units) wearing PPE is recom- mended. Read this manual to find out where PPE is necessary. :Anapurna H3200i LED Advanced Operator Manual (v1.0) -
Page 20: Lockout/Tagout (Locked)
2.10 Lockout/tagout (locked) Lockout/tagout is a safety procedure where the machine is turned off and locked from being switched on. This procedure ensures: • that people can safely perform maintenance and/or repair work on the machine. • that unauthorized people cannot turn on the machine. 2.10.1 Lockout/tagout procedure 1 Shut down the printer, refer to chapter 5. -
Page 21: Chapter 3 Description Of Printer Parts
(touch screen) Optical safety sensors (light curtain) 2.2.1 Powered take-up axle for roll media 3.1.3 Vacuum media transport belt 3.1.4 Front media set bar 3.1.5 Roll to roll media controller Cutting slit 3.1.6 :Anapurna H3200i LED Advanced Operator Manual (v1.0) -
Page 22: Shuttle
3.1.1 Shuttle Side View (A) The shuttle is used for printing on the media. The shuttle consists of: Shuttle part Refer to Manual height adjustment (only in power off mode). Vacuum control. The vacuum system allows for a very precise control of the ink flow during print- ing and prevents the ink nozzles from dripping in home position. -
Page 23: Ink Supply Drawer
The :Anapurna H3200i LED can also handle a dual winding axle [2]. The dual winding axle has a clutch and flanges to limit the media roll in a lateral direc- tion on the axle. -
Page 24: Media Transport Belt
3.1.4 Media transport belt The media transport belt moves the media under the printing shuttle while it is held securely by vacuum pressure from below. The vacuum is applied over the area of the transport bed in four individually controlled areas as shown by the yellow arrows on the shuttle beam. -
Page 25: Back
Vacuum unit (on left side of printer) 3.2.1 Optical safety sensors (light curtain) 2.2.1 Back control panel Transport vacuum controls 3.2.2 Vacuum media transport belt 3.1.4 Media tension roll 3.2.3 Unwinding axle for roll media 3.2.4 Cutting slit 3.1.6 :Anapurna H3200i LED Advanced Operator Manual (v1.0) -
Page 26: Vacuum Unit
The :Anapurna H3200i LED can also handle a dual unwinding axle [2]. The dual unwinding axle has a clutch and flanges to limit the media roll in a lateral direction on the axle. -
Page 27: Chapter 4 Operator Panels
Vacuum Control PID: shows the pressure of applied vacuum. • red digits: processing value indicator (actual measured value)* • green digits: setting value indicator (target value)* * For more information, see chapter 12 “Varia”. :Anapurna H3200i LED Advanced Operator Manual (v1.0) -
Page 28: Back Control Panel
4.2 Back control panel Name Description Indicator • Indicator off: Main power (switch) OFF • Indicator is lit: Main power (switch) ON Main power Main switch to switch the main power supply of the printer ON or OFF Emergency switch Push button to switch the complete printer OFF in case of an emergency. -
Page 29: Shuttle Control Panel
Each color ink circuit has a valve to control the flow of the ink to the print head. See also 4.3.2 Storage flush drain valve Valve to rinse the storage flush supply. Drain valves Each color ink circuit has a drain valve to remove air from the circuit. :Anapurna H3200i LED Advanced Operator Manual (v1.0) -
Page 30: Vacuum Control Print Heads
4.3.1 Vacuum control print heads The standard negative pressure value (= vacuum) is preset in the factory for the default ink and should not be changed unless performance issues require it or other ink types are used. • Pressure value color ink circuits: -.038 Bar. •... -
Page 31: Ink/Storage Flush Level Indicators
Clear: deletes the entire new entry. Delete: deletes the last digit entered respectively. Min: fills the minimum value allowed in. Max: fills the maximum value allowed in. Cancel: leaves the current value untouched. :Anapurna H3200i LED Advanced Operator Manual (v1.0) -
Page 32: Control Screen
4.5 Control screen Pressing the Control Tab opens the Control screen. This screen provides control over the motion and alignment functions of the printer. Screen field Refer to Control 4.5.1 Controls of the media transport belt. 4.5.2 & 4.5.3 Sets the language and system. Print Alignment Patterns Chapter 7 There are four types of calibration patterns;... -
Page 33: Control
Set: Language This button opens the “Language” selector pop-up. The pop-up shows the current language. How to change the current language: 1 Select a language. 2 Press ‘OK’ to set the new selection. :Anapurna H3200i LED Advanced Operator Manual (v1.0) -
Page 34: Set: System Set
(is default off). Caution: Despite the fact that the option is available in the software, Agfa strongly advises against disabling a safety device of the printer. There is a serious risk of bodily harm from the printer’s moving parts. All of the safety sensors should be active during the operation of the machine. -
Page 35: Print Screen
Starts printing the job. Button title changes to “Pause” during the job to permit head cleaning or media feed adjustments. Cancel: Cancels printing. Only active during a print job. Percentage bar: Shows the progress of the print job. Margins (mm) 4.6.4 :Anapurna H3200i LED Advanced Operator Manual (v1.0) -
Page 36: Color Configuration
4.6.1 Color configuration The “Color Configs” button opens a selector for the many color configurations that are available. The most used modes are: • Color: normal printing of a single color image. • C1+C2: opens a second image tab. For printing at double density with high quality. •... -
Page 37: Print Control And Settings
The Mask Mode button opens a section for the mask calculation to be done on the image. :Anapurna H3200i LED Advanced Operator Manual (v1.0) -
Page 38: Options
4.6.3 Options Image Shift: See description below. Feed Adjust: See description below. Step and Repeat: See description below. 0/ x : Number of vertical copies. Return Media: This option is used to print multiple layers exactly on top of each other during multiple print runs. When check-box is checked, the media is moved back (in Y-direction) to the start position of the previous print run. -
Page 39: Margins
(e.g. 100 mm in the figure shown above). Skip Home: Deactivated: the shuttle returns to its home position after every print pass. Activated: the shuttle stops on the starting point for printing (e.g. 90 mm in the figure shown above). :Anapurna H3200i LED Advanced Operator Manual (v1.0) - Page 40 4.6.4.2 Roll media Skip Home Shuttle Home Left Right Left (with border) Left Left (with border) Left: The scale on the ruler of the media set bar corresponds with the calibration of the printer pro- gram and starts measuring at the beginning of the media transport. When you want to start printing on the edge of the roll media, you enter the distance (in mm) of the left edge of the roll media on the ruler (e.g.
-
Page 41: Chapter 5 Startup And Shutdown Procedures
If the printer will not operate for a long period (holiday), the white ink must be removed from its circuit and the white ink circuit must be cleaned with storage flush. This situation is termed a “long-term shutdown”. • 5.7 Procedure: Holiday shutdown (Long-Term) • 5.8 Procedure: Startup after a Long-Term Shutdown :Anapurna H3200i LED Advanced Operator Manual (v1.0) -
Page 42: Procedure: Sleep Mode
5.2 Procedure: sleep mode If the printer some time (approx. 3 hours) is not used, then it goes in the sleep mode and appears a message box on the screen. The operator needs to perform some actions to cancel the sleep mode and return to normal use. -
Page 43: Procedure: Daily Shutdown
- switch off media set [8] - switch off media tension [9] 12 Leave iGUI program running. 13 Leave PC ON, blue indicator lamp is lit [11]. 14 Leave START ON, white indicator lamp is lit [10]. :Anapurna H3200i LED Advanced Operator Manual (v1.0) -
Page 44: Procedure: Daily Startup
5.4 Procedure: daily startup Procedure: The state of the printer is sleep mode. Perform the procedure “Sleep mode”, see section 5.2. Load some media (see chapter 6). Perform the procedure to set the media thickness (see 7.1 “Setting Head Gap”). Perform a prime check and clean the print heads if needed (see 7.2 “Checking and clearing nozzles”). -
Page 45: Procedure: Weekend Shutdown (Short-Term)
- switch off media set [8] - switch off media tension [9] 13 Close the iGUI program. 14 Shut-down Windows and wait for the shutdown to be complete, blue indicator lamp [11] goes off. :Anapurna H3200i LED Advanced Operator Manual (v1.0) -
Page 46: Procedure: Startup After Weekend (Short-Term Shutdown)
5.6 Procedure: Startup after weekend (Short-Term Shutdown) Procedure: Press START ON, white indicators [1] and [11] are lit. Press button PC ON, blue indicator lamp [12] is lit. Start the iGUI program. Switch the color vacuum switch [13] on. Switch the color flow valves [14] in the position “ink”. -
Page 47: Procedure: Holiday Shutdown (Long-Term)
21 Lockout the main switch, see section 2.10. Note: After the printer is turned off with the main power switch, the display on the shuttle stays on till the voltage of the backup battery is around 40%. :Anapurna H3200i LED Advanced Operator Manual (v1.0) -
Page 48: Procedure: Startup After A Long-Term Shutdown
5.8 Procedure: Startup after a Long-Term Shutdown Turn on the compressed air at least 1 hour before startup procedure. Warning: The source of compressed air needs to be turned on at least one hour before beginning a startup procedure to ensure the white ink has been stirred enough to be ready for use. -
Page 49: Chapter 6 Media Loading
The vacuum pressure is set using the numeric control and is adjustable between 0 and 130. Vacuum control, fourth controller (far right) Full coverage requires a low vacuum setting! • Full coverage: 5 - 10 mbar. • other: 15 - 30 mbar. :Anapurna H3200i LED Advanced Operator Manual (v1.0) -
Page 50: Rigid Media
6.3 Rigid media 6.3.1 Media Tables Remark: • Attach the :Anapurna media tables as a pair to the front and rear of the printer for correct print- ing results over the complete media surface. • The media must be fully supported by the media table so they can not deform. Small media tables For a media depth up to 1 m, the small media feed tables may be used.
Need help?
Do you have a question about the Anapurna H3200i LED and is the answer not in the manual?
Questions and answers