
Related Manuals for Siemens SIMATIC 505 PPX:505–6108A


Summary of Contents for Siemens SIMATIC 505 PPX:505–6108A
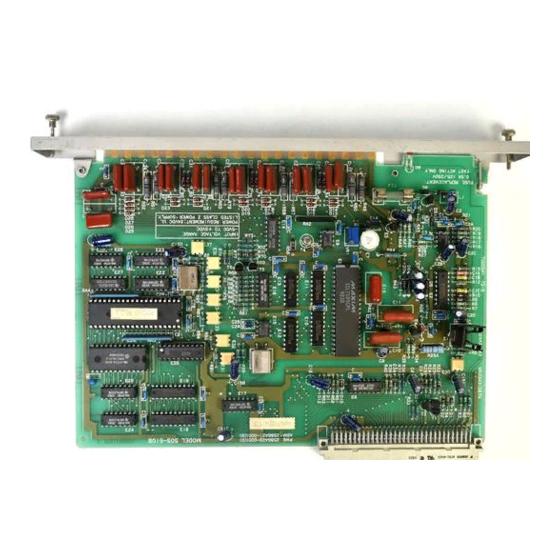
- Page 1 (217) 352-9330 | Click HERE Find the Siemens 505-6208A at our website:...
- Page 2 SIMATIC 505 Analog I/O Modules (PPX:505–6108A PPX:505–6108B PPX:505–6208A PPX:505–6208B) User Manual Order Number: PPX:505–8120–3 Manual Assembly Number: 2586546–0072 Third Edition Artisan Technology Group - Quality Instrumentation ... Guaranteed | (888) 88-SOURCE | www.artisantg.com...
- Page 3 All Rights Reserved — Printed in USA Reproduction, transmission, or use of this document or contents is not permitted without express consent of Siemens Energy & Automation, Inc. All rights, including rights created by patent grant or registration of a utility model or design, are reserved.
- Page 4 MANUAL PUBLICATION HISTORY SIMATIC 505 Analog I/O Modules User Manual Order Manual Number: PPX:505–8120–3 Refer to this history in all correspondence and/or discussion about this manual. Event Date Description Original Issue 10/91 Original Issue (2591824–0001) Second Edition 12/92 Second Edition (2591824–0002) Third Edition 08/98 Third Edition (2591824–0003)
- Page 5 LIST OF EFFECTIVE PAGES Pages Description Pages Description Cover/Copyright Third History/Effective Pages Third iii — viii Third 1-1 — 1-10 Third 2-1 — 2-14 Third 3-1 — 3-9 Third Third B-1 — B-5 Third Registration Third Artisan Technology Group - Quality Instrumentation ... Guaranteed | (888) 88-SOURCE | www.artisantg.com...
-
Page 6: Table Of Contents
Contents Preface Chapter 1 Product Overview Description ..............Analog Input Operation . - Page 7 Appendix A Terminal Block Worksheet ....... . . A-1 Appendix B Specifications ......... . . B-1 Contents Artisan Technology Group - Quality Instrumentation ...
- Page 8 List of Figures 1-1 Series 505 Analog Modules (PPX–505–6108B and PPX–6208B) ......1-2 Output from the PPX:505–6108A Module to the Controller .
- Page 9 List of Tables 1-1 Analog Input Module Power Cycling ..........1-10 1-2 Analog Output Module Power Cycling .
-
Page 10: Preface
(IEC–65A/WG6) for programmable controllers (released as IEC 1131–2, Programmable Controllers, Part 2: Equipment Requirements and Tests, First Edition, 1992–09). Contact Siemens Energy & Automation, Inc., for information about regulatory agency approvals that have been obtained on Series 505 units. - Page 11 Telephoning for For technical assistance, contact your Siemens Energy & Automation, Inc. Assistance distributor. viii Preface Series 505 Analog I/O Modules User Manual Artisan Technology Group - Quality Instrumentation ... Guaranteed | (888) 88-SOURCE | www.artisantg.com...
-
Page 12: Chapter 1 Product Overview
Chapter 1 Product Overview Description ..............Analog Input Operation . -
Page 13: Description
Description The Series 505 Analog Input (PPX:505–6108A and PPX:505–6108B), and Output (PPX:505–6208A and PPX:505–6208B) Modules are single-wide versions of the Analog I/O Modules (PPX:505–6108 and PPX:505–6208), and can replace the double-wide models without any wiring changes. The Input Modules (PPX:505–6108A and PPX:505–6108B) offer the additional benefit of an optional 10 V input range, and they do not require external user-supplied power. -
Page 14: Series 505 Analog Modules (Ppx-505-6108B And Ppx-6208B)
Backplane connector Bezel screw Module description Module good LED Terminal block Model number PPX:505–6208B Output Module PPX:505–6108B Input Module Figure 1-1 Series 505 Analog Modules (PPX–505–6108B and PPX–6208B) Series 505 Analog I/O Modules User Manual Product Overview Artisan Technology Group - Quality Instrumentation ... Guaranteed | (888) 88-SOURCE | www.artisantg.com... -
Page 15: Analog Input Operation
Analog Input Operation Signal Translation The Analog Input module operates asynchronously with the controller. That is, the controller and module do not update at the same time. Instead, the module translates all analog inputs in one module update and stores the translated words in buffer memory. -
Page 16: Analog Signal For Ppx:505-6108B
Analog Signal for The PPX:505–6108B analog signal is translated into a 13-bit digital word. PPX:505–6108B Since the controller requires a 16-bit word for inputs, the 13-bit value from the converter is placed into a 16-bit word for transmittal to the controller. As shown in Figure 1-3, of the three bits not used for the converter magnitude, one is used to show the sign of the value, one is used to note overrange values, and the remaining one is not used and is set to zero. -
Page 17: Current Or Voltage Input
Analog Input Operation (continued) Current or Voltage The analog input module has eight inputs. You can select each of the eight Input inputs to receive either voltage or current as the incoming analog signal. Since the inputs are single-ended, the source for a current signal must be a true current-sourcing transmitter, not a current-sinking transmitter. -
Page 18: Calculating Digital Words For The Ppx:505-6108A
Calculating Digital The PPX:505–6108A module has a resolution of 8 counts out of 32000. That Words for the is, the smallest unit into which the module divides a unipolar input is 1 part PPX:505–6108A out of 4000. For a voltage input of 0 to +5 V, this division corresponds to a step of 1.25 mV. -
Page 19: Analog Output Operation
Analog Output Operation The analog output module operates synchronously with the controller. Any change in the output signal is dependent on the update time of the module. Figure 1-5 shows this relationship. Output Level New Output Level – = Response Time See Appendix B –... -
Page 20: Output From Controller To Module
NOTE: Bit 1 (the sign bit) is used to check for a negative number sent to the output module. If this bit is set to 1, the output for the point is not updated, and the last positive output is repeated. 10 11 12 13 14 15 16 Digital word to be converted Sign bit... -
Page 21: Power Sources
Power Sources The output module requires both user-supplied and base-supplied power. Table 1-1 shows the input module response at power-up and power-down. Table 1-1 Analog Input Module Power Cycling Base Power User Power Module Transition on Not applicable Module resumes converting and controller resumes reading from module Transition off Not applicable... -
Page 22: Chapter 2 Installation
Chapter 2 Installation Wiring Guidelines ............. . . Planning Analog Output Wiring . -
Page 23: Wiring Guidelines
Wiring Guidelines Wiring for these modules consists of wiring for the input or output signal and wiring user power for the output module. Keep the two types of wiring separate to prevent noise on the signal wiring. Wiring for the input or output signal should be shielded, twisted-pair cable (14–24 AWG or 0.18–1.5 mm , either stranded or solid-type). - Page 24 Follow these guidelines when you wire the module. Use the shortest possible wires. Avoid placing signal wires parallel to high-energy wires. If the two must meet, cross them at right angles. Avoid placing wires on any vibrating surfaces. Avoid bending the wire into sharp angles. Use wireways for wire routing.
-
Page 25: Planning Analog Output Wiring
Planning Analog Output Wiring Signal Wire Loop resistance for the output circuit is determined by the length and type Carrying Current of wire and the device series resistance. This section gives instructions for calculating the maximum length cable you can use. The circuit resistance must be in the range of 10–600 Ω. -
Page 26: Signal Wire Carrying Voltage
Signal Wire To help ensure accuracy within module specifications, consider the following Carrying Voltage in choosing wire that carries voltage: Load imposed by the field device Type and length of wire Wiring practices The load imposed by a field device must be at least 5000 Ω. The maximum capacitance that can be driven by the output is 0.01 µ... -
Page 27: Wiring And Installing The Terminal Block
Wiring and Installing the Terminal Block Terminal Block Figure 2-2 shows the two terminal block types that are available for use Options with the analog I/O modules. Connector PPX:2587705–8006 is shipped with the modules. However, you can order the other connector, PPX:2587705–8002, and wire it identically. -
Page 28: Wiring The Terminal Block
Wiring the Terminal You can wire the terminal block before or after it is attached to the module. Block Strip back the insulation on the wires 0.25 or 1.0 cm. Use a 14–24 AWG or 0.18–1.5 mm wire, either stranded or solid-type. You may attach a spade or a ring lug (amp 34141) to the end of the wire if allowed by the connector type. -
Page 29: Pinouts For Ppx:505-6108A, Ppx:505-6108B, Ppx:505-6208A, And Ppx:505-6208B
Wiring and Installing the Terminal Block (continued) Not used 24 VDC+ Not used 24 V common I5 in I5 out I1 in I1 out V5 in V5 out V1 in V1 out Return 5 Return 5 Return 1 Return 1 Not used Not used Not used... -
Page 30: Selecting Voltage Or Current Inputs For The Analog Input Module
Selecting Voltage The Analog Input Module has eight input channels. Each of the eight or Current Inputs channels may be selected to receive either voltage or current as the for the Analog incoming analog signal. See Figure 2-5. Input Module To wire voltage input signals, wire the input signal directly to the voltage input point. -
Page 31: Analog Input Module: Field Wiring For 2-Wire Transmitter
Wiring and Installing the Terminal Block (continued) Figure 2-6 through Figure 2-8 show typical connections for analog input and analog output modules. Figure 2-6 and Figure 2-7 show Channel 1 of the analog input module configured for current and wired to a transmitter. Channel Input 250 Ω... -
Page 32: Analog Output Module: Typical 4-Channel Connection
Terminal Block 24 VDC User Power + – Current Driver Converter Field Device Voltage Driver CH 1* GND Shield at Base (Use on all Signal Lines) Current Driver Converter Voltage Driver CH 2* Field Devices Current Driver Converter Voltage Driver CH 3* Field Device Current... -
Page 33: Inserting The Module
Inserting the Module These analog I/O modules are single-wide. You can install either module in any unused I/O slot. However, avoid installing the modules next to high-energy switching modules or other potential sources of electromagnetic interference (EMI). Install the module in the same manner as any other Series 505 I/O module. -
Page 34: Apply Power
Apply Power Apply power only to the base. Configure the I/O. See Section 2.5 on configuring the I/O. Now that the terminal block is installed and the module is configured, restore all user-supplied power to the base. NOTE: If more than one module is to be installed, do not restore power until all modules have been installed. -
Page 35: Configuring I/O
Configuring I/O After you have inserted the module into the base, you must register the module in PLC memory. NOTE: If you do not register the module, the PLC logs a nonfatal error; however, the module LED status indicator remains on. Configure the analog modules as 8-point word as shown in Table 2-1. - Page 36 Chapter 3 Troubleshooting and Maintenance Status Indicator ..............Replacing the Fuse .
-
Page 37: Status Indicator
Status Indicator The LED status indicator and the programming device indicate whether the module is operating correctly. Table 3-1 lists symptoms, possible causes, and corrective actions to take if the module is not operating correctly. Table 3-1 Troubleshooting Chart Symptom Probable Cause Corrective Action LED is not on... -
Page 38: Replacing The Fuse
Insert the module into the base. Connect the terminal block (if necessary). Power up the system. If you cannot correct the problem, contact your Siemens Energy & Automation, Inc. distributor for technical assistance. Series 505 Analog I/O Modules User Manual Troubleshooting and Maintenance Artisan Technology Group - Quality Instrumentation ... -
Page 39: Calibration Guidelines
Calibration Guidelines The modules are calibrated during manufacture and should not need to be calibrated again to operate properly; however, a maintenance schedule to check accuracy every six to twelve months is recommended. If the accuracy is not within specified tolerance at 25 C, recalibrate the module. - Page 40 CAUTION To help avoid potential damage to equipment, use a non-metallic screwdriver to calibrate the module. Do not use a metallic screwdriver. WARNING To minimize the risk of personal injury or property damage, do not touch the printed circuit board during the calibration procedure while the system is powered up.
-
Page 41: Calibrating Analog Input Modules
Calibrating Analog Input Modules To calibrate the input module, follow this procedure. Disable system and user power. Disconnect the field wiring. If you are using a Euro-extender card (Euroboard): Remove the module from the base. Insert the extender card into the I/O slot that the module occupied. You may use a Schroff, Inc. - Page 42 Prompt the programming device to display the module points and their associated values. Send +5.000 V to all input points (+10.000 V with the 10 V input range). Locate the calibration potentiometer on the circuit board (Figure 3-2). Turn the screw with a non-metallic screwdriver until the programming screen shows all addresses at an average of +32000.
-
Page 43: Calibrating Analog Output Modules
Calibrating Analog Output Modules To calibrate the output module, follow this procedure. Disable system and user power. Disconnect all loads and field wiring (except user power). If you are using a Euro-extender card (Euroboard): Remove the module from the base. Insert the extender card into the I/O slot that the module occupied. - Page 44 Measure all voltage and current channels. Using the current outputs, calculate the mean of the output value, then find the channel whose output is closest to this calculated value. 10. Locate the calibration potentiometer on the circuit board (Figure 3-3). Using the channel which has an output closest to the mean output value, adjust to 20.000 mA at 25 C by using the calibration potentiometer.
- Page 45 Appendix A Terminal Block Worksheet Series 505 Analog I/O Modules User Manual Terminal Block Worksheet Artisan Technology Group - Quality Instrumentation ... Guaranteed | (888) 88-SOURCE | www.artisantg.com...
-
Page 46: Environmental Specifications: Analog Input And Output Modules
Appendix B Specifications Table B-1 Environmental Specifications: Analog Input and Output Modules Minimum torque for bezel screws 2.6 in-lb (0.3N-m) Maximum torque for bezel screws 4.12 in-lb (0.6N-m) Operating temperature 0 to 60 C (32 to 140 F) Storage temperature –40 to +70 C (–40 to 158 F) Relative humidity 5% to 95% noncondensing... -
Page 47: Analog Input Module Ppx:505-6108A Electrical Specifications
Table B-2 Analog Input Module PPX:505–6108A Electrical Specifications Number of input points 8, single-ended Module width Single-wide –5 V to +5 V and 0 to 20 mA, or Signal range –10 V to +10 V (selected voltage range applies to all channels) Voltage accuracy ( ) 0.82% of full scale over operating range ( ) 0.5% of full scale at 25 C... -
Page 48: Analog Input Module Ppx:505-6108B Electrical Specifications
Table B-3 Analog Input Module PPX:505–6108B Electrical Specifications Number of input points 8, single-ended Module width Single-wide –5 V to +5 V and 0 to 20 mA, or Signal range –10 V to +10 V (selected voltage range applies to all channels) Voltage accuracy ( ) 0.41% of full scale over operating range ( ) 0.25% of full scale at 25 C... -
Page 49: Analog Output Module Ppx:505-6208A Electrical Specifications
Table B-4 Analog Output Module PPX:505–6208A Electrical Specifications Output channels 8, single-ended, simultaneous voltage and current Module width Single-wide Signal range 0 to 10 VDC, 0 to 20 mA Voltage accuracy ( )1.45% of full scale over full temp. range ( )0.5% of full scale at 25 C Current accuracy ( )1.83% of full scale over full temp.range... -
Page 50: Analog Output Module Ppx:505-6208B Electrical Specifications
Table B-5 Analog Output Module PPX:505–6208B Electrical Specifications Output channels 8, single-ended, simultaneous voltage and current Module width Single-wide Signal range 0 to 10 VDC, 0 to 20 mA Voltage accuracy ( )1.45% of full scale over full temp. range ( )0.5% of full scale at 25 C Current accuracy ( )1.83% of full scale over full temp.range... - Page 51 Specifications Series 505 Analog I/O Modules User Manual Artisan Technology Group - Quality Instrumentation ... Guaranteed | (888) 88-SOURCE | www.artisantg.com...
- Page 52 Customer Registration We would like to know what you think about our user manuals so that we can serve you better. How would you rate the quality of our manuals? Excellent Good Fair Poor Accuracy Organization Clarity Completeness Overall design Size Index Would you be interested in giving us more detailed comments about our manuals?
- Page 53 UNITED STATES BUSINESS REPLY MAIL PERMIT NO.3 FIRST CLASS JOHNSON CITY, TN POSTAGE WILL BE PAID BY ADDRESSEE SIEMENS INDUSTRIAL AUTOMATION, INC. 3000 BILL GARLAND RD. P.O. BOX 1255 JOHNSON CITY TN 37605–1255 ATTN: Technical Communications M/S 3519 FOLD Artisan Technology Group - Quality Instrumentation ... Guaranteed | (888) 88-SOURCE | www.artisantg.com...
- Page 54 SIMATIC is a registered trademark of Siemens AG. 500, 505, TISOFT, SOFTSHOP, and PEERLINK are trademarks of Siemens Energy and Automation, Inc. UL is a registered trademark of Underwriters Laboratories. Artisan Technology Group - Quality Instrumentation ... Guaranteed | (888) 88-SOURCE | www.artisantg.com...
Need help?
Do you have a question about the SIMATIC 505 PPX:505–6108A and is the answer not in the manual?
Questions and answers