
Related Manuals for Wilo Helix EXCEL Complete


Summary of Contents for Wilo Helix EXCEL Complete
- Page 1 Pioneering for You Wilo-Helix EXCEL Complete Installation and operation manual Wilo-Helix EXCEL Complete - November 2019...
- Page 2 Fig. 1...
- Page 3 Fig. 2...
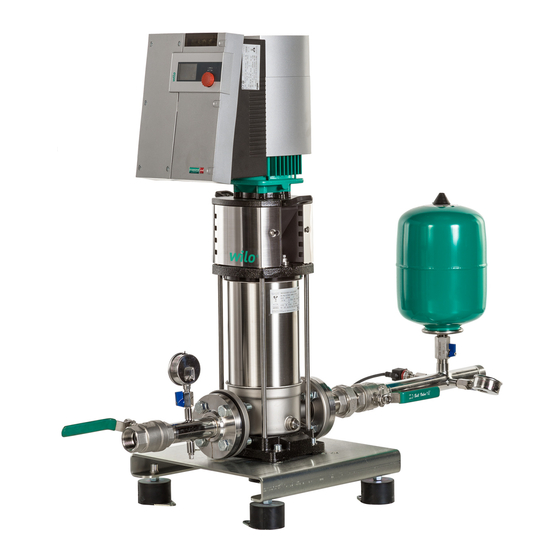
- Page 4 Fig. 3 Fig. 4 Fig. A1...
- Page 5 Fig. A2 Fig. A3...
- Page 6 Fig. A4 Fig. A5 Fig. A6...
- Page 7 Installation and operating instructions...
- Page 8 NOTE: Useful information on the handling of the product. It attends the user to possible problems. 2.2 Personnel qualification The personnel installing the pump must have the appropriate qualification for this work. Helix EXCEL Complete - Installation and operation manual (Version 1 11012019)
-
Page 9: Transport And Interim Storage
3: pump casing in cast iron GJL-250 + hydraulic in stainless steel 304 A3: ANSI flanges 300 lb E : O rings EPDM V : O rings VITON KS : Cartridge seal + System orientation Helix EXCEL Complete - Installation and operation manual... -
Page 10: Description And Function
CAUTION! Possible damage of the pump! Dirt and solder drops in to the pump body can af- fect the pump operation. • It is recommended that any welding and solde- Helix EXCEL Complete - Installation and operation manual (Version 1 11012019) - Page 11 National Electrical Codes (NEC), local codes and regulations must be followed. - The motor is provided with condensate hole WARNING! Electrical shock hazard! Dangers caused by electrical energy must be ex- cluded. Helix EXCEL Complete - Installation and operation manual...
- Page 12 NPT 1/4”Hexagon head 0.7 in (17 mm) 4/48 (6) Union nut, NPT 1/2” Hexagon head 0.8 in (22 mm) 6/72 (8) cable lead-throughs NPT 3/4” Hexagon head 1.1 in (27 mm) 8/96 (11) Helix EXCEL Complete - Installation and operation manual (Version 1 11012019)
- Page 13 The connection is twist-proof. • Loosen the screws and remove the converter cover. NOTE: The terminals IN1, IN2, GND and Ext. Off meet the requirement for “isolated secondary circuits, limited voltage/limited current” (accor- Helix EXCEL Complete - Installation and operation manual...
- Page 14 • The external control allows for the enabling/disabling of Example: Float switch, pressure gauge for dry-running… the pump via the free contact. To disable this control, a ju- mper must be placed between terminals 3 and 4. Helix EXCEL Complete - Installation and operation manual (Version 1 11012019)
- Page 15 • 2 wires ( [20mA/10V] / +24V ) 10 11 • 3 wires ( [20mA/10V] / 0V / +24V ) Setpoint determined via external source External External pressure control set value sensor Helix EXCEL Complete - Installation and operation manual...
- Page 16 100% Value Value in % of the range in % of the range of of measurement of measurement of the the sensor sensor Input current (mA) Input voltage (V) Helix EXCEL Complete - Installation and operation manual (Version 1 11012019)
- Page 17 100% 100% Area where converter stops Area where converter stops Minimum Minimum Frequency run speed Frequency run speed of the converter of the converter ~30% ~30% Input current (mA) Input voltage (V) Helix EXCEL Complete - Installation and operation manual...
- Page 18 - Open the guard valve on the discharge side a little (3). - Unscrew the air bleed screw from filling plug for air venting (6a). - Retighten the air-bleed screw when air escapes Helix EXCEL Complete - Installation and operation manual (Version 1 11012019)
- Page 19 (example 4000->5000). Icon display • Any blinking elements (value, menu number, symbol or icon) allow the choice of a new value, a new menu number or a new function. Helix EXCEL Complete - Installation and operation manual...
- Page 20 Position Switch 1 Description OPERATION Only reading for the « Information » menu. SERVICE • The « Information » menu displays measuring, device and operating data, see, (Fig. A8). Helix EXCEL Complete - Installation and operation manual (Version 1 11012019)
- Page 21 Fig. A7 Navigation of basic menus in normal operation (Switch1 = OFF in «OPERATION » position) Setting point Controle type Pump Information Service Acknowledge Errors Appears when an error is actived Helix EXCEL Complete - Installation and operation manual...
- Page 22 Actual conditions SSM relay See chapter 11 - Menu <5.6.7.0> SBM relay Default “Available transfert” ext. off Device data Pump name User controller software version Motor controller software version Helix EXCEL Complete - Installation and operation manual (Version 1 11012019)
- Page 23 • « P.I.D. control » Then in menu <5.0.0.0>, the expert mode gives access to all the converter parameters (Fig. A11). • After setting, put the switch 1 on OFF position (Fig. A1, ref. 1). Helix EXCEL Complete - Installation and operation manual...
- Page 24 External setpoint input - IN2 Selection of the signal type parameterization P.I.D. Selection value “P” (0.0-300.0) parameterization P.I.D. Selection value “I” (10ms-300s) With external setpoint parameterization P.I.D. Selection value “D” (0ms-300s) Helix EXCEL Complete - Installation and operation manual (Version 1 11012019)
- Page 25 Selection parameters “I” Selection parameters “D” Other settings zero flow delay Only displayed when „Constant Pressure“ or „Variable time Pressure“ is enabled Selection of reduced frequency Selection of SBM relay Factory settings Helix EXCEL Complete - Installation and operation manual...
-
Page 26: Maintenance
• For the starting up, we recommend a pressure set value at 60% of its maximum pressure. « P.I.D. control » mode Regulation with a sensor (temperature, flow...) by P.I.D.control and setting point (internal or ex- ternal). Helix EXCEL Complete - Installation and operation manual (Version 1 11012019) -
Page 27: Faults, Causes And Remedies
Change it or add an other one on the in- installation stallation If the fault cannot be solved, please contact Wilo customer service. Faults should only be remedied by qualified personnel! Observe the safety instructions, see chapter 9 Maintenance. Helix EXCEL Complete - Installation and operation manual... - Page 28 Example: 6 defects with a variable time limit on 24 sliding hours. State of SBM relay is « Available transfer ». Errors Active relay Rest relay Active relay Rest relay 24H00 sliding Helix EXCEL Complete - Installation and operation manual (Version 1 11012019)
- Page 29 Current sensor defect. Call the after-sales technician. E077 immediate immediate no restart 24V defect Call the after-sales technician. Power E099 immediate immediate no restart Unknown pump type. Call the after-sales technician. off/on Helix EXCEL Complete - Installation and operation manual...
- Page 30 NOTE: When there is a time before considering of the defect, after signalling (example: 300s), the defect must always be manually acknowledged. The auto reset timer is inactive and “- - -” is displayed. Helix EXCEL Complete - Installation and operation manual (Version 1 11012019)
-
Page 31: Spare Parts
• Observe the locally applicable regulations! Please consult your local municipality, the nearest waste disposal site, or the dealer who sold the product to you for information on proper disposal. Subject to technical alterations! Helix EXCEL Complete - Installation and operation manual... - Page 32 WILO USA LLC 9550 W. Higgins Rd. #300 Rosemont, IL 60018 P (888) 945-6872 F (888) 945-6873 WILO Canada Inc. Bay 7 - 2915 10th Ave. N.E. Calgary, Alberta, T2A 5L4 CANADA P (403) 276-9456 Pioneering for You F (403) 277-9456...
Need help?
Do you have a question about the Helix EXCEL Complete and is the answer not in the manual?
Questions and answers