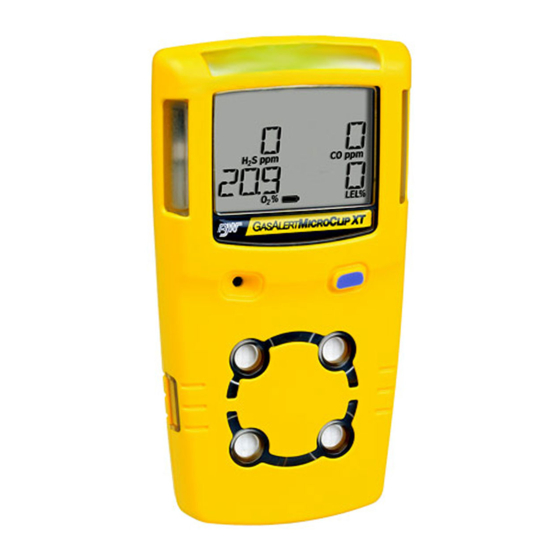
BW Technologies GasAlert MicroClipXT Instructions
Bump test
Hide thumbs
Also See for GasAlert MicroClipXT:
- User manual (68 pages) ,
- Operator's manual (24 pages) ,
- Quick reference manual (2 pages)
Advertisement
Table of Contents
A bump test simply confirms that the alarm and sensors are responding to gas by
exposing the detector to a gas concentration that exceeds the lowest alarm set
point. This means that you must manually apply gas and verify that the audible
and visual alarms are activated before each day's use (aka bump test).
Note:
Bump tests and calibrations must be performed in a fresh air environment.
DO NOT bump test or calibrate the detector while charging or immediately after
charging the unit. Allow at least one hour cool-down after charge.
Performing a Bump Test:
1. Turn on the air monitor
a. Allow the unit to Self-Test and wait for the
b. If the light DOES NOT FLASH, DO NOT USE THE UNIT.
2. Thread the regulator to the cylinder.
3. Connect the calibration hose to the regulator.
4. Attach the black calibration cap to the detector.
5. Open the gas valve.
6. The unit should respond to the gas and the audible and visual alarms
(flashing red lights) will activate. That means that the Bump Test is
Complete and Successful! The detector will temporarily remain in alarm
until the gas clears from the sensors.
a. If the alarm does not sound when applying gas (failed bump test),
DO NOT USE the unit. Call the Safety Department to get an air
monitor that is in proper working condition.
7. Turn off the gas; remove the calibration cap from the detector; remove the
hose from the regulator; remove the regulator from the gas cylinder.
8. Charge the air monitor after every workday and store and maintain all
supplies in carrying case.
BUMP TEST INSTRUCTIONS
green flashing light.
Advertisement
Table of Contents

Related Manuals for BW Technologies GasAlert MicroClipXT


Summary of Contents for BW Technologies GasAlert MicroClipXT
- Page 1 BUMP TEST INSTRUCTIONS A bump test simply confirms that the alarm and sensors are responding to gas by exposing the detector to a gas concentration that exceeds the lowest alarm set point. This means that you must manually apply gas and verify that the audible and visual alarms are activated before each day’s use (aka bump test).
- Page 2 BUMP TEST INSTRUCTIONS...
Need help?
Do you have a question about the GasAlert MicroClipXT and is the answer not in the manual?
Questions and answers