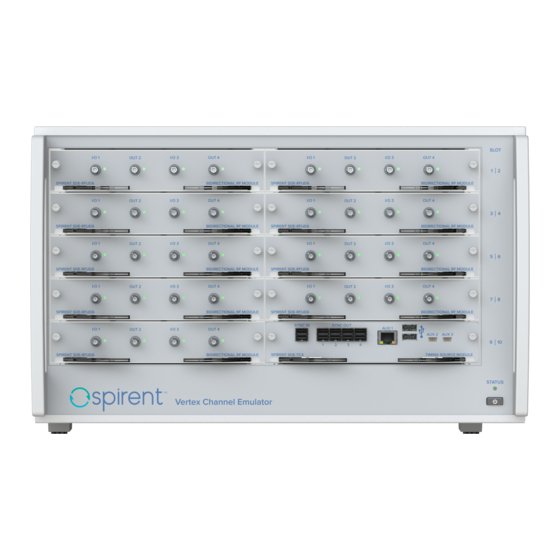
Spirent Vertex Setup Manual
Channel emulator
Hide thumbs
Also See for Vertex:
- User manual (22 pages) ,
- Application note (9 pages) ,
- Setup manual (11 pages)
Advertisement
Quick Links
Spirent Setup Guide:
Vertex Channel Emulator
Equipment Layout
+1 800-SPIRENT – www.spirent.com
Item
Vertex Channel Emulator
Vertex power supply
Ethernet cable (loopback cable)
Controller laptop
Laptop power supply
1 Ensure the AC power cords are not connected to wall outlets.
2 Connect the rear panel cables by following the instructions on the following page:
- For a single-Vertex configuration, see page 2.
- For a dual-Vertex configuration, see page 3.
- For a quad-Vertex configuration, see page 4.
3 Connect the front panel cables by following the instructions on the following page:
- For a dual-Vertex configuration, see page 5.
- For a quad-Vertex configuration, see page 6.
For a quad-Vertex configuration, make sure there is adequate open space on the sides of
4
the rack. See page 7 for more information.
5 Make sure the loopback cable is connected on the rear panel.
Connect the power cords to all instruments and apply power to the system by following the
6
instructions on page 8.
7 Start the Vertex Channel Emulator application by following the instructions on page 9.
Attention!
You MUST connect the loopback
cable from the right side
Ethernet port of the embedded
PC to Ethernet port 2 of the
DSPM board at slot1 before you
apply power to the system.
Controller laptop
Page 1 of 9
System Components
Quantity
1
1
1
1
1
Assembly Procedure
Instructions
Information subject to change.
Ethernet port 2 of
DSPM board
Loopback
cable
Ethernet port of
embedded PC
71-007894.A10
Advertisement

Summary of Contents for Spirent Vertex
- Page 1 - For a dual-Vertex configuration, see page 5. - For a quad-Vertex configuration, see page 6. For a quad-Vertex configuration, make sure there is adequate open space on the sides of the rack. See page 7 for more information. 5 Make sure the loopback cable is connected on the rear panel.
- Page 2 Spirent Setup Guide: Vertex Channel Emulator Single-Vertex Configuration: Rear Panel Cable Routing Supplied by User E2 LAN Cable U1 USB to RS-232 E1 LAN Cable 71-007894.A10 Page 2 of 9 Information subject to change. +1 800-SPIRENT – www.spirent.com...
- Page 3 Spirent Setup Guide: Vertex Channel Emulator Dual-Vertex Configuration: Rear Panel Cable Routing Vertex 1: Primary E4 LAN Cable M5 MINI SAS M3 MINI SAS E2 LAN Cable cable cable H1 HDMI M4 MINI SAS M6 MINI SAS cable B1 BNC cable...
- Page 4 Spirent Setup Guide: Quad-Vertex Configuration: Vertex Channel Emulator Rear Panel Cable Routing Vertex1 Ethernet cable Vertex2 Controller PC Vertex3 Vertex4 71-007894.A10 Page 4 of 9 Information subject to change. +1 800-SPIRENT – www.spirent.com...
- Page 5 Spirent Setup Guide: Vertex Channel Emulator Dual-Vertex Configuration: Front Panel Cable Routing Vertex 1: Primary Primary SYNC OUT2 M1 MINI SAS cable M2 MINI SAS Primary SYNC IN cable Primary SYNC OUT1 Vertex 2: Secondary Secondary SYNC IN 71-007894.A10 Page 5 of 9 Information subject to change.
- Page 6 Spirent Setup Guide: Vertex Channel Emulator Quad-Vertex Configuration: Front Panel Cable Routing Vertex1 Vertex2 Vertex3 Vertex4 71-007894.A10 Page 6 of 9 Information subject to change. +1 800-SPIRENT – www.spirent.com...
- Page 7 Spirent Setup Guide: Vertex Channel Emulator Quad-Vertex Configuration: Rack Mounting Rack 40U R40-VCE6-01 (53-005278) Attention! The rack has a mesh panel Vertex1 on each side for ventilation. You MUST keep at least 20cm of open space on each side of the rack.
- Page 8 Vertex1. NOTE: 3 Connect the AC power cord to the power connector on the rear panel of the Vertex instrument. If the AC power voltage is <200V, make sure to connect a 20A power cord NOTE: If this is a multi-Vertex configuration, start with Vertex1, which is the top unit.
- Page 9 Instructions 1 On the Controller laptop, double-click on the Vertex Channel Emulator desktop shorcut. In the Primary Fader IP Address box, type in the IP address of the Vertex instrument, and then click the Connect button. The Vertex window appears.


Need help?
Do you have a question about the Vertex and is the answer not in the manual?
Questions and answers