
Subscribe to Our Youtube Channel
Related Manuals for Rohde & Schwarz AREG100A


Summary of Contents for Rohde & Schwarz AREG100A
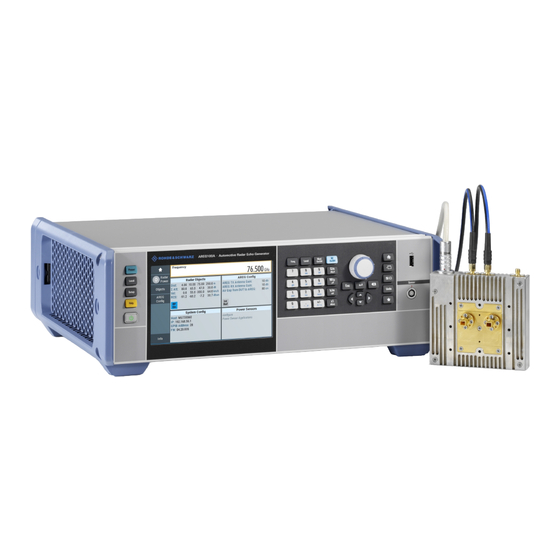
- Page 1 ® R&S AREG100A Automotive Radar Echo Generator Getting Started (>NSÖ2) 1430357202 Version 06...
- Page 2 ® This document describes the R&S AREG100A, stock no. 1430.3508K02. © 2021 Rohde & Schwarz GmbH & Co. KG Mühldorfstr. 15, 81671 München, Germany Phone: +49 89 41 29 - 0 Email: info@rohde-schwarz.com Internet: www.rohde-schwarz.com Subject to change – data without tolerance limits is not binding.
-
Page 3: Table Of Contents
4.2 Unpacking and Checking..............15 4.3 Choosing the Operating Site............. 16 4.4 Setting Up the R&S AREG100A............16 4.4.1 Placing the R&S AREG100A on a Bench Top........16 4.4.2 Mounting the R&S AREG100A in a Rack..........17 4.5 Important Aspects for Test Setup............18 4.6 Connecting to Power................ - Page 4 ® Contents R&S AREG100A 4.8 Connecting USB Devices..............21 4.9 Connecting to Ref In/Ref Out.............22 4.10 Connecting to Aux IF In/Aux IF Out ..........22 4.11 Connecting the Frontend..............23 4.12 Switching On or Off................25 5 Instrument Tour..............28 5.1 Front Panel Tour..................28...
- Page 5 ® Contents R&S AREG100A 6.3 Use Case Example - Testing Radar Sensors against Interferers..44 7 Instrument Control.............. 46 7.1 Possible Ways to Operate the Instrument........46 7.2 Means of Manual Interaction..............47 7.3 Understanding the Display Information..........47 7.3.1 Additional Display Characteristics............48 7.4 Accessing the Functionality..............
- Page 6 ® Contents R&S AREG100A Getting Started 1430.3572.02 ─ 06...
-
Page 7: Safety And Regulatory Information
® Safety and Regulatory Information R&S AREG100A Safety Instructions Safety and Regulatory Information The product documentation helps you use the product safely and efficiently. Fol- low the instructions provided here and in the Chapter 1.1, "Safety Instructions", on page 7. - Page 8 ® Safety and Regulatory Information R&S AREG100A Safety Instructions If any part of the product is damaged or broken, stop using the product. Never open the casing of the product. Only service personnel authorized by Rohde & Schwarz are allowed to repair the product. Contact Rohde & Schwarz customer service at http://www.customersupport.rohde-schwarz.com.
- Page 9 ® Safety and Regulatory Information R&S AREG100A Safety Instructions Connecting to power The product is an overvoltage category II product and has to be connected to a fixed installation used to supply energy-consuming equipment such as household appliances and similar loads. Be aware that electrically powered products have risks, such as electric shock, fire, personal injury or even death.
-
Page 10: Labels On R&S Areg100A
Table 1-1: Labels regarding R&S AREG100A and environment safety Labeling in line with EN 50419 for disposal of electrical and electronic equipment after the product has come to the end of its service life. For more information, see the prod- uct user manual, chapter "Disposal". -
Page 11: Documentation Overview
Getting Started Manual Introduces the R&S AREG100A and describes how to set up and start working with the product. Includes basic operations, typical measurement examples, and general information, e.g. safety instructions, etc. A printed version is delivered with the instrument. -
Page 12: Instrument Security Procedures
AREG100A Release Notes and Open Source Acknowledgment (OSA) Instrument Security Procedures Deals with security issues when working with the R&S AREG100A in secure areas. It is available for download on the Internet. Basic Safety Instructions Contains safety instructions, operating conditions and further important informa- tion. -
Page 13: Application Notes, Application Cards, White Papers, Etc
® Documentation Overview R&S AREG100A Application Notes, Application Cards, White Papers, etc. Application Notes, Application Cards, White Papers, etc. These documents deal with special applications or background information on particular topics. www.rohde-schwarz.com/application/areg100a Getting Started 1430.3572.02 ─ 06... -
Page 14: Key Features
R&S AREG100A Key Features The R&S AREG100A Automotive Radar Echo Generator sets standards in RF performance and usability. Outstanding key features are: ● Remote frontends supporting up to 4 GHz signal bandwidth and different fre- quencies, like 24 GHz to 24.25 GHz, 76 GHz to 77 GHz and 76 GHz to 81 ●... -
Page 15: Preparing For Use
1. Unpack the R&S AREG100A carefully. 2. Retain the original packing material. Use it to protect the control elements and connectors when transporting or shipping the R&S AREG100A later. See also chapter "Transporting" in the user manual. 3. Using the delivery notes, check the equipment for completeness. -
Page 16: Choosing The Operating Site
"Intended use" on page 7. 4.4.1 Placing the R&S AREG100A on a Bench Top To place the product on a bench top 1. Place the product on a stable, flat and level surface. Ensure that the surface can support the weight of the product. For information on the weight, see the data sheet. -
Page 17: Mounting The R&S Areg100A In A Rack
● Do not place the product next to heat-generating equipment such as radia- tors or other products. 4.4.2 Mounting the R&S AREG100A in a Rack To prepare the rack 1. Observe the requirements and instructions in "Setting up the product"... -
Page 18: Important Aspects For Test Setup
Important Aspects for Test Setup To mount the R&S AREG100A in a rack 1. Use an adapter kit that fits the dimensions of the R&S AREG100A to prepare the instrument for rack mounting. For information on the dimensions, see data sheet. -
Page 19: Connecting To Power
● Ensure that connected external devices comply with EMC regulations. Signal input and output levels Information on signal levels is provided in the data sheet. Keep the signal levels within the specified ranges to avoid damage to the R&S AREG100A and connec- ted devices. Preventing electrostatic discharge (ESD) Electrostatic discharge is most likely to occur when you connect or disconnect a DUT. -
Page 20: Connecting To Lan
► Connect the LAN socket via an RJ-45 cable to the LAN. By default, the R&S AREG100A is configured to use DHCP (dynamic host config- uration protocol) and no static IP address is configured. If switched on and connected to the LAN, the R&S AREG100A displays the address information on the screen. -
Page 21: Connecting Usb Devices
You can connect or disconnect all USB devices from the R&S AREG100A during operation. To connect USB storage devices USB storage devices, such as memory sticks, allow easy data transfer from/to the R&S AREG100A. You can also use them for firmware updates. -
Page 22: Connecting To Ref In/Ref Out
To connect a mouse ► Connect the mouse to any of the USB connectors. When connected, the R&S AREG100A detects the mouse automatically. To connect power sensors You can connect power sensors of the R&S NRP families to any of the USB con- nectors. -
Page 23: Connecting The Frontend
® Preparing for Use R&S AREG100A Connecting the Frontend To connect the cable with the "Aux IF In"/"Aux IF Out" connectors, proceed as follows: a) Carefully align the connector of the cable and the "Aux IF In"/"Aux IF Out" connector along a common axis. - Page 24 To connect the base unit and the frontend with the TRX CRTL Cable 1. NOTICE! If you connect or disconnect the control cable while the base unit is powered on, you can damage the R&S AREG100A. Switch off the base unit.
-
Page 25: Switching On Or Off
Switching On or Off To disconnect the frontend 1. NOTICE! If you connect or disconnect the control cable while the base unit is powered on, you can damage the R&S AREG100A. Switch off the base unit. "To shut down the product"... - Page 26 The LED changes to green. The R&S AREG100A boots. When starting for the first time, the R&S AREG100A starts with the default settings. When restarting the instrument, the settings depend on the instru- ment configuration before shut-down. See the chapter "Saving and Recalling Instrument Settings" in the user man- ual.
- Page 27 Shut it down first. Set the toggle switch on the power supply to position [0]. The LED of the [On/Standby] key is switched off. 2. Disconnect the R&S AREG100A from the power source. Getting Started 1430.3572.02 ─ 06...
-
Page 28: Instrument Tour
36 This section explains the control elements and the connectors of the R&S AREG100A with the aid of the front and rear views. For specifications of the interfaces, refer to the data sheet. The meanings of the labels on the R&S AREG100A are described in Chapter 1.2,... -
Page 29: Utility Keys
6 = USB 7 = Sensor 8 = [On/Standby] 5.1.1 Utility Keys The utility keys set the R&S AREG100A to a defined state, and provide access to basic settings and information on assistance. Table 5-1: Utility keys Utility key Assigned functions... -
Page 30: Function Keys
® Instrument Tour R&S AREG100A Front Panel Tour Figure 5-2: Touchscreen The touch-sensitive panel provides an alternative means of user interaction for quick and easy handling of the instrument, see Chapter 7.2, "Means of Manual Interaction", on page 47. See also: ●... -
Page 31: Keypad
® Instrument Tour R&S AREG100A Front Panel Tour Function key Assigned functions [Mod on/off] Switches the modulation on and off. [RF on/off] Switches the RF output on and off. 5.1.4 Keypad The keypad enables you to enter alphanumeric parameters, including the corre- sponding units. -
Page 32: Editing Keys
® Instrument Tour R&S AREG100A Front Panel Tour 5.1.5.2 Editing Keys Editing keys enable you to confirm an entry, delete individual characters, or exit the current operation. Table 5-4: Editing keys Type of key Description [Esc] key Closes all kinds of dialog boxes, if the edit mode is not active. -
Page 33: Display Keys
® Instrument Tour R&S AREG100A Front Panel Tour Table 5-5: Navigation keys Type of key Description [Up/Down] key The [Up] and the [Down] key does the following: ● In a numeric edit dialog box, increase or decrease the instru- ment parameter. -
Page 34: Sensor
Sensor Connector for R&S NRP sensors. A power sensor is connected to the R&S AREG100A by inserting the male con- nector. To disconnect, pull the connector by its sleeve. You cannot disconnect the sensor simply by pulling at the cable or the rear part of the connector. -
Page 35: Connectors
® Instrument Tour R&S AREG100A Rear Panel Tour 1 = Frontend Control, see "Control" on page 35 2 = Rx IF In and Tx IF Out connectors (SMA), see "Rx IF In/Tx IF Out " on page 35 3 = Aux IF In and Aux IF In connectors (SMA), see "Aux IF Out/Aux IF In "... -
Page 36: Frontend
Female USB In connector (USB type B), for example for remote control. How to: Chapter 4.8, "Connecting USB Devices", on page 21 RJ-45 connector to connect the R&S AREG100A to a LAN for remote control, remote operation, and data transfer. How to: Chapter 4.7, "Connecting to LAN",... -
Page 37: Connectors
® Instrument Tour R&S AREG100A Frontend Figure 5-4: Frontend of R&S AREG100A 1 = Control, see "Control" on page 37 2 = Rx IF Out and Tx IF In (SMA), see "Rx IF Out/Tx IF In" on page 37 3 = Rx Power (SMA), see "Rx Power"... -
Page 38: Cables
Supported are different frequency ranges: 24 GHz to 24.25 GHz, 76GHz to 77GHz or 76 GHz to 81 GHz. The R&S AREG100A is delivered with one or two antennas mounted to the wave- guide ports. The antenna type, single or dual, depends on the options you have purchased. -
Page 39: Trying Out The Instrument
Generating Radar Echo Signals Trying Out the Instrument This chapter introduces the first steps with the R&S AREG100A. It shows how to operate and configure the instrument using simple examples. The complete description of the functionality and its usage is given in the R&S AREG100A user manual. - Page 40 ® Trying Out the Instrument R&S AREG100A Generating Radar Echo Signals 3. Modify the attenuation until the display shows the appropriate value for the radar cross section (RCS), which indicates the size of the simulated radar object. Examples for RCS values at 79 GHz (can vary in reality): ●...
- Page 41 Generating Radar Echo Signals 5. Switch on your radar object. 6. Switch "RF On". The RUT reports the range and the radar cross section of the target. Compare these values with the pre-configured values in the R&S AREG100A. Getting Started 1430.3572.02 ─ 06...
-
Page 42: Saving And Recalling Settings
® Trying Out the Instrument R&S AREG100A Saving and Recalling Settings Saving and Recalling Settings To restore the results of our measurements later, we save the instrument settings in a file. To save the instrument settings in a file We assume, a test configuration as described in Chapter 6.1, "Generating Radar... - Page 43 ® Trying Out the Instrument R&S AREG100A Saving and Recalling Settings To load saved instrument settings You can restore the settings to the instrument at any time using the settings file. 1. Press the [Preset] button to restore the default instrument settings so you can check that the stored user settings are restored afterwards.
-
Page 44: Use Case Example - Testing Radar Sensors Against Interferers
Use Case Example - Testing Radar Sensors against Interferers The R&S AREG100A provides an input interface in the IF domain ("Aux IF Out" ), which allows in combination with any analog or vector signal generator the simu- lation of a wide range of interferers together with the wanted echoes. - Page 45 AREG100A Use Case Example - Testing Radar Sensors against Interferers Figure 6-1: Testing radar sensors against interferers 1. Connect R&S SMW to the "Aux IF Out" connector of the R&S AREG100A base unit. See also Chapter 4.10, "Connecting to Aux IF In/Aux IF Out ",...
-
Page 46: Instrument Control
® Instrument Control R&S AREG100A Possible Ways to Operate the Instrument Instrument Control This chapter provides an overview on how to work with the R&S AREG100A. It covers the following topics: ● Possible Ways to Operate the Instrument............46 ● Means of Manual Interaction................47... -
Page 47: Means Of Manual Interaction
Understanding the Display Information The home screen of the R&S AREG100A displays all main settings and generator states, divided into three main operation areas. ●... -
Page 48: Additional Display Characteristics
® Instrument Control R&S AREG100A Understanding the Display Information 7.3.1 Additional Display Characteristics The following section provides a short insight on the indication of the screen in general, and significant elements that you see under specific operating modes, in dialogs or settings. -
Page 49: Accessing The Functionality
® Instrument Control R&S AREG100A Accessing the Functionality Accessing the Functionality All functionalities are provided in dialog boxes as known from computer pro- grams. You can control the instrument intuitively with the touchscreen. This sec- tion provides an overview of the accessing methods. -
Page 50: Entering Data
® Instrument Control R&S AREG100A Entering Data ● Tap the required tile, and then the menu entry. ● Tap the minimized view (button) on the taskbar. Some of the utility keys access a dedicated dialog, too. To minimize a dialog box ►... -
Page 51: Entering Numeric Parameters
Tip: For quick unit change, you can enter shortcuts, e.g. for a frequency value 1e8h for 100 MHz. For an overview of shortcuts supported by the R&S AREG100A, see chapter "Unit Shortcuts" in the appendix of the user manual. 3. If the parameter does not require a unit, confirm the entered value by pressing "Enter". -
Page 52: Entering Alphanumeric Parameters
® Instrument Control R&S AREG100A Getting Information and Help 7.5.2 Entering Alphanumeric Parameters If a field requires alphanumeric input, you can use the on-screen keyboard to enter letters and (special) characters. 7.5.3 Undo and Redo Actions Accessed via the context-sensitive menus, "Undo" allows you to restore one or more actions on the instrument. - Page 53 ® Instrument Control R&S AREG100A Getting Information and Help Contents of the help dialog box The help dialog box covers two main areas: ● "Contents" - contains a table of help contents ● "Topic" - contains a specific help topic The help system also provides an "Index"...
-
Page 54: Remote Control
The corresponding help topic is displayed. Remote Control In addition to working with the R&S AREG100A interactively, located directly at the instrument, it is also possible to operate and control it from a remote PC. The R&S AREG100A supports various methods for remote control: ●... -
Page 55: Remote Operation Over Vnc
Thus, remote operation of the instrument is possible. Instrument control from a remote computer To access the basic utility functions of the R&S AREG100A, perform a right mouse click the block diagram and select "Key Emulation". A key panel to the right of the block diagram gives access to the utility func- tions provided by the front panel keys. -
Page 56: Index
® Index R&S AREG100A Index Active elements ........48 Emulating front panel keys ...... 55 Alphanumeric parameters ....... 52 Application cards ........13 Application notes ........13 Front panel tour ........28 Function keys Details - see user manual ....30 Bench top, placing ........ - Page 57 ® Index R&S AREG100A Preset ..........29 Power Resize window ........33 Connecting the instrument ....19 RF on/off ..........30 Power on ..........34 Right ........... 32 Power supply Setup ..........29 Connector ........... 35 Up ............32 Preparing for use ........15 User ............
Need help?
Do you have a question about the AREG100A and is the answer not in the manual?
Questions and answers