Table of Contents
Advertisement
Advertisement
Table of Contents
Troubleshooting

Related Manuals for formlabs Fuse 1


Summary of Contents for formlabs Fuse 1
- Page 1 Manual Fuse 1...
- Page 3 Installation and Usage Instructions Fuse 1 Benchtop Selective Laser Sintering (SLS) 3D printer Original English instructions Read this manual carefully and keep it for future reference. January 2021 REV 01 © Formlabs...
-
Page 4: Table Of Contents
Fuse 1 user interface . . . . . . . . . . . . . . . . . . - Page 5 Maintenance . . . . . . . . . . . . . . . . . . . . . . . . . . . . . . . . . . . . . . . . . . . . . . . . . . . . . . . . . . . 39 Tools and supplies .
- Page 7 Neither Formlabs nor any of its affiliates or subsidiaries shall be responsible or liable for misuse of the information that is contained herein. Notify us if you have any suggestions for improvements or amendments or have found errors in this publication.
-
Page 8: Preface
These 110 micron thick layers are stacked on top of each other to create 3D parts. This manual explains how to set up, use, and properly maintain the Fuse 1, as well as provides design guidance for optimizing print results. - Page 9 The serial name is on the back panel of the machine in the format AdjectiveAnimal. Service providers of Formlabs products also provide support and service. To the extent that Formlabs or a certified service provider offers other or extended warranties, the terms of the separate offer may apply.
-
Page 10: Introduction
Introduction Intended use The Fuse 1 is a commercial, precision tool intended for use in the additive manufacture of end-user supplied designs from SLS powder. The final performance characteristics of sintered SLS powder may vary according to your compliance with the instructions for use, application, operating conditions, material combined with, end use, or other factors. - Page 11 4.01 mrad beam divergence (nominal, full angle) Laser spot size (FWHM) 200 μm | 0.0079 in Radiation information The Fuse 1 is a Class 1 laser product. Accessible radiation is within Class 1 limits. Connectivity Wi-Fi: 2.4 GHz Ethernet: 1000 Mbit USB: 2.0...
-
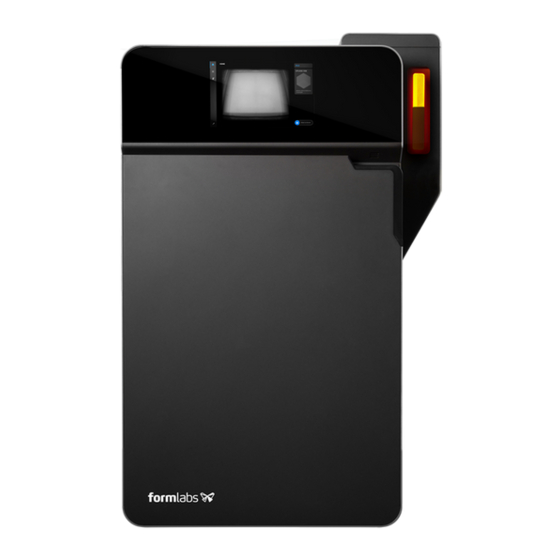
Page 12: Product Components
Product components 2.3.1 Fuse 1 Print enclosure door: Provides access to the print enclosure and optical cassette tray. IR sensor door: Provides top-down access to the IR sensor and powder card reader. Touchscreen: The LCD capacitive touch user interface displays print information, settings, and error messages. - Page 13 2.3.2 Build chamber Print bed: The moving surface (Z-axis) on which powder is deposited and sintered. Front handle: Silicone handle for loading and unloading the build chamber. Side handles: Silicone handles on each side for moving the build chamber. Plug holster: A retainer to keep the plug secure when moving or storing the build chamber.
- Page 14 2.3.6 Additional Fuse 1 package components Power cable: Compatible with both the Fuse 1 and the Fuse Sift. Stand: Freestanding platform for the Fuse 1. Optical cassette: A set of gasketed windows that protect the laser and camera. Each Fuse 1 includes an optical cassette packaged with the printer.
-
Page 15: Fuse 1 User Interface
Tap the home icon in the left sidebar to access the Home screen. A status card on the right indicates if the Fuse 1 is idle, printing, or cooling. Below the status card is the Next Job card, which presents the next print job in the queue. -
Page 16: Safety
Safety Read and understand this manual and its safety instructions before using the Fuse 1. Failure to do so can result in serious injury or death. WARNING Supervise young or inexperienced users to ensure enjoyable and safe operation. The instructions contain warnings and safety information, as explained below: DANGER indicates a hazard with a high level of risk which, if not avoided, will result in death or serious injury. -
Page 17: Component And Subsystem Safety
Component and subsystem safety 3.1.1 General The Fuse 1 requires a 230 VAC (50 Hz), 7.5 A power supply (EU) or 120 VAC (60 Hz), 15 A power supply (US) for nominal operation. Unless explicitly instructed by DANGER Formlabs Support or a certified service provider, do not disassemble or tamper with the product beyond what is explicitly outlined for typical maintenance. - Page 18 Laser The above Class 4 laser warning label is also located in the Fuse 1. It can be seen on the laser module heatsink. It is visible when the rear cover of the printer is opened by an authorized technician.
- Page 19 Formlabs powder handling instructions. In general, Formlabs powder is not approved for use with food, drink, or medical applications on the human body. Refer to the safety data sheet (SDS) for each specific powder as well as support.formlabs. com for more detail.
-
Page 20: Personal Protective Equipment (Ppe)
Personal protective equipment (PPE) Safe operation of the Fuse 1 can be achieved by implementing the following equipment: • Particulate filtering respiratory protection (N95 or better) -
Page 21: Sensitive Components
• IR sensor The Fuse 1 uses an infrared (IR) sensor to monitor conditions inside the print enclosure, and as a secondary interlock measure for the laser. Refer to section 5.4.4 Checking the IR sensor for more information. - Page 22 If a localized fire develops either inside or outside of the machine, immediately take the following actions. If the fire is inside the print enclosure: 1. Immediately disconnect the machine from its power source. 2. Open the filter door and locate the emergency chamber door release cable. Pull the cable away from the machine until the print enclosure door unlocks.
-
Page 23: Preparation And Setup
Preparation and setup Location and environs Prepare a space to install and operate the Fuse 1 and house the necessary accessories and consumables. To prepare the workspace: 1. Choose a location separate from any machinery or tooling that generates dust or sparks, such as wood or metal working equipment. -
Page 24: Power And Networking
For detailed guidance and visual assistance, visit support.formlabs.com. The Fuse 1 requires a dedicated AC circuit, providing at least 7.5 A at 230 VAC (EU) or 15 A at 120 VAC (US) , as well as reliable grounding. This circuit must be separate from... -
Page 25: Accessing The Serial Name
The serial name is a unique identifier used to track the history of manufacturing, sales, and repair. The serial name for the Fuse 1 is located on a sticker next to the A/C input on the back panel in the format AdjectiveAnimal. For a Fuse 1, the serial name is also available on the touchscreen. -
Page 26: Installing The Machine
2. Flip the breaker switch on the back of Fuse 1 to the ON position to turn on the machine. 3. As the Fuse 1 initiates, the Formlabs logo with a progress bar appears on the touchscreen, followed by the onboarding process. -
Page 27: Setting Up A Network Connection
Ethernet. Visit support.apple.com for assistance with Bonjour. The USB connection can still be used while the Fuse 1 is connected to a LAN. When the Fuse 1 is connected to a LAN, its current status and print progress can be monitored with Dashboard: formlabs.com/dashboard. -
Page 28: Updating Firmware
4.8.1 Loading powder credit Powder credit is used to identify which Formlabs powder you are using, as well as the amount of new powder that is available for printing. Before starting a print, load powder credits onto the printer. - Page 29 2. Insert an unused powder identification card into the card holder. The Powder Credit screen appears on the touchscreen. The Powder Credit screen displays the amount of available powder credit on the new card and the amount of powder credit currently registered to the printer appears.
-
Page 30: Preparing The Optical Cleaning Kit
Preparing the optical cleaning kit The Fuse 1 comes with three push-top dispensers for the Alconox, distilled water, and ethanol used to clean the optical cassette. Each dispenser is dedicated to one cleaning agent. The three cleaning agents must be purchased separately. -
Page 31: Transporting The Machine
Before repackaging, remove the build chamber and optical cassette. Ensure the printer is clean by vacuuming the print enclosure and air filters, then emptying the hopper. The Fuse 1 is a heavy object. A two person lift is required to prevent injury and avoid damage to the machine. - Page 32 To prepare the machine: 1. Open the print enclosure door. 2. Unplug and remove the build chamber. 3. If you have the cardboard and foam optics protector that shipped in the optical cassette tray, remove the optical cassette. 4. Using the vacuum attached to the Fuse Sift, vacuum the print enclosure and air filters. 5.
- Page 33 Each person should push at an upward angle when lifting to keep the printer steady and level. The Fuse 1 is a heavy object. Use appropriate precautions and correct lifting form when moving the machine.
-
Page 34: Printing
Avoid contact with skin, eyes and clothing. Operational environment The operating temperature for the Fuse 1 is 20–27 °C (68–81 °F), with low ambient humidity. For optimal printing, do not exceed these limits. Designing for SLS For detailed guidance and visual assistance, visit support.formlabs.com. -
Page 35: Setting Up A Print
For detailed guidance and visual assistance, visit support.formlabs.com. Fuse 1 print jobs can be set up using PreForm, the dedicated print preparation software for Formlabs printers. To start, open OBJ or STL files in PreForm, orient and layout multiple models into a complete build, then send the print job to the machine. -
Page 36: Preparing For A Print
Preparing for a print For detailed guidance and visual assistance, visit support.formlabs.com. Starting a print on the Fuse 1 requires several critical maintenance procedures that must be completed before every print. After selecting a print job, the touchscreen guides you through the necessary maintenance procedures. - Page 37 5.4.2 Loading the optical cassette A clean optical cassette must be inserted into the Fuse 1 before every print. Check that the optical cassette is clean before inserting it into the printer. Wear clean nitrile gloves when handling the optical cassette. Powder, skin oils, and other contaminants may smudge the windows.
- Page 38 5.4.4 Checking the IR sensor The Fuse 1 uses an IR sensor to monitor temperature changes inside the print enclosure. Readings from the sensor greatly influence the print quality, accuracy, and reliability of the printer. Any obstruction of the sensor adversely affects prints and is likely to result in a print failure.
-
Page 39: Retrieving And Cleaning Prints With The Fuse Sift
Starting a print Once a print job is uploaded to the Fuse 1, the print card on the right side of the touchscreen displays the next print job in the queue. To start the print, tap Start Print on the touchscreen. -
Page 40: Managing The Machine
5.6.4 Turning off The Fuse 1 is designed to remain powered on when not in use. Flip the breaker switch on the back of the unit to the OFF position to turn off the machine completely and conserve power. When moving or storing the machine, unplug the unit from its power source in addition to... -
Page 41: Maintenance
Tools and supplies Only use tools, chemicals, or procedures to maintain the Fuse 1 that are outlined in this manual, by prompts on the touchscreen, and on support.formlabs.com. Do not use any tools, chemicals, or unapproved procedures with the Fuse 1 unless otherwise instructed to do so by Formlabs or a certified service provider. -
Page 42: Inspection And Maintenance
Certified for use with materials whose fine particles present an explosive risk when in the vicinity of potentially malfunctioning electrical equipment. Used to regularly remove loose powder from the workspace of the Fuse 1 and Fuse Sift. • Distilled water The second agent used for cleaning the printer’s optical components. - Page 43 6.3.1 Cleaning the optical cassette Inspect the Fuse 1’s optical cassette after every print. If the optical cassette is contaminated or dirty, clean it before using it again. Required supplies: Standard cleaning Full cleaning • Ethanol • Alconox • Non-reactive nitrile gloves •...
- Page 44 To clean the optical cassette: 1. Put on a pair of new, clean nitrile gloves. Powder, skin oils, and other contaminants may smudge the windows on the optical cassette. 2. Place the dirty optical cassette with the gaskets facing down on a flat, clean surface. 3.
-
Page 45: Periodic Maintenance
Periodic maintenance The Fuse 1 displays prompts on its touchscreen to notify if any periodic maintenance procedures are past due. The standard cycle for the following procedures is every 30–500 hours of printing, specified in the following sections and on the printer’s touchscreen. - Page 46 To clean the camera lens: 1. Open the print enclosure door. 2. Loosen the thumb screw in the front-center of the ceiling of the print enclosure. The cassette tray swings down. 3. Slide the optical cassette out of the cassette tray. 4.
- Page 47 6.4.3 Cleaning the exhaust filter The Fuse 1 uses a filter to remove powder and laurolactam from its exhaust that may be expelled into the workspace. The exhaust filter should be cleaned every 30 hours of printing, whichever comes first. Used filters that have experienced 20 prints or 400 hours of printing should be cleaned after every print to extend their lifetime.
- Page 48 6.4.4 Cleaning the intake filter The Fuse 1 uses a filter to remove contaminants from air being drawn into the printer. The intake filter should be cleaned every 30 hours of printing, whichever comes first. Used filters that have experienced 20 prints or 400 hours of printing should be cleaned after every print to extend their lifetime.
- Page 49 3. Disconnect the vacuum hose from the side of the Fuse Sift. 4. Turn on the vacuum by pushing the Vac button on the control panel or by tapping the vacuum hose icon on the touchscreen. 5. Vacuum the loose powder on the print enclosure floor. Avoid touching the gaskets around the door with the vacuum hose.
-
Page 50: Intermittent Maintenance
Updating the firmware For detailed guidance and visual assistance, visit support.formlabs.com. Formlabs regularly releases updated firmware to fix bugs and improve functionality. Review the PreForm and firmware release notes to learn more about the improvements that come with each version’s release. - Page 51 6.5.3 Replacing the intake filter When disposing of a damaged or clogged intake filter, remove it from the printer and clean off any lauralactum and powder following the instructions in section 6.4.4 Cleaning the intake filter. Once cleaned, the filter can be disposed of with standard waste. 6.5.4 Replacing the exhaust filter When disposing of a damaged or clogged exhaust filter, remove it from the printer and clean off...
- Page 52 12. Pull the swab across the upper laser window in a single direction to clean the surface. Repeat this multiple times, making sure to cover the full width and length of the upper laser window while wiping in a single direction. 13.
-
Page 53: Troubleshooting
2. Unplug and remove the build chamber. 3. Flip the breaker switch on the back of Fuse 1 to the OFF position to turn off the machine. 4. Locate the powder troughs and flippers, which run along the sides of the print enclosure above the build chamber. -
Page 54: Troubleshooting Errors Or Abnormal Activity
Troubleshooting errors or abnormal activity In the case of errors, abnormal activity, or print failures with the Fuse 1, reference the following errors, causes, and proposed solutions. Complete the initial troubleshooting steps and carefully document all results. Contact Formlabs Support... - Page 55 The heaters or the IR sensor may be malfunctioning. The powder on the surface of the above its melting temperature. print is blackened due to melting. Contact Formlabs Support certified service provider additional guidance and provide diagnostic logs. Delamination •...
-
Page 56: Disassembly And Repair
Disassembly and repair All steps that involve opening the machine and/or investigating internal components should be done by skilled persons under the guidance of Formlabs Support or a certified service provider. Any damage resulting from attempting disassembly and/or repair without prior authorization from Formlabs Support or a certified service provider is not covered by warranty. -
Page 57: Recycling And Disposal
3. Inform your waste disposal service that your bottle contains solvent with small amounts of laurolactam and microplastics. Have a copy of the Formlabs powder safety data sheet (SDS) on hand in case the disposal service attendant needs more information. -
Page 58: Disposal Of Electronic Components
services. Solvent recycling systems use distillation and fractionation processes to remove solutes from waste solvents, making it possible to reuse the solvent. The recycled solvent may still have small amounts of contaminants in it. Recycling solvent reduces waste disposal costs, emissions that are required to produce solvents, and the cost of purchasing solvent. Disposal of electronic components The symbol on the product, the accessories, or packaging indicates that this device shall not be treated as nor disposed of with household waste. -
Page 59: Index
Index laser window laser 6, 9, 11, 12, 14, 16, 19, 48, 49, 50, 53, 54, Alconox 12, 18, 21, 28, 29, 40, 41, 42, 57, 59 57, 59, 60, 61 level 10, 13, 14, 23, 24, 25, 31, 57 build chamber 9, 10, 11, 12, 15, 21, 22, 29, 30, leveling 24, 57 32, 33, 34, 35, 37, 38, 41, 43, 47, 51, 53, 54, 57, 59, 60... - Page 60 technical data 8, 58 temperature 9, 11, 13, 15, 18, 32, 36, 37, 53, 58, heat 9, 11, 13, 15, 18, 32, 36, 37, 53, 58, 59 touchscreen 9, 13, 19, 23, 24, 25, 26, 27, 34, 35, 37, 38, 39, 43, 44, 45, 46, 47, 49, 51, 52, 58 USB 9, 24, 25, 26, 30, 34, 58 vacuum 16, 18, 21, 30, 40, 45, 46, 47, 51, 58...
-
Page 61: Glossary
Short for “Light Amplification” via “Stimulated Emission of Radiation.” The laser is the source of sintering energy in the Fuse 1 with a wavelength of 1065 nm, and a maximum output of 10 W. The Fuse 1 is a Class 1 laser product. - Page 62 (or slices) that eventually form a 3D part. Surface armor A print process component of the Fuse 1 that surrounds parts with a semi-sintered shell of material to alleviate thermal inconsistencies which may adversely affect the accuracy of a part.
-
Page 63: Product Compliance
Product compliance The Fuse 1 complies with the following machinery, electromagnetic, waste, and laser safety standards: European Machinery Directive 2006/42/EC • A-Type Standards: EN ISO 12100:2010 • B-Type Standards: EN 60204-1:2018 • C-Type Standards: None Laser • ISO 11553-1:2020 •... - Page 64 Original English instructions January 2021 © Formlabs...
Need help?
Do you have a question about the Fuse 1 and is the answer not in the manual?
Questions and answers